How to Design a Native Plant Garden

One of the biggest criticisms of native plants is that they often look too wild, unkempt and messy.  Grasses dominate while wildflowers struggle to provide the visual impact desired in a landscape.  Wild is as wild does.

So how do we tame the wildness of the prairie? How do we design a native plant garden that doesn’t look so wild?  Is it even possible?  I believe it can be done.  You can have the beauty of the prairie and all the benefits of a native ecosystem with a properly designed native garden.

Consider these fundamentals as you design your native plant garden:

IMG_8147

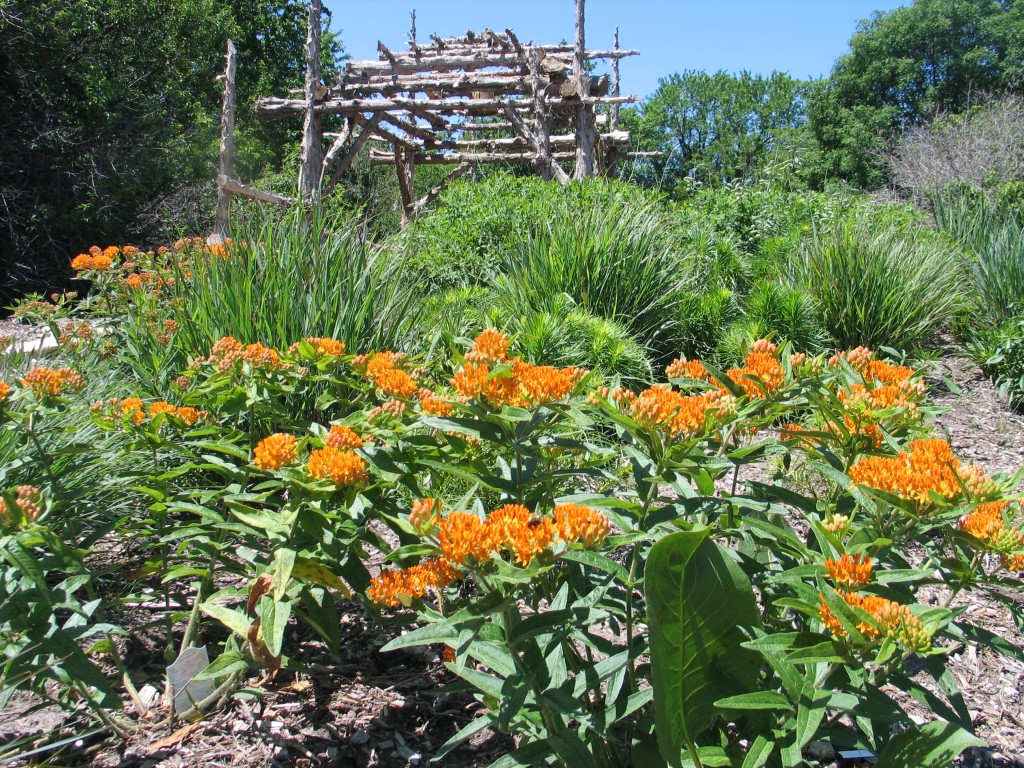
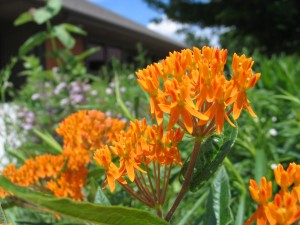
Butterfly weed and ornamental native grass display

Match plants to your site. Look at your landscape.  Is it sunny or in the shade?  Is the soil clay or sand?  Evaluate these elements and choose plants that will thrive in the microclimate of your yard.  Sun-loving native plants need at least 6 hours of direct sunlight to grow happily. Otherwise look at more shade-loving natives.  A carefree landscape begins with matching plants with climate.  Choose plants that occur in the same or similar climate for a maintenance free garden.  It has been my experience that this is the most important element in developing a successful native garden.  Anytime you stray too far off, the plants don’t flourish and they require more effort.  Planting a swamp milkweed on a dry hill or a primrose in a bog will never work.


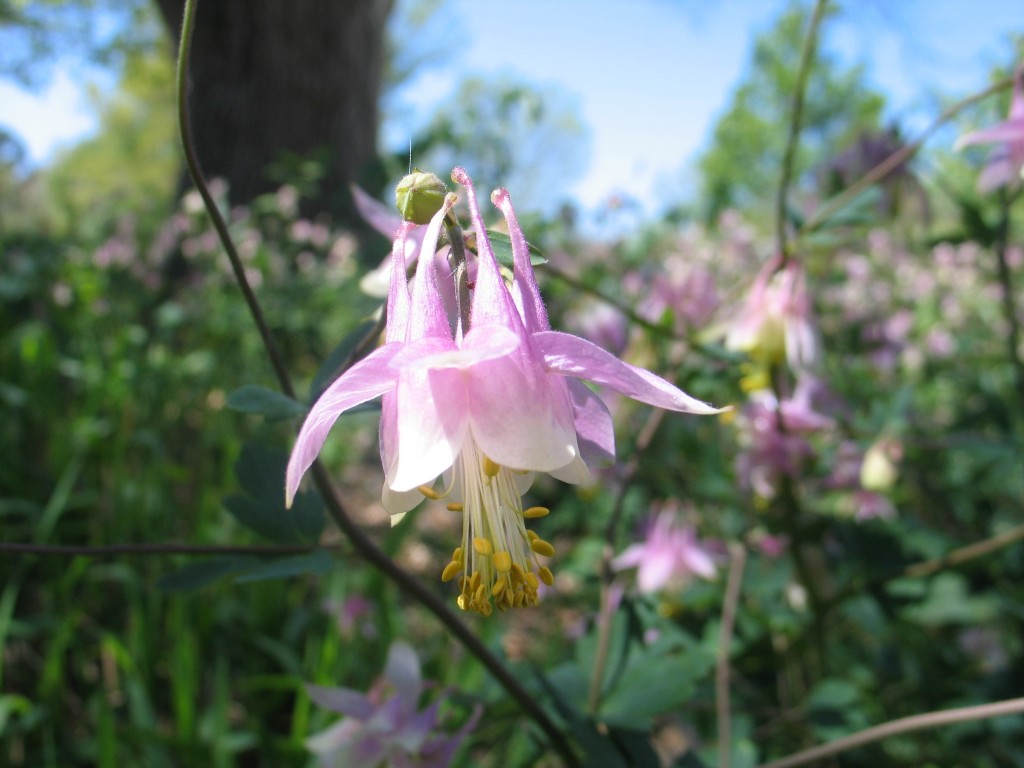
Native Columbine

Native Columbine

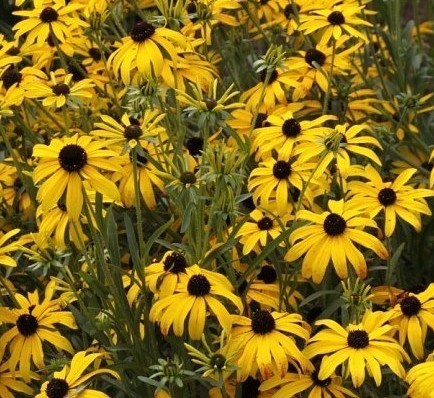
Design for succession of bloom. There are no Wave Petunias in the prairie or plants that bloom all season, so choose plants that will bloom in spring, summer and fall.  If you go to the prairie throughout the year, you will observe wildflowers coming into or out of bloom.  The prairie is constantly changing.  Design with those changes in mind.  Discover how native plants appear at different times of the year and highlight interesting elements such as seedheads for winter interest.  Grasses can be included for structure, winter texture and movement.   Little bluestem in fall accentuates the seedheads of the Missouri Black-eyed Susan beautifully.


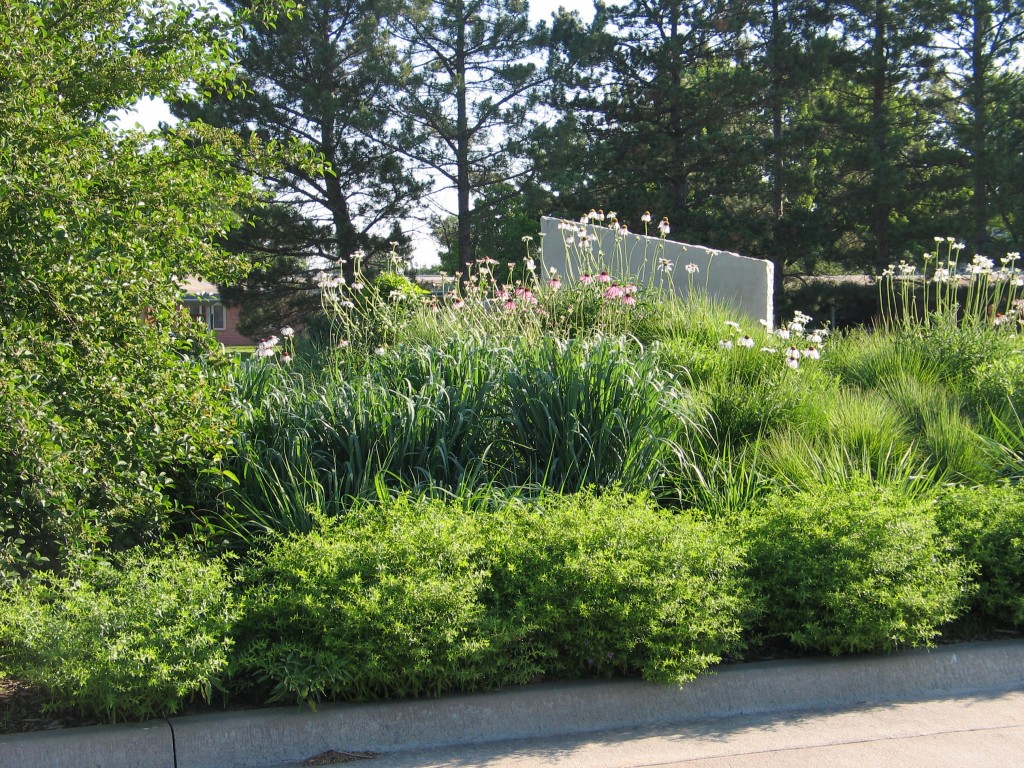
Summer Prairie Garden

Summer Prairie Garden

Group similar plants together. Fifteen blazing stars blooming in the summer create a focal point in the landscape.  Place them next to a spring blooming wildflower and a fall blooming wildflower and you have organized the display for year round interest.  Use grasses sparingly to frame the garden or as a backdrop for some of your wildflowers.  This makes it easier to maintain, because you know what is planted in each area.  When weeding, you know everything else has to be removed because wildflowers will reseed.


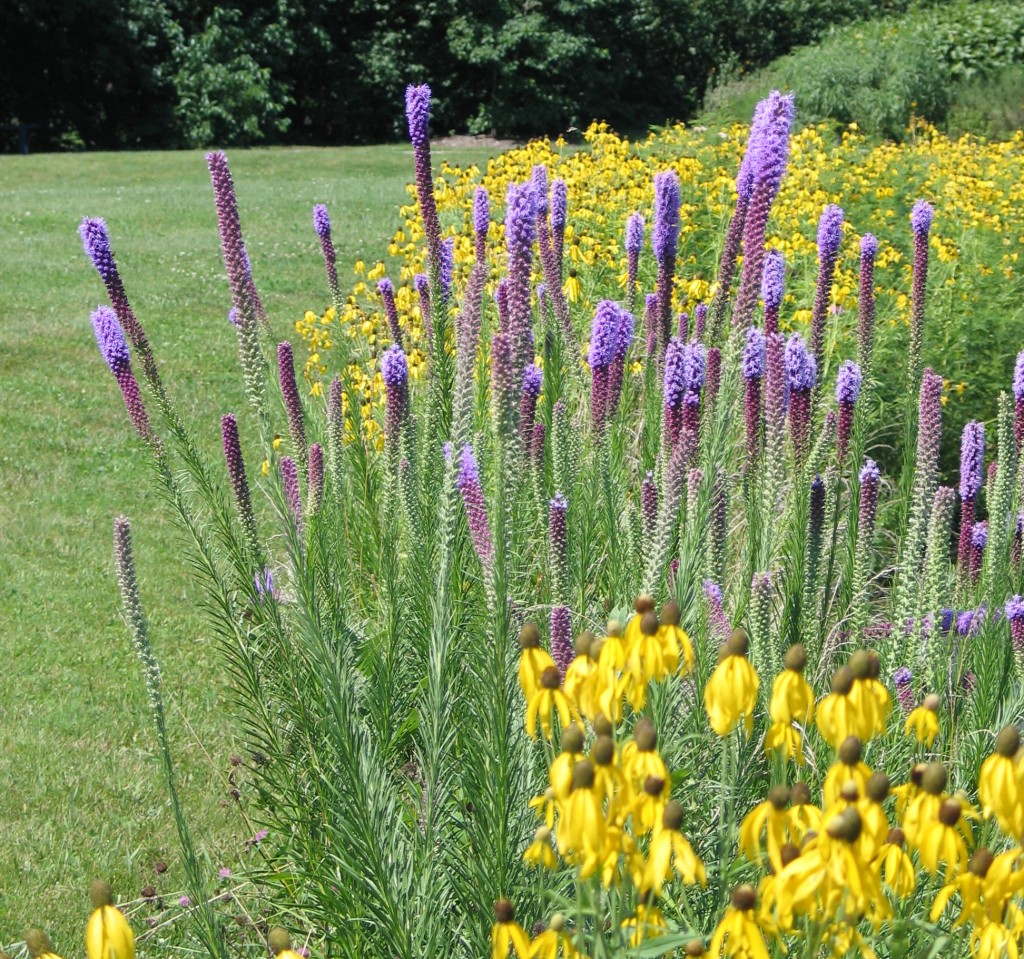
LateSummerPlants_0015

Kansas gayfeather and gray-headed coneflower

Keep your plants in scale. Choose plants that don’t grow taller than half the bed width.  So if your display bed is six feet wide choose plants that are no more than three feet tall.  A compass plant would be way too tall.

Define the space. A well-designed native garden can be enhanced with a border.  It can be edged with limestone, brick or some other natural material.  This element alone makes your native garden look clean, attractive, and intentional.  Even a clean-cut edge can really help define the garden’s borders.

Control Perennial Weeds. You will save yourself many headaches by eradicating problem weeds like bindweed and Bermuda grass before you plant.  It is better to wait until these weeds are eliminated before you establish your new garden, trust me!!!

It sounds so easy, but we all know that landscapes, no matter how well-designed, will take some input on our part.  Beautiful gardens don’t just happen. They are the result of planning, development, time and a little bit of effort.

I am still learning too.  My epiphany came several years ago after trying to grow dry, sun loving plants in a wet, sunny garden.  It took me three tries to realize the futility of my efforts.  Hopefully, you can learn from these basic principles and find success in your landscape.  If you need information about native plants, visit our plant library, landscape designs or give us a call.


Winter Garden Checklist

Last week, in early December, I did some work in my yard.  The day was warm, which made the work more enjoyable.  While I was working I made a checklist of all the things I need to get done in my yard before next spring.  My daughter Allyson is graduating from high school and we are having her graduation party in our backyard.  So the pressure is on to get it ready for the big event.


It may seem strange to be thinking about spring when it’s cold outside, but in March and April, when things start blooming, you’ll be glad you planned ahead. Here are some things you should definitely include in your winter garden checklist:

Leaf Collection

It is critical this time of year to continue removing leaves so they don’t smother your grass.  Fescue lawns need sunlight even during winter months and a thick layer of leaves can stunt growth or kill the lawn altogether.

Pick Up Hoses and Drain Irrigation System

Unhook hoses from the faucet, drain them, roll up and store inside.  Hoses can deteriorate if left out through the winter.  The sunlight can be harmful and water left in hoses can cause damage due to freezing temperatures.  I drain sprinklers and irrigation systems that can be busted by prolonged cold weather.

Prune

Winter is the ideal time to prune deciduous trees because they are dormant.  Prune dead branches and shape trees.  Step back and look at the tree as a whole before pruning.  Envision what the tree will look like after the branch is removed.

Mulch

Landscapes can really benefit from a fresh layer of mulch.  Put down 2-4 inches of wood chips or any weed-free organic matter before the ground freezes.  Mulch keeps the soils temperatures more even, holds moisture,  slows runoff,  and controls soil erosion.  Newly planted trees and shrubs will benefit the most from mulch.

Clean Gutters

Before winter rains and snowstorms, it is a great time to clear away any leaves or debris that has collected in your gutters this fall.  Impeding flow causes ice buildup which is a safety concern when it falls from the roof.  Be careful and don’t fall off the ladder.

Winterize Equipment and Tools

I run stabilized fuel through my power equipment and then drain the fuel tanks.  Gas left in the carburetors can do damage to them by deteriorating the components and aluminum parts.  A varnish can also develop which clogs small openings within the components.  Chainsaws, hedge trimmers, weed-eaters, and mowers will be ready to go next spring.  Clean, sharpen and store hand tools.  A thin coat of linseed oil will keep them from rusting.

Take Notes

What do you need to do next spring?  What plants will you need to fill the gaps in your landscape?  What are your dreams for your outdoor space?


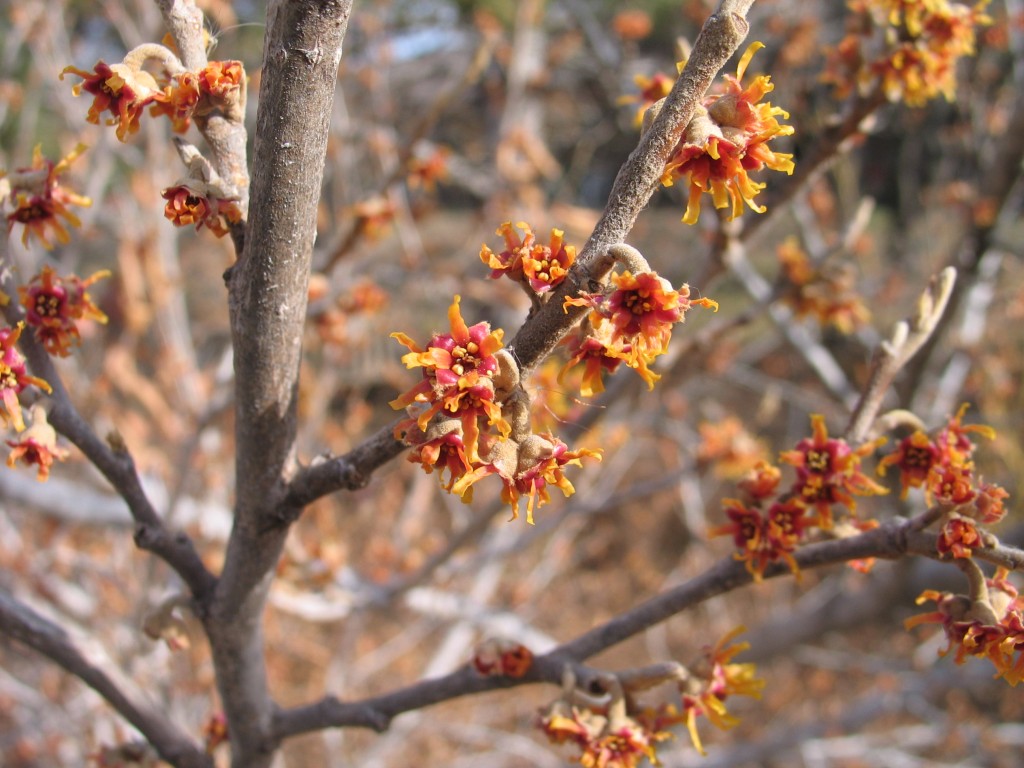
First plant to bloom in the arboretum next spring

First plant to bloom in the arboretum next spring – Vernal Witchhazel


Spring will come too fast.  So will Allyson’s graduation.  It is hard to believe that 17 years have passed already.  People kept telling me that she will grow up fast.  They were right.  We look forward to that graduation day with anticipation and a lot of fear and trembling.  Hopefully, my backyard will be ready, because I know I will not be ready for that day.


How to Make a Natural Evergreen Wreath

The other day I made a wreath out of Juniper branches to hang from the Visitor Center chandelier.  We needed a centerpiece for our luminary stroll open house.  It took about 45 minutes.  This natural evergreen wreath was easy to make and looks great.

IMG_2096[1]

Here are the steps to making your own natural evergreen wreath:

  • First, find a Juniper tree with large quantities of blue berries.  Prune branches 18 to 24 inches long.  You will need at least 12 branches this size.
  • Next, place four branches in a square overlapping each other by six to eight inches.  Make sure branches are all facing the same direction all around the square.
  • Tie the stems to the upper portion of the branch-ends with fine black wire.
  • Next, attach four more branches but rotate 1/8 of a turn.  Tie stems and tips together like the previous square. Tie these branches to the original four branches as well.
  • Now look at the wreath.  If there are exposed stems (pruned portions), cover them with the last four branches placing them the opposite direction.  Tie these branches to the wreath tightly.  All ties should be invisible.
  • I topped my wreath with some red holly berries.  They really show up well against the dark green of the Juniper branches.
  • You can finish it with some red velvet bows, pine cones or other natural elements.


IMG_2100[1]

The fragrance of fresh cut evergreen branches permeate the room plus you have the satisfaction that you created your own wreath from natural elements.  If I can make this, then you can too.  Good Luck.


Five Reasons We are Giving Thanks at the Arboretum

November is a great time to reflect on the many blessings of the past year here at the arboretum.  We are grateful for so many things.  We enjoy serving you and serving with you to fulfill the mission of this organization, to promote through education and stewardship the conservation and use of plants native and adaptable to Kansas.

Though words cannot adequately express our appreciation and thankfulness, here are five reasons we are giving thanks this holiday season:

Generous Supporters – When I became director, I had no idea how many people there are who underwrite the work we do throughout the year. I have been amazed at the generosity of our supporters.  Your financial gifts are not taken for granted.  Each membership and each donation is accepted with much appreciation.  I view your support as a partnership.  Thank You!


9-4-2014 photo 6


Dedicated Volunteers – When people come along side us and give us their time and talent, it makes a difference. Volunteers are special people.  Last year, volunteers contributed over 2,000 hours of valuable service to help us accomplish the work of the arboretum.  We encourage volunteers to use their skills and interests to help in our valuable work.  Volunteering is a great way to support our mission, as you share your experiences about this prairie garden with others, learn about plants, meet new people and serve our visitors.  Thank You!


IMG_1912


An Important Mission – Since its inception, the arboretum’s mission has been about the prairie. We are a prairie education facility that promotes stewardship and conservation.  Advocating for plants that use less water, teaching children about the prairie and its many benefits, and hosting events that bring visitors to the arboretum are at the heart of our calling as an organization.  Our core values have never been more important in the world.


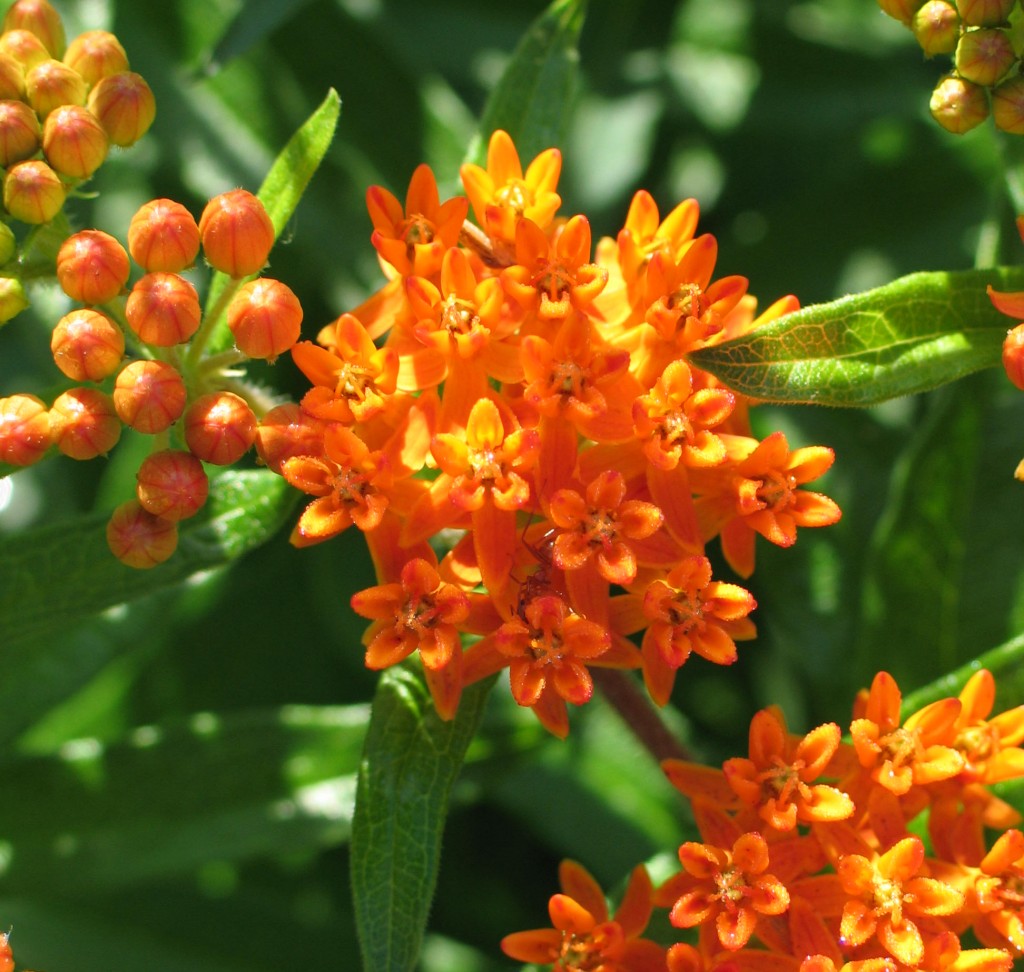
Butterfly milkweed in the small rain garden at the arboretum


Earth Partnership for Schools (EPS) – This signature arboretum program has impacted over 21,000 students, 173 teachers from 58 schools over the past eight years. Thanks to the dedicated work of teachers, who were guided by our EPS staff, students are able to detach themselves from the daily distractions of technology, slow down and observe the beauty of the prairie.  This program perfectly fits our mission and is having a positive impact on students in Kansas.


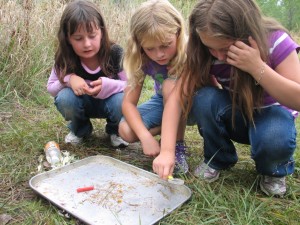
EPS Students


A Successful Year – All the reasons above and many more have helped the arboretum continue to grow this year. Our goal is to increase our influence, educate more people, and enhance the arboretum gardens and programs we offer throughout the year.  We had one of our most successful years because of your efforts and support.  THANK YOU!


Bonus Reason! Dedicated Staff – I am fortunate to lead a team who love the arboretum. These individuals strive daily to champion the mission of the arboretum and provide you with excellent programs and events.  I wish you could see their diligence, hard work and passion.  I am blessed to serve with them.  Thanks Brad, Janelle, and Brett!

Take time to count your blessings.   Be grateful for the good things you enjoy.


Seven Reasons to Attend This Years’ Luminary Walk

Over the years, the Winter Luminary Walk at Dyck Arboretum of the Plains has become a tradition for many people.  Here are my top seven reasons to be part of this unique event:


Bridge

The south bridge is one of our favorite spots along the path during the luminary walk, especially on a magically snowy night. Photo by Ken Raney.


  • Enjoy the natural beauty of the gardens in winter.  Thousands of lights bring the arboretum to life, highlighting the pure, organic forms of the trees, shrubs and prairie plants.
  • Relax and stroll the pathways with more than 900 jars and candles lighting the way.  No commercial glitz – just the simple, soft light of candles.
  • Roast s’mores.  Warm yourself by the fires and roast a marshmallow.  Sticky fingers, but oh so good.
  • Drink hot almond tea with Christmas cookies in the Visitor Center.  This drink is perfect on a cold winter night along with cookies from the Hesston Women’s Civic Club and other volunteers.


Luminary Walk 2008 Bonfire

Walkers gather around the fire to roast marshmallows.


  • Make memories at the Arboretum.  It is great to be with family and friends spending an evening together.  Forget about the hustle and bustle of the season, slow down and enjoy together everything this time of the year has to offer.
  • Be creative. Each night children will make crafts that relate to a different culture’s holiday traditions.
  • Learn about other cultures.  With the theme “Joy to the World: A Multicultural Celebration”, this year’s luminary walk will include performers, crafts, stories and an outdoor nativity representing a variety of cultural perspectives.


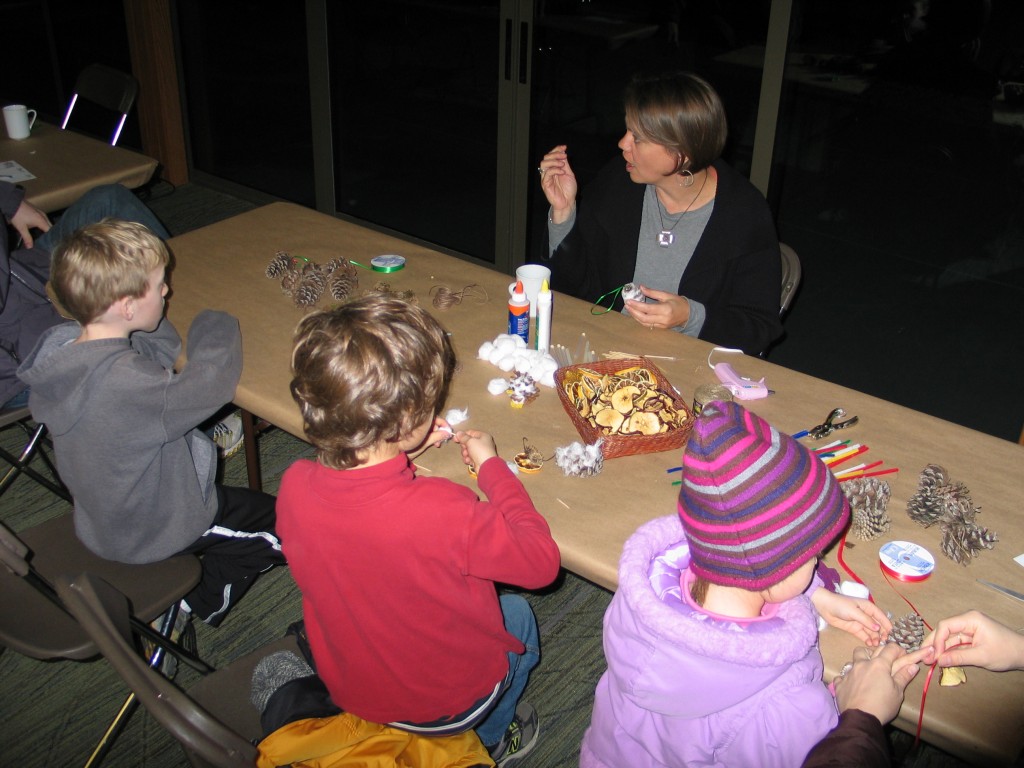
Crafts at Luminary Walk

Stop in to the buildings to warm up and be creative during craft time.


We at the arboretum enjoy hosting this special event.  It is unique because it invokes fond memories of Christmas’ past while making new memories with the special people in your lives.  Come, relax, and enjoy this one-of-a-kind Christmas celebration.

For this year’s Luminary Walk schedule and line-up of performers, click here.

Is Your Yard Pollinator-Friendly?

It is true that pollinators are important for many reasons, including food production. According to the Natural Resources Defense Council in a report from March of 2011, “more than $15 billion a year in U.S. crops are pollinated by bees, including apples, berries, cantaloupes, cucumbers, alfalfa, and almonds.  U.S. honey bees also produce about $150 million in honey annually.”  It is also true that populations of pollinators are declining throughout the world.

There are many reasons for these declining populations, but what can we do to help them?  A few simple steps can be taken in our own gardens, landscapes, and neighborhoods to create healthy ecosystems for pollinators to thrive.  Our own backyard can provide the safe habitat they need to rebound from these startling declines.

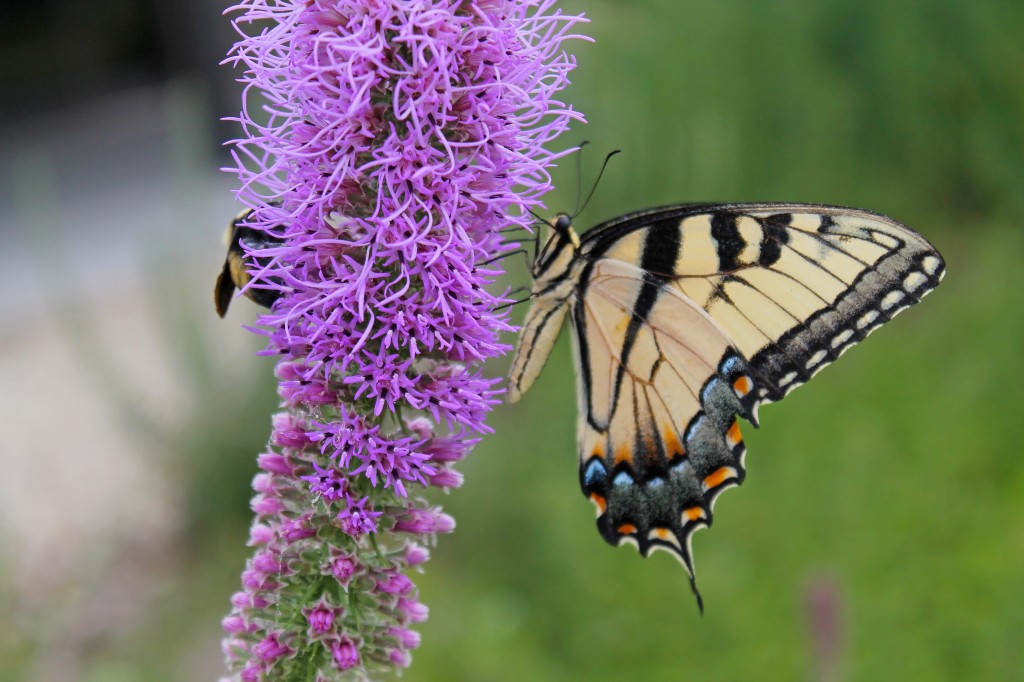
adjusted.IMG_0762

Tiger swallowtail and bumble bee on Liatris pychnostachya


5 Key Elements of a Pollinator-Friendly Landscape

1. Plant a variety of flowering plants:

The importance of flowering plants, especially native plants, to pollinators is well documented.  Pollinators seek these plants out in the landscape.  A recent butterfly survey for Harvey County found 17 of the 22 recorded species at the arboretum.  We attribute this to the many native plants we have growing here.  They don’t have to search to find food.  They can find food throughout the year because the prairie is continuously in bloom with overlapping wildflowers blooming from early spring to late fall.  Other low maintenance perennials add to the diversity of nectar-rich plants utilized by pollinators.

2. Water, Water, Water:

A water source gives life to pollinators.  It can be a bird bath, pool, water feature or small stream.   The type of source is not as important as its location.  Place your water source in a semi-shaded area protected from wind along with a place to land and sip up the water.  Any water in close proximity to the food they need will reduce stress on pollinators.

3. No Pesticide Zone:

This seems obvious, but it is important to note.  When our plants are being eaten by insects or foliar diseases appear, we often grab the spray can to immediately solve the problem. Here at the arboretum, we spray as a last resort.  By spraying sparingly and infrequently, we minimize the risk of harming pollinators in the garden.  Think carefully about when, why and how you spray.

4. Provide shelter:

Pollinators need easy access to protecting habitat.  Evergreen trees and shrubs with layered vegetation within easy flying distance from flowering plants is an ideal habitat.  The layered plants provide protection from the wind and predators.  This protecting habitat is a great place for pollinators to make their homes.

5. The more, the merrier:

If you are the only garden in your neighborhood that is pollinator-friendly, it is a start.  But just imagine your landscape connected with your neighbors’ gardens, which are connected with hundreds of others within the community – a giant ecosystem that can be freely navigated by pollinators.  Pollinator-friendly gardens can have a tremendous impact on reversing the decline of pollinators.  Educate your friends, neighbors and children about what can be done to positively impact pollinators.  It has to start somewhere, why not with you?

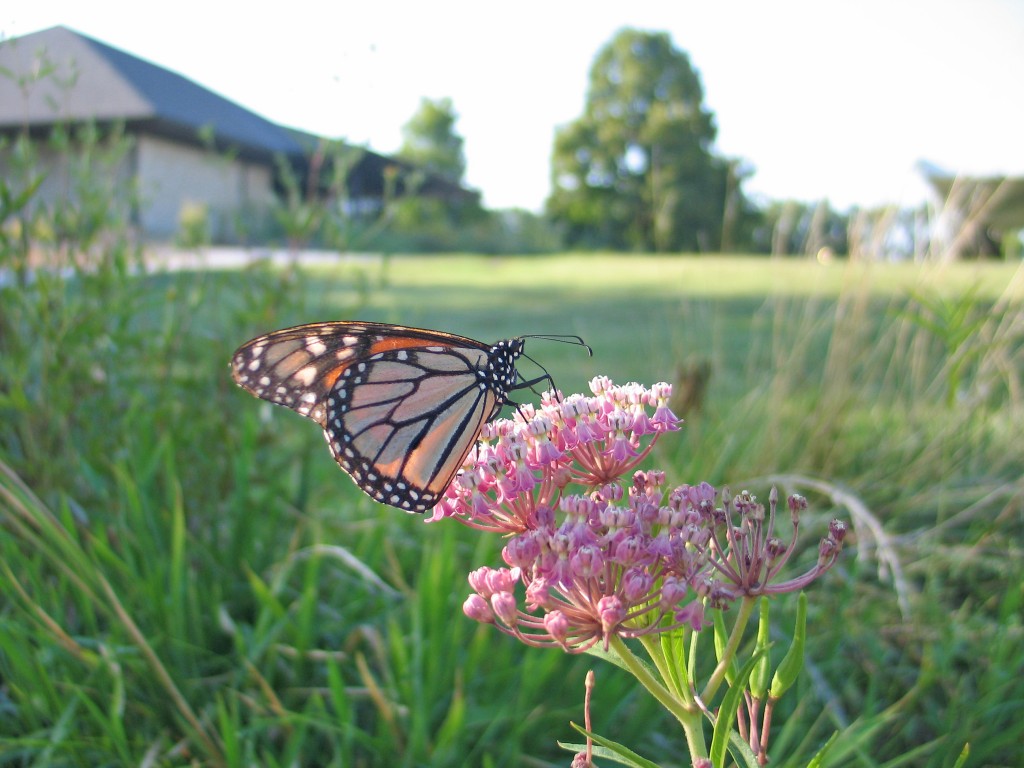
Dyck Arboretum photo

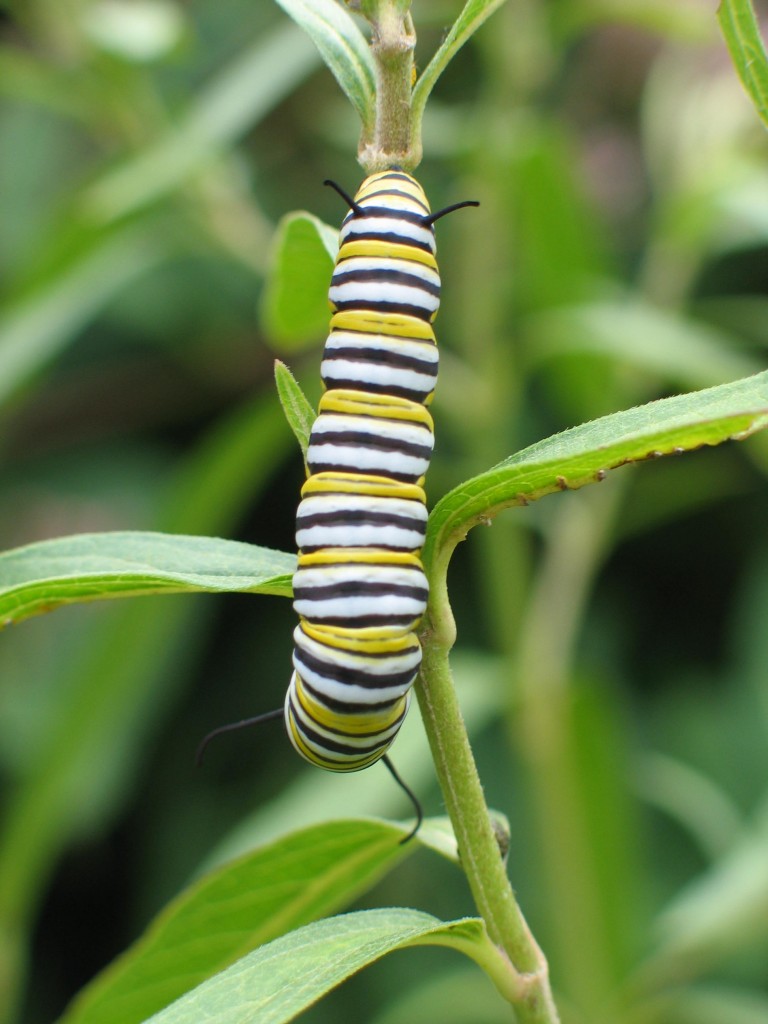
Monarch butterfly on Asclepias incarnata

Five Oaks for the Kansas Landscape

The strongest oak of the forest is not the one that is protected from the storm and hidden from the sun. It’s the one that stands in the open where it is compelled to struggle for its existence against the winds and rains and the scorching sun.  – Napoleon Hill

If you live in Kansas long enough, you really begin to appreciate trees.  They endure heat and extreme cold along with persistent wind.  Months without rain are common, but so is the occasional soaking rain that saturates the soil.  Trees in this part of the world need to be resilient.

Folks in areas of the country that have an abundance of trees often take trees for granted.  Trees grow easily, but not here.  A good shade tree in Kansas is a luxury.   They need to withstand the rigors of the climate.  To sit under a mature tree on a warm afternoon, enjoy the blue skies and sip your favorite cool drink is a special experience.

Here are five oaks trees that are “plains tough”.   (This is my list, but there are over 10 species of oaks native to Kansas and several other non-native varieties that are equally tenacious.)

OAK TREES FOR KANSAS

1. Bur oak

When I go fishing along the Cottonwood River, I can’t help but notice the huge Bur oaks (Quercus macrocarpa) stretching out their limbs over the river.  West of Hesston, there is one that has a span of over 150 feet.  It is quite a specimen.  This native oak of the eastern two-thirds of Kansas is one of the most adaptable hardwood trees in Kansas.  Generally, it is slow growing, but in the right conditions it can grow two to three feet a year.  Mature height is 50 to 80 feet tall and with a spread from 40 to 60 feet. The Bur oaks don’t typically have great fall color, but it is very sturdy and problem-free.

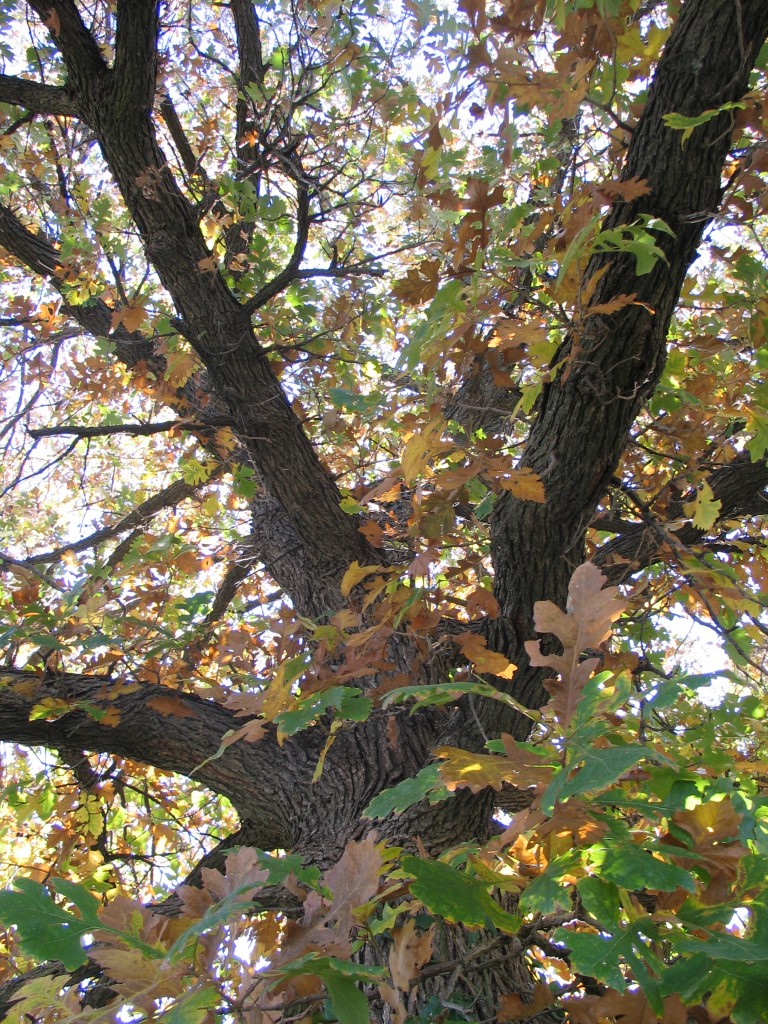
Bur Oak

Bur oak


2. White oak

As part of my horticulture classes at Kansas State University, I had to learn the names of many different plants on campus.  One of the trees I remember the most is a white oak (Quercus alba) on the east side of campus.  It is a beautiful tree with great fall color.  This stately tree stood about 60-70 feet tall with a spread of at least 60 feet.  I would love to have that white oak in my back yard, because I know that it would be there for generations.

White oak

White oak


3. English oak

The Kansas state champion English oak (Quercus robur) is in Kinsley.  If it can grow in Kinsley, it can grow anywhere in the state.  It is native to Europe, but a versatile tree in Kansas.  Typical growth is 30 to 50 feet in height and 30 to 40 feet in spread.  Leaves are dark green throughout the year.  They eventually turn brown, but stay on the tree much of the winter.  This tree adapts to most soil types, including heavy clay.  Ours at the arboretum puts on good growth each year – one to two feet.  Give it room to grow and you will be rewarded with an excellent shade tree.


4. Shumard (red) oak

The fastest growing member of the red oak family is Shumard oak (Quercus shumardii) making it a great choice for the home landscape.  Its native range is eastern Kansas along moist streams and upland rocky hillsides.  It is quite adaptable to a wide range of soil conditions.  The fall color can be incredible.  It is recommended that you choose your tree in the fall when they are coloring because the species can be variable in fall color intensity.  Shumard oaks are more tolerant than other red oaks of urban areas and challenging sites.


5. Shingle oak

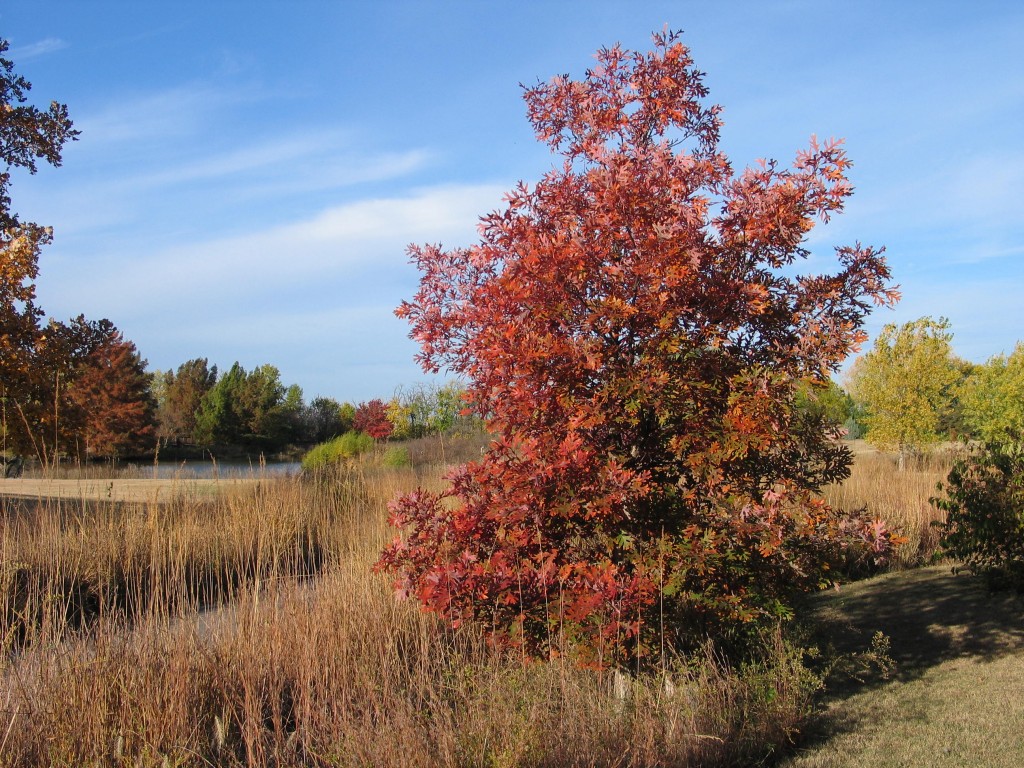
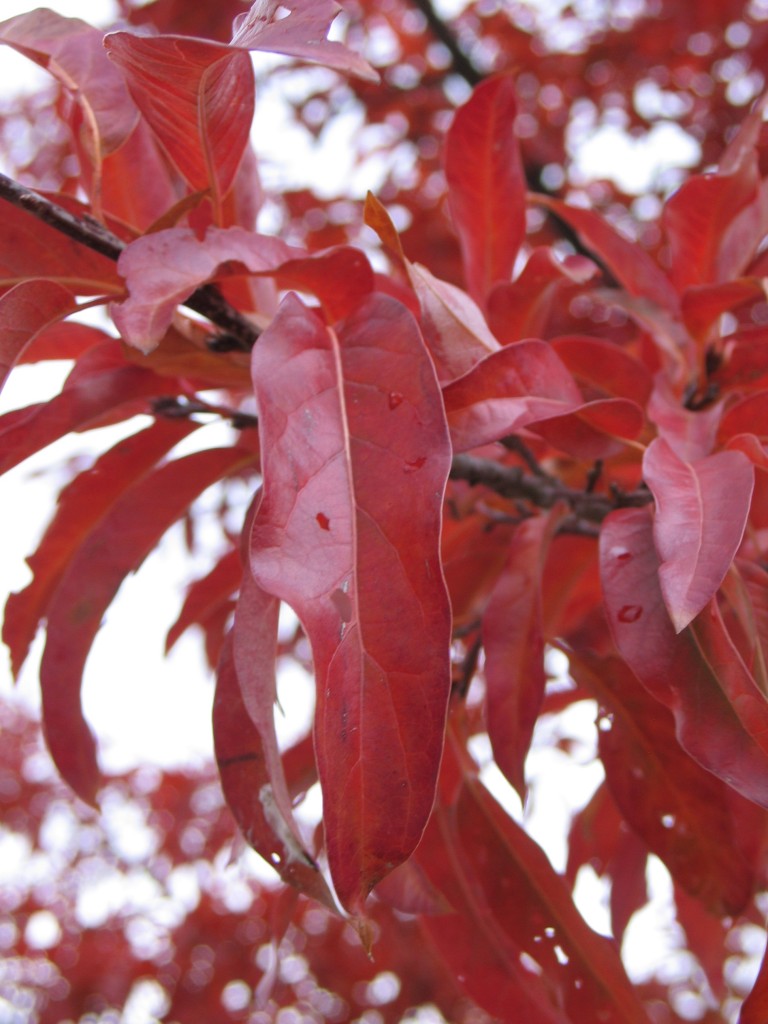
Our shingle oaks (Quercus imbricaria) this fall have been spectacular.  The red fall color was more brilliant than in previous years.  The color fades, but the leaves will persist through most of the winter.  Speaking of the leaves, they are unusual among oaks.  They don’t have lobes, but are smooth along the margins.  It is a great form that can thrive in drier conditions.   They grow 40 to 60 feet tall and spread 30 to 50 feet.

Shingle oak

Shingle oak


Planting an oak today is like leaving an inheritance to future generations.  Choose wisely!

What to Do with Those Leaves, Leaves, Leaves.

The other day I was driving through town and really noticed the changing leaves for the first time this fall.  They are looking particularly colorful this year.  The Maple tree varieties like ‘John Pair’, ‘Autumn Splendor’, ‘Table Rock’ and Oaks like Red Oak and Shingle Oak put on quite a show.  My favorite tree at the arboretum is the Sugar Maple called ‘Table Rock’.  It has consistent orange-red fall color.


Table Rock Maple

Table Rock Maple


These leaves, no matter how beautiful, will eventually fall.  Then we need to decide what to do with them.  Here at the arboretum we compost them.  Leaf compost makes excellent plant food and humus that can be incorporated into your garden or flower bed.  Leaf compost is high in valuable minerals such as nitrogen, phosphorus, magnesium, calcium and other trace elements.  Analysis shows that leaves from most trees can contain up to twice as many minerals as aged manure.


Gingko biloba

Gingko biloba, ‘Autumn Gold’


Why wouldn’t you want to make your own compost from leaves?  Good compost developed from leaves also adds organic matter to the soil.  This organic matter is great for aerating heavy clay soils or increasing water holding in sandy soils.  Take advantage of these free gifts.

Steps for composting leaves:

  1. Collect leaves. Shred them into small pieces to speed decomposition. Place leaves on the ground, which will make it easier to turn them and allow beneficial organisms such as worms to infiltrate the pile.
  2. To start your compost pile, your first layer should be several inches of leaves on the bare ground. This helps aerate the entire pile.
  3. Layer with alternating green (nitrogen rich) and brown (carbon rich) material. Green material can be grass clippings, food scraps, algae, tea bags or any nitrogen source.  These green ingredients speed the decomposition of the brown material.  Brown material can be leaves, newspaper, cardboard, sawdust, or straw.  These ingredients are generally slow to decompose and clump together.  They need time and moisture for optimum breakdown.  As a general rule, try to have one-third green and two-thirds brown.  The secret to a healthy compost pile is to maintain a working balance between these two elements.  Too much green makes a smelly, anaerobic mess.  More brown is better than too much green.
  4. Keep pile moist by either manually watering or allowing rain to infiltrate compost, but don’t go overboard.
  5. Turn the pile every few weeks. This incorporates and mixes all the elements together while aerating the pile.  If the pile is never turned, oxygen, which is an essential component in the process of decomposition, will be excluded.  Allow the compost pile to reach an internal temperature of 140-160 degrees to kill weed seeds.  If your compost pile is not reaching these temperatures, add more green material.
  6. In 4-6 months (next spring) the composting process will be complete.
Leaf House

Leaf house at the Dyck Arboretum of the Plains


If you don’t have need of fresh compost, the arboretum is willing to take your bagged leaves.  We are again filling our leaf house with our leaves, but we can take more.  Just drop your bags of leaves in the bus parking area at the arboretum.  We will take them back to the leaf house.  The leaf house is a great example of decomposition in action.

Three Iconic Prairie Grasses to Add to Your Landscape

Native grasses are at their best right now.  They are in full plumage.  They are changing color from green to bold reds, yellows, and oranges.  They have reached their full height.  They are spectacular.

I can’t imagine the view atop a rise looking over the expanse of the Great Plains in its unbroken state – a “sea of grass” as far as you could see.  It must have been awe inspiring. Within these waves of gold and green, three grasses stood out from the rest.

Within these waves of gold and green, three grasses stood out from the rest.

Big Bluestem (Andropogon gerardii)

This is the king of the prairie grasses, reaching to the skies and sending its roots deep.  It perseveres in tallgrass prairies.  The vertical stems stand firmly and sway with only a slight breeze and change vibrantly in the fall to shades of red and orange.  The three-pronged seed heads resemble a turkey’s foot, hence its other name “Turkey Foot Grass”.  Plant it in full sun in a medium to moist soil.


Big Bluestem3

Switchgrass (Panicum virgatum)

The airy seed heads and upright habit make this a great landscape grass.  These forms make quite a statement in the fall and winter landscape.  They add structure, texture and movement.  For best results, plant them in a sunny spot in a medium to moist soil.  It is very drought tolerant.  Discover these varieties: ‘Northwind’-consistent upright form to four feet tall and golden yellow fall color, ‘Cheyenne Sky’-red leaves develop early in the summer and grows to three feet, and ‘Dallas Blues’-tall (to 8 feet), with blue foliage and purple seed heads.

Panicum Northwind.resize

Indian Grass (Sorghastrum nutans)

The yellow/tan plumes and vase-shaped habit make this grass easy to recognize in prairies.  I use them in naturalistic plantings or formal plantings.  Give them space, because mature plants can be five feet across the top.   It grows best in a medium to dry soil and all-day sun.  Heavy clay soils make it robust, but it thrives in many different soil types.

Indian Grass


These native grasses are the backbone of the tallgrass prairie.  They are resilient because their roots go deep making them drought tolerant and tough.  They are garden-worthy and deserve a place in the landscape.  Give them a try.  You will be rewarded for many years to come.

Check out this article in Fine Gardening that I wrote several years ago for more information on other native grasses.

Five Things You Should Do Now to Prepare for Winter

This is my favorite time of the year.  I love autumn.  You can see and feel the changes of the seasons.  Prairies turn from green to brilliant shades of red, orange and yellow.  Trees light up the landscape with vibrant fall color.  Asters dot the landscape as pollinators search for the last remaining nectar in the garden.  There is so much to enjoy this time of the year.  We don’t want to think about the real big change coming when winter arrives, but that change is coming all too soon.

I like to spend some time in the fall preparing our landscapes for winter.  By dedicating some time now to your landscape, you will be rewarded with healthier, more beautiful plants next spring.

Here are some things on my checklist for the fall:

#1 Mulch

Fall is a great time to mulch all your plants.  Mulching now will help protect roots from extreme temperatures while also helping the soils to retain moisture in a typically cold, dry winter.  We apply 2-3 inches of new mulch around perennials, trees and shrubs.  Be careful!  Don’t allow mulch to contact the stem or trunk.  We leave a halo around the plants to aid in air exchange and drying.  Too much mulch can cause more harm than good.

Table Rock Maple

Table Rock Maple

#2 Lawn Care

This is the best time of the year to plant a new fescue lawn or overseed an existing fescue lawn.  I overseeded my back yard last week.  It is just starting to germinate.  I used clean, weed free seed and watered it daily.  I applied 3-5 lbs. per 1000 square feet.  If you are planting a new lawn, apply 5-10 lbs. per 1000 square feet.  You have until October 15 to get your seeding finished.  It is usually too late to seed after October 31.  The cool nights, warm days, beneficial rains and less weed competition make this time of year ideal for seeding grass.

Seeded Grass

It is also the best time to fertilize your fescue lawn.  We apply one pound of nitrogen per 1000 square feet.  Fall fertilization promotes root growth.  The roots of the fescue absorb and store the nutrients for the winter.  This stored energy will make for a thicker, healthier lawn next spring.

Remove leaves from lawn and place in compost pile.  Falling leaves block sunlight to the grass inhibiting growth.  Leaves can be shredded and composted into the lawn, but often this causes more problems.  It is usually best to completely remove them.

#3 Fall Clean-up

Remove Annuals and Cut Perennials: After the first frost, annuals can be removed from the landscape.  Prior to the first hard freeze, tender annuals need to be dug up and stored for the winter (i.e. cannas and elephant ears).

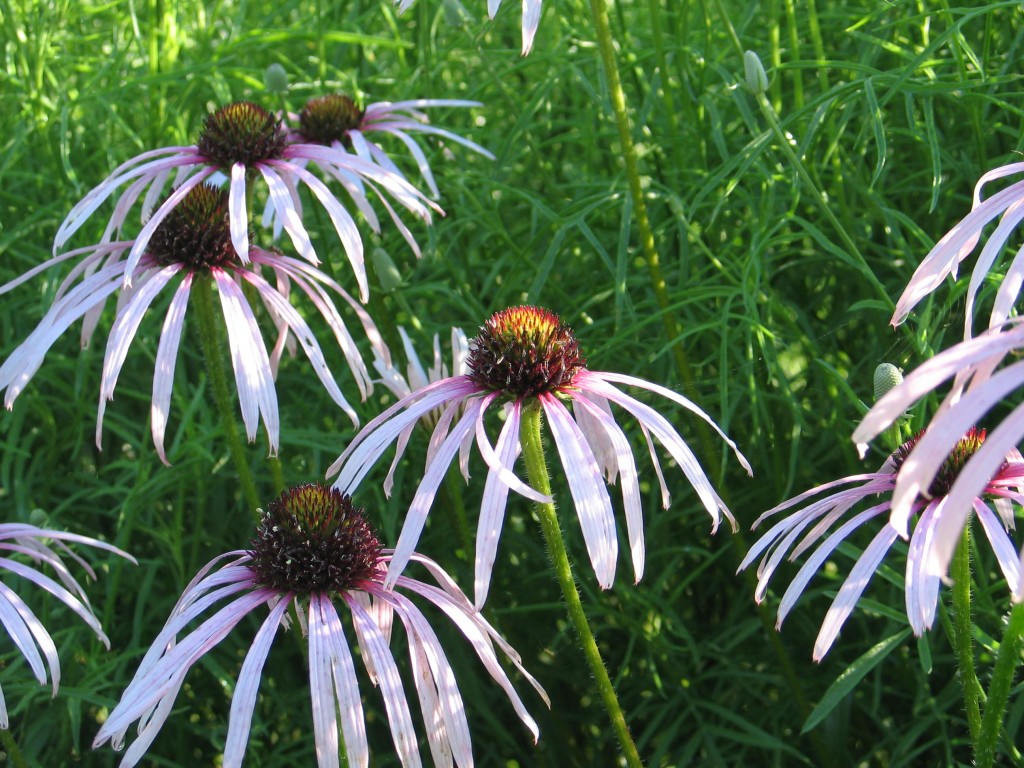
Coneflower Seedhead

In certain gardens, we deadhead spent blooms on plants such as gray-headed coneflower and coneflowers to prevent seeding.  Other seedheads are left through the winter as food sources for birds.  We leave ornamental grasses through the winter.  They provide texture and movement in the winter landscape.  These beds will be cleaned up in the spring.

Keep in mind that fall is NOT the best time to prune trees and shrubs.  It encourages new growth that will not get hardened off before winter, making it susceptible to damage.  Prune trees in the winter after they have gone dormant.  Shrubs can be pruned in the winter as well but only if they bloom on new growth.  Pruning spring blooming shrubs in the winter will remove next year’s blooms.  Prune these after they have finished blooming in the spring.

#4 Water

It is vital that perennials, trees and shrubs are adequately watered throughout the fall.  Newly installed plants don’t have a fully established root system and would benefit from periodic watering.  If the top 1-2 inches of soil is dry, the plants need water.  Evergreen trees continue to need moisture in winter, so irrigate thoroughly before the ground freezes.

Arizona Cypress

Arizona Cypress

#5 Take inventory and Think Spring

In the fall, I analyze the landscape.  This is the best time to determine what your needs will be next spring.  What plants did well in the landscape?  What plants need help or need to be moved next spring?  Are there any plants that would benefit from dividing such as grasses?  What areas need to be filled next spring?  Does the canopy of the trees need to be thinned to allow more light into the landscape?  Install spring blooming bulbs before the ground freezes.

This is a great season of the year.  Take some time to appreciate the beauty of fall.  There is so much to enjoy, but set aside some time to prepare for the winter.  A little work now on your landscape will pay big dividends in the spring.