Echinacea Hybrids

I read an interesting article about Echinacea (coneflowers) the other day. It highlighted the highs and lows of the newfangled coneflower cultivars over the last decade or so. You know – the ones in oranges, reds, yellows and every shade in between. It seems that many coneflower breeders are doing some soul searching and they are coming full circle, back to producing hardier varieties of our wonderful native prairie wildflowers. 

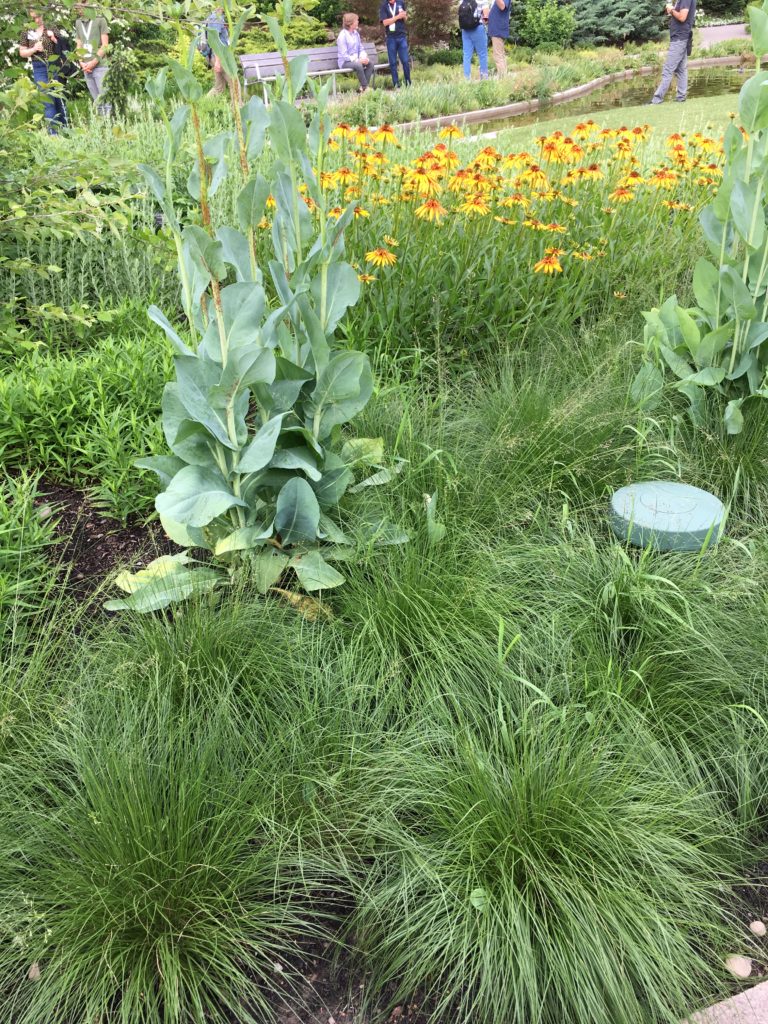
Yellow coneflowers with Rudbeckia maxima and prairie dropseed

The Problems   

One of the biggest criticisms of these bright colored coneflower hybrids has always been their (lack of) persistence in the landscape. If you were lucky, you could get one or two years out of them before they disappeared.  Maybe one survived, but often you couldn’t find that variety anymore, because it had been replaced with another new form.  You would have to go back and start over again with another new coneflower. 

These coneflowers had other problems too. Winter kill, color fading and short bloom times soured gardeners toward coneflowers. They were not as reliable or persistent as their parents from the prairie. 

‘Julia’ is a hybrid coneflower sporting vibrant orange flowers on strong stems. Photo courtesy of Walter’s Gardens.

Problem solving

I can still remember offering those first forms such as Orange Meadowbrite and Razzmatazz. These diverged from the adapted forms of Magnus, Ruby Star, White Swan and Kim’s Knee High in dramatic fashion. We no longer only had pink and white coneflowers, but a warm rainbow of colors available on the market. Everyone wanted to try some in their yards. 

The problems quickly became evident and the novelty wore off. The coneflower fad stalled. Breeders began to look at coneflowers from a “whole plant” approach. A “good” coneflower was no longer identified by its unique color, but by the extended bloom times, heavy flower count, longer life span, and vibrant colors that don’t fade. Winter survival and multiple growing points were a focus as well. 

Most of these colorful coneflowers are produced through tissue culture production. However, some seed forms with reliable color, such as Cheyenne Spirit and the Pow Wow series have become a cost effective alternative to tissue culture forms of coneflowers. These seeded forms are consistent, vibrant, and affordable.

Going Forward

The trend for new coneflowers forms and colors shows no sign of slowing.  Innovation drives sales and new styles are always on the horizon.  One of my recommendations is to always start with the true natives first.  Pale purple coneflower (Echinacea pallida), narrowleaf coneflower (E. angustifolia), yellow purple coneflower (E. paradoxa) and purple coneflower (E.purpruea) are adapted to our climate.  They are always a good bet in the landscape.  Remember, the pollinators prefer these forms too. 
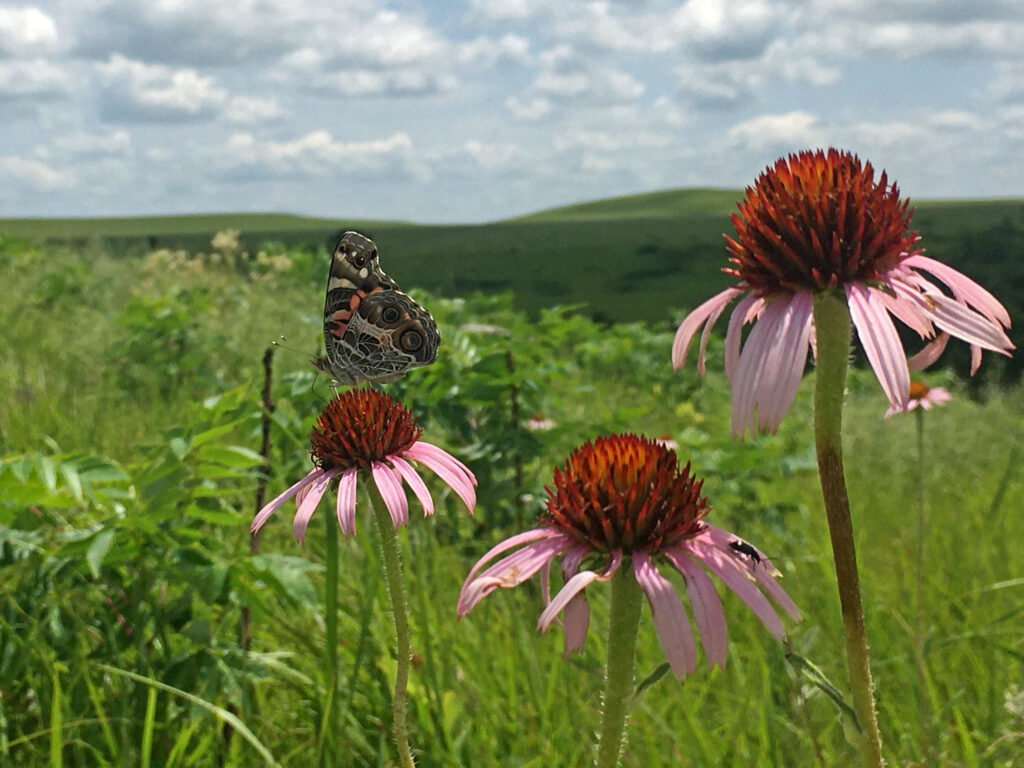
American lady butterfly on Echinacea angustifolia at Chase State Fishing Lake, near Cottonwood Falls, KS (Photo Credit: Brad Guhr)
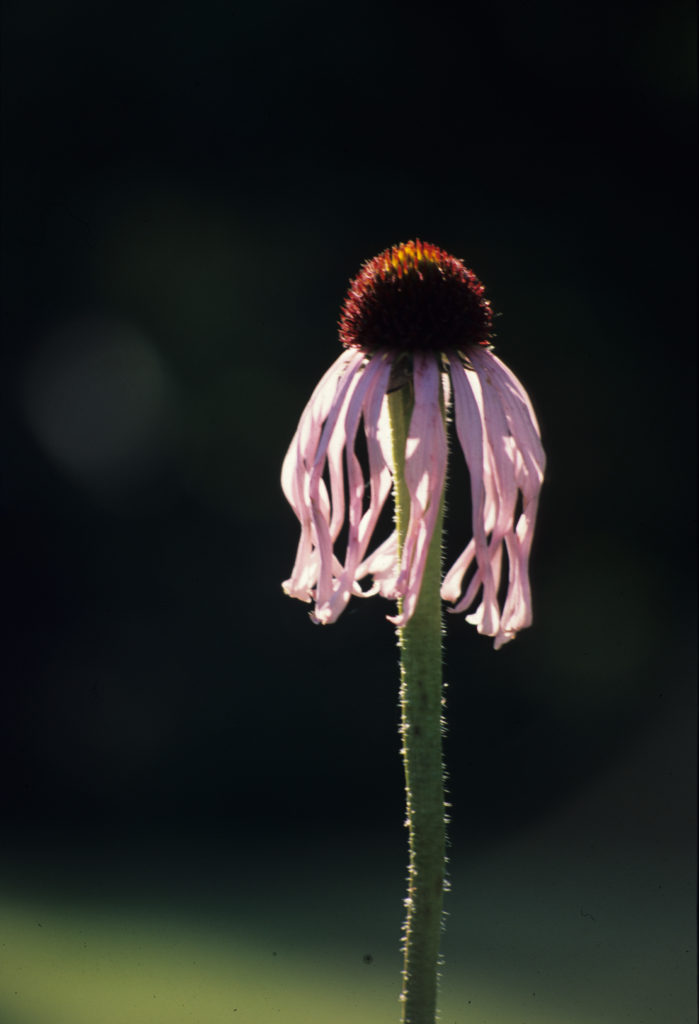
Our native Echinacea pallida always has thin, reflexed petals and a pale purple hue.

We have been tinkering with coneflowers for a long time and that will continue. The simple prairie coneflowers that we have moved into our landscapes often don’t look the same. I believe these changes come with a price. Sure you get uncommon colors, but it is obviously not the same prairie plant. Do pollinators recognize them? 

If you want to try some of these new colors, choose wisely after doing some research.  One of the best new coneflowers, according to the Mt. Cuba coneflower trials, is Sensation Pink.
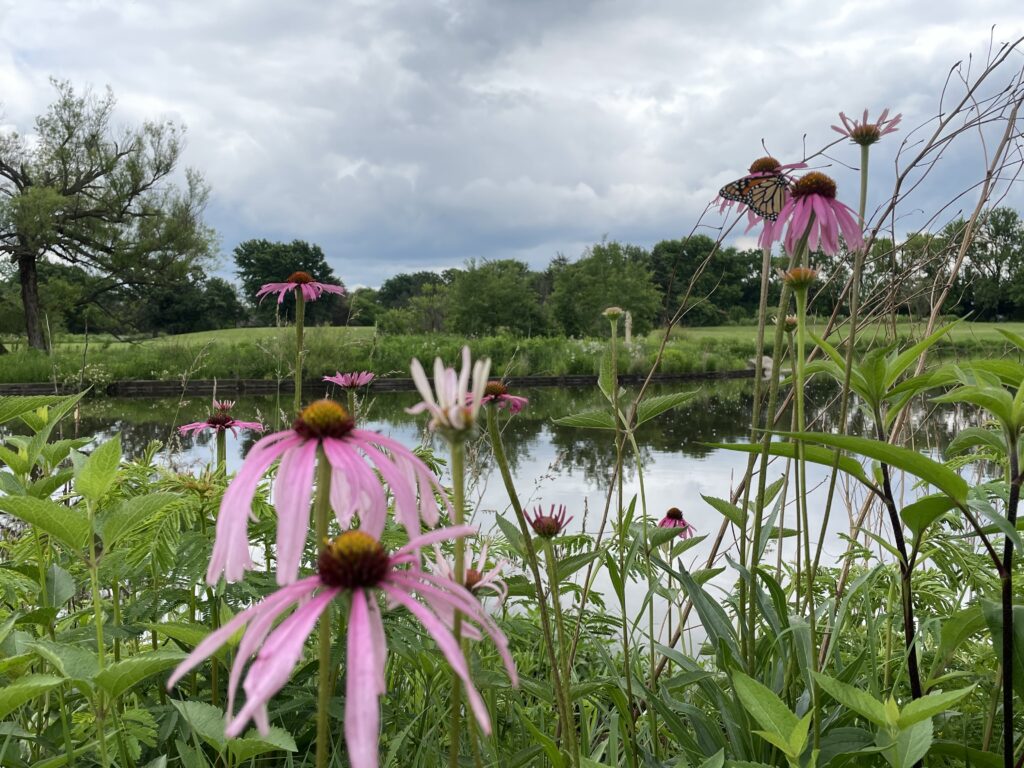
(Photo Credit: Brad Guhr)
Echinacea blooming along pond at Dyck Arboretum (Photo Credit: Brad Guhr)

Plant Profile: False Solomon’s Seal

Originally published in the Winter 2022 issue of the newsletter of the Kansas Native Plant Society.

It started with seed collection. Throughout this past spring, summer and fall, I’ve been collecting seed for propagation of native seeds, seeds to be shared with the Dyck Arboretum, and seeds for our prairie restoration. So when I gazed out the window earlier this fall and noted the scarlet berries of False Solomon’s Seal hanging from spent stems, I collected them. I’ve never propagated this species from seed, so clearly, research needed to be done. In that process, I’ve learned more about False Solomon’s Seal, and I’ve also come to more fully appreciate it!

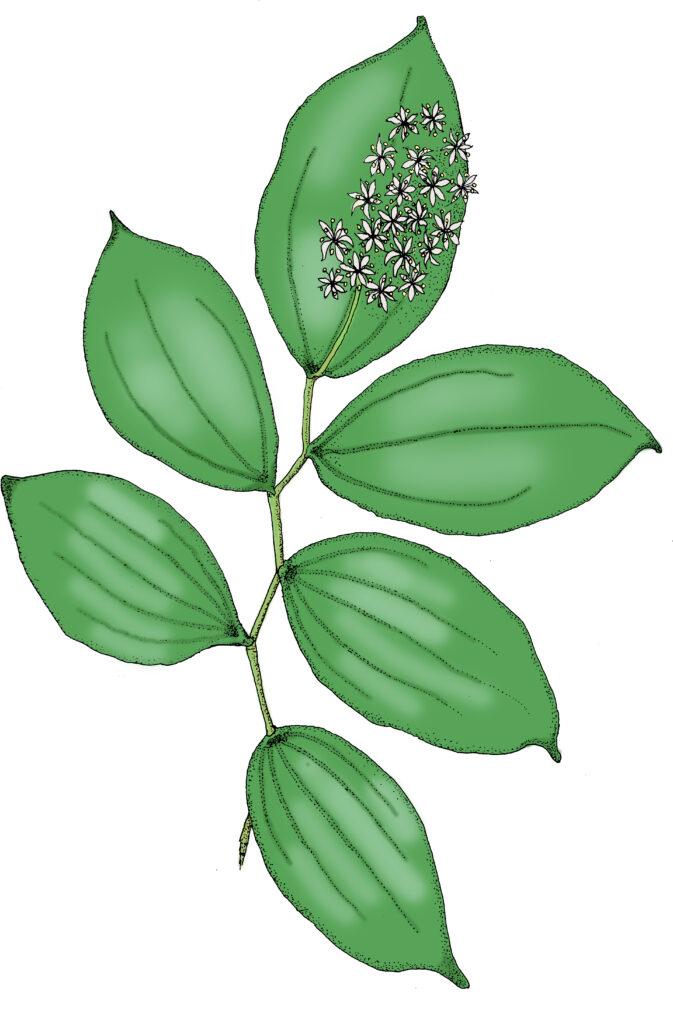
Maianthemum racemosum, or False Solomon Seal, drawing by Lorna Harder.

False Solomon’s Seal

Maianthemum racemosum (formerly Smilacina racemosa)– is an herbaceous perennial, native to woodlands throughout North America. The common name reflects its similarity to Solomon’s Seal, but False Solomon’s Seal is easily distinguished by the flowers and later berries that are produced at the ends of the stems. Indigenous people have variously used the spring shoots, rhizomes and leaves for medicinal and food purposes; and deer will also browse on it.

In spring, this plant’s stalks emerge from fleshy rhizomes. Stems are slightly zigzag and grow from 18 – 36 inches in length. Leaves are smooth and alternate with parallel venation. In late spring, up to 80 feathery, quarter-inch flowers are produced at the ends of the stems. The flowers are characteristic of the lily family, having six tepals (look-alike petals and sepals), with six stamens surrounding the central pistil. They are fragrant and attract a variety of pollinators including small native bees, flies and beetles. The berries that form contain a few seeds each. Initially they are green with purple spots, ripening to crimson. Birds and mice disperse the seeds after eating the berries and eliminating the the seeds elsewhere.

How to Propagate

False Solomon’s Seal prefers moist, rich, well-drained soils and full to partial shade. The fibrous roots can be divided and transplanted, but it takes several years to fully reestablish in a new location. When grown from seed, False Solomon’s Seal can be sown directly into the soil in autumn for spring germination in a year or two. When propagating indoors, seeds require several rounds of alternating warm (room temperature) and cold (35 – 40 F) moist stratification before planting in pots. Here again, germination may take up to two years. Patience should definitely be included as part of the seed propagation protocol for this species!

The False Solomon’s Seal I planted nearly 20 years ago has flourished along the western side of the house. It receives light shade most of the day, but it also gets blasted by late afternoon summer sun, demonstrating this species’ ability to also tolerate drier, more exposed conditions. Over the years, the False Solomon’s Seal bed has filled in and reliably produces panicles of creamy white flowers each spring, graceful arching foliage in summer and bright red berries in fall; and it continues to serve as an elegant companion plant for Jack-in-the-Pulpit (Arisaema triphyllum), columbine (Aquilegia canadensis), prairie phlox (Phlox divaricata), wild ginger (Asarum canadense), and yellow violets (Viola pubescens). Slow starter though it is, False Solomon’s Seal is hearty, pollinator- and wildlife-friendly, easy to care for, long-lived, and attractive throughout the growing season – perfect for your native shade garden!

References

https://hort.extension.wisc.edu/articles/false-solomons-seal-maianthemum-racemosum/
https://www.mountroyalseeds.com/product/maianthemum-racemosum-false-solomons-seal/
https://plants.usda.gov/home/plantProfile
https://www.wildflower.org/plants/result.php?id_plant=marar

Preparing to Establish a Landscape with Native Plants

It’s obvious to me that interest in landscaping with native plants continues to expand.  More and more people are reconnecting with the natural world through their native landscapes.  Besides creating habitat for wildlife, including pollinators and insects, these newly developed gardens conserve water, reduce chemical and pesticide use and beautify the landscape.  As you think about preparing to establish a landscape with native plants, here are some things to consider.

Analyze the Location

You know your garden better than anyone. You know the soil type. Does it stay wet or is it extremely dry or something in between? You know how much sun your area receives during the day and throughout the year. You know where the water flows. Are there areas that you can utilize as a background or backdrop?  Is there something you are trying to screen? Is there an area you are trying to develop? These are important questions that ultimately determine the types of plants you will choose.

Prepare the Site

Site preparation doesn’t have much to do with plant selection, but it is an important step to consider any time you are preparing to establish a landscape. You need to get perennial weeds such as bindweed and Bermuda grass eradicated before you plant your garden. If these weeds are not eliminated, they will overrun and out compete anything you plant. Trust me on this. I am still fighting these weeds in certain areas in my yard because I didn’t complete this step.

It is also good to define the area with some kind of border. Start by laying out a garden hose and moving it around until you settle on size and shape that seems appropriate for the space. I recommend starting small. Develop an area you can manage and fits your lifestyle. You can always expand, but a bed that is too large can quickly become overwhelming. Once you have defined the border, I use metal edging, brick, limestone or landscape stone as a buffer for a mower or weed eater. Edging makes your native garden look intentional.

Choose the Plants

Once you have gathered all this information about your site and all the initial work has been done, you are ready to decide which plants will grow well together. The most important step in the selection process is matching plants to the site. There are a group of plants or a plant palette that will grow in your site with little or no water once fully established. You need to become familiar with every aspect of the plants through investigation, research and experience. I often start with one or two plants I know will grow in this location. Once I have established them as the foundation, the other plant combinations come easier.

I design each landscape with the finished picture in mind. I consider heights, bloom time, habit, forms and textures. We often only think about these plants when they are in bloom. But don’t forget their other qualities, such as seed heads that provide visual interest in the winter months. It provides you an opportunity to highlight these qualities with another perennials or native grasses (e.g. coneflower seed heads against little bluestem). 

I group plants together for visual affect and stagger blooms throughout the season. Conceptually, I lay out plants in such a way that plants with different bloom times are next to one another. For instance, I would not plant two spring bloomers next to one another, but rather a spring bloomer next to a fall bloomer next to a summer bloomer. I even like to mix some grasses with certain perennials so you have the structure of the grasses propping up the perennial. Also, you want something coming into bloom and going out of bloom from spring through fall. Grasses add wonderful texture and movement to the garden during the winter months.

Maintenance

One of the misconceptions about native plants is that you just plant it and forget it. That is generally not the case. Establishing native plants in your garden or landscape usually requires putting extra work in those first few years. It takes time for those root systems to fully develop. Over time, you will begin to reap the benefits of native plants, especially if you have done your homework before you put the first plant in the ground.

Those tiny plants are most vulnerable during the first two or three weeks after planting. You must water them daily and sometimes twice a day in warm, dry seasons until you start to see some new growth. There is a fine line between over watering and under watering. Generally, you try to rehydrate the potting soil of those plants each time you water. Many maintenance practices used for traditional cultivated plants also work for native plants.

The first couple of years, I try to keep the tags around the plants so I don’t accidentally pull a small wildflower or grass. Pull all the winter and summer annual weeds when they are small and certainly don’t let them go to seed. February or March is the time to prepare your bed for spring. 

Northwind Switchgrass cut back and ready for spring

Your native landscape connects you to the land. The economical, ecological and beautiful garden you create can be enjoyed for years to come. I predict that your native landscape will be a hub of pollinator and butterfly activity. It will be an important link to other gardens in your neighborhood. It may even inspire you to establish other prairie gardens in your landscape. 

Your success may influence others to follow your example. A native plant garden should be cherished, because you are helping the natural world in so many far-reaching ways. Believe it or not, your garden will have a positive impact. So get started! Let your imagination and creativity inspire your design.

Bearer of the Ammonite by Paul Friesen. Photo Courtesy of Jen LeFevre

Photo Credit

Plant Apologies: Campsis radicans

I have accidentally been spreading some plant slander, and now it is time to apologize. Sometimes even we plant people get it very, very wrong! And so today’s post is all about Campsis radicans, aka the trumpet vine.

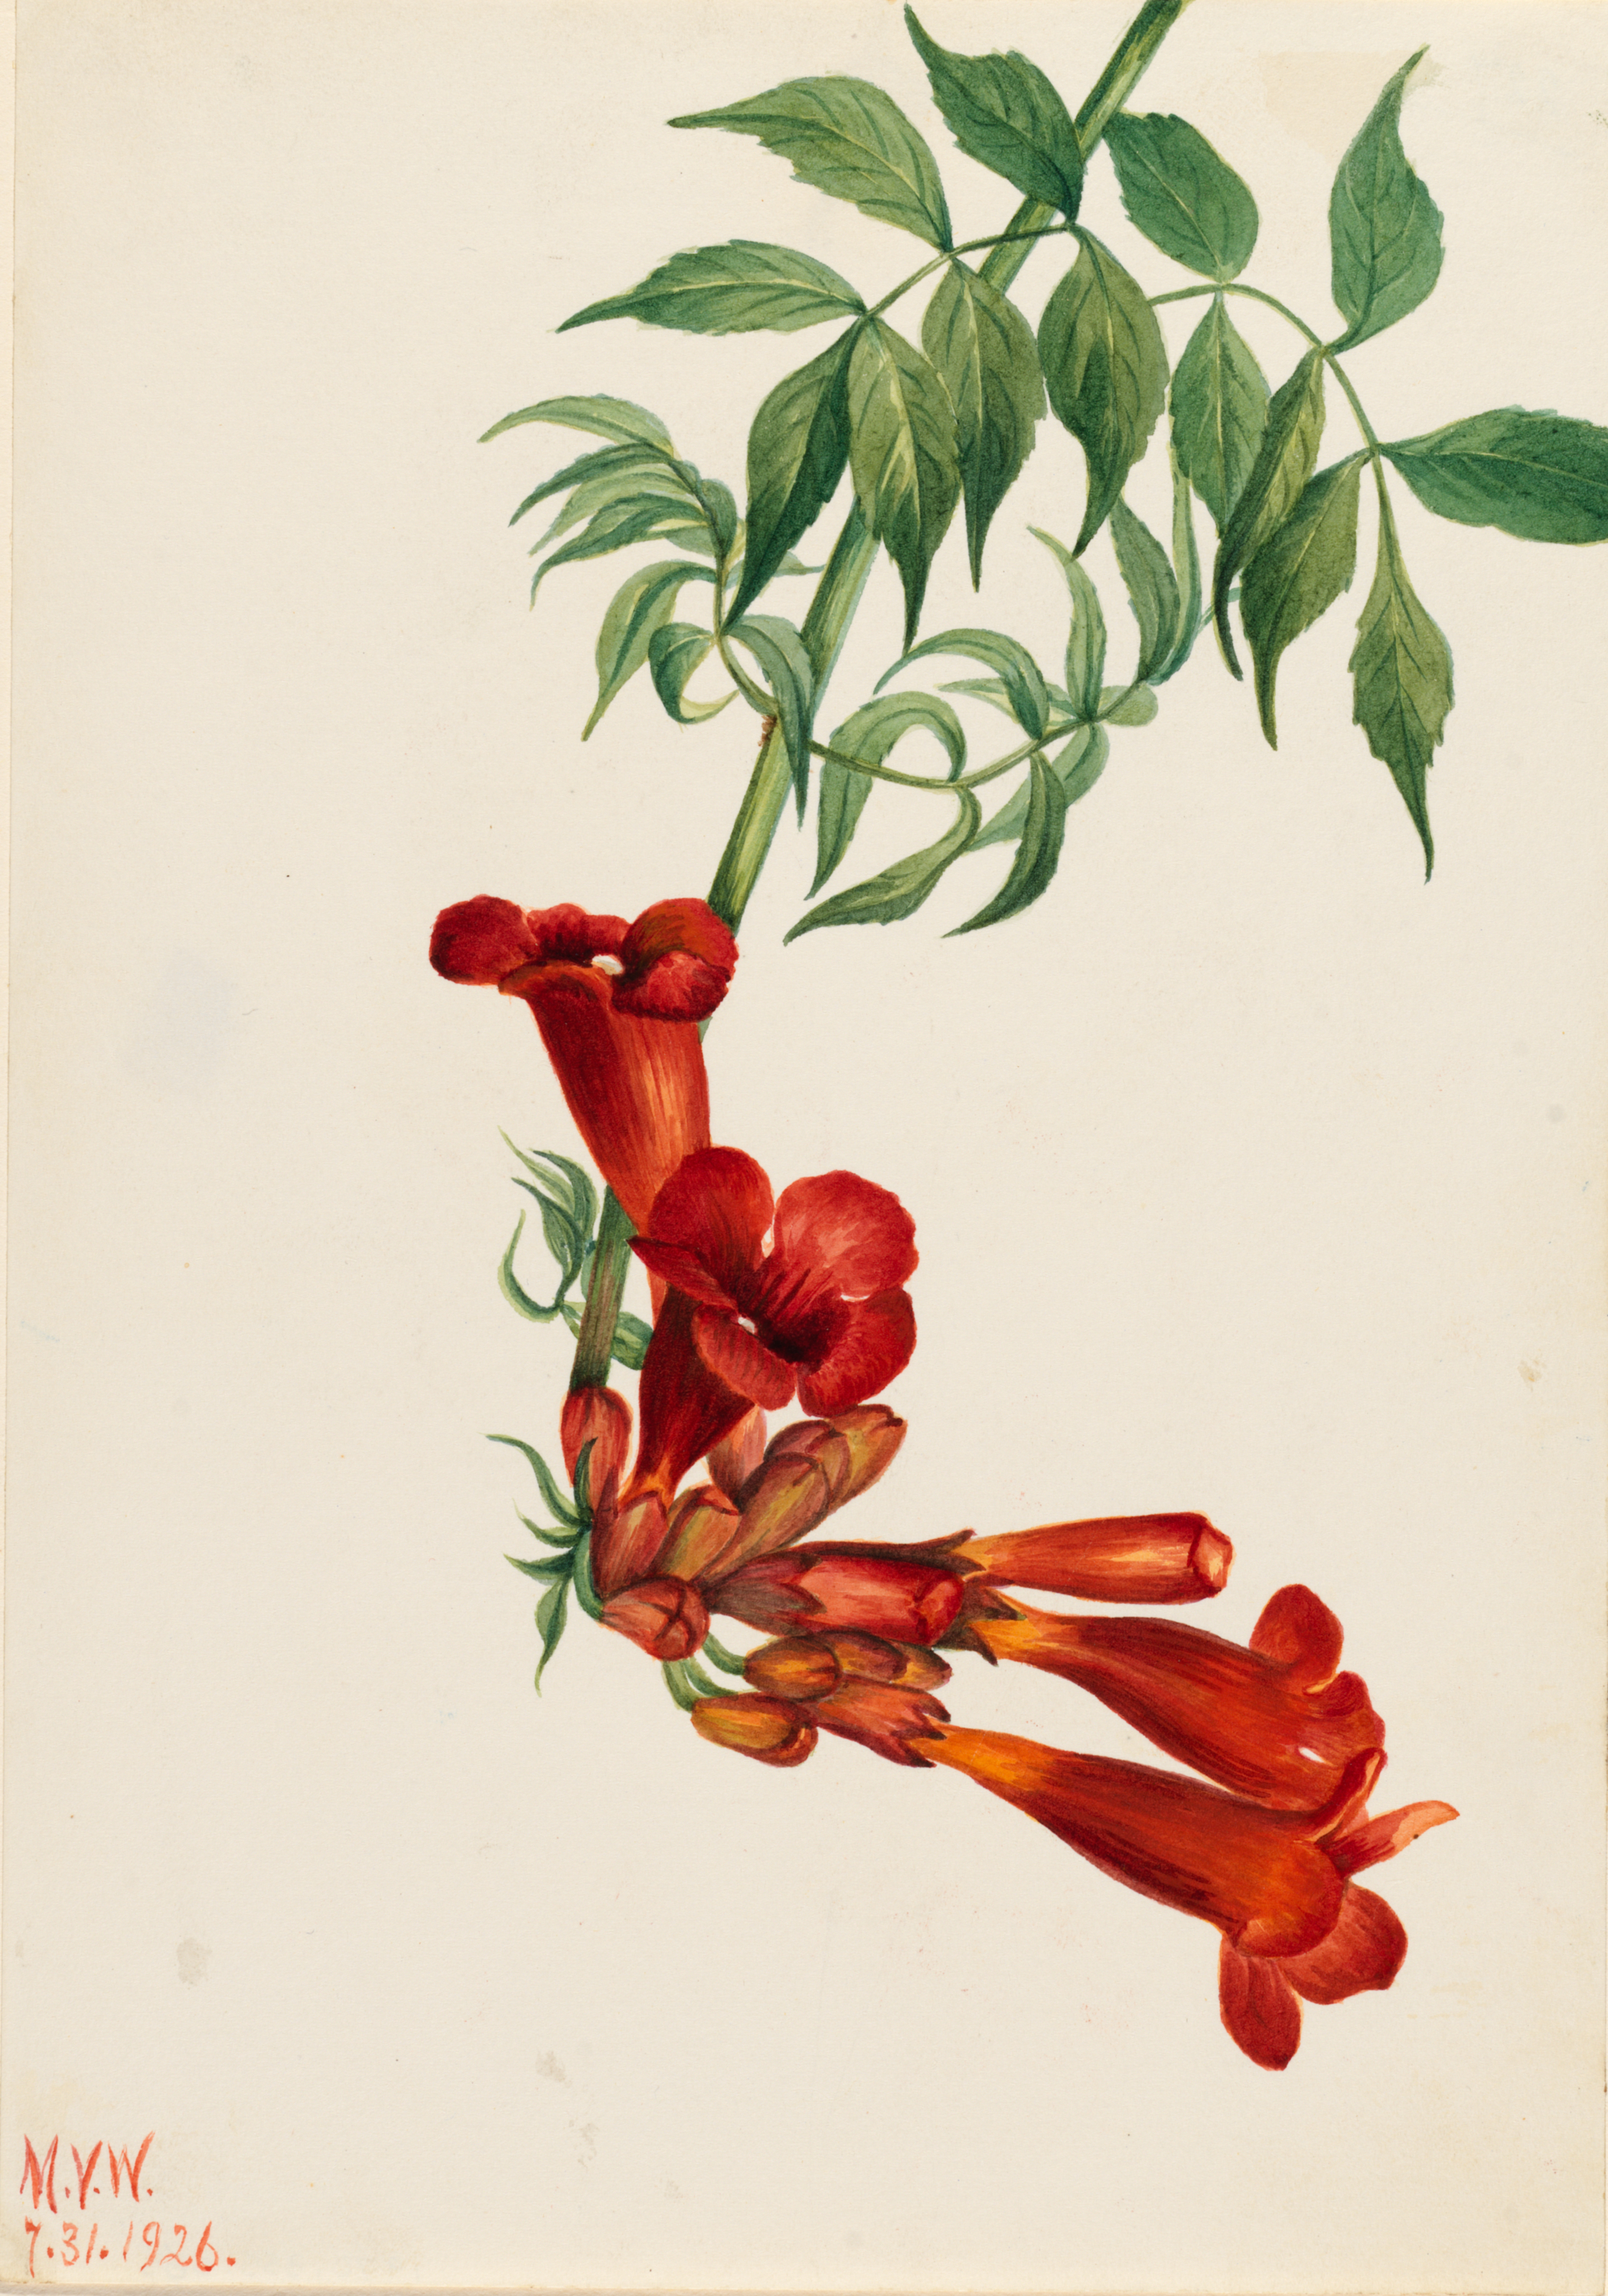
Illustration by Mary Vaux Walcott, CC0, via Wikimedia Commons

For years I have been railing against this plant.

“Ridiculously aggressive!”

“Impossible to get rid of!”

“It’s sold at these big box stores because they don’t care about the environment!”

While those things might be true in their own way, they leave out an important fact: It is NATIVE. Yes, Campsis radicans is a native vine that is found from Maine to Florida and west to Kansas. I have said many times that is was invasive, imported from far flung lands, and is a plague upon our forests. And boy was I misinformed. Remember, the word ‘invasive’ really should be reserved for non-native plants that have reproduced in and disturbed the local ecosystem. Aggressive is a better, more accurate way to describe a plant’s behavior if it spreads readily, but is native to our area. Invasive, as a horticultural term, means something about its origins and introduction into a new place.

Photo from Wikimedia Commons

Many Good Traits

This plant blooms July through August, attracting a whole host of long-tongued pollinators. Blooms can be red to orange, and its slightly sweet scent is great for trellises near the patio. It grows quickly, so can create fast shade over a pergola. The foliage is attractive and lush, and serves as a host plant for several species of moth.

The showy flowers attract bees and hummingbirds. Photo by Rob Hille, Public domain, via Wikimedia Commons

Some Not So Good Traits

My information about its origins was bad, but my warnings about its behavior were spot on. It is fast growing to a fault, and can be seen toppling fences and commandeering telephone poles. To keep this thing in control means relentless pruning. Growing right before your eyes, trumpet vine can easily climb 10 feet or more in a summer. It does not play well with others, and will send runner roots out into nearby garden areas. And don’t forget its seeds! A single pod can have 600+ seeds.

So, Campsis, I am sorry. You are a native vine with your own beautiful and ecosystem-sustaining qualities! Though I will still keep it out of my own garden, I can see it has a rightful place in a forest edge or hedgerow, and I will never call it invasive again!