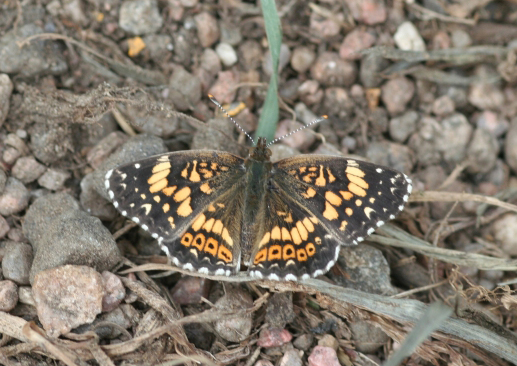
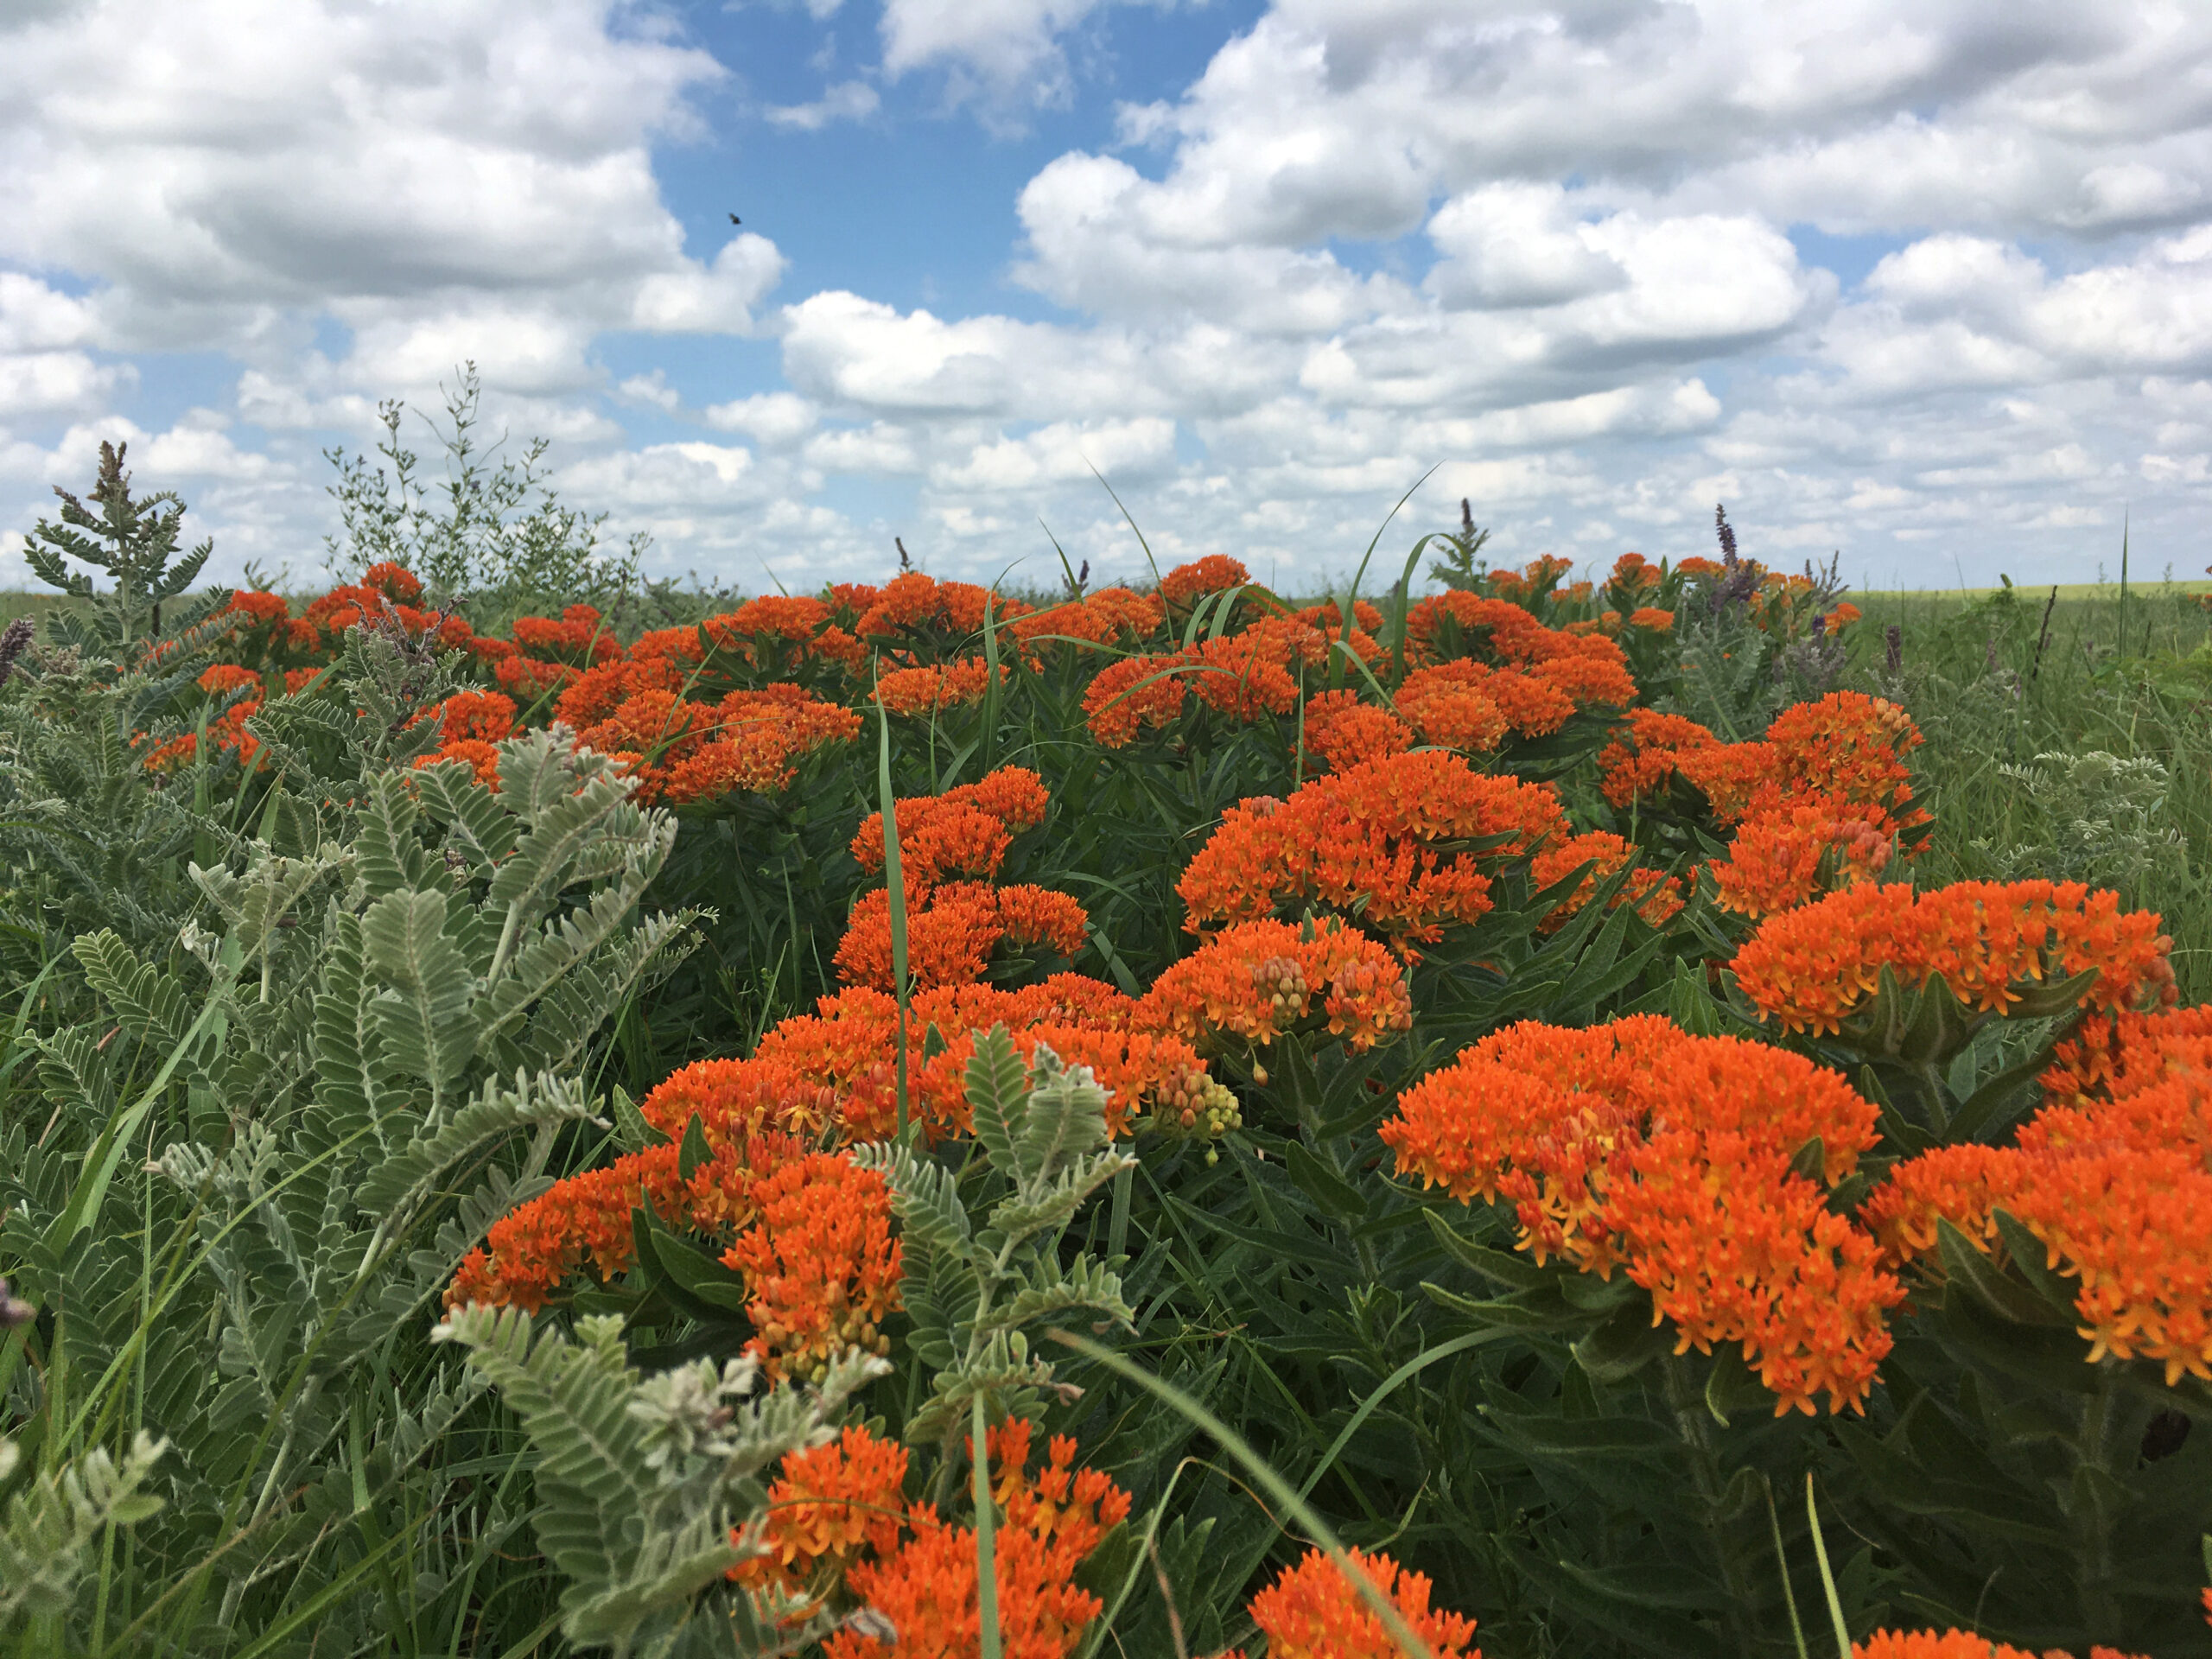
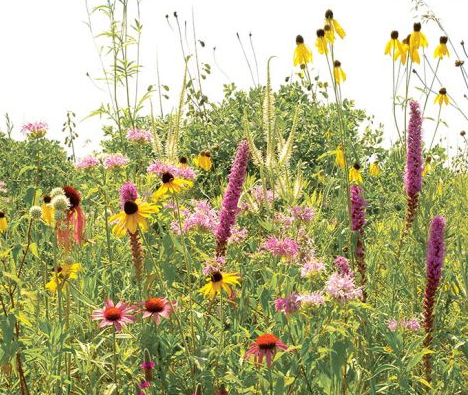
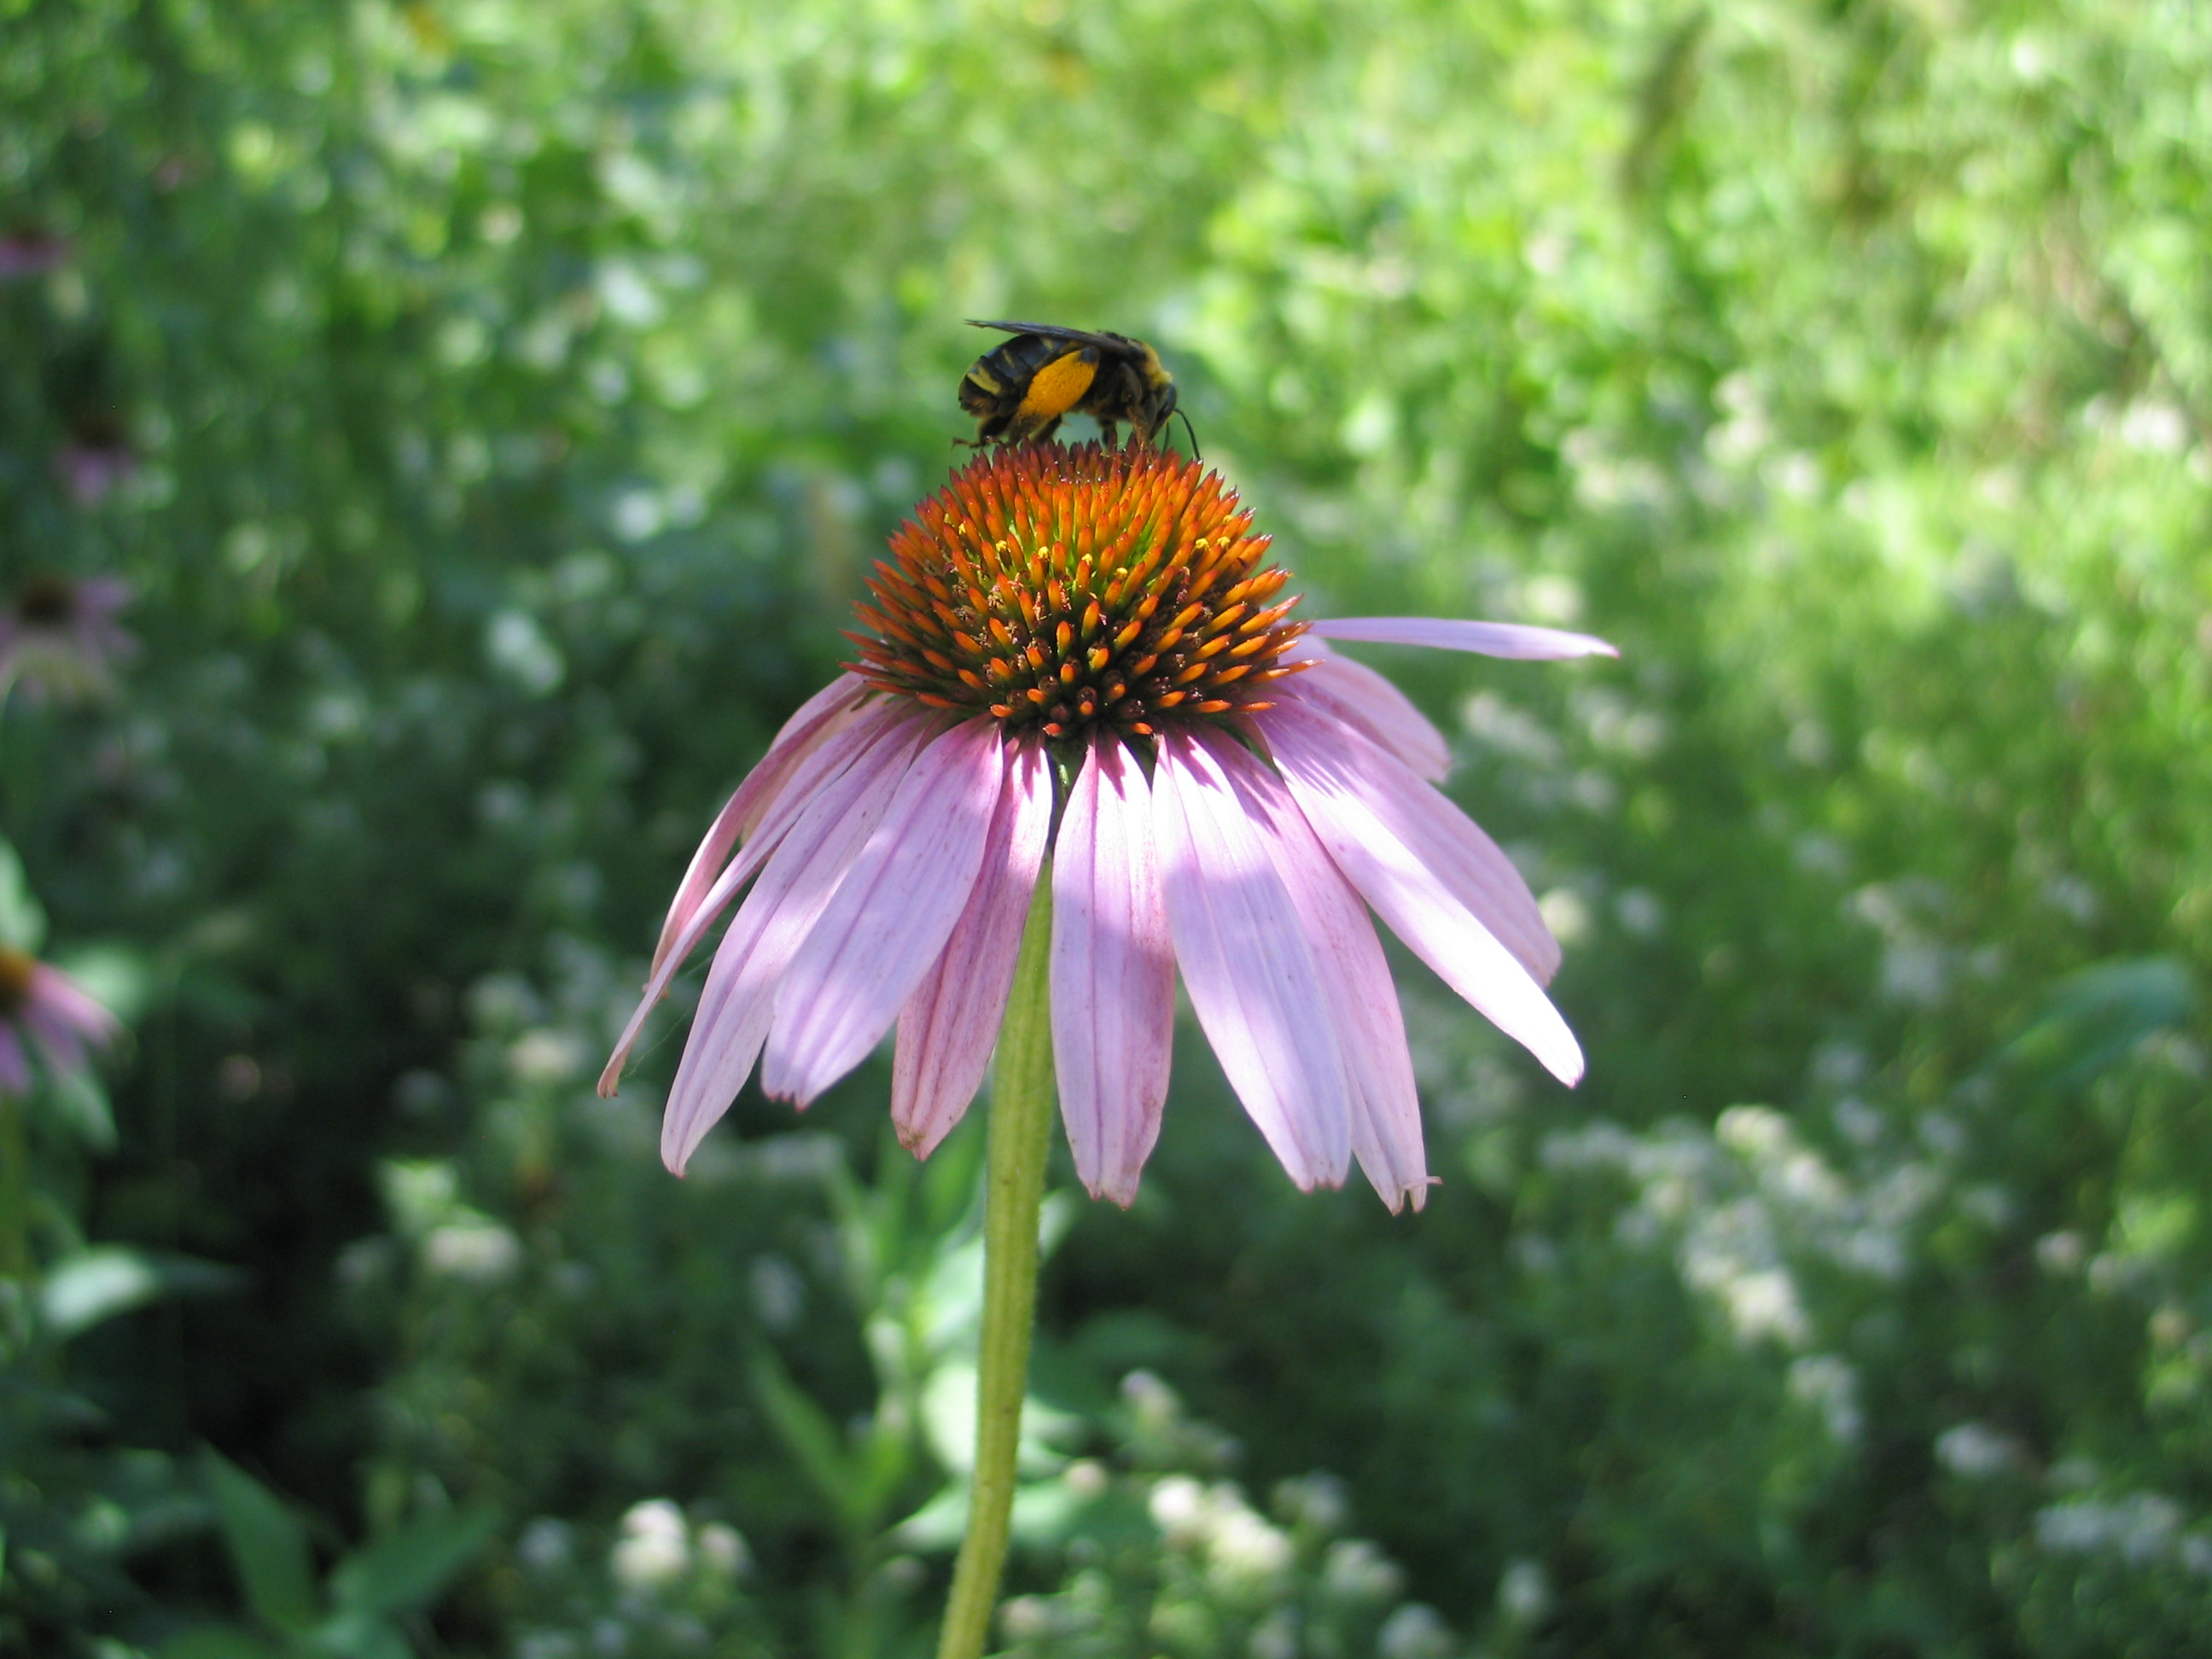
Coneflowers are so emblematic of the prairie. I love to include these prairie denizens in many of my designs. They are quite adaptable and I love the yellows, purples and pink colors of the true natives as they bloom during the summer. The new cultivated varieties are attractive too. A mass of coneflowers with little bluestem make a nice combination by providing color and texture through the growing season. But right now, many of the plants are full of little black or brown caterpillars that are using Echinacea and Rudbeckia as their food.
Coneflowers as host plants
We are getting calls from our members and customers, and are seeing damage on our plants as well. Coneflower leaves are blackening, getting holes and disappearing. Contrary to how you may feel, this damage is an indication that your garden is functioning properly. Host plants are the vital food source that caterpillars live on. Adult butterflies will seek out these plants to lay their eggs on because they know that the caterpillar cannot travel far and will not survive if placed on a plant that they cannot eat. These caterpillars will eventually turn into checkerspot butterflies or a relative in that family.
Think differently about your landscape
One of the goals of any garden – besides beauty – is to have pollinators in your garden. Sometimes they might not immediately be in the form you desire. Sometimes pollinators or their caterpillars may eat your plants or deform them. Don’t be too hasty to spray or remove the culprits. They are doing what comes naturally to them and it is often better to leave the insect. These insects are fantastic food for fledgling birds as well.
Understand the life cycle
The caterpillars eating your coneflowers will make cocoons in a week or so and then turn into butterflies. We must learn to embrace these caterpillars and accept some damage. The coneflowers will eventually recover. The tradeoff is that we create habitat suitable for butterflies to complete their life cycle. The “ugly, hairy” caterpillars will morph into beautiful butterflies that are equal to the beauty of the flower.
The key to a successful butterfly garden is to plant both nectar and host plants, so that the butterflies will have a food source in all stages of their life cycles. We often design our landscapes as nectar sources and forget that these pollinators need host plants too. So as you design your landscape, include flowering plants that produce nectar and also double as host plants.
Other host plants
Black Eyed Susan (Rudbeckia hirta) Host plant for: Silvery Checkerspot, Gorgone Checkerspot, Bordered Patch butterfly
Aster spp. Host plant for: Pearl crescent, Painted Lady and more
Coneflower (Echinacea spp.) Host Plant for: Silvery Checkerspot and more
Hollyhock (Alcea spp.) Host plant for: Painted Lady, Common Checkered-Skipper and more
Golden Alexander (Zizia aurea) or Dill (Antheum graveolens) Host plant for: Black Swallowtail, Anise Swallowtail and more NOTE: The Black Swallowtail will feed on any plants within the Parsley family.
Sunflower (Helianthus spp.) Host plant for: Silvery Checkerspot, Painted Lady and more
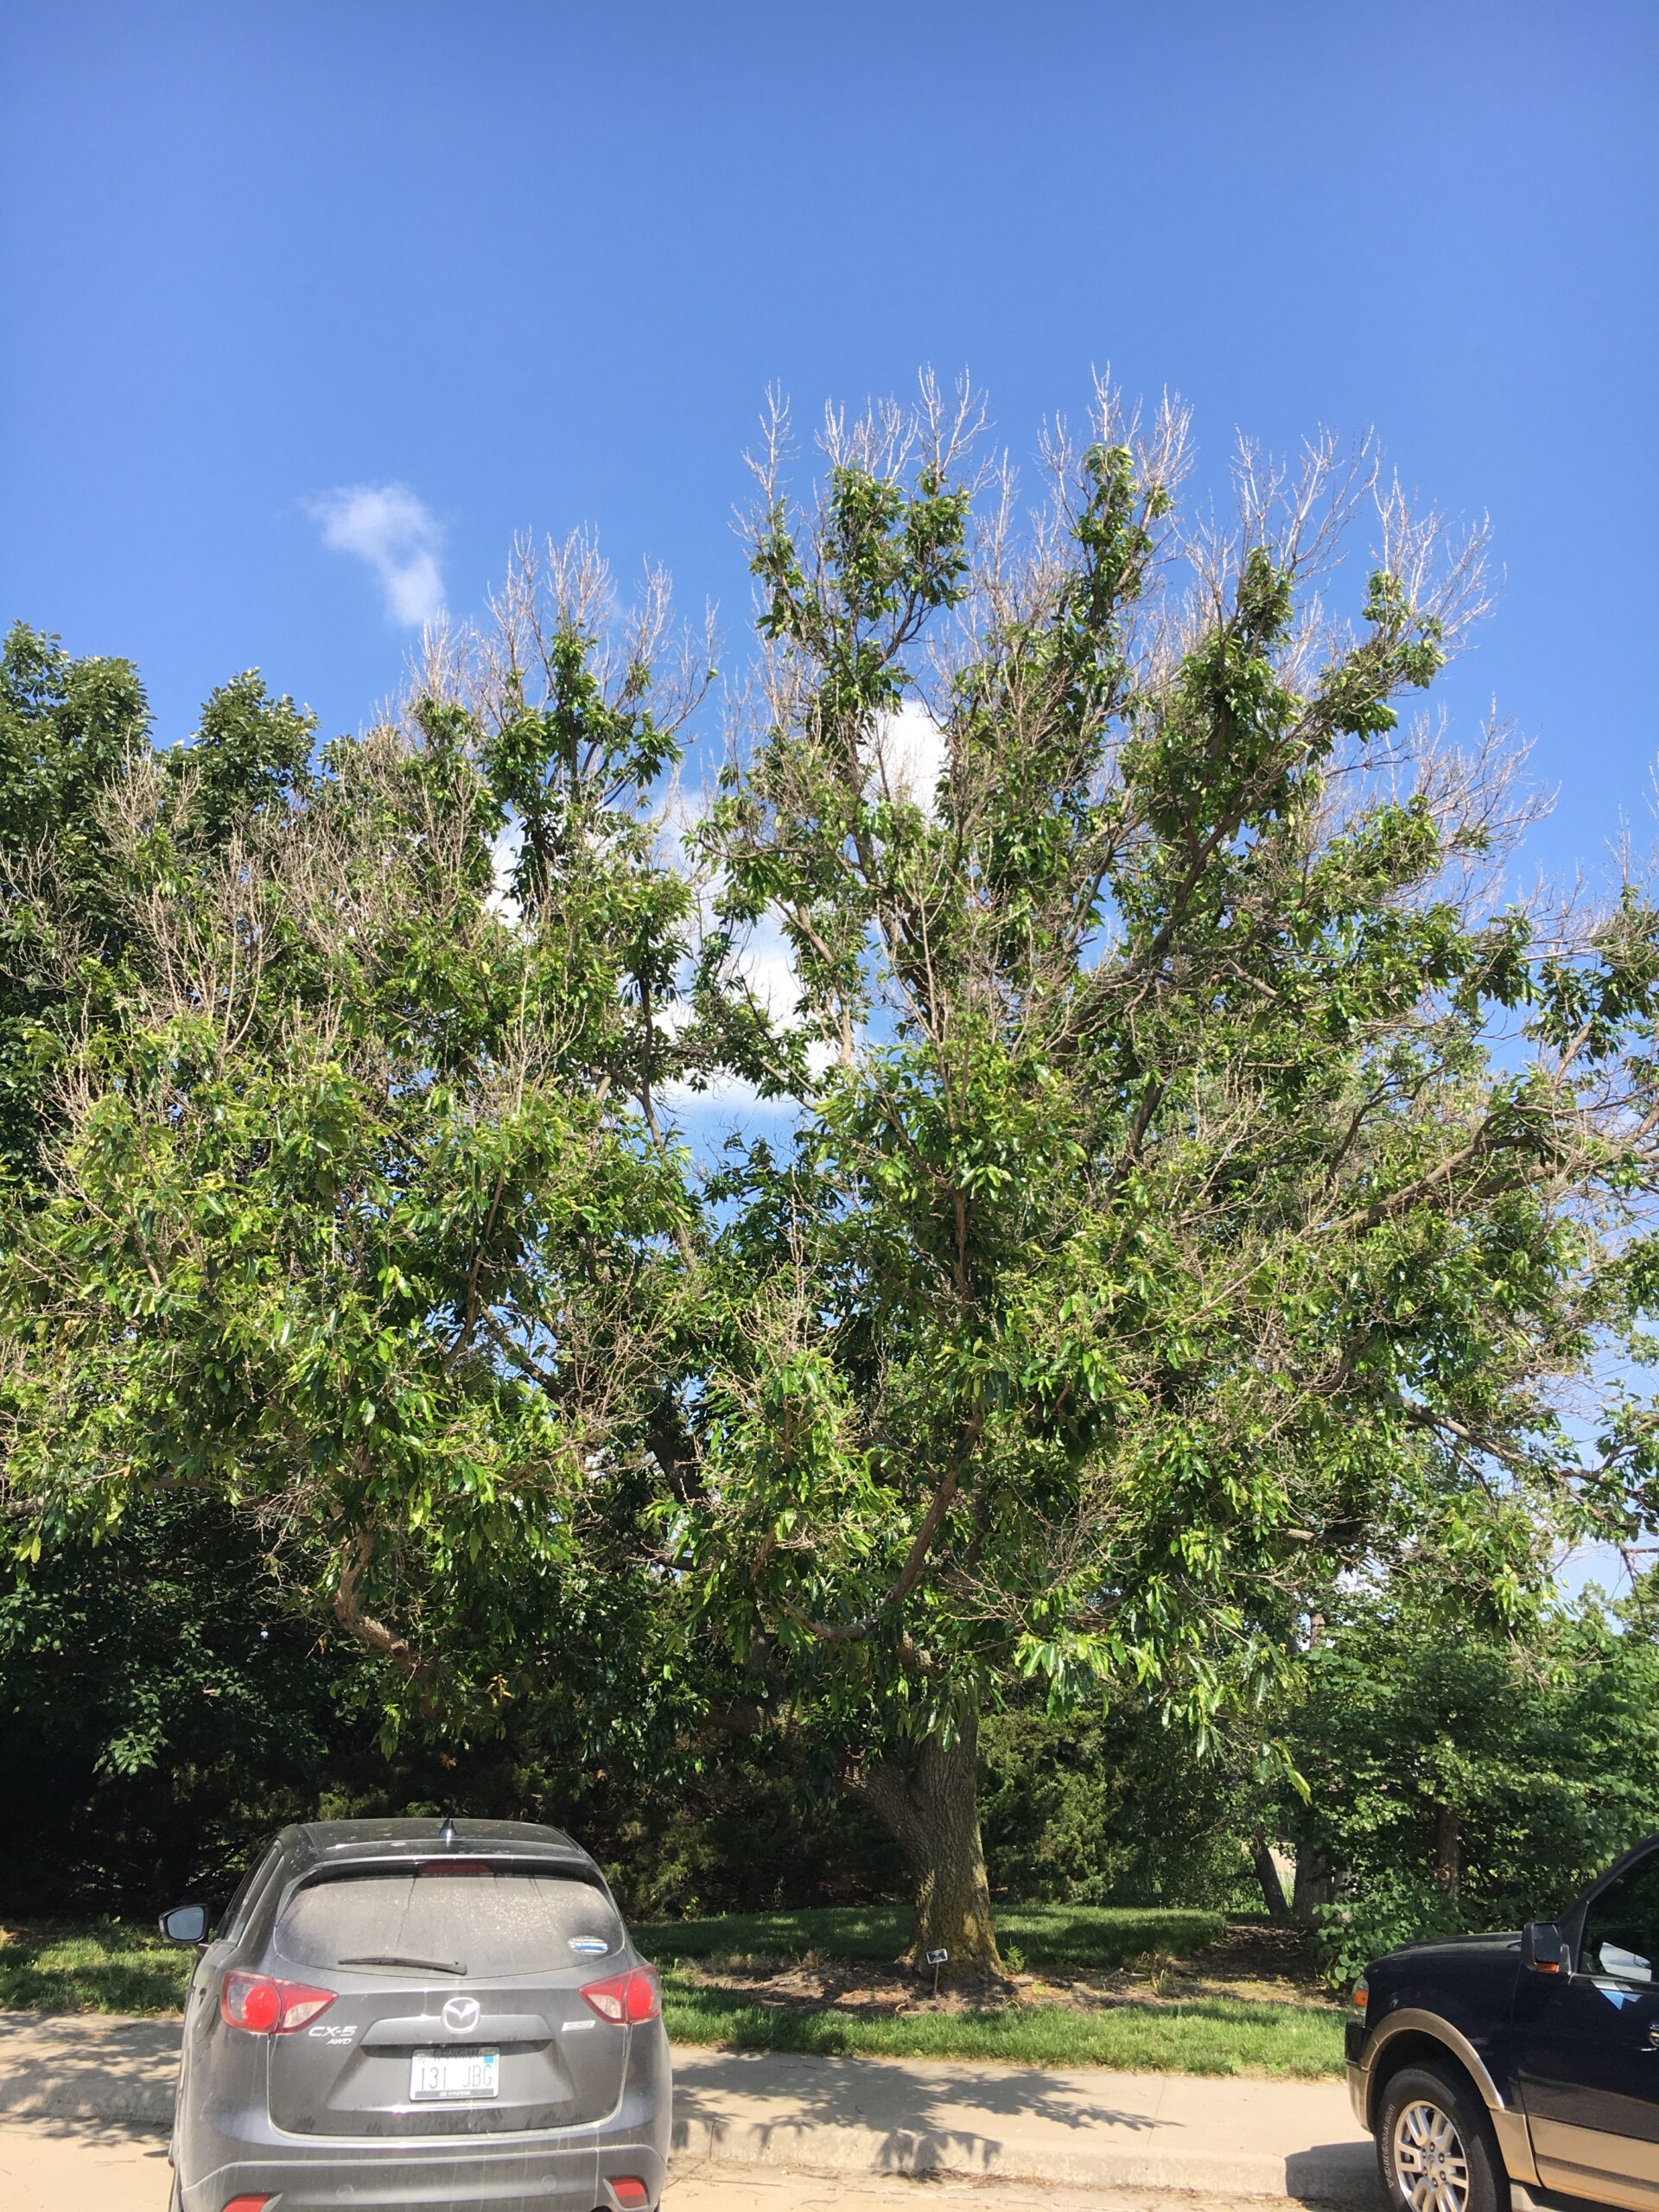
This spring we have several trees showing signs of stress that are not particularly attractive. Since last fall, something has happened to them. They leafed out late and/or they have some dead branches throughout the tree. More than likely, it is a result of the historic cold temperatures this winter. But it made me wonder about some other reasons these trees may be stressed this spring.
Why trees?
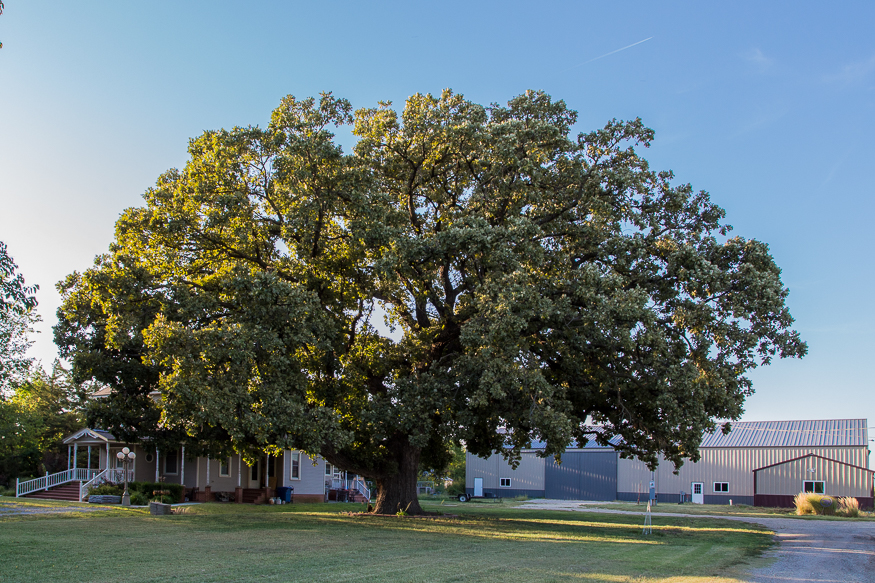
Trees in Kansas are a luxury and one of your property’s greatest assets. To sit under a mature tree on a warm afternoon, enjoy the blue skies and sip your favorite cool drink is a special experience.
Trees need to withstand the rigors of the climate. Trees block harsh winter winds, give you privacy, delineate boundaries, offer great fall color, attract birds and other wildlife that enhance your enjoyment or your landscape, and increase its resale value. Trees are important for all of these reasons and more, but they are not invincible. At any moment, signs of stress can emerge, so we need to understand and make every effort to alleviate problems that may arise.
Open-grown burr oaks are wider than they are tall (Photo by Lamar Roth)
Tree Stress Symptoms
Stressed trees are easy to pick out in the landscape. Symptoms will manifest in a number of ways including flaking bark, secretions, distorted or missing growth, insects, foliage issues, dead branches and lack of vigor.
These symptoms are visual clues to internal, external or environmental stressors. Left untreated, these stressors could ultimately kill your tree. Stressed trees are beacons to insects because they are weaker and vulnerable to attack. Compounding factors over a number of years from the same stressors or multiple stressors lead to tree fatality. Here are some common causes of stress in trees.
Poor Tree Watering Techniques
It is true that trees need water to survive, but they need just the right amount of water. Too much or too little can cause a tree to be under stress. These problems can be compounded when planted in our clay soils. Defoliation, yellowing of the leaves and branch die back are all symptoms to avoid. Most trees, if properly situated, can withstand seasons of drought without much extra inputs.
Monitor trees during stressful times such as drought to make sure they don’t need a deep soaking. Keep in mind that waterlogged soils are more problematic than drier soils because proper air exchange by the roots in hindered by extremely wet conditions. Sometimes we see a tree under stress from drought and do more damage by giving it too much water. Give it a deep soaking, but let it dry out between watering.
Install the tree properly
One of the first lessons I learned as a novice horticulturist is how to plant a tree. “How hard can it be?”, you may say. Just dig a hole, put it into the ground, water it for a while and watch it grow. More trees are killed by improper installation than you might realize. Choosing the right tree for the soil conditions, along with understanding mature size, will go a long way to helping that tree survive and thrive.
In our clay soils, I plant the root flair a few inches higher than the soil line in a hole that is at least twice the size of the root ball. I make a small basin around the tree that makes it easier to water and then lightly mulch the basin. It is important to keep mulch away from the trunk of the tree. I stake the tree for the first year and remember to remove the wires that will eventually girdle the tree if forgotten.
For some additional tips on how to properly plant trees, check out my blog post “Steps to Planting a Tree”.
Beware Lawn mowers and Weed eaters
Anything you can do to keep mowers and weed eaters away from the trunk of trees is vitally important. I have seen too many tree trunks damaged by mowers bumping them and people string trimming around the base of the tree, trying to cut down every sprig of grass. A small two to three foot mulch ring provides just the right buffer between the trunk and lawn. I have seen a string trimmer completely girdle the soft bark of a maple tree and kill it in a couple weeks. If you have invested in a tree, protect it from these tree killers.
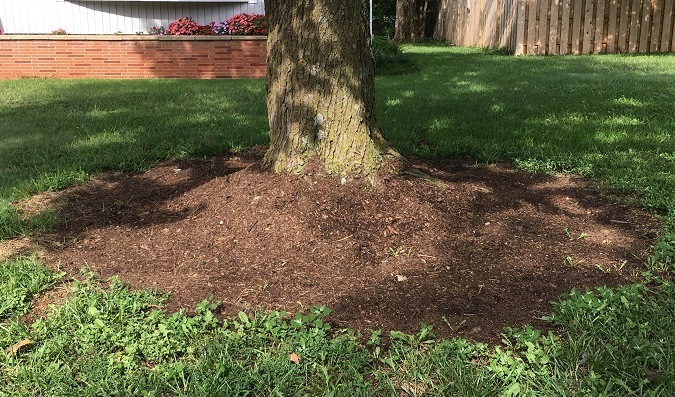
The advantages of mulch around trees are obvious. It is one of the easiest things to do and it improves the aesthetics of the landscape. However, too much mulch, mulch touching the trunk, or mulch volcanos around your trees could cause major tree stress. These stressors are totally avoidable with one to two inches of mulch around the trunk, but not touching the trunk. It is important to keep the mulch several inches away from the trunk. Too much mulch will cake up and seal off the soil, impeding proper air exchange by the roots.
This is an example of a mulch volcano. Be sure to pull mulch away from trunk of tree and spread out.
Improper Tree Pruning
Pruning your trees as they mature is a necessary function. I generally prune our deciduous trees during the winter when they are dormant, making sure not to remove more than 1/3 of the growth at a time. Proper timing will allow the tree to begin to heal without opening up the tree to potential diseases and pests. Evergreen trees can be pruned any time but I avoid the hottest part of the year.
Construction Injuries to Trees
Trees often suffer during and after construction projects. Compacted soils and branch or trunk damage can stunt the growth for several years after the project has been completed. It often takes years for compact soils to improve. I killed several nice maple trees after our Visitor Center was constructed because the soil was too compacted. The soil would not drain and they were essentially planted into an undraining bowl. The roots were completely surrounded by water and they drowned and stunk when I pulled the dead trees out. Remember to protect/ fence off any trees you want to save during a construction project.
Environmental Injuries
There are so many nice trees and shrubs from which to choose. We often push the hardiness zones to grow trees that are borderline hardy in our area. As I mentioned earlier, we have a sawtooth oak and gingko that suffered damage from the extreme cold earlier this year. The are coming out of it, but they will look tough for a few years. These trees are not native and remind me to choose native plants first. It also reminds me to be aware of the hardiness of plants we install. Match plants up to your site, including sun, soil, exposure, hardiness, mature size, and moisture.
Sawtooth Oak winter damage
Trees are resilient, but we can help them by considering their needs. A little homework before planting can alleviate problems through the years. Trees are alive and ultimately affected by so many factors, some of which are out of our control. Who know what the next pest will be? Who knows when the next drought will occur? All we can do is try to create/match an environment conducive to growth.
Last November, I set out to establish buffalograss a different way than I have traditionally done. Normally, I have areas prepared this time of year for buffalograss seeding. May and June are considered the best time to plant buffalograss because it is a native warm season grass. It needs to be planted when soil temperatures are above 60 degrees.
In South central Kansas, it is recommended that seeding of buffalograss be completed no later than August 15. Later seeding is not very successful because the newly germinated seedlings do not get fully rooted before winter. That has been a good rule of thumb, but requires so much water in the summer to get the seeds to germinate.
With this new approach, one plants the buffalograss seeds along with annual ryegrass in the fall or early winter. In theory, the annual ryegrass, a cool season grass, will germinate and hold the soil through the winter. The buffalograss seeds will work their way into the soil with the natural freeze/thaw of the soil throughout the winter. These seeds will then germinate the following spring on their own with annual rainfall and warm 60 degree soil temperature.
Area before planting, November 2020Annual ryegrass mowed for the second time this spring.
Update
The buffalograss is starting to germinate. I have not irrigated it this spring, which is a huge time and money saver. Over the next few weeks, I will monitor it for dryness. Beneficial and timely rains have allowed the seed to germinate on its own. Essentially, this process mimics the natural seeding process.
In the center of the image, is a buffalograss seedling.
We are mowing the annual ryegrass weekly. It is important to keep the canopy open so the sun warms the soil, allowing the buffalograss seeds to continue to germinate. The seeded annual ryegrass will expire on its own as we move into warmer summer temperatures. As the ryegrass dies, the roots continue to hold the soil. Buffalograss will then be able to spread and fill in the area through the rest of the summer.
What I would do differently
Reduce the seeding rate of the annual ryegrass: It is recommended that you plant 3-4 lbs./1000 sq. ft. I would only seed 2-3 lbs./1000 sq. ft. The seeds will still germinate to hold the soil through the winter, but not be so dense that they shade out the buffalograss seeds in the spring.
Plant buffalograss seed first and slightly cover it: I had some buffalograss seed float off the soil as I established the annual ryegrass seed last fall.
Start the process earlier in the fall after the first freeze (October 15): It would have been better to get the annual ryegrass established with slightly warmer temperatures, but not so warm that the buffalograss seed germinates.
I will continue to monitor the progress of the buffalograss planting. For smaller areas this seems to be a viable alternative to the traditional buffalograss planting. There are additional costs with the purchase of the annual ryegrass seed, but you save so much time and water compared to the traditional seeding method. Look for another update on the buffalograss seeding in a couple of months as the buffalograss begins to spread.
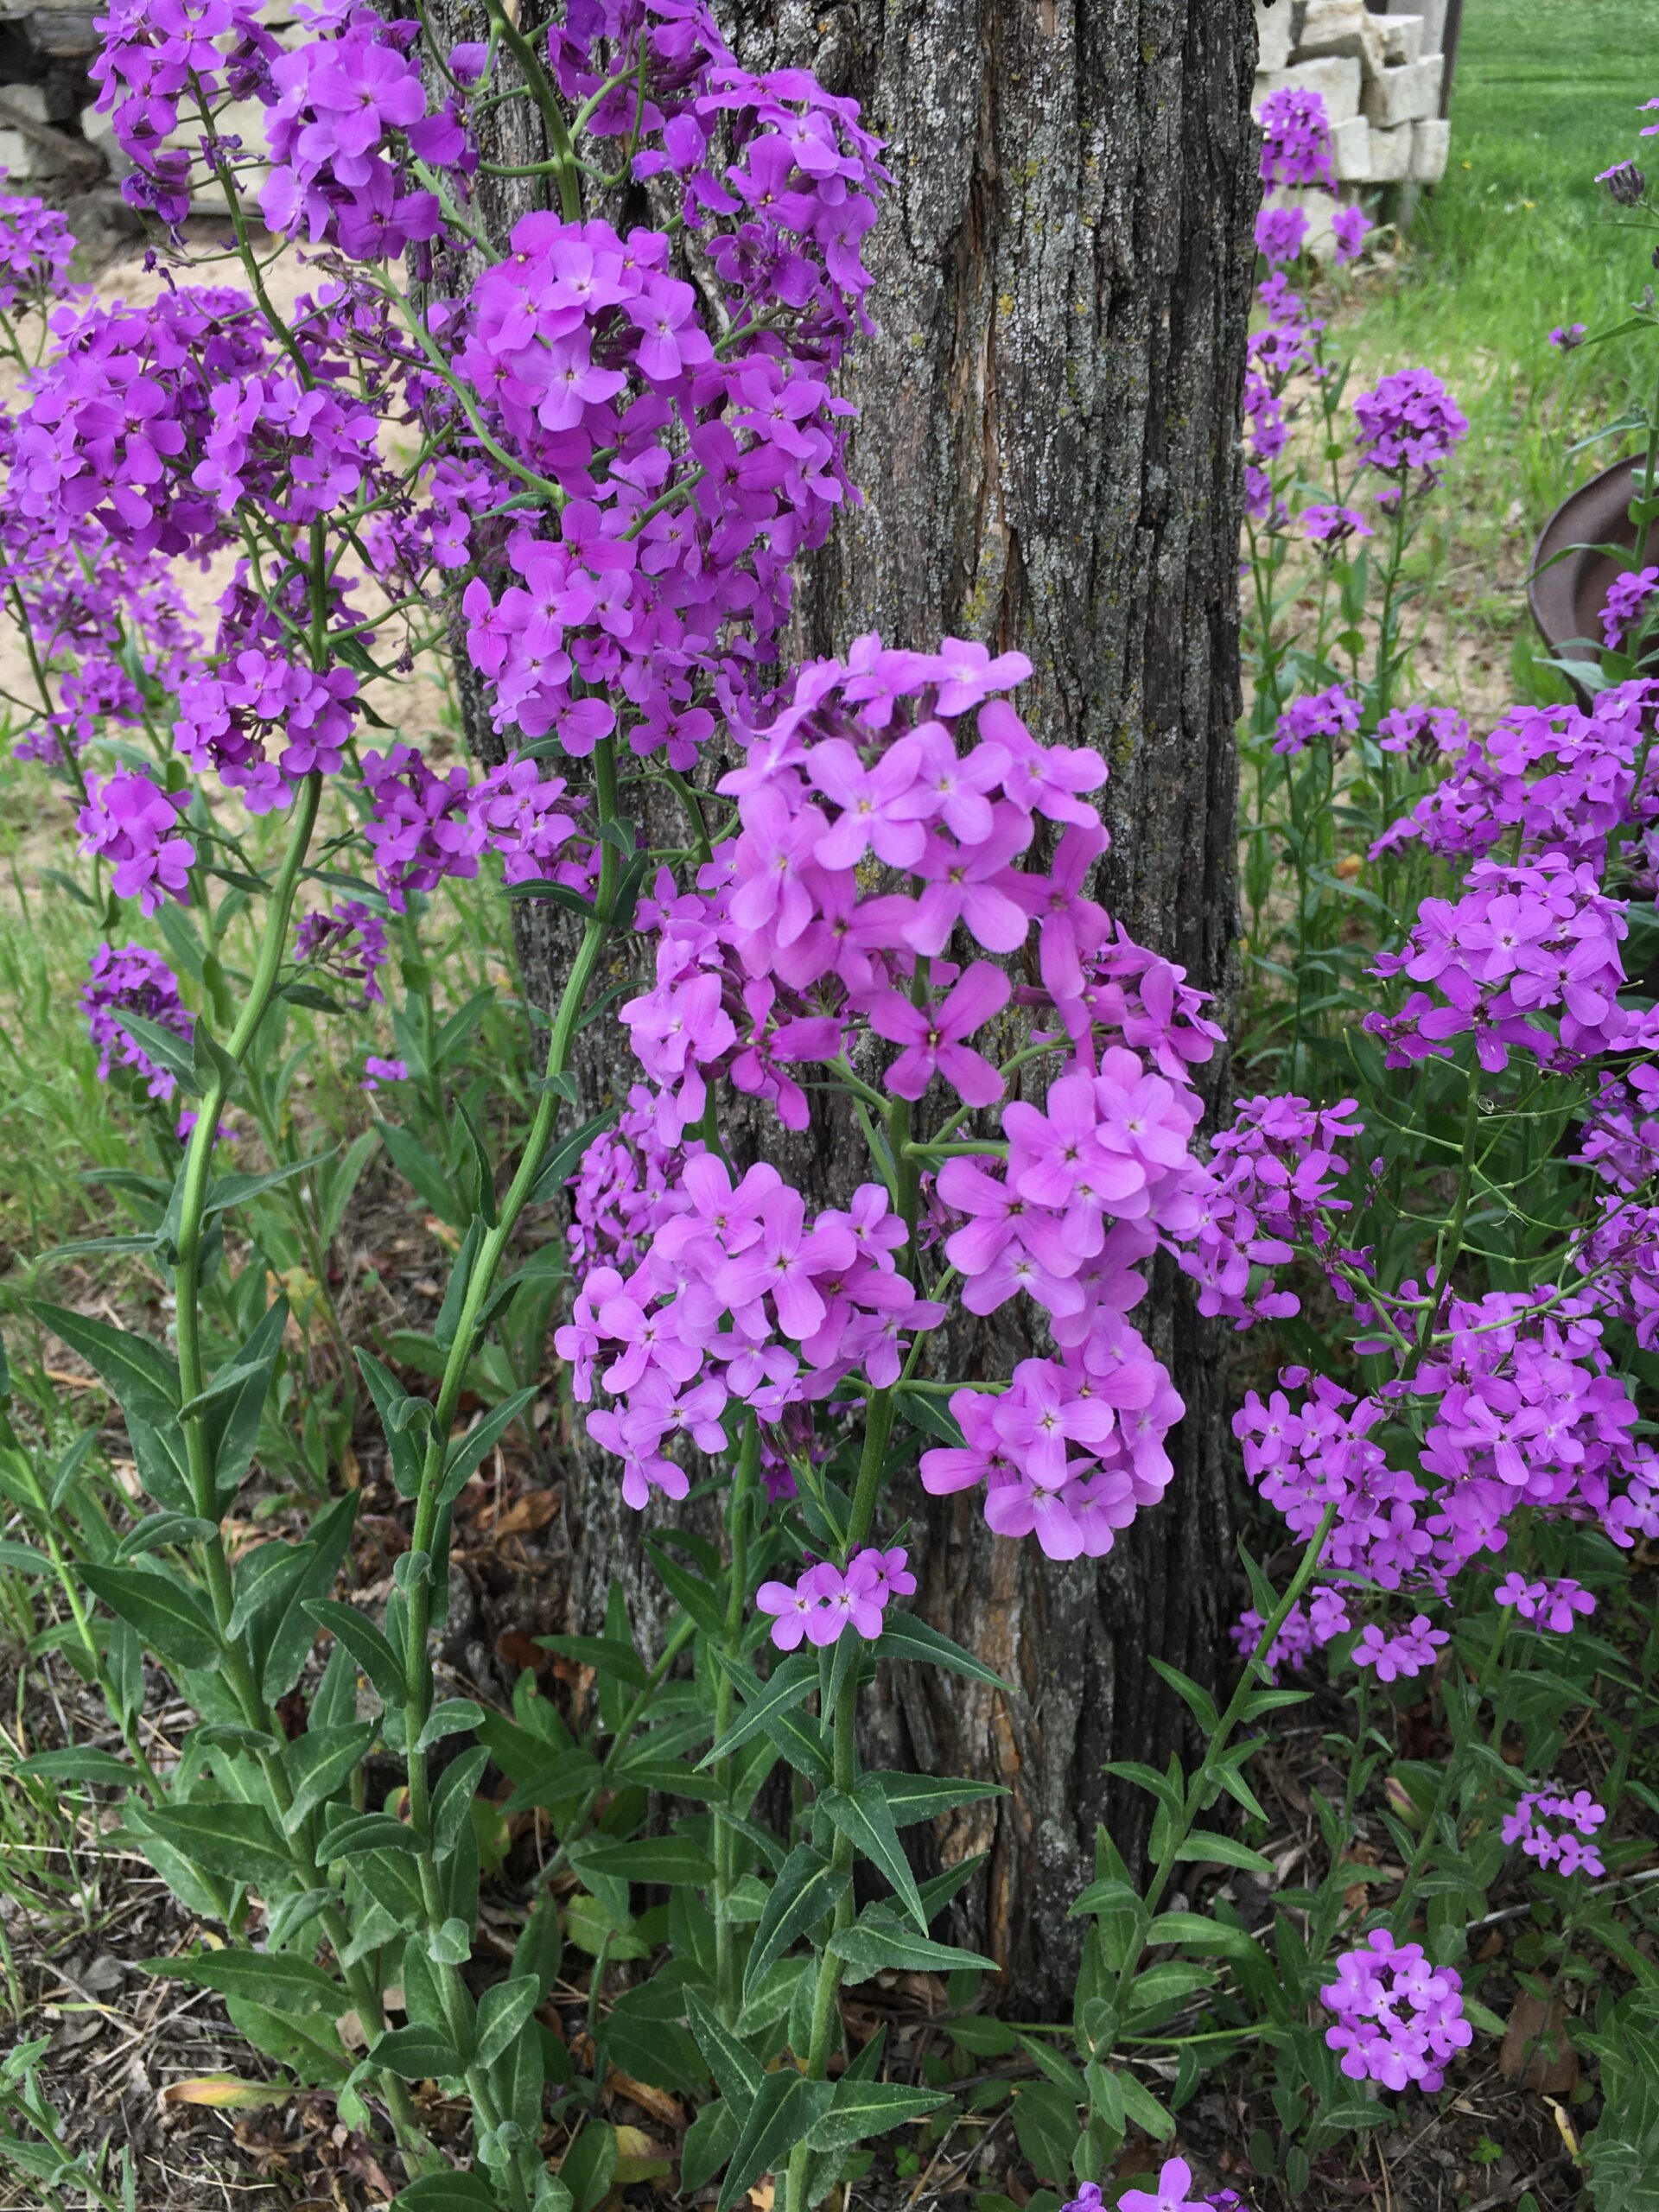
As stewards of our landscapes, we need to be constantly vigilant as we monitor for problematic weeds and invasive species. We have some usual culprits such as bindweed, bermuda grass, Johnson grass and Bradford pear trees. However, I have noticed another subtle spreader that is quite attractive but quite pushy – Dame’s rocket.
For years, I have been monitoring a growing population of Dame’s rocket in one of our bordering hedgerows. It is beautiful right now with its bright purple blooms, but don’t be fooled. This desirable plant will wreak havoc on the natural environment if left unchecked. Larger populations will even threaten the survival of native plants and degrade habitat and water quality.
Dame’s Rocket in full bloom
Dame’s rocket (Hesperis matronalis) is a tall, annual, biennial or short-lived perennial, which produces either white, pink or purple flowers in the April and May. It was introduced to North America in the 1600’s from Eurasia. The attractive blooms have made it a garden favorite. It is often seen in roadside ditches, hedgerows, older farmsteads. However, in recent years, Dame’s rocket has gone rogue, moving from yards and garden plantings into adjoining landscapes.
Phlox’s Doppelgänger
From the Mustard family (Brassicaceae), this weed resembles tall garden phlox in height and color. However, Phlox is in the Phlox family (Polemoniaceae). Perhaps the most distinguishing difference between the two is that Dame’s rocket has four petals, while phlox has five. As part of the mustard family, it produces an abundance of seed. These seeds are dispersed by mammals and eaten by birds. When the seed pods ripen, they shoot seed in all directions, including the coats of wildlife. These mammals unknowingly spread the seed to nearby waterways, hedgerows, pond edges, and maybe your landscape. Dame’s rocket is reported in most states equal or north of Kansas longitudinally. It is reported as invasive in CO, CT, IN, MD, MI, NJ, PA, TN, VA, WI, and WV.
Dame’s rocket spreading from it’s original colony
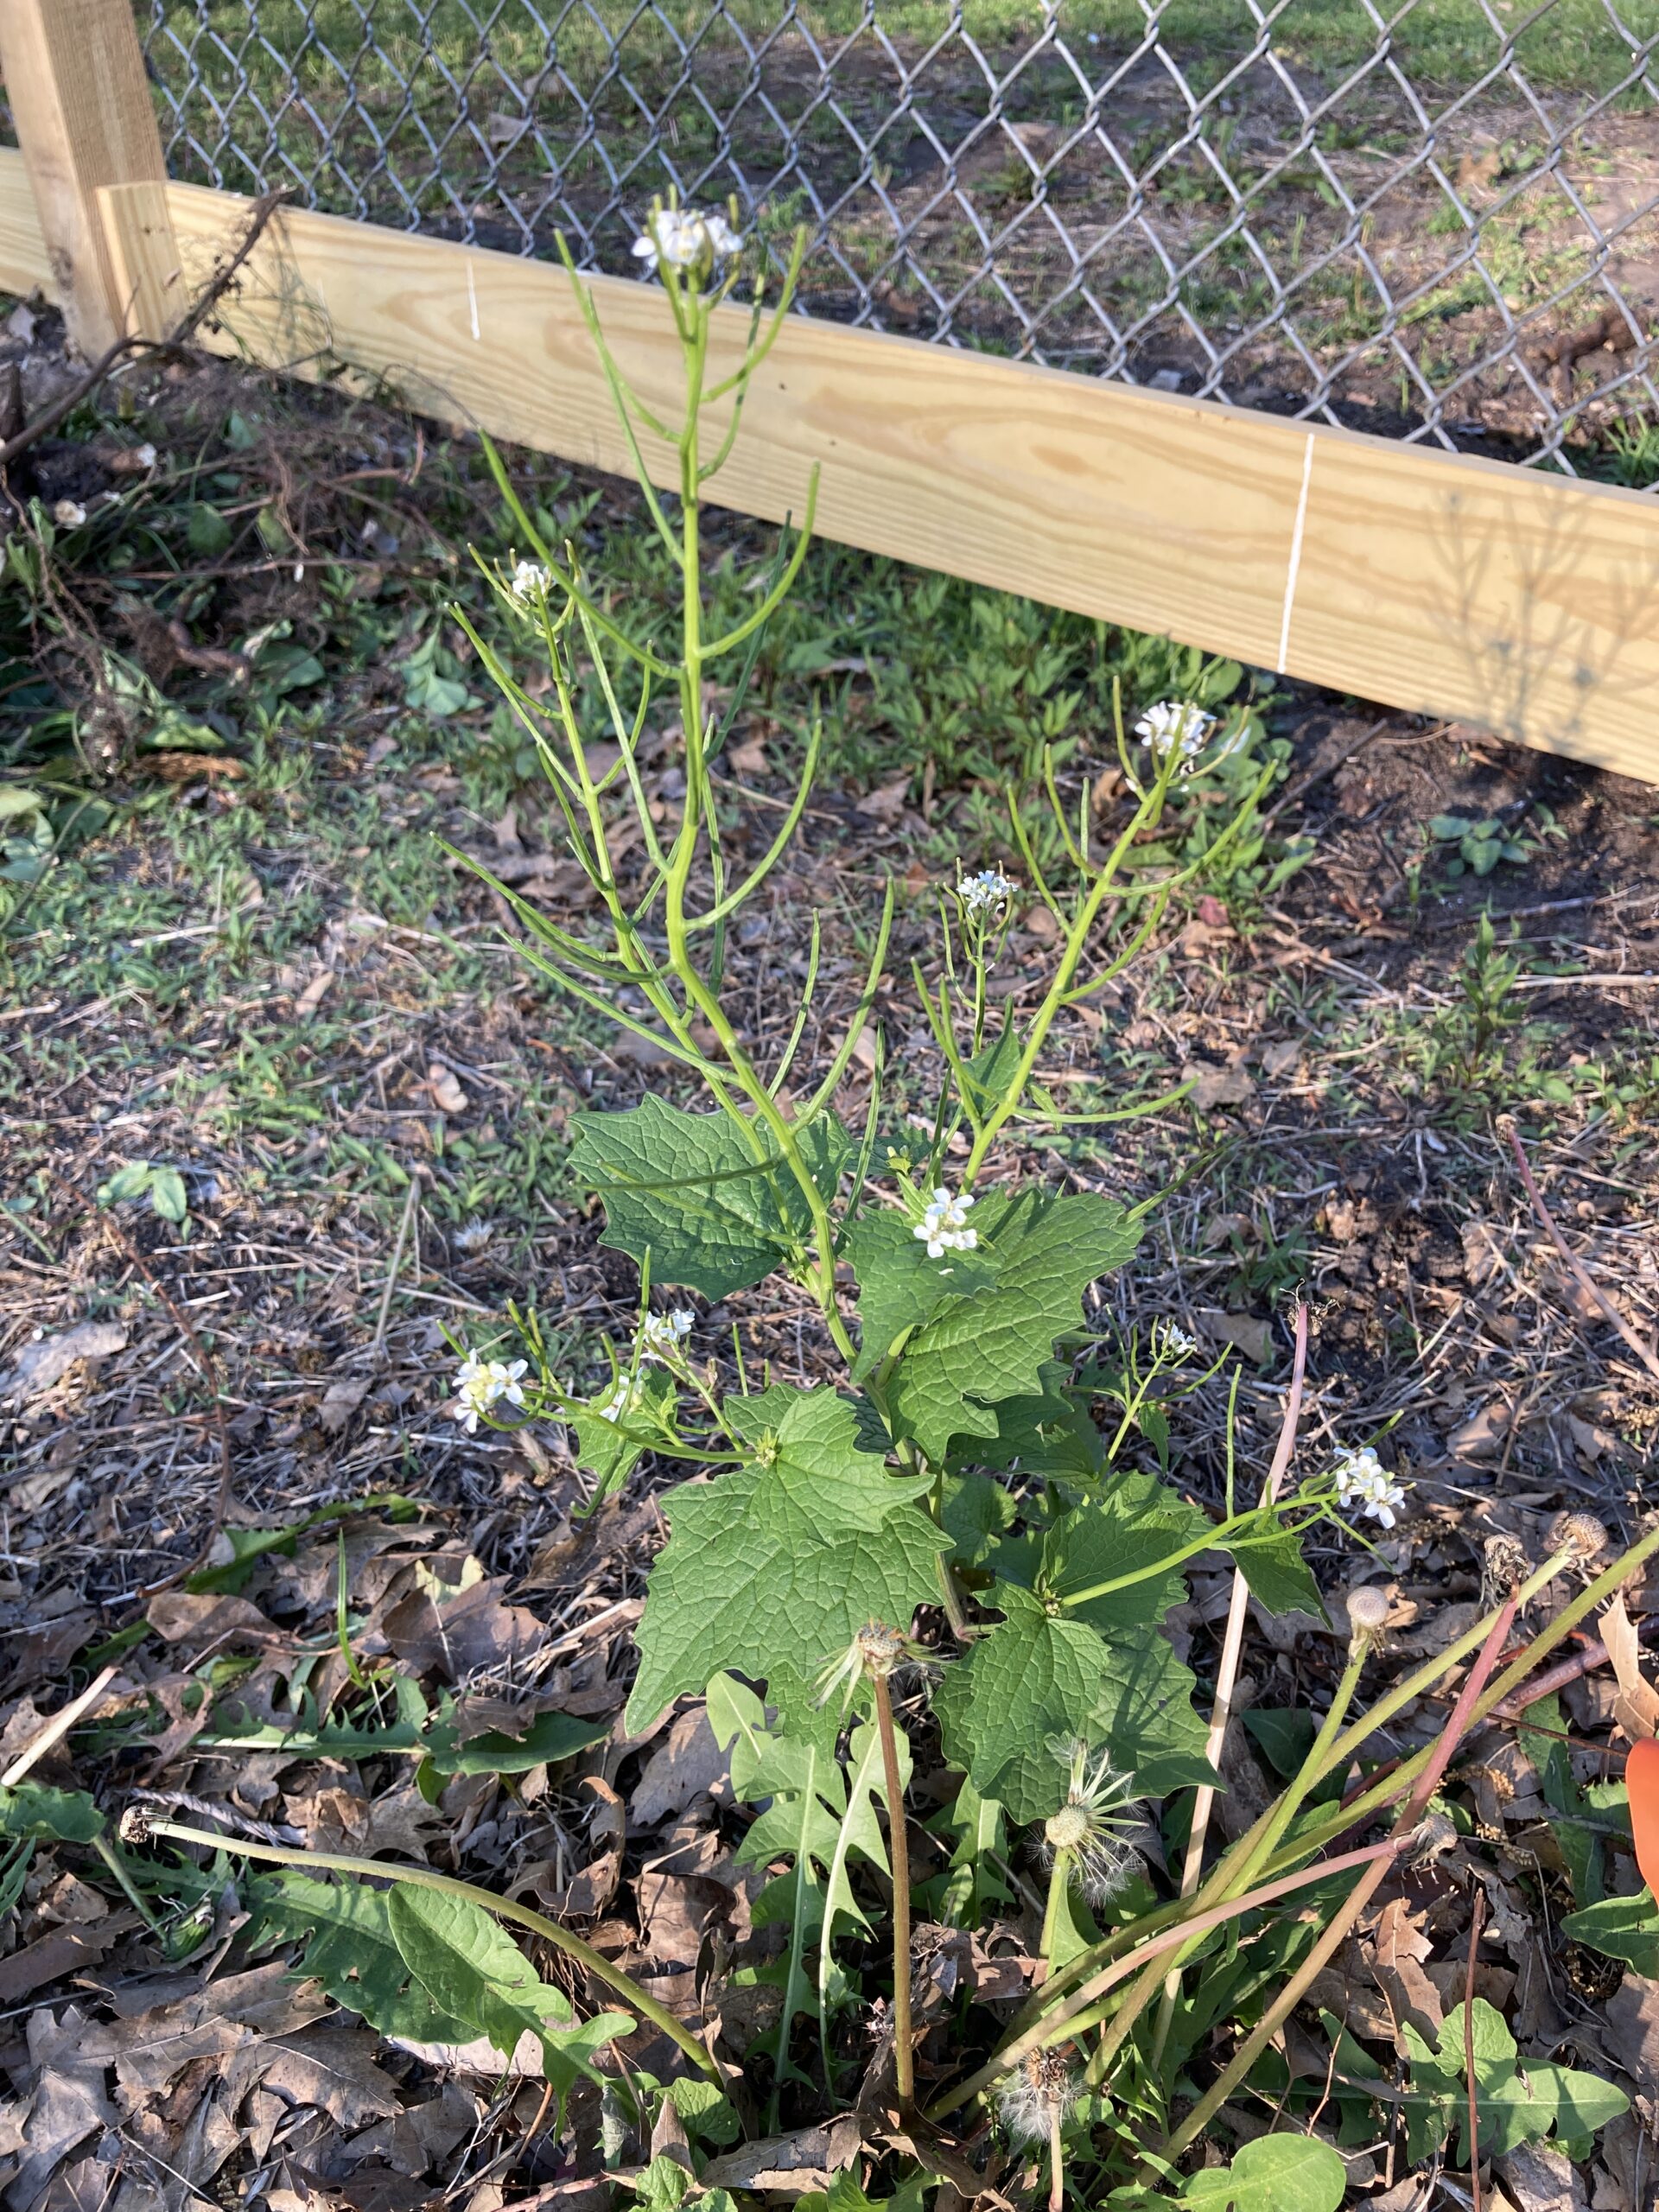
Dame’s Rocket is closely related to other problematic weeds of the mustard, family such as garlic mustard, hedge mustard, wild radish and yellow rocket. All of these weeds are prolific and opportunistic, infesting field margins, woodlands, open grassland and wetlands. It appears to have allelopathic tendencies (the ability to produce chemicals that prevent or reduce the growth of other plants) similar to garlic mustard. With these tendencies, Dame’s rocket and garlic mustard will quickly form dense monocultures within a few years, pushing out other desirable native plants. As has happened to our little planting, it quickly colonizes by spreading in every direction.
Garlic Mustard
Controlling Dame’s Rocket
To control Dame’s rocket, pulling before it produces seed is the best option if the population isn’t too large. Make sure to remove the whole plant roots and all. Discard the plants in the trash.
Spraying is another option with a 2,4-D product. A systemic herbicide applied as a foliar spray can be effective. Herbicide is best applied to the basal rosettes (low round clumps of leaves) in late fall or early spring, when other plants are dormant. Always read and follow the directions on the label when using herbicide. Any plan must also be mindful of desirable native plant species and habitat conditions in a targeted location that may be vulnerable to herbicide uses. This is a reason to spray as a last resort. Cutting or mowing can also prevent seed production and spread until other management techniques can be initiated.
Over the past few years, I have changed my tune regarding Dame’s rocket. As beautiful as Dame’s rocket may appear, it is an invasive species with the potential to damage entire natural ecosystems. I used to say, it is doing no harm growing in the hedgerows. Those are just waste areas that need a little beautification, I thought. Then I started seeing it in other small populations away from the original colony. Be on the lookout for it and take action before it spreads and really becomes a problem in your landscape or your neighbors landscape.
There is no “one way” to landscape with native plants. One person’s dream landscape design might be someone else’s nightmare. Native gardens can be wild and wistful, or organized and formal. As long as the plant species being used are beneficial to wildlife and water conscious, you are on the right track! But it can be overwhelming when you have lots of great plants to choose from, but no guidance on how or where to install them in an aesthetically pleasing way. Planting can be daunting for beginners.
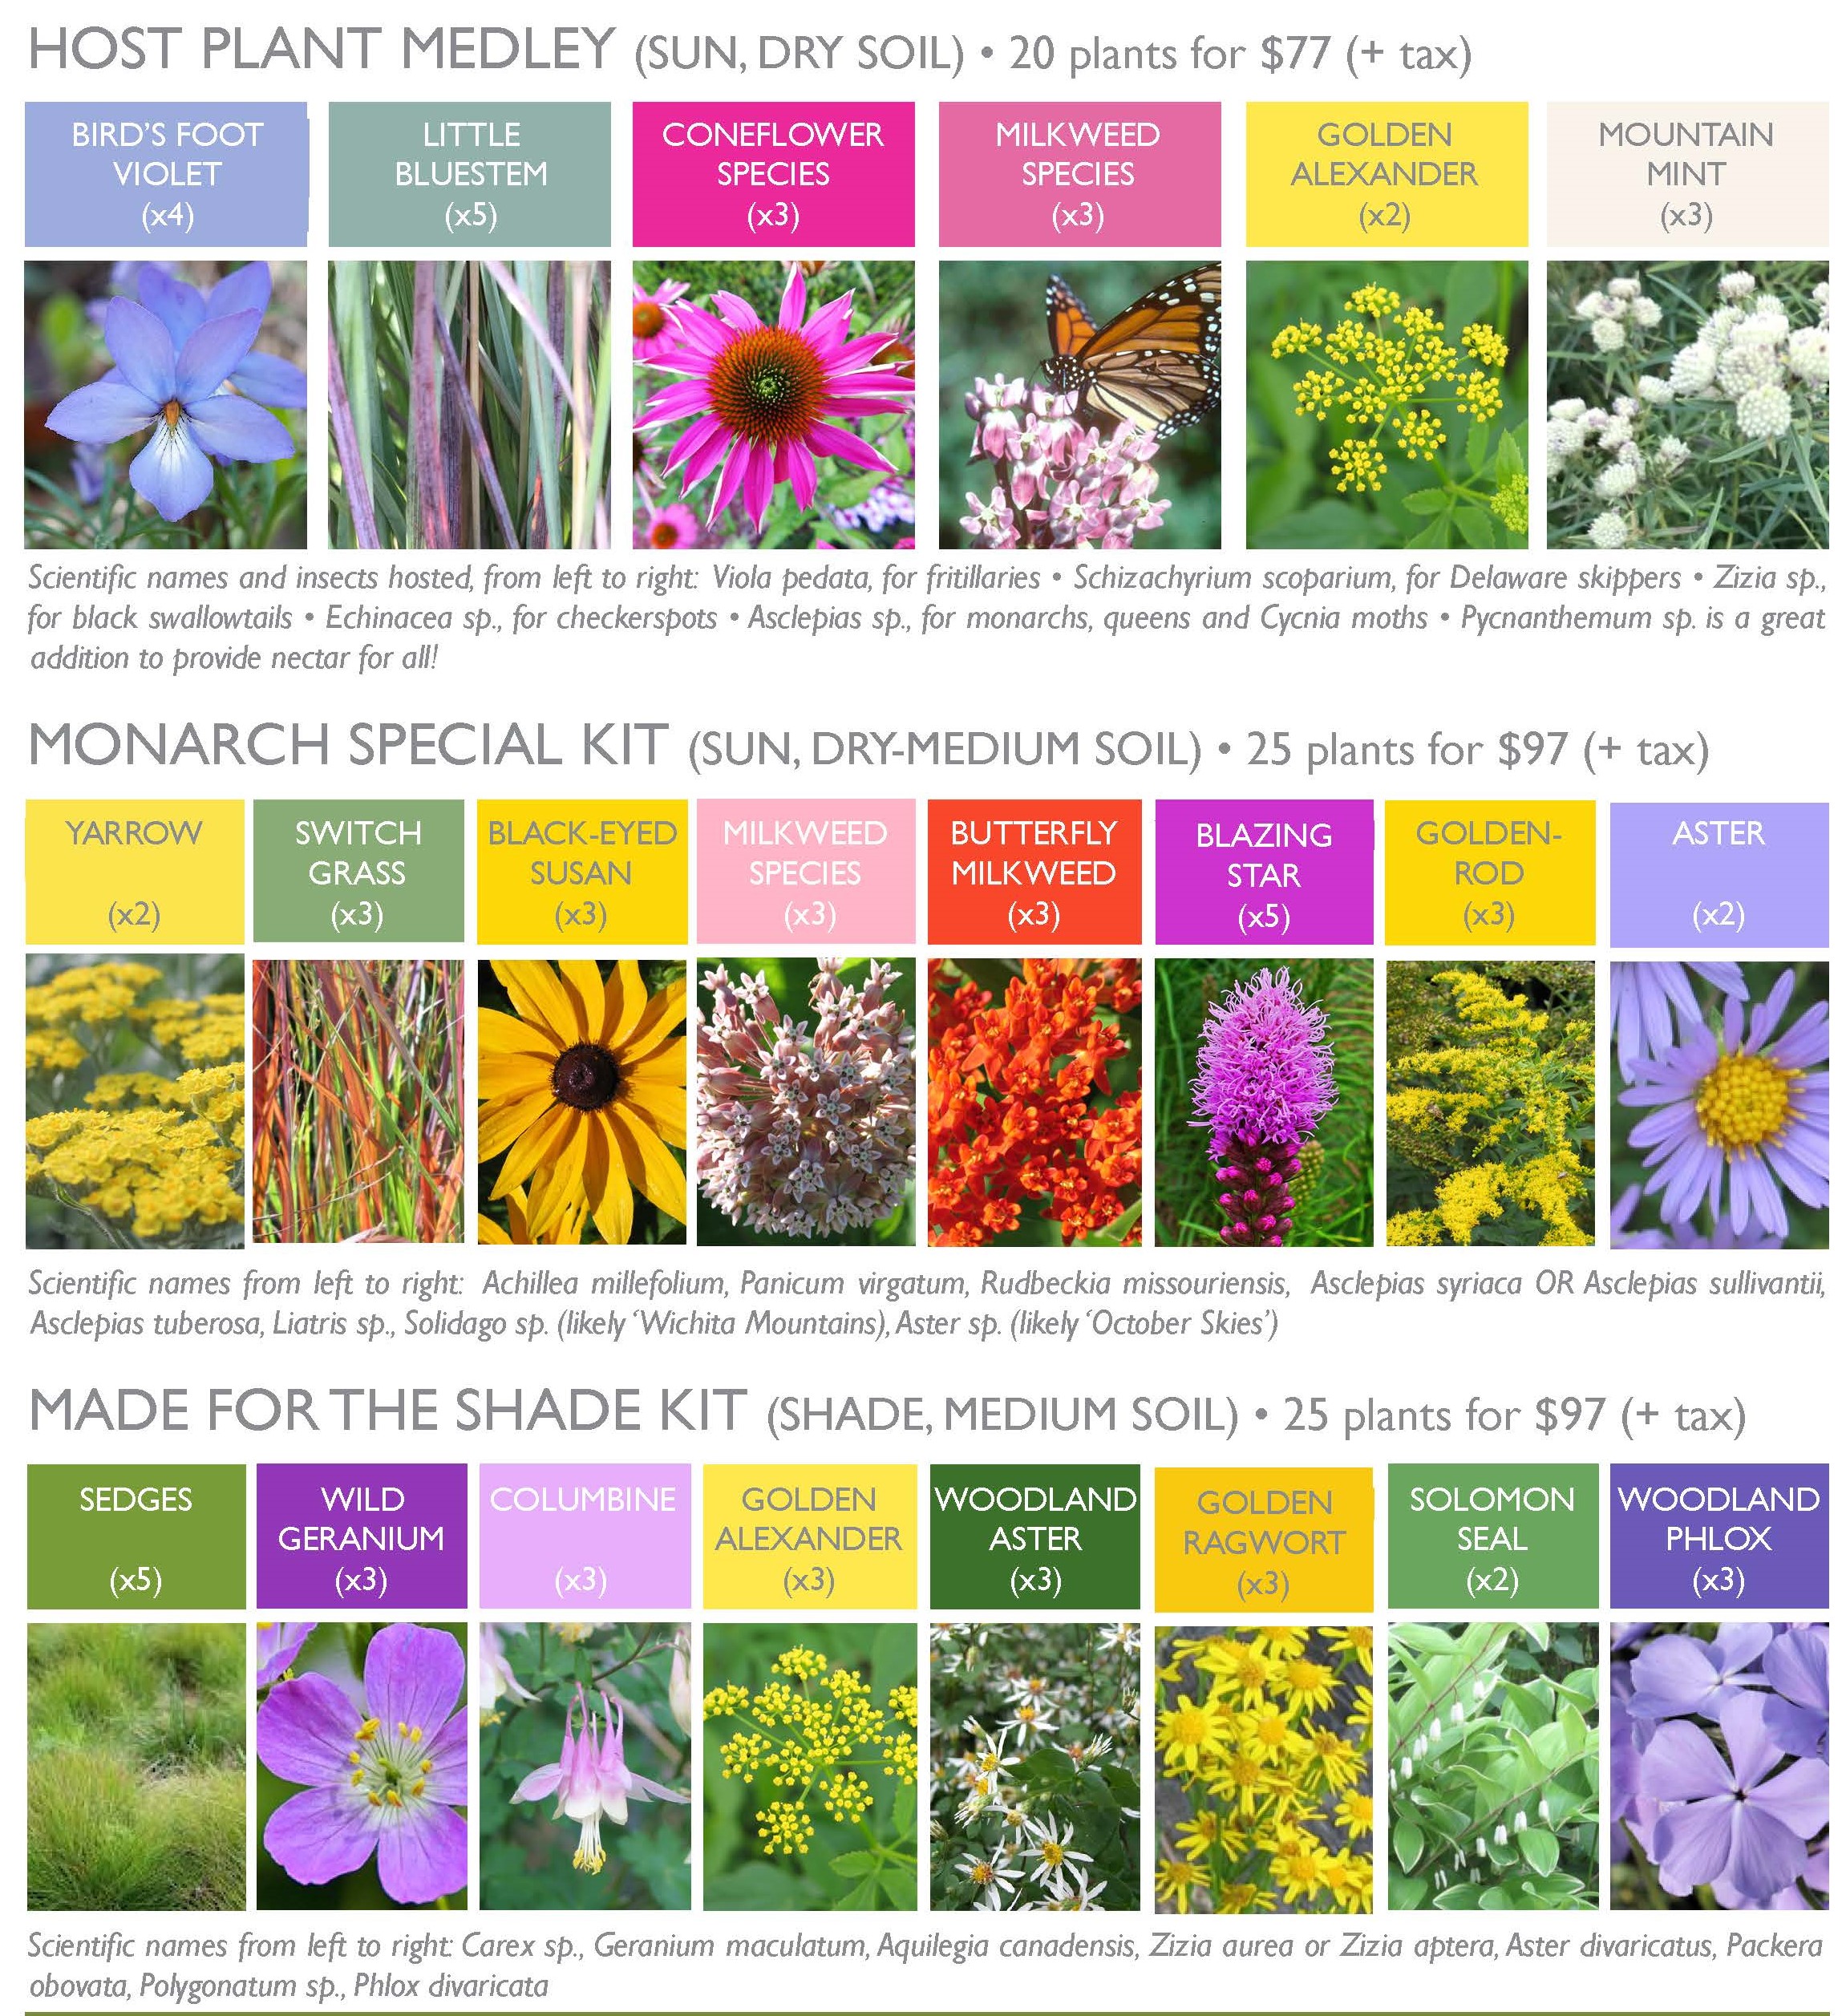
Our garden kits are so popular at FloraKansas because they take the guess work out of plant selection. Looking to fill in your shade garden? Our shade garden kit has a mix of spreaders and specimens to keep your interest through the season. Hoping to host caterpillars? The host plant medley we put together is a buffet for monarchs, fritillaries, swallowtails, and more. But after buying the kit, the real work begins!
Mountain mint is a plant included in our Monarch Special kit. A magnet for pollinators, it has a long bloom period and should be placed toward the middle or back of your garden area because of its height.This is a very simple example schematic you could draft for yourself, depending on your circumstances. Use X’s to show each plant’s future placement and be sure to include existing structures like fences, driveways, sidewalks, or trees.
Keep It Simple
Our basic guidance is simple: cluster plants and design by height. This means keeping some color blocks together. For example, if the species are small like Viola pedata in our host plant kit, consider placing them in close proximity. When they bloom, it will make a much bigger impact and will draw more attention than just one plant here and there. Also keep an eye on height, planting so that one species doesn’t overshadow others. Place tall species at the back or middle of your viewing area, and shorter species toward the front or around the border. These two guidelines alone will help make your garden kit look planned and intentional, and can also help you stay organized when it comes time to weed. Use this simple design as an example, and make your own adjustments based on the kit you purchased.
Plants out in their natural prairie settings have no organization or man-made pattern, which is beautiful and awe inspiring at large scale. In our small home gardens however, careful design and clustering of color is a more manageable and visually pleasing approach. Photo by Brad Guhr.
Let the Plants Be Your Guide
If you purchased a garden kit with taller grasses like switch grass, those can serve as a backdrop for the color of flowers in front. If your kit included little bluestem, consider mixing those into a mid-height section as added structure for Liatris or milkweeds. As for how close to plant, we usually suggest no more than one plant per 2.5 to 3 square feet to accommodate the vigorous growth that is sure to come.
So grab some scratch paper and make a few sketches before you start digging holes. Or don’t! As I said before, there is no right way. You can plan down to the very last inch or throw them in willy-nilly. As long as you are having fun and planting native, you can’t go wrong.
While taking time this weekend to weed the small native plant beds I have dotted around my landscape, I was reminded of the joy this tending process brings me. Not necessarily because I love weeding the seemingly endless emergence of hackberry seedlings and henbit sprouts every spring. But because it leads to my spending time with and being intentional in these gardens.
Weeding and Experiencing Wildlife
Of course, I want my gardens to look nice. But a big part of my intentionality in native gardening is knowing that it is a place to feed and host wildlife. And how will I notice and enjoy that wildlife if I don’t spend time looking for it? While weeding to help manage the human-desired aesthetics of this garden, I’m also being mindful of how this garden will look to insects, birds, small mammals, amphibians, and reptiles.
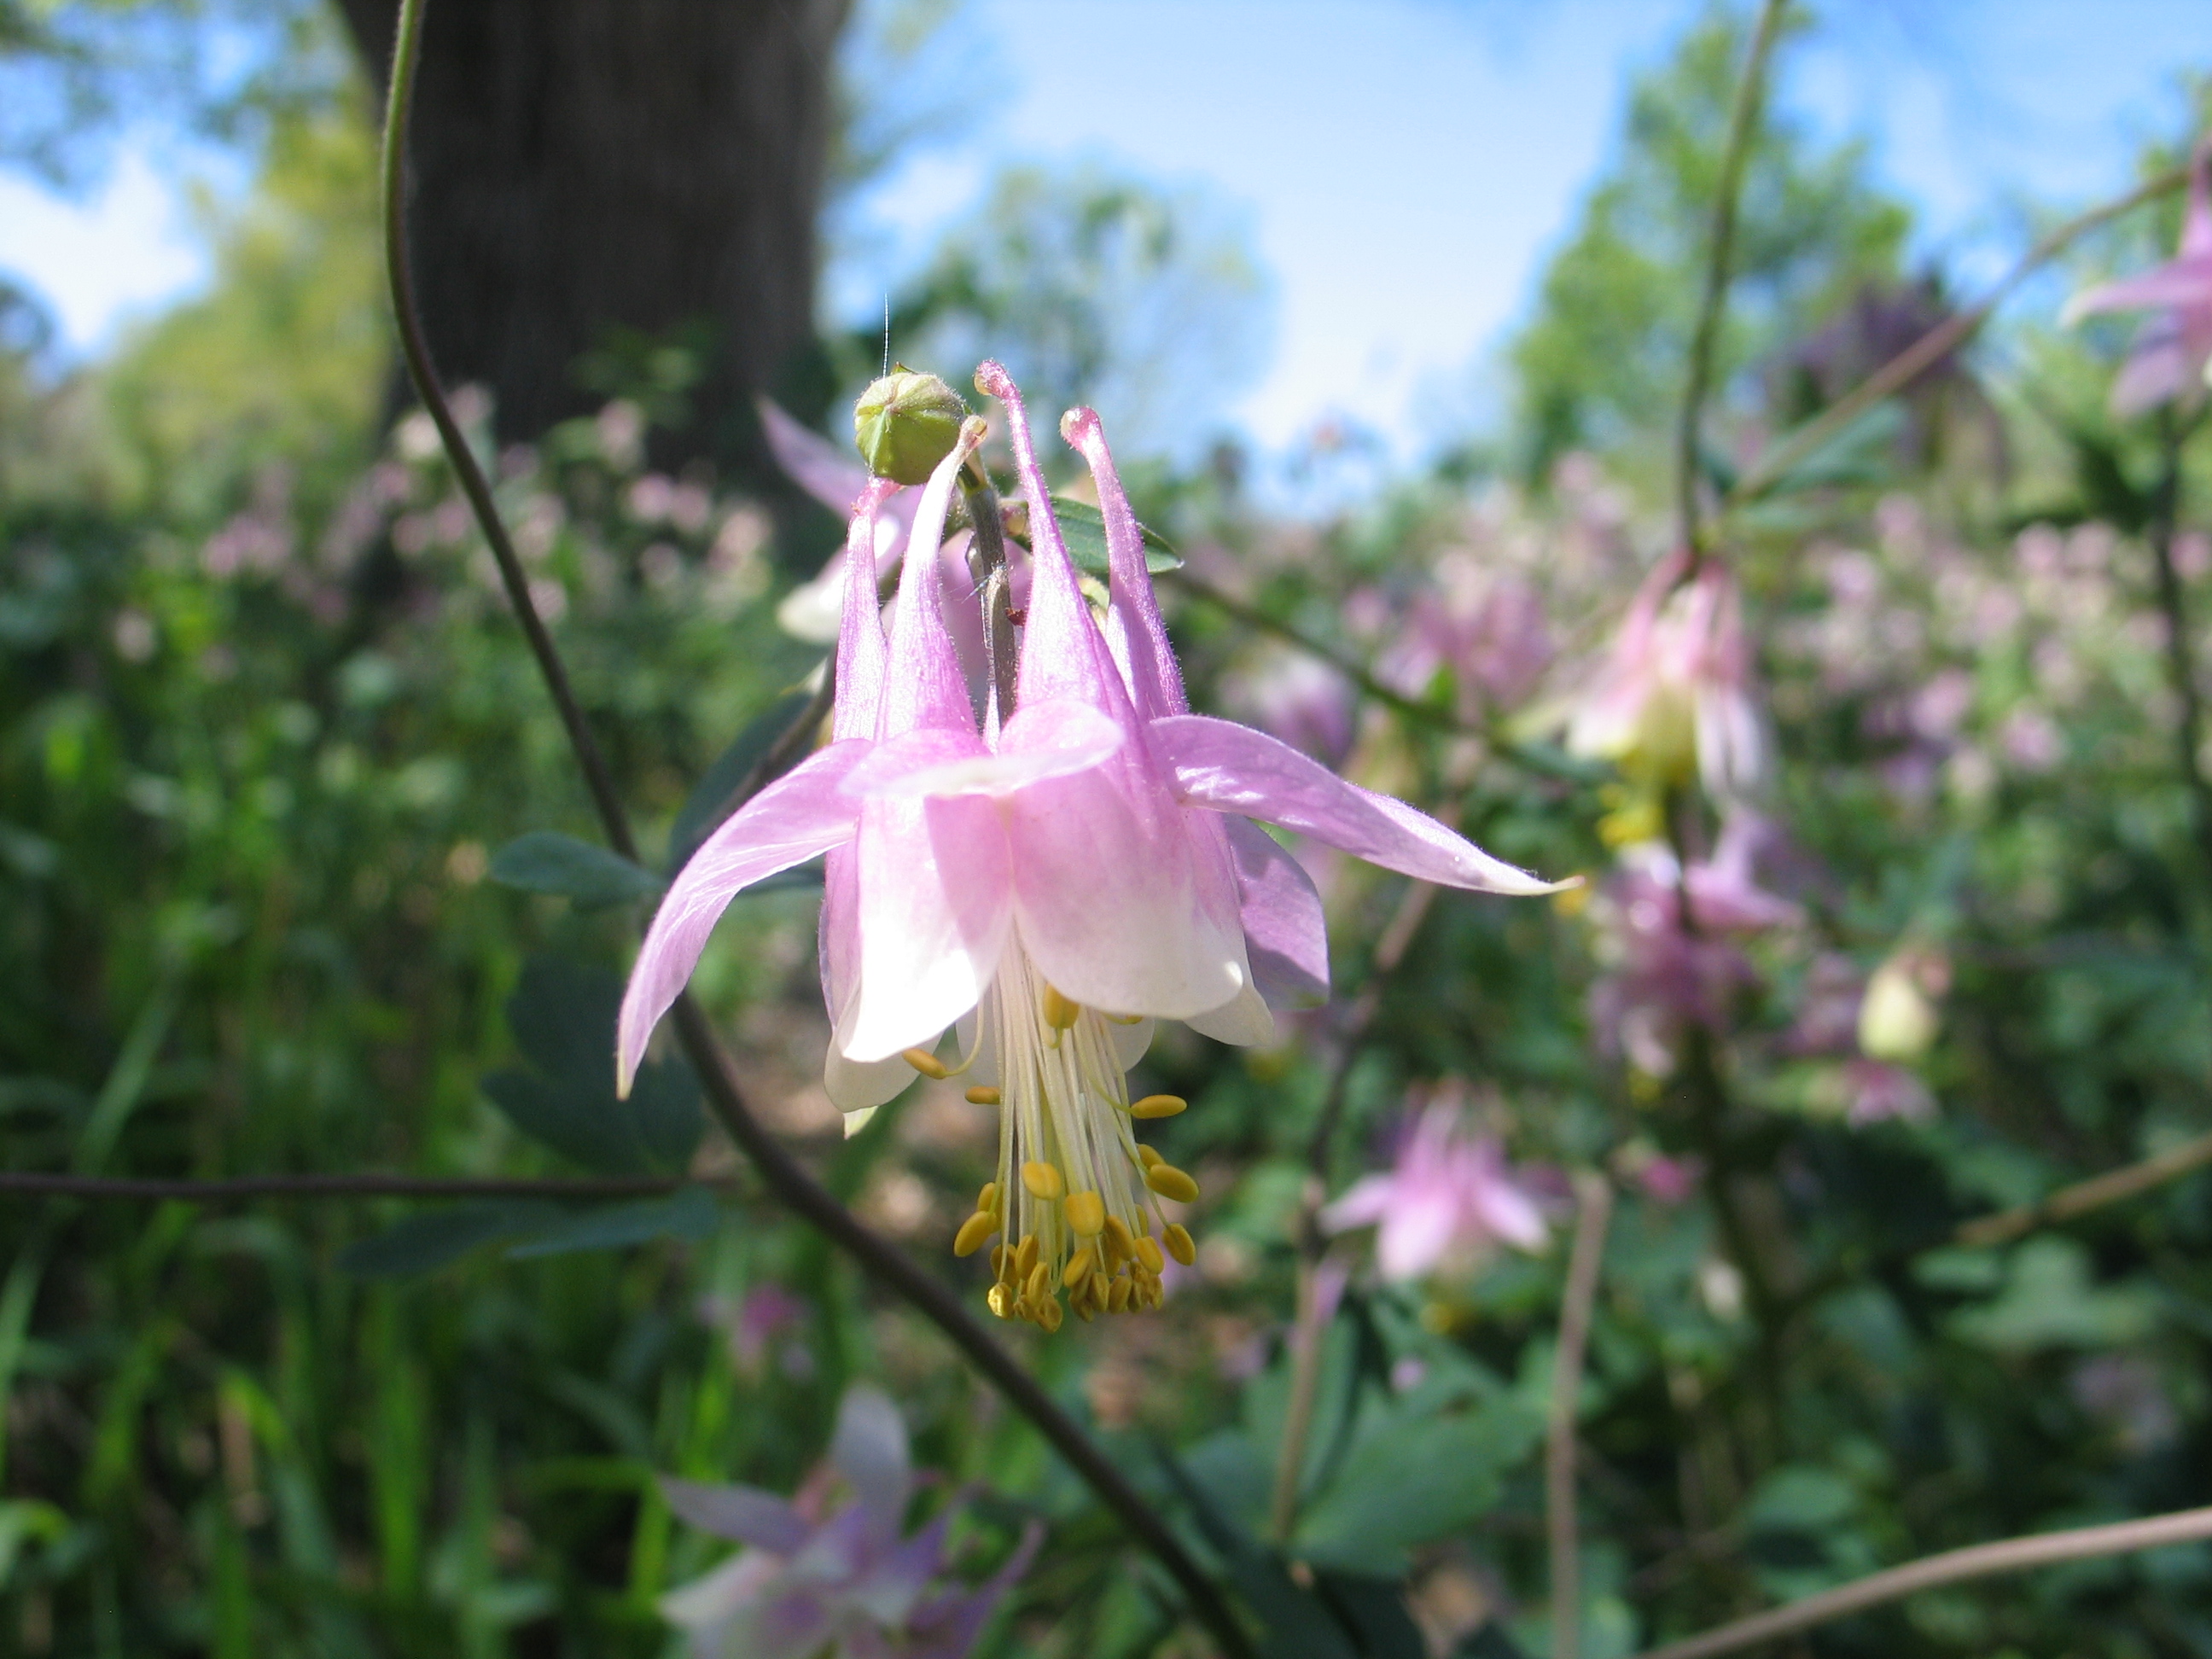
I know that the new flower emergence of rose verbena, celandine poppy, columbine, golden alexanders, golden ragwort, and woodland phlox all around me will attract wildlife. And sure enough, before long two pearl crescent butterflies make an appearance and land on nearby vegetation. Robins scratch through leaf litter nearby and grackles squawk overhead in the hackberry trees that gifted me their seedlings.
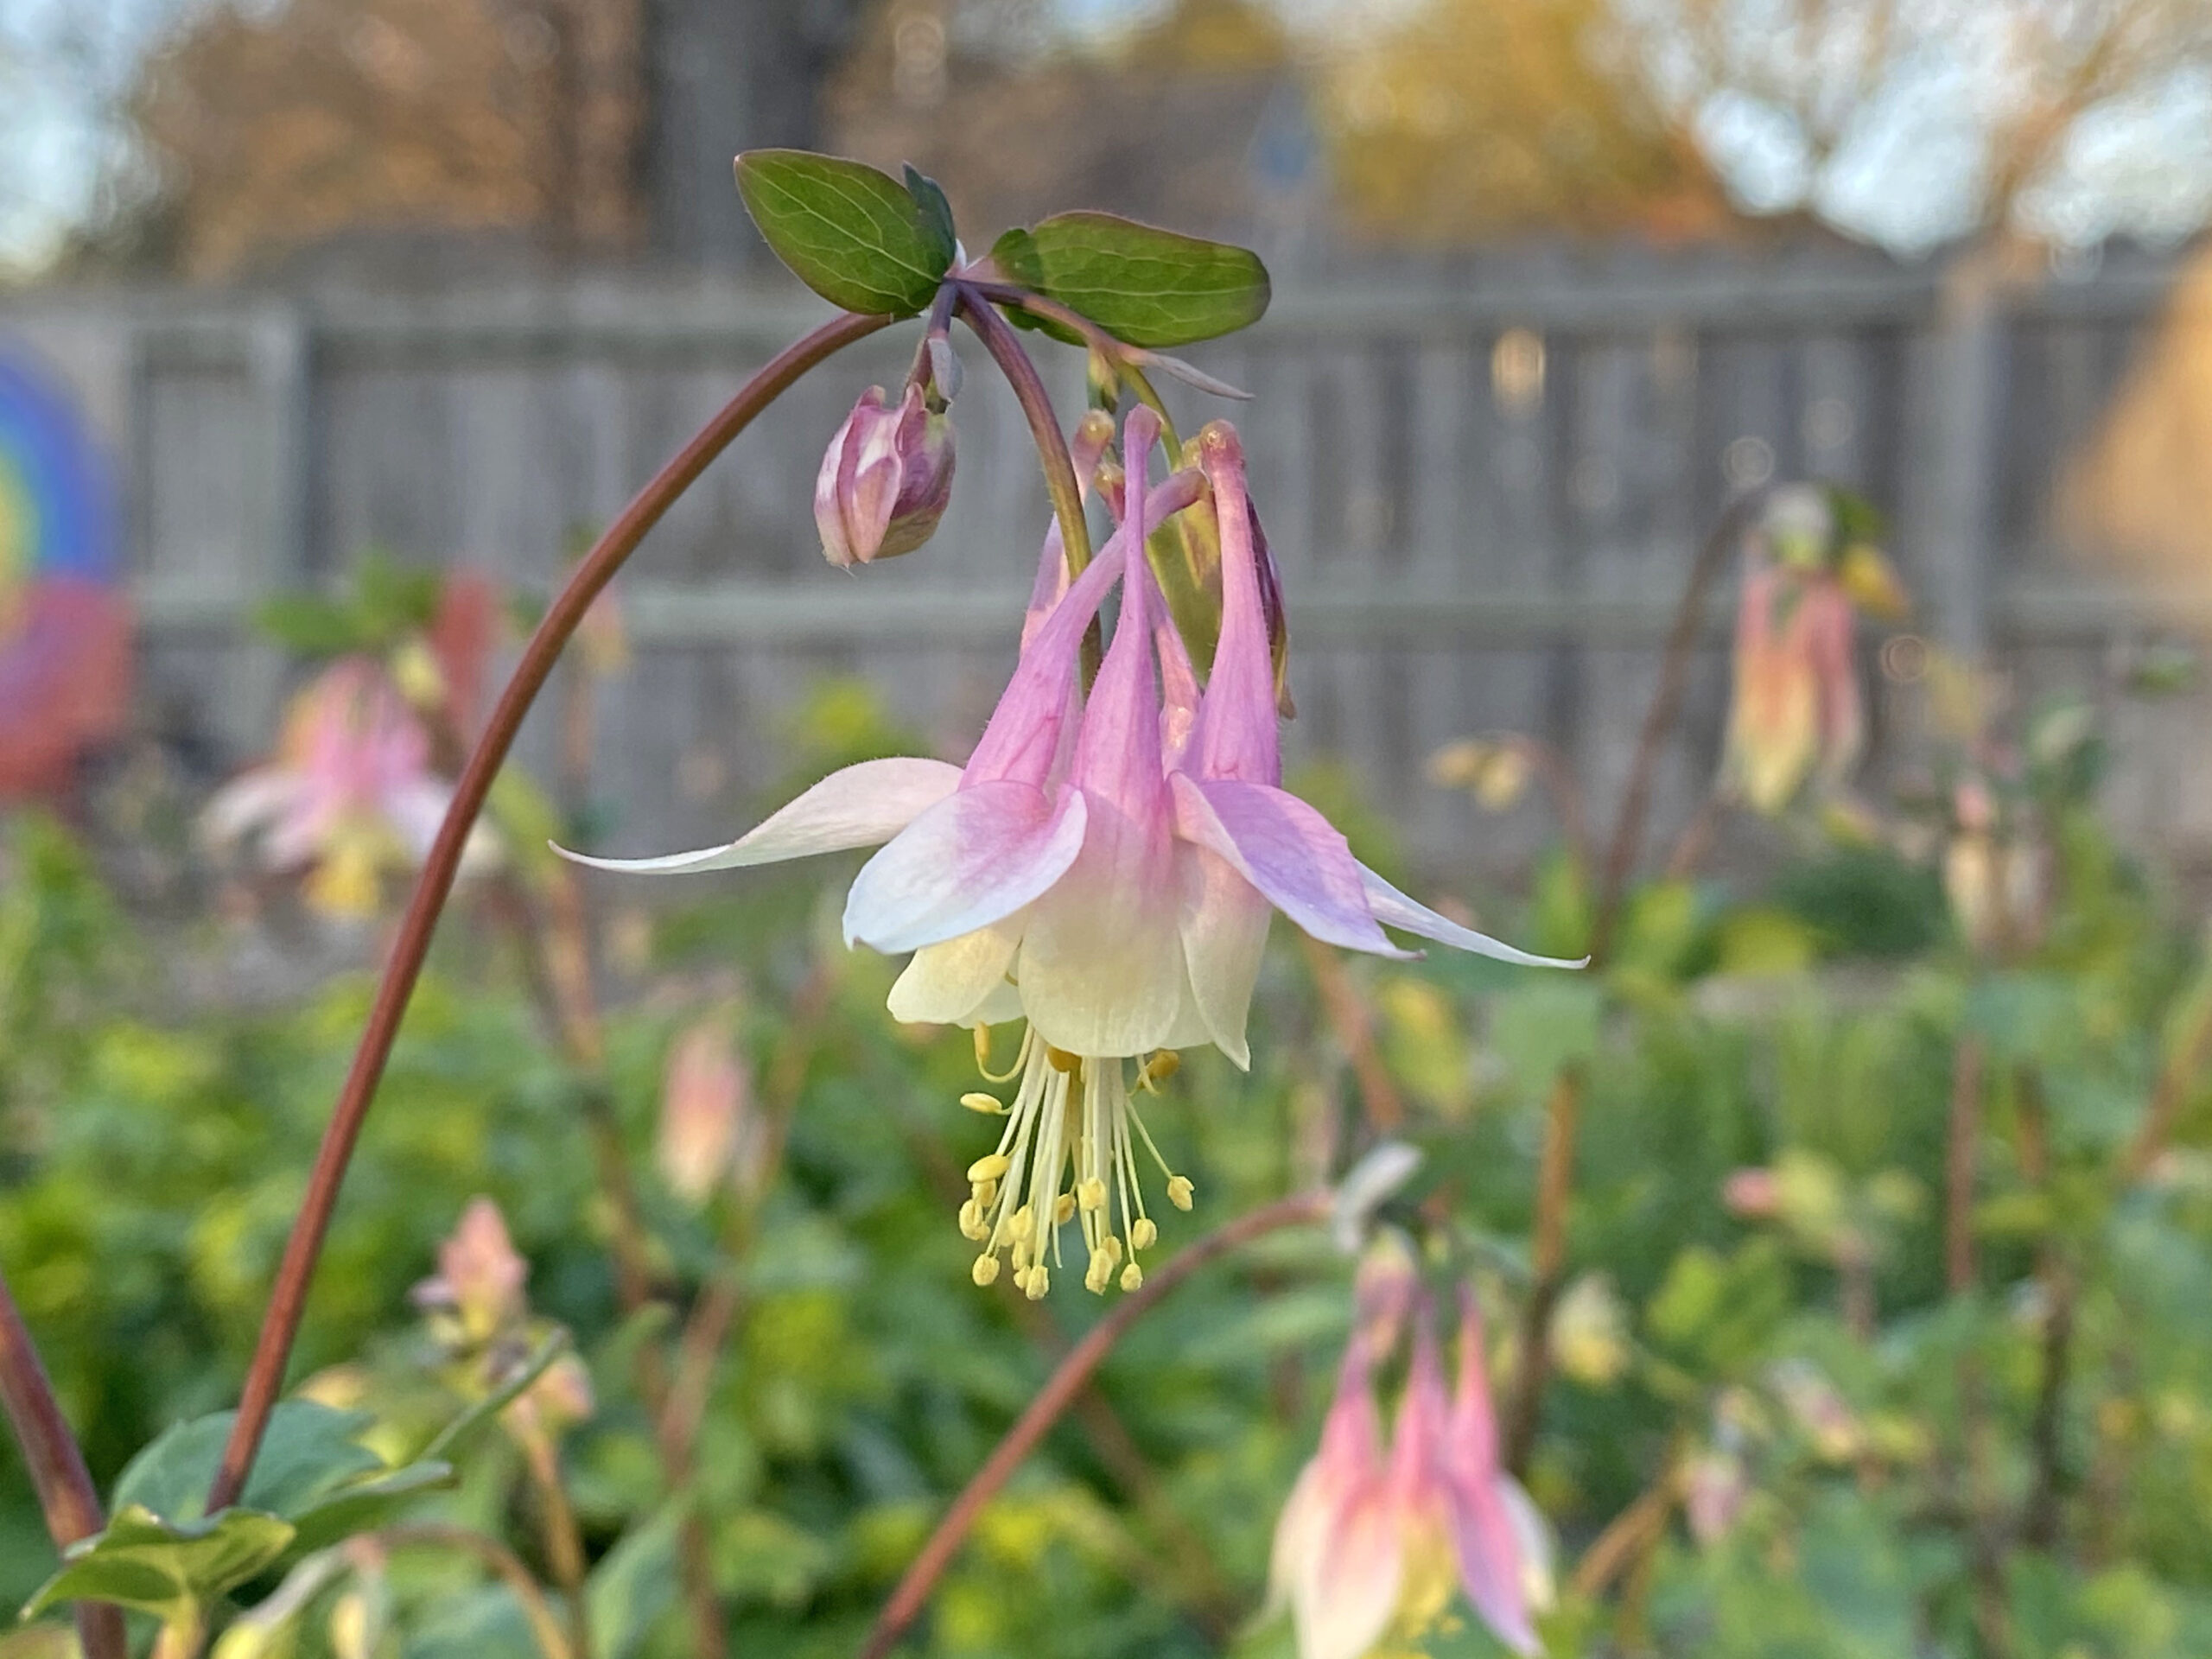
Columbine (Aquilegia canadensis) in flower
A tattered monarch (the first I’ve seen this spring) stops to sip nectar from a dandelion that I’m glad I hadn’t yet plucked. Unfortunately, none of the five species of milkweed in my yard (common, butterfly, whorled, showy, and green antelopehorn) have yet to emerge from dormancy. I’m guessing this female has carried eggs here all the way from Mexico and is looking to oviposit on milkweed stems. Soon, new shoots will be available to serve as monarch caterpillar food.
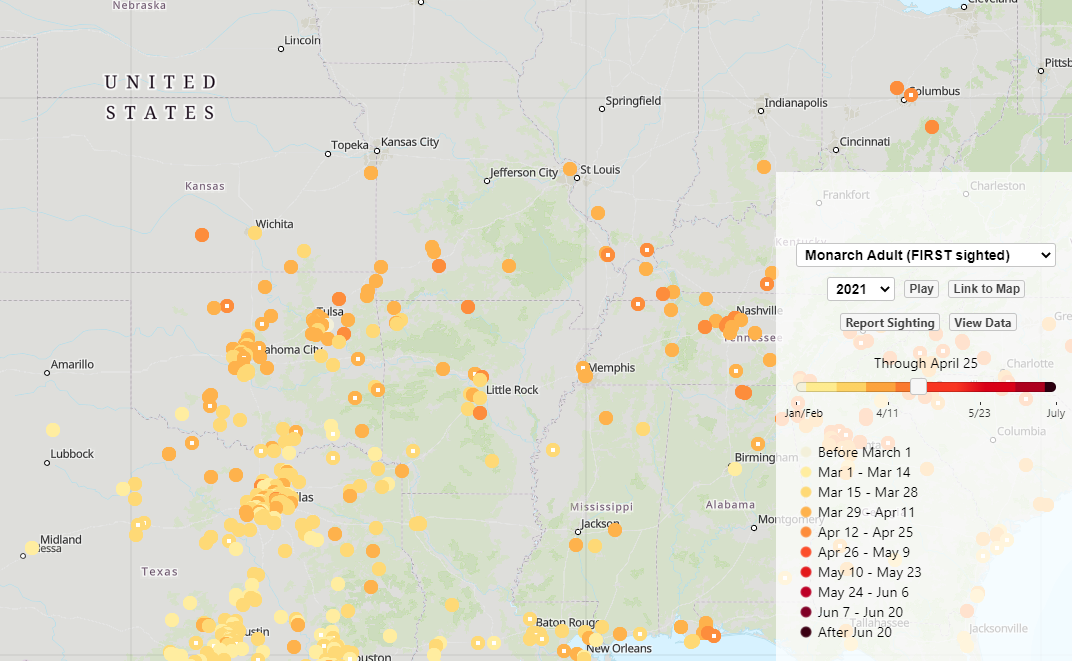
4/19/21 Map of first sightings of adult monarchs at Journey North website confirms that I should now start to see monarchs in South Central Kansas
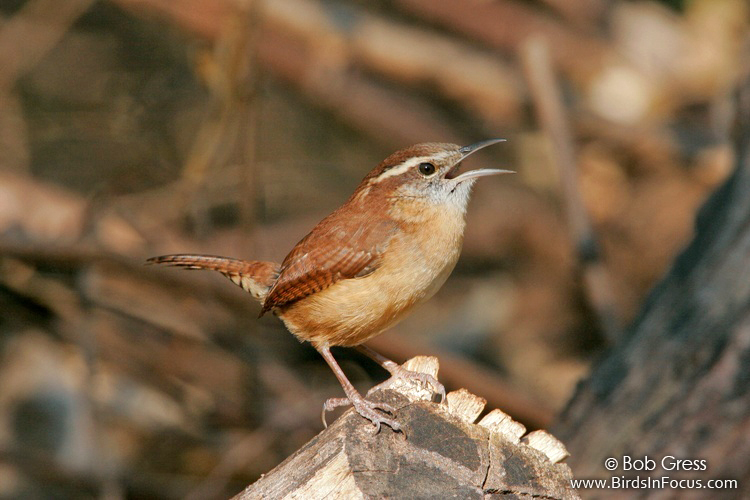
Next, a fresh-looking eastern tiger swallowtail butterfly flaps through with powerful flight while a Carolina wren sings loudly nearby, part of a resident pair that I enjoy seeing regularly. Then, a bumblebee visited a nearby columbine flower, reminding me not to mulch too heavily or thoroughly, because they commonly nest underground.
Carolina Wrens eat mostly insects during the breeding season including caterpillars, beetles, true bugs, grasshoppers, crickets, and many others drawn in by native plants – Photo by Bob Gress (Birds in Focus)
I’ve been at this native gardening process for decades now. But it seems that I see and learn something new almost every time I’m observant and present in the garden.
Start with Small, Manageable Gardens
If you are interested in a brief explanation how I got started with planning and planting some of my small gardens, HERE is an earlier blog post on the topic. The key is to start small and plant only what you will enjoy managing. If you don’t enjoy the regular process of weeding and tending your garden(s), then the process will not be sustainable. And for some native plant gardening best management practices, HERE is another blog post with advice.
Once you have your small garden site outlined and prepared for planting, consider one of the following wildlife-attracting garden kits of thoughtfully-selected assemblages of plants to fit your planting location. For more details about our FloraKS plant sale, click HERE.
Garden kits available at Spring FloraKS Plant Sale
To make sure you are successful in your gardening efforts and enjoy the process, be sure that you start small. Keep your effort manageable, and be intentional with your focus.
Lawn alternatives are more than just a passing craze. They are a great way to reduce your carbon-footprint and increase pollinator habitat. I am excited to present a class this week on this very topic, and thought it might be nice to preview it here on the blog.
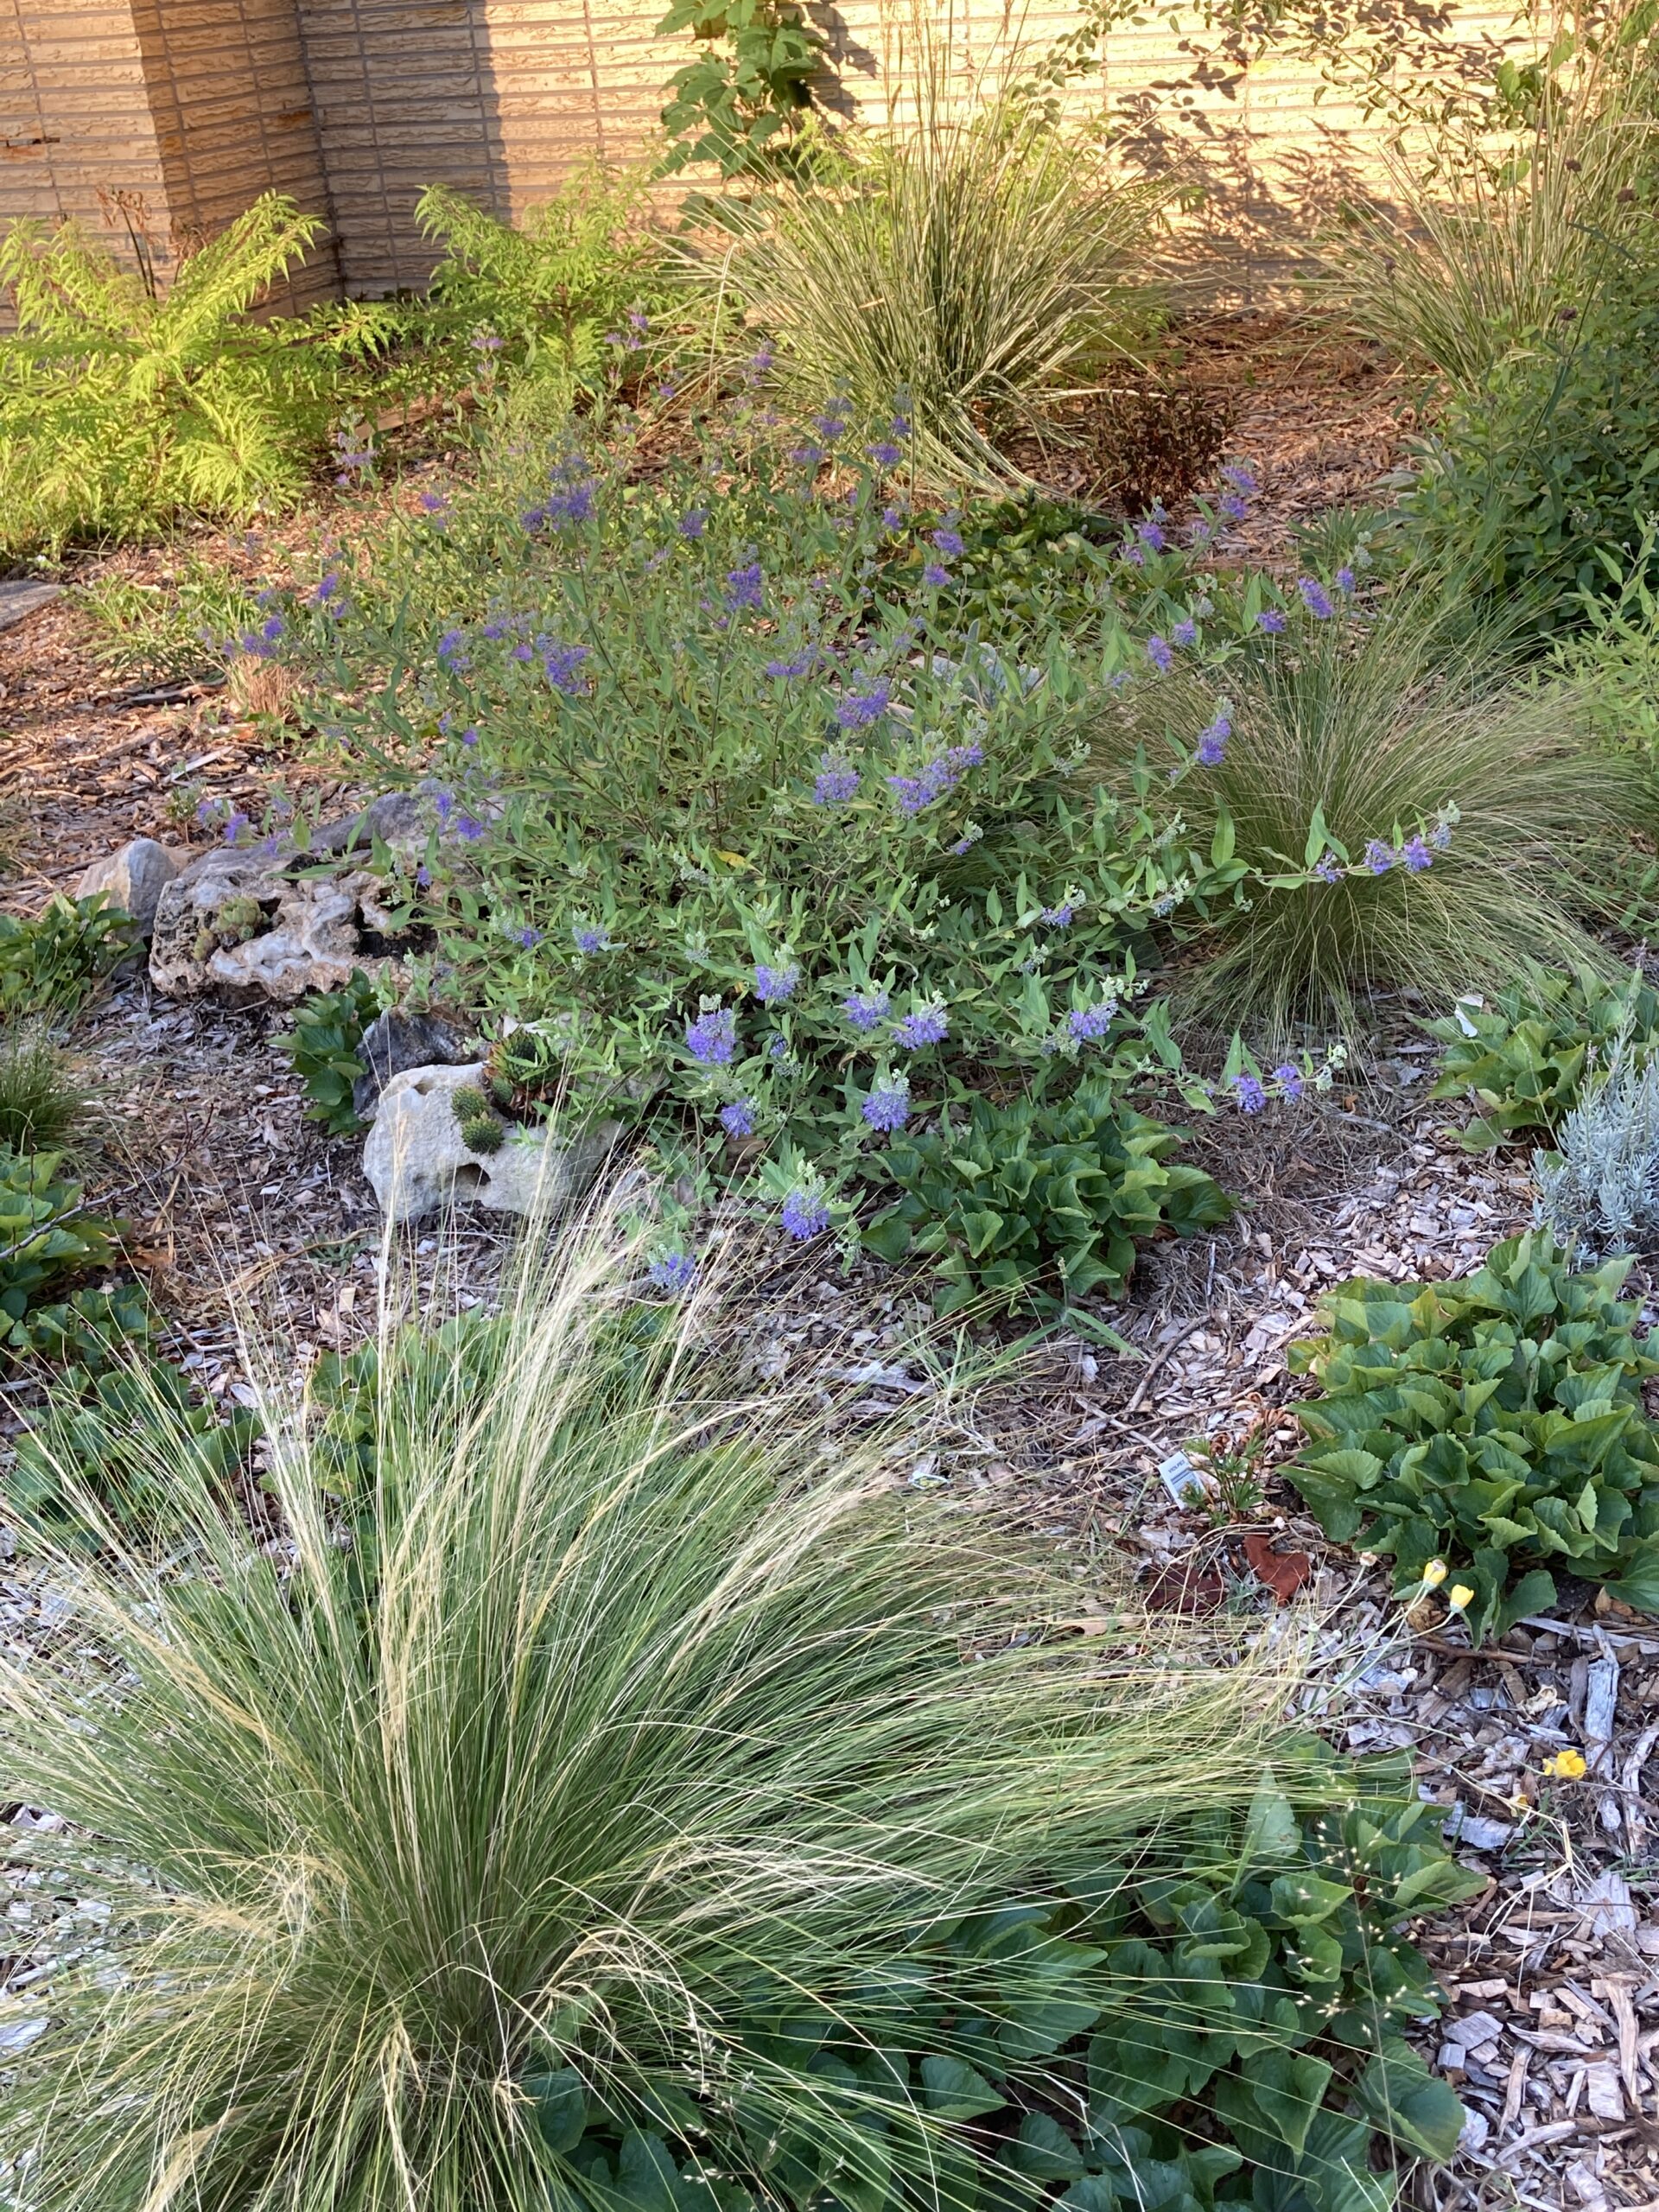
I replaced a large section of lawn at my own home, and instead planted with bluebeard, perky sue, sedum, prairie drop seed, Mexican feather grass, horsetail milkweed, and lavender. The violets came up on their own, and in hordes! But I leave them there because they are host plants for fritillary butterflies.
Cost over the ‘Lawn’ Haul
Traditional lawns of cool season grasses such as fescue and Kentucky blue grass have a wonderful place in my heart. They are great for entertaining, playing family games of badminton or throwing a Frisbee for the dog. But all that green space adds up: Kansas alone has 157,000 acres of turf and lawn, according to data from 2006 released by the KSDA. In that year, it cost Kansans an average of $1,541 per acre to maintain the turf grass in our state. So we end up with lots of grass, lots of money spent, but little to show in terms of habitat, soil health, or carbon sequestration.
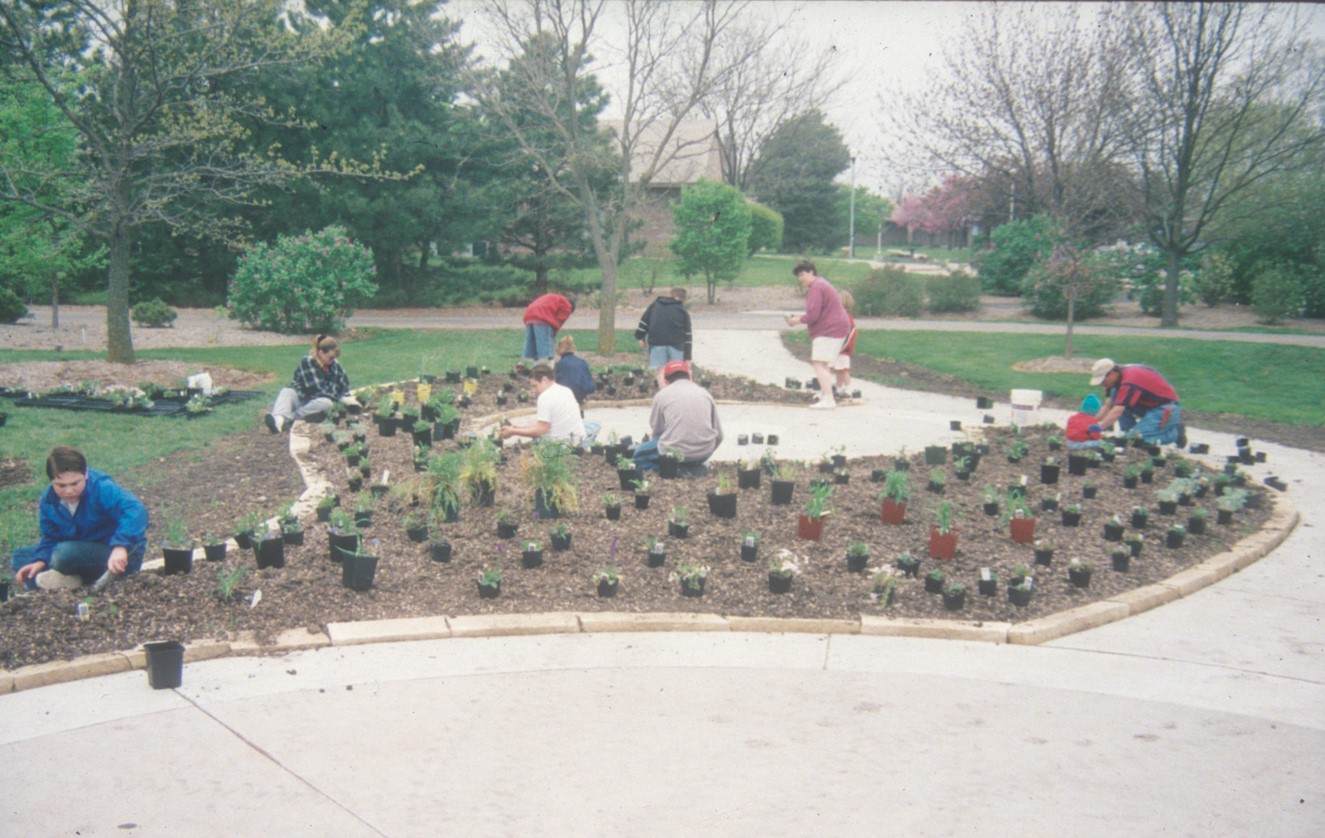
Volunteers helped us plant our Sundial bed near the Visitor Center. The planting is dense and diverse, but is balanced well by the solid green of the fescue lawns around it and the tidy limestone edging.
Lawn Alternatives Bring Balance
Rather than villainizing turf grass and framing it as the epitome of all native landscaping evils, a symbol of a Eurocentric society ,obsessed with outward displays of status that date back to palaces and aristocratic practices of a bygone era….I choose to focus on balance. We must balance our love of flat, green, monoculture lawns with the urgent need for diverse native plantings. By converting some areas of your lawn to forbs, shrubs, native grasses and groundcovers, you gain interest and beauty and ecological benefits.
This home in Oklahoma has skipped the traditional grass lawn by planting shrubs and perennials around pathways/hardscape. The sidewalks keep it looking organized and also make for easy access to the beds. By Lebuert [CC BY-SA 3.0 (https://creativecommons.org/licenses/by-sa/3.0) or GFDL (http://www.gnu.org/copyleft/fdl.html)], from Wikimedia Commons
If you want to learn more about planting lawn alternatives, what species to choose and maintenance tips, be sure to sign up for our Native Plant School Series and catch my class tomorrow night!
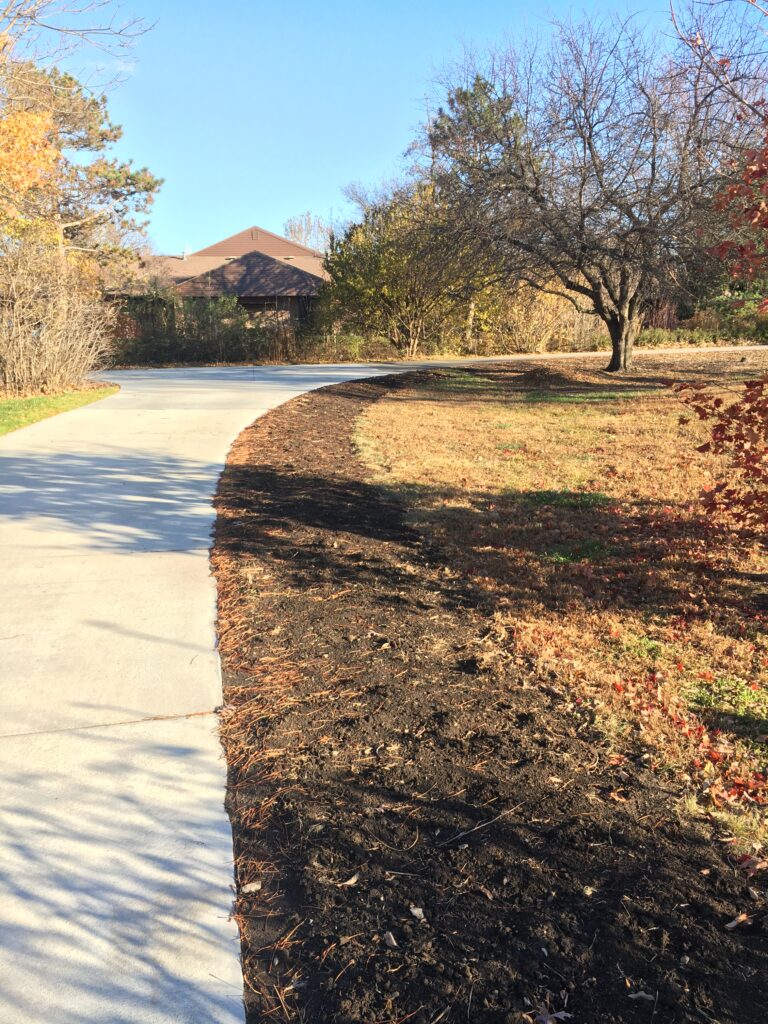
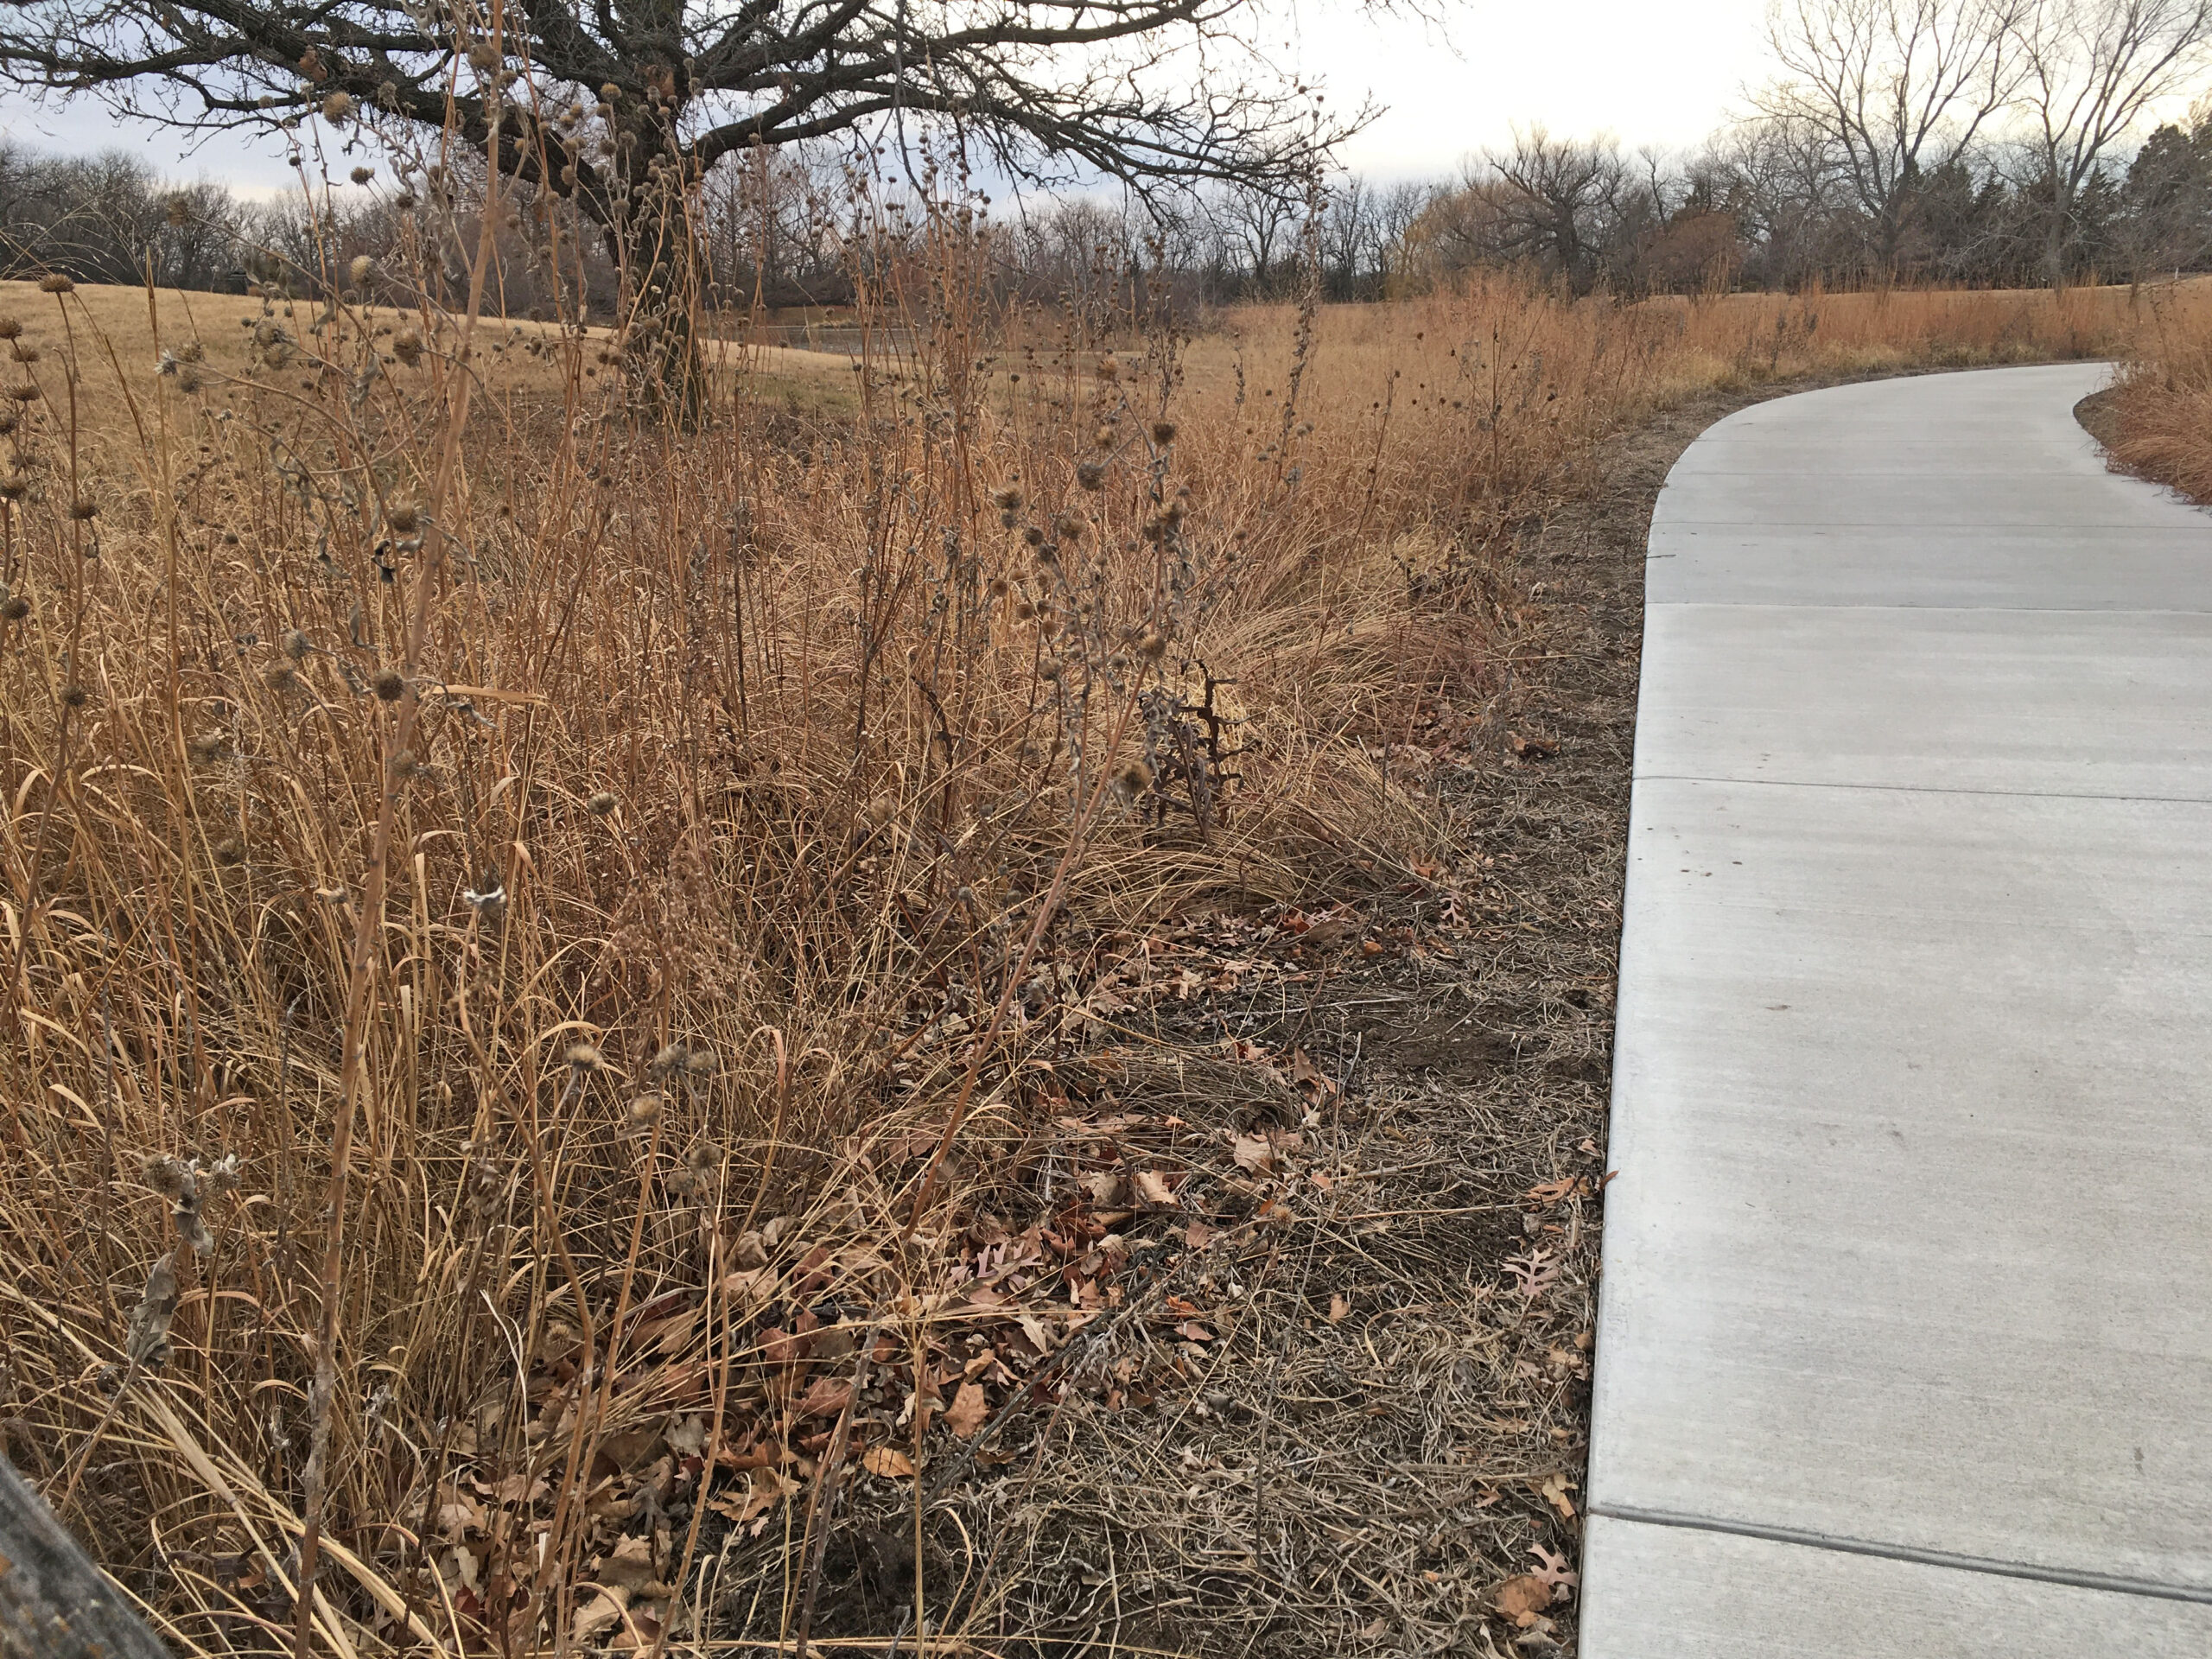
Dispersal of prairie wildflower seeds after sidewalk construction
I’d like to tell you about our late December sidewalk edge prairie seeding after disturbance following the installation of a new sidewalk right outside my office window.
Preamble about Disturbance
Disturbance is rich with meaning and ever-present.
In humans…
Our lives are filled with different levels of disturbance. While we typically trend toward stability and shy away from disturbance, we know unsettling events will happen. So, we try to be ready for them, use them as a resetting point, and work to make ourselves more resilient as quickly as possible going forward. How we respond to disturbance determines how quickly we recover in that quest to eventually make ourselves better.
In the prairie…
The same goes in native plant communities on the Plains. Disturbance is a natural and important element in maintaining a prairie ecosystem. While fire and grazing are two disturbing elements, they have ironically been prairie stabilizers for thousands of years. Without their occurrence on a semi-regular basis to knock back woody plants, prairies will be invaded by shrubs and trees and transition to woodlands and eventually forests in a manner of decades.
Fire and grazers also expose and disturb soil. In the spring, fire removes a cold-insulating organic matter layer, blackens the soil surface, and heats the soil profile. Hooves of grazers stir soil and buffalo wallows clear existing vegetation. Burrowing mammals of the prairie also stir up and expose soil. All of these activities encourage the germination of early successional forb seeds in the soil seedbank that attract unique species of wildlife in biological diverse prairie. Disturbance is not only good for the prairie, but it is essential.
In this sidewalk-lined prairie garden…
Ever since the new sidewalk was installed summer of 2020, the adjacent soil in 2-4′ zone of disturbance on either side has been bare. The vegetation in these areas prior to disturbance consisted of native prairie grasses and the occasional prairie wildflower. But after this soil disturbance, annual weeds will explode from these areas come spring. It may have been 40 years since this site was a farm field, but I guarantee that the agricultural nonnative and native annuals brought in by years of farming, including species like henbit, foxtail, and ragweed, will profusely germinate here in a few months.
A Unique Opportunity
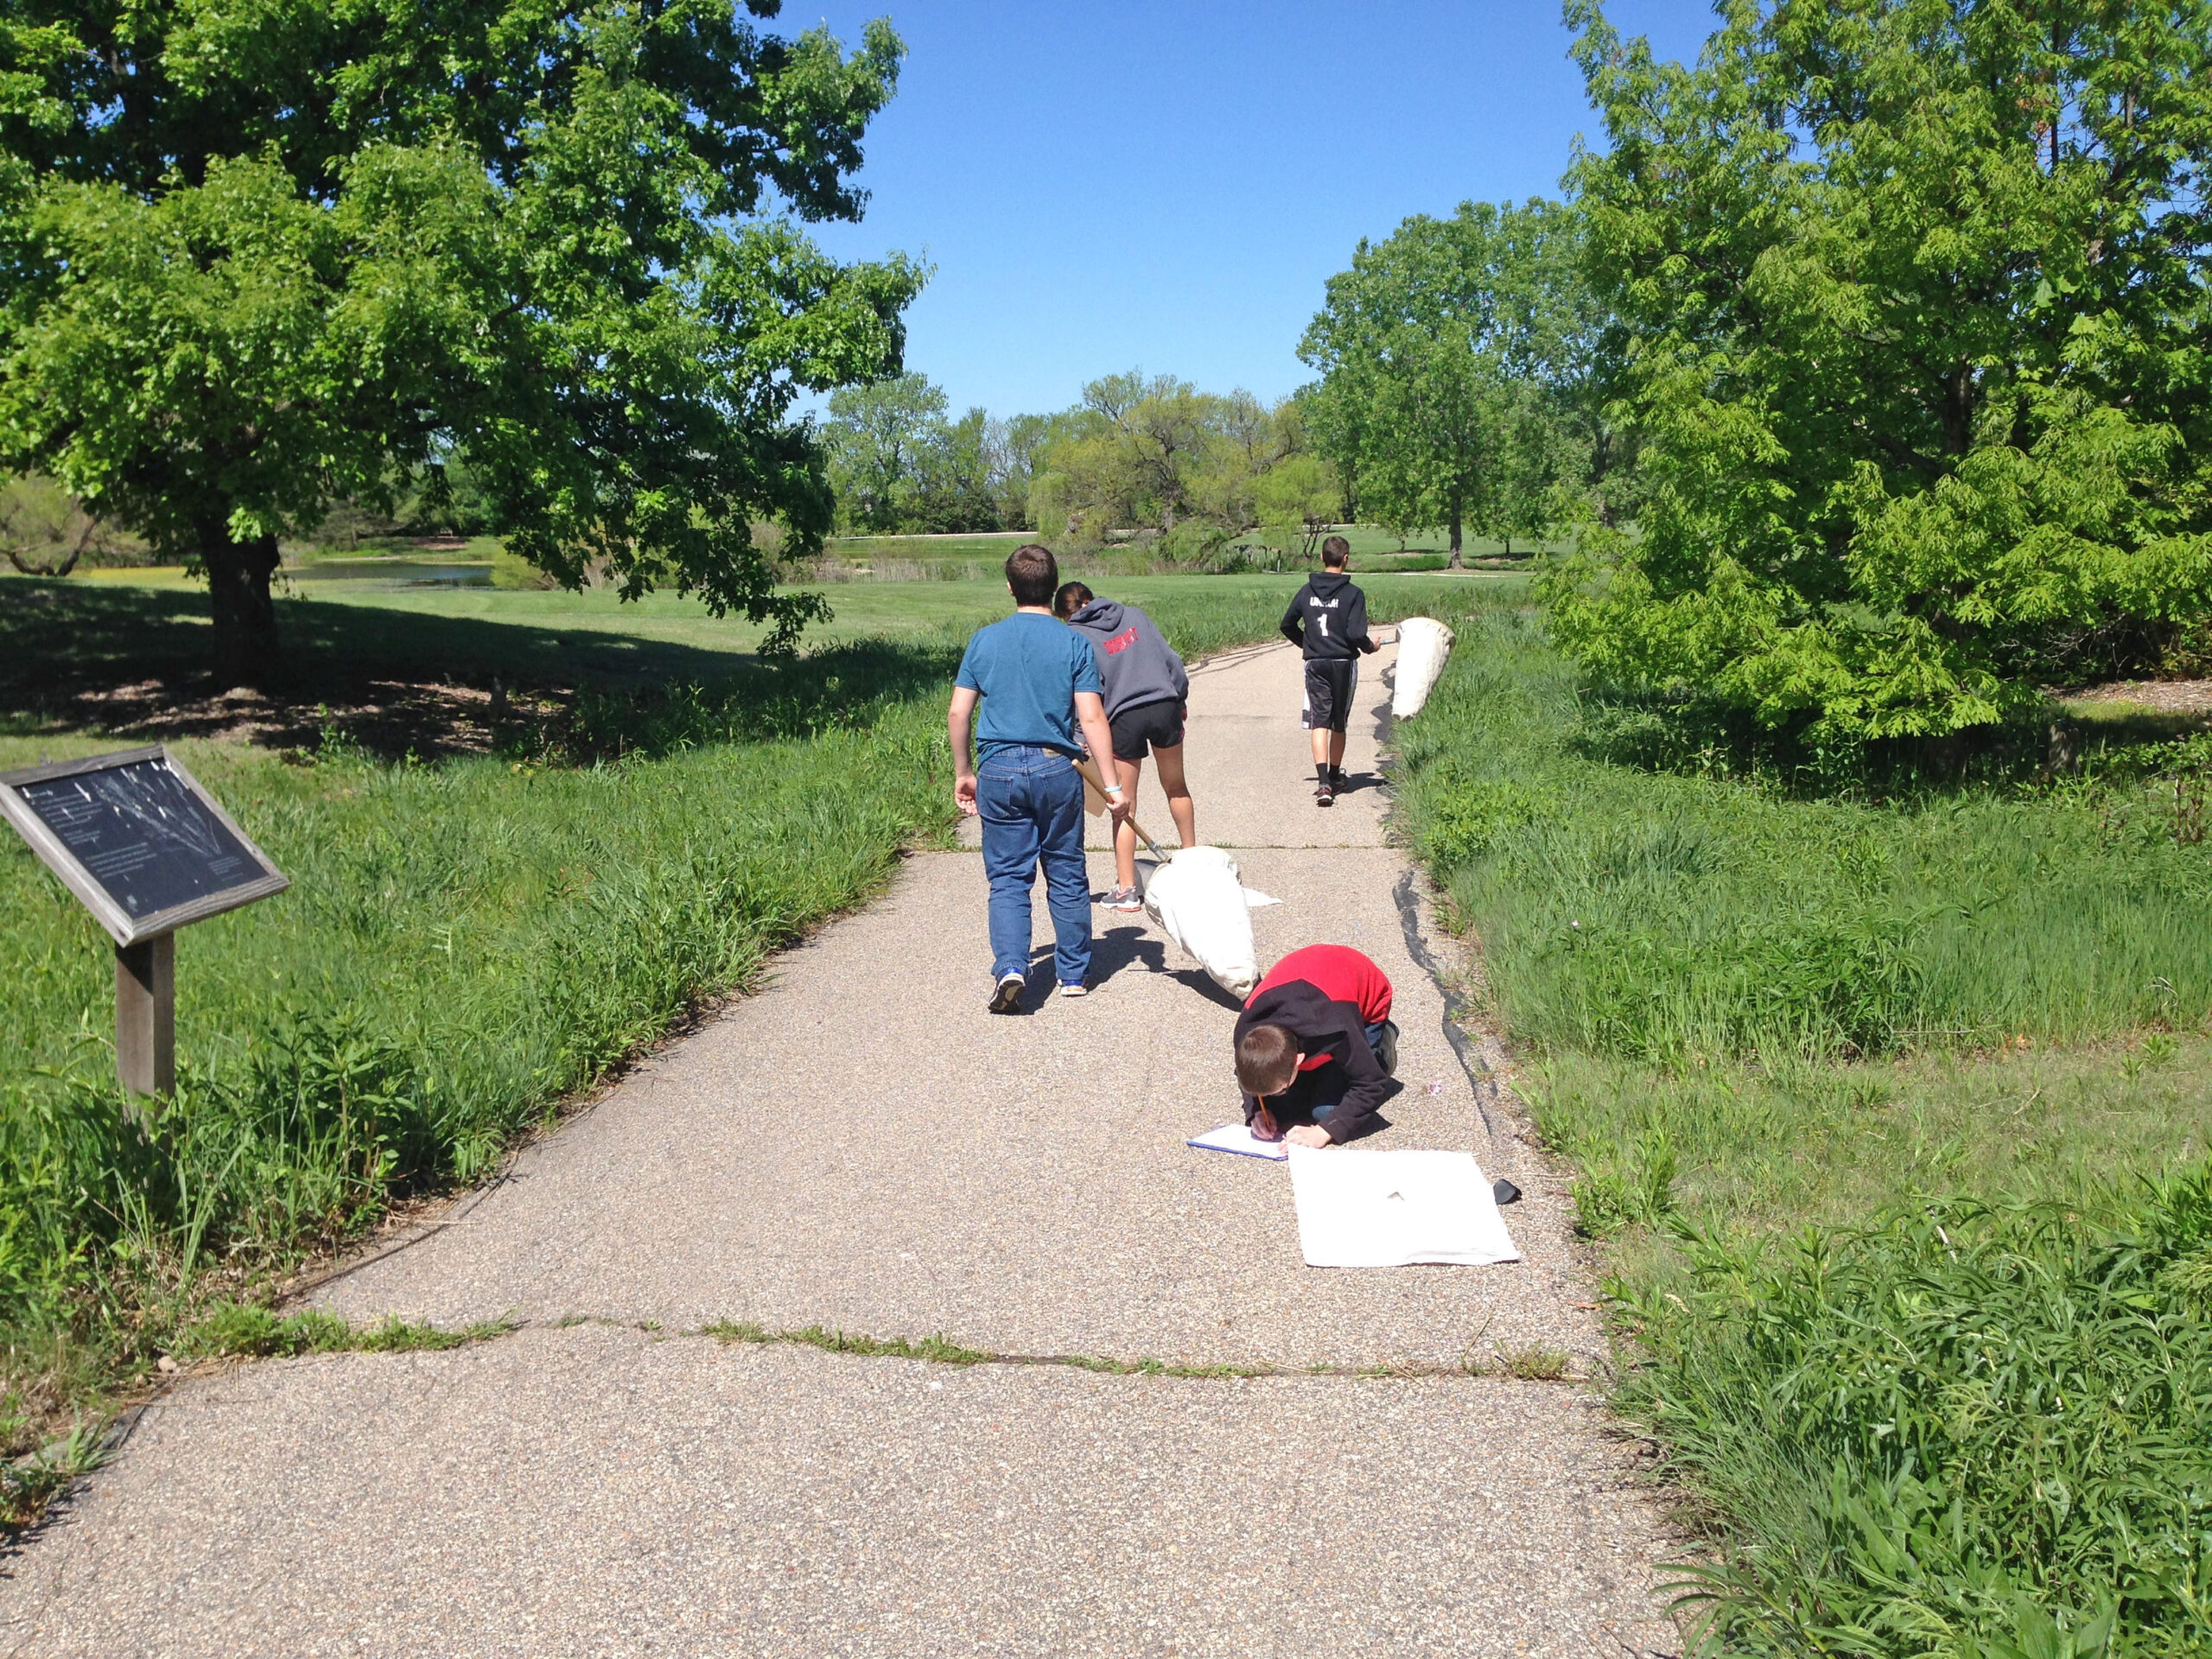
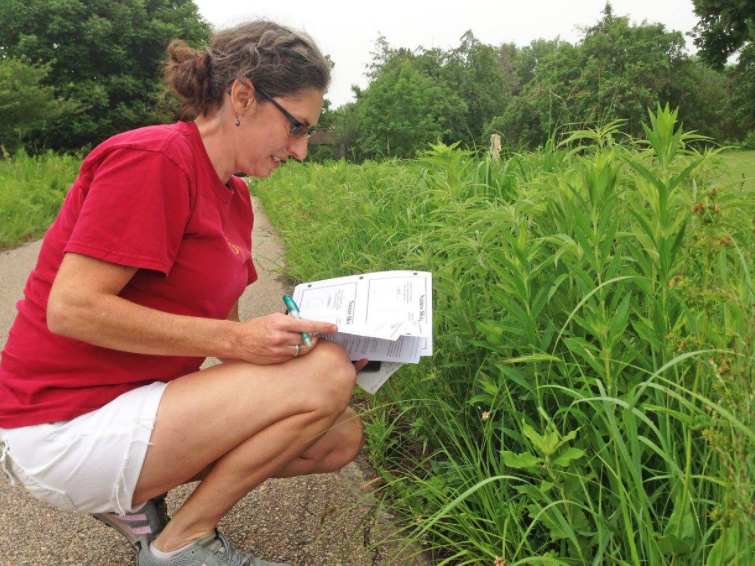
These sidewalk edges have been an important educational resource over the last 15 years. Thousands of students, from Kindergarten through college-age, have studied them for plant and insect diversity via field trips and labs. School teachers participating in our Earth Partnership for Schools summer institutes and classes of master gardeners and master naturalists have also gotten in on the sampling of these areas each fall.
Field trip students conducting insect studies of sidewalk edge prairie habitatA science teacher studying sidewalk edge prairie habitat during an Earth Partnership for Schools summer institute
Over these years, I’ve noticed that tall native prairie grasses, including big bluestem, Indian grass, switch grass, and eastern gamma grass, have come to dominate these sidewalk plantings, while wildflowers have slowly gotten crowded out. Frankly, these plantings needed some disturbance to break the grass stronghold and provide a window of opportunity for an infusion of new species.
Rather than discourage with herbicides the germination of annual weeds and grasses sprouting from roots along this disturbed sidewalk edge, we decided to plant a native wildflower mix to offer hearty competition. We chose a diverse array of colorful flowering prairie species desirable to human eyes and insect pollinators alike. The sports adage that “the best defense is a good offense” certainly fits our approach to the ecological restoration of this sidewalk edge.
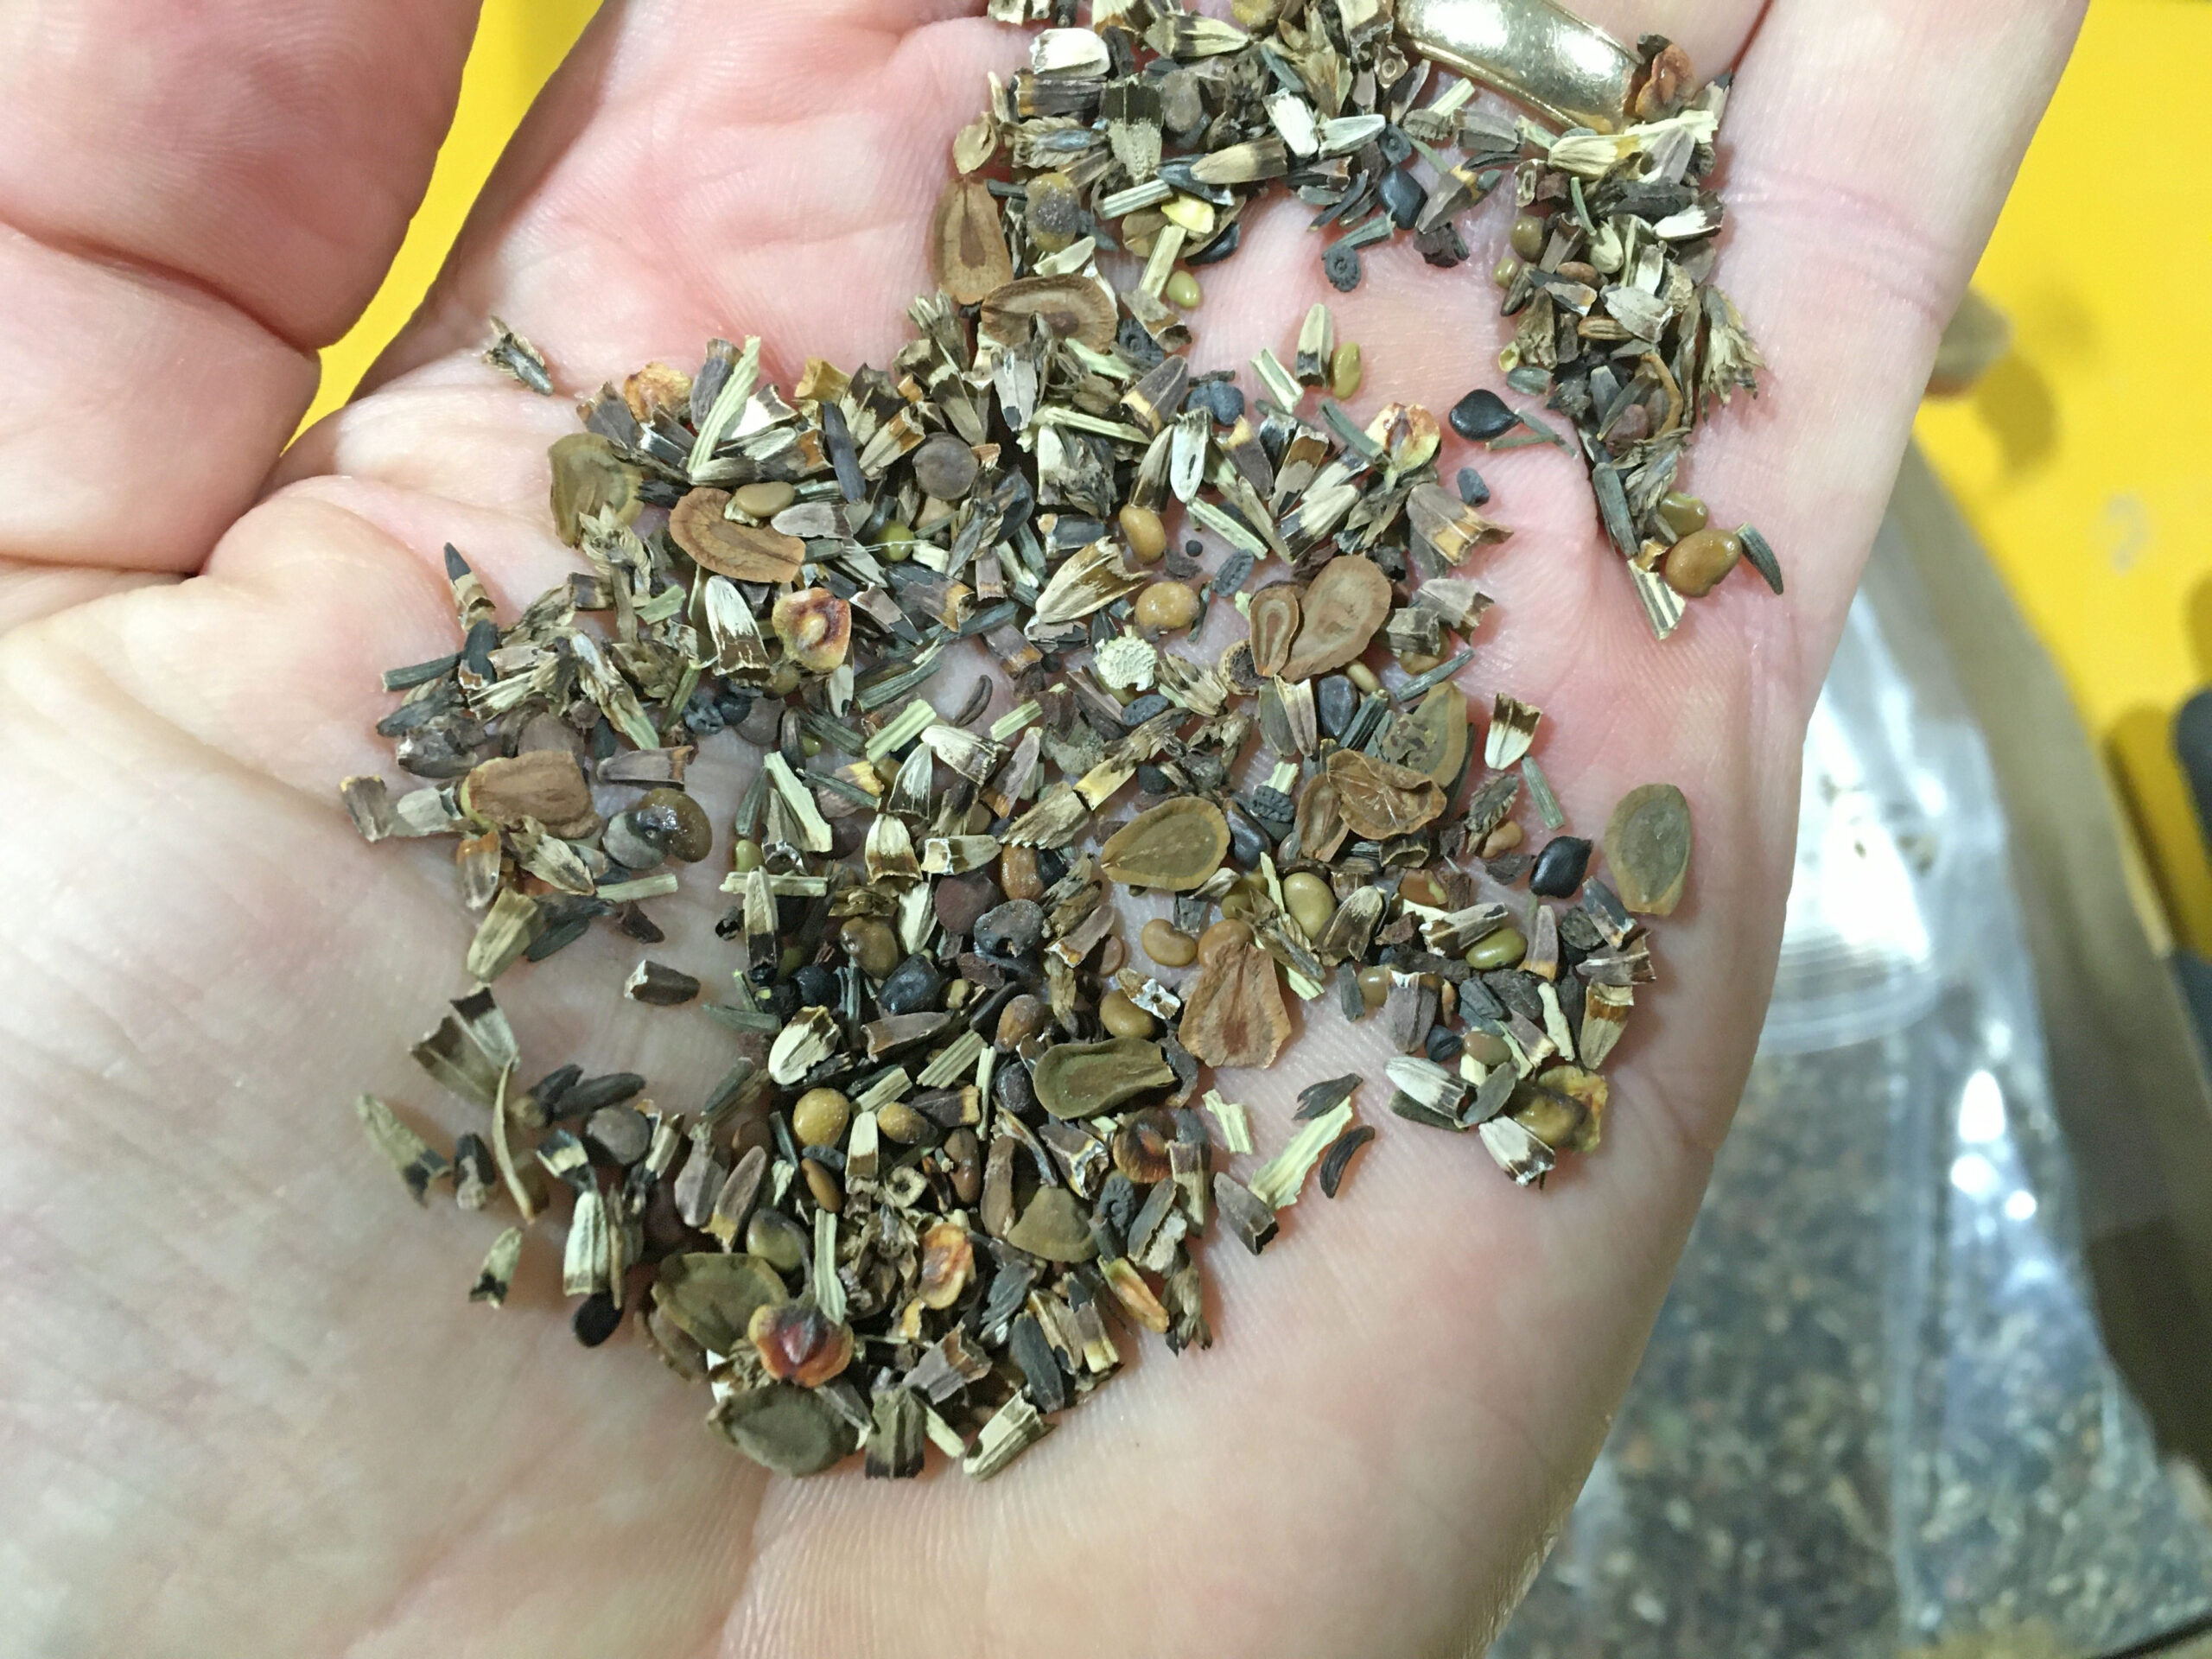
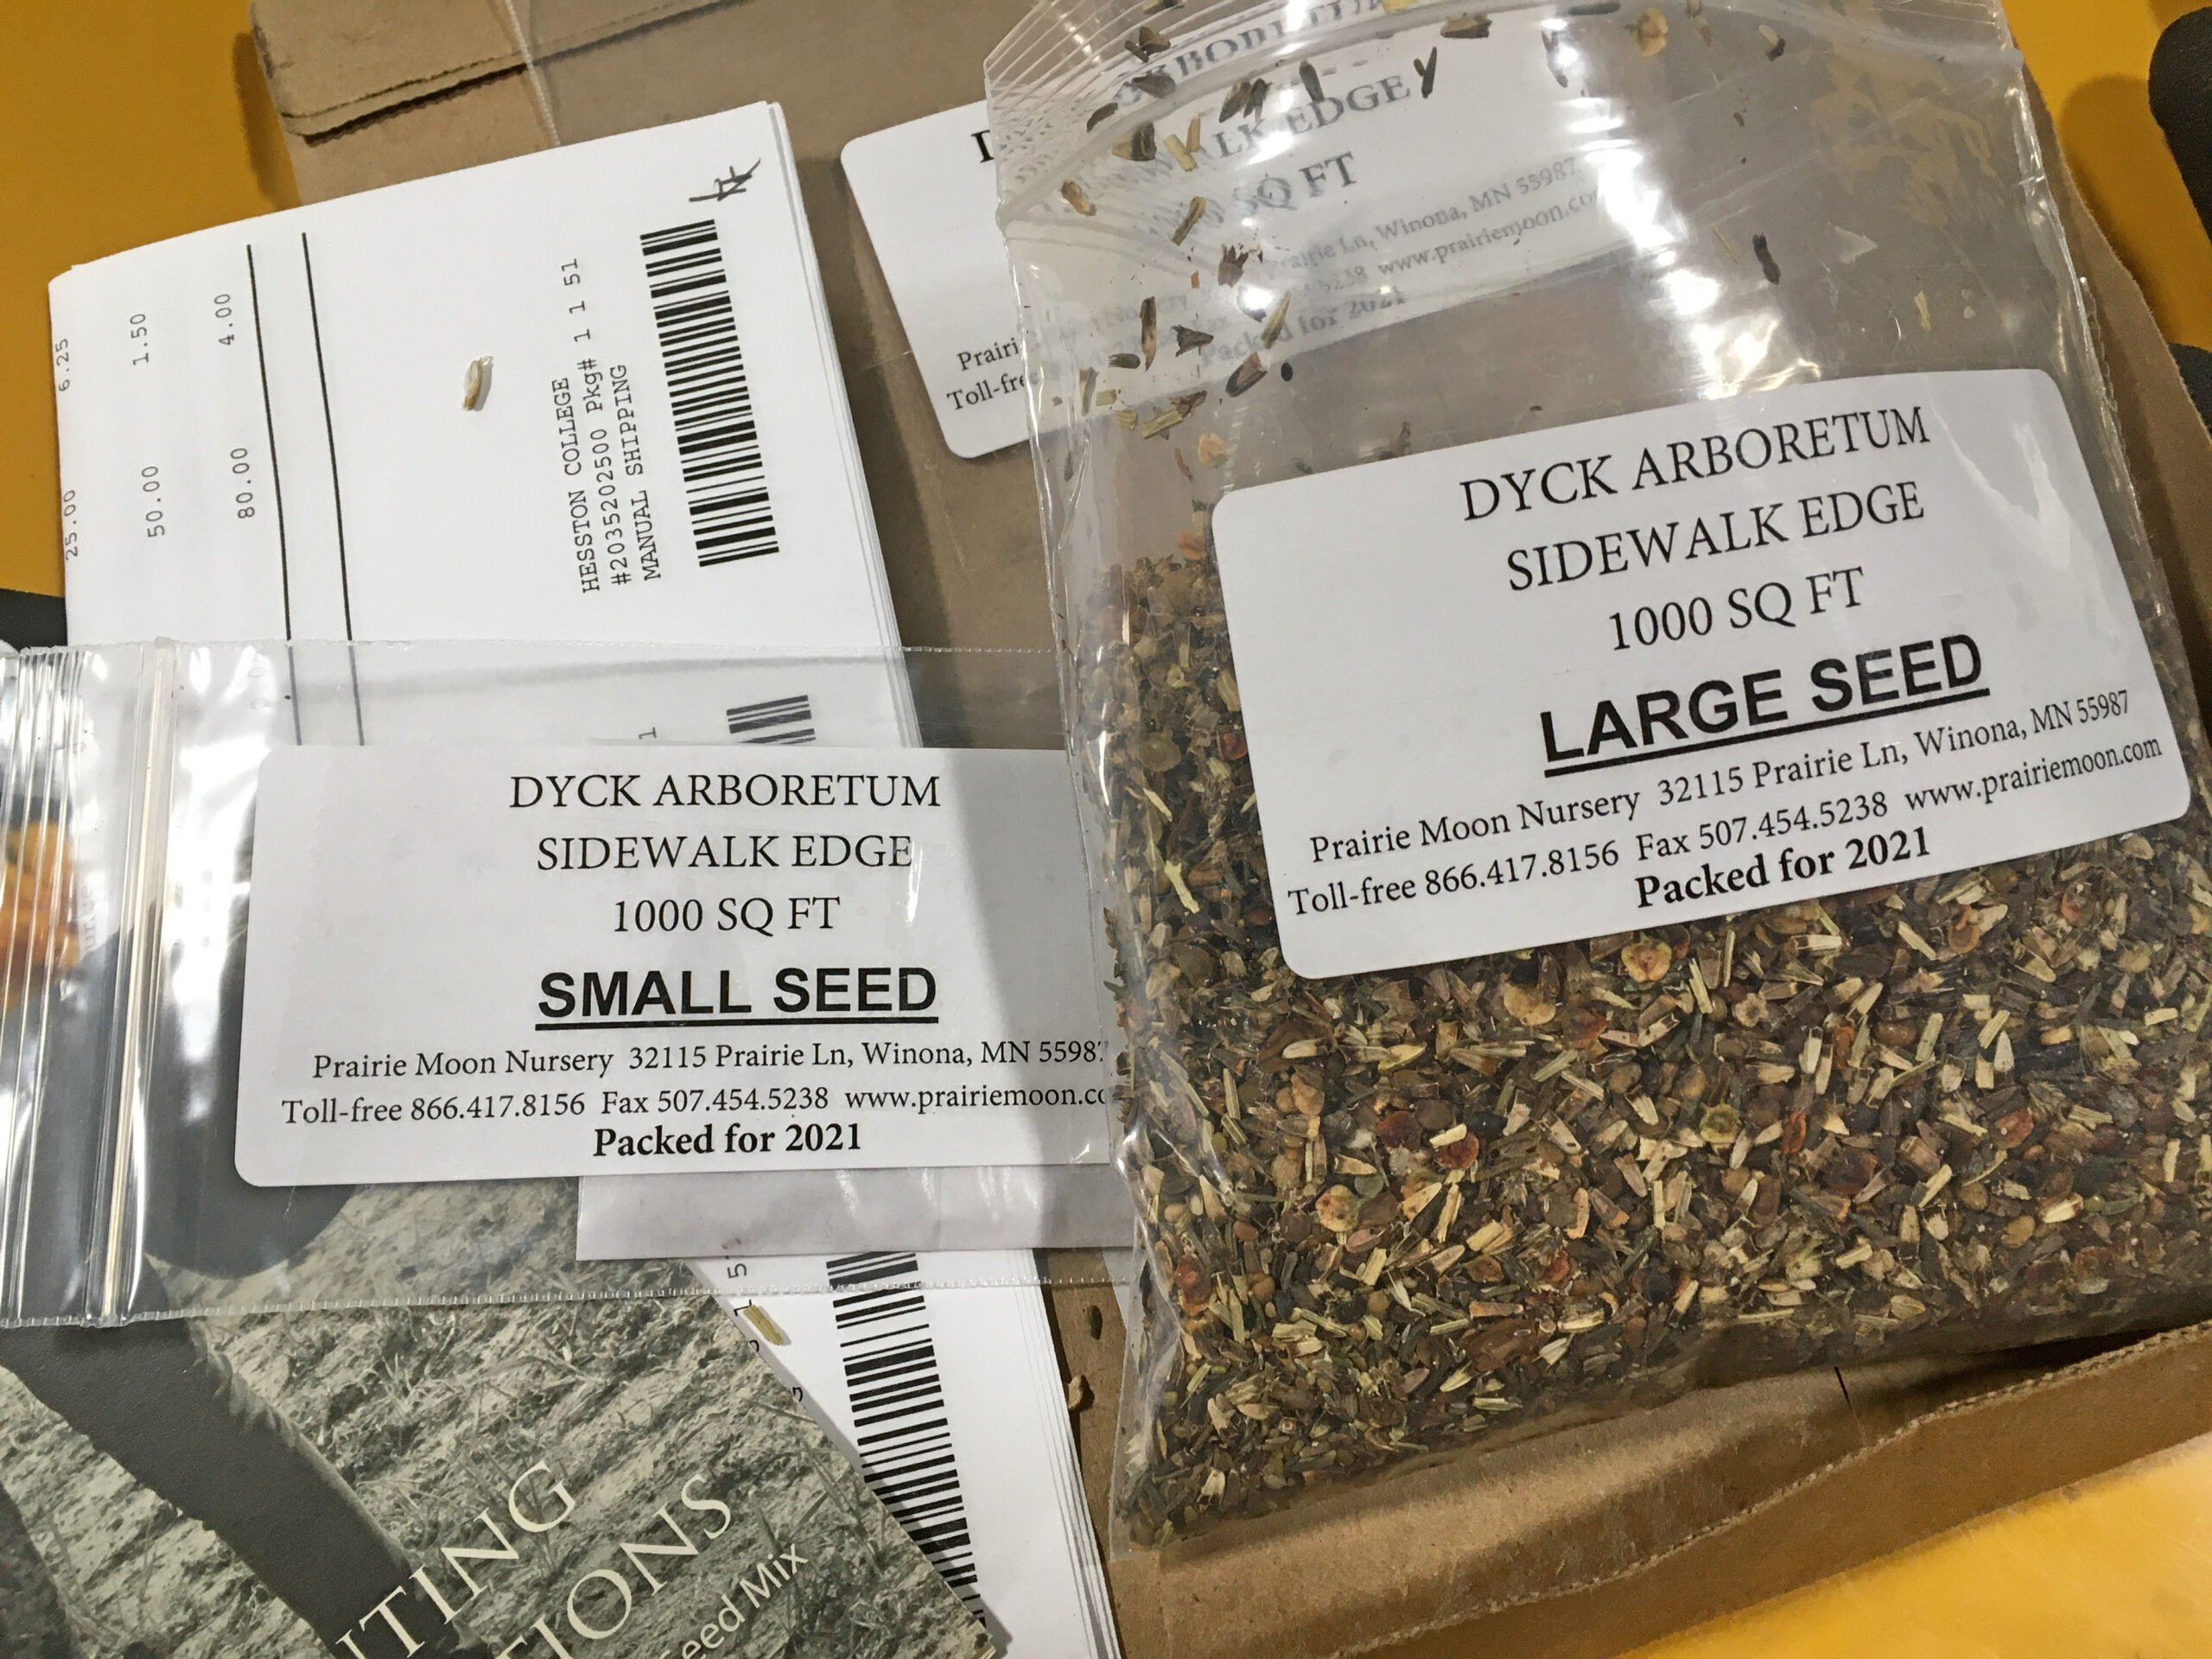
Seed Mix
Sidewalk edge seed mix including 43 species of forbs
Prairie Moon Nursery offers a nice array of prairie wildflowers with historical range into the mixed/tallgrass prairie of Kansas. I went through their seed inventory and chose all the species that I know from regional prairies (with a few exceptions). A nice summary of other seed and plant sources can be found through Kansas Native Plant Society. The developed species list amounted to the following 43 species, representing a variety of heights, colors, and bloom times and should add a nice diversity of plants and eventually wildlife to these areas.
FORBS
Allium stellatum
pink wild onion
Anemone canadensis
Canada anemone
Asclepias sullivantii
smooth milkweed
Asclepias tuberosa
butterfly milkweed
Asclepias verticillata
whorled milkweed
Asclepias viridis
green antelopehorn milkweed
Aster azureus
sky blue aster
Aster novae-angliae
New England aster
Baptisia alba
white wild indigo
Baptisia australis
blue wild indigo
Brickellia eupatorioides
false bonset
Callirhoe involucrata
purple poppy mallow
Chamaecrista fasciculata
yellow partridge pea
Coreposis palmata
prairie coreopsis
Dalea candida
white prairie clover
Dalea purpureum
purple prairie clover
Desmodium canadense
showy tick trefoil
Desmodium illinoense
Illinois tick trefoil
Echinacea angustifolia
narrow-leaved coneflower
Echinacea pallida
pale purple coneflower
Eryngium yuccifolium
rattlesnake master
Lespedeza capitata
round-headed bush clover
Liatris aspera
button blazing star
Liatris punctata
dotted blazing star
Liatris pycnostachya
Kansas gayfeather
Monarda fistulosa
wild bergamot
Oenothera macrocarpa
Missouri evening primrose
Penstemon digitalis
smooth penstemon
Penstemon grandiflorus
large beardtongue
Penstemon tubaeflorus
tube beardtongue
Phlox pilosa
prairie phlox
Pycnanthemum virginianum
mountain mint
Ratibida columnifera
long-headed coneflower
Rudbeckia hirta
black-eyed susan
Ruellia humilis
wild petunia
Sisyrinchium campestre
prairie blue-eyed grass
Solidago missouriensis
Missouri goldenrod
Solidago speciosa
showy goldenrod
Tradescantia bracteata
bracted spiderwort
Tradescantia ohiensis
Ohio spiderwort
Zizia aurea
golden alexanders
SHRUBS
Amorpha canescens
lead plant
Ceanothus americanus
New Jersey tea
I was sure to omit species that would be aggressive as they are in nearby gardens and will eventually invade on their own. The mix for 1,000 square feet was calculated to be planted at a generous rate of 73 seeds/sq. ft. (50 seeds/sq. ft. is what I recall to be a minimum industry standard) This cost us $171.20 including shipping and a $50 mixing fee for orders under $200.
Eye candy from the Prairie Moon Nursery catalog
Planting Process
We pushed to get this seed ordered and delivered as early in the winter as possible. I like to aim for December, but have planted in January also. Different wildflower species require various types of treatment/stratification for best chance of germination, but a general successful approach is aiming for 2-3 months of cold-wet conditions (a typical winter) that will lead to the best rate of germination possible. After receiving the seed, we proceeded as follows…
Seed mix from Prairie Moon Nursery
Mix seed with bulk
We used sand, but mixing sawdust, kitty litter, or other media with your seed will do. The seed will seem like an incredibly small quantity of material to spread over a large area and adding bulk material helps increase the chances that you will cover the entire planting area with seed.
Dividing mix evenly into planting areas
A supply of 5-gallon buckets is helpful to divide the seed/bulk material mixture into even quantities that match the number of even-sized planting areas. To give yourself a reserve quantity of seed, I recommend doubling the number of seed quantities per planting area. For example, we had two sides of sidewalk to plant, and prepared four buckets of seed. Cover each planting area with one bucket and then do the same again with the second bucket. If you blow it with the first bucket and don’t cover the entire area – which is easy to do – then you have a reserve bucket to finish the job.
Raking planting area
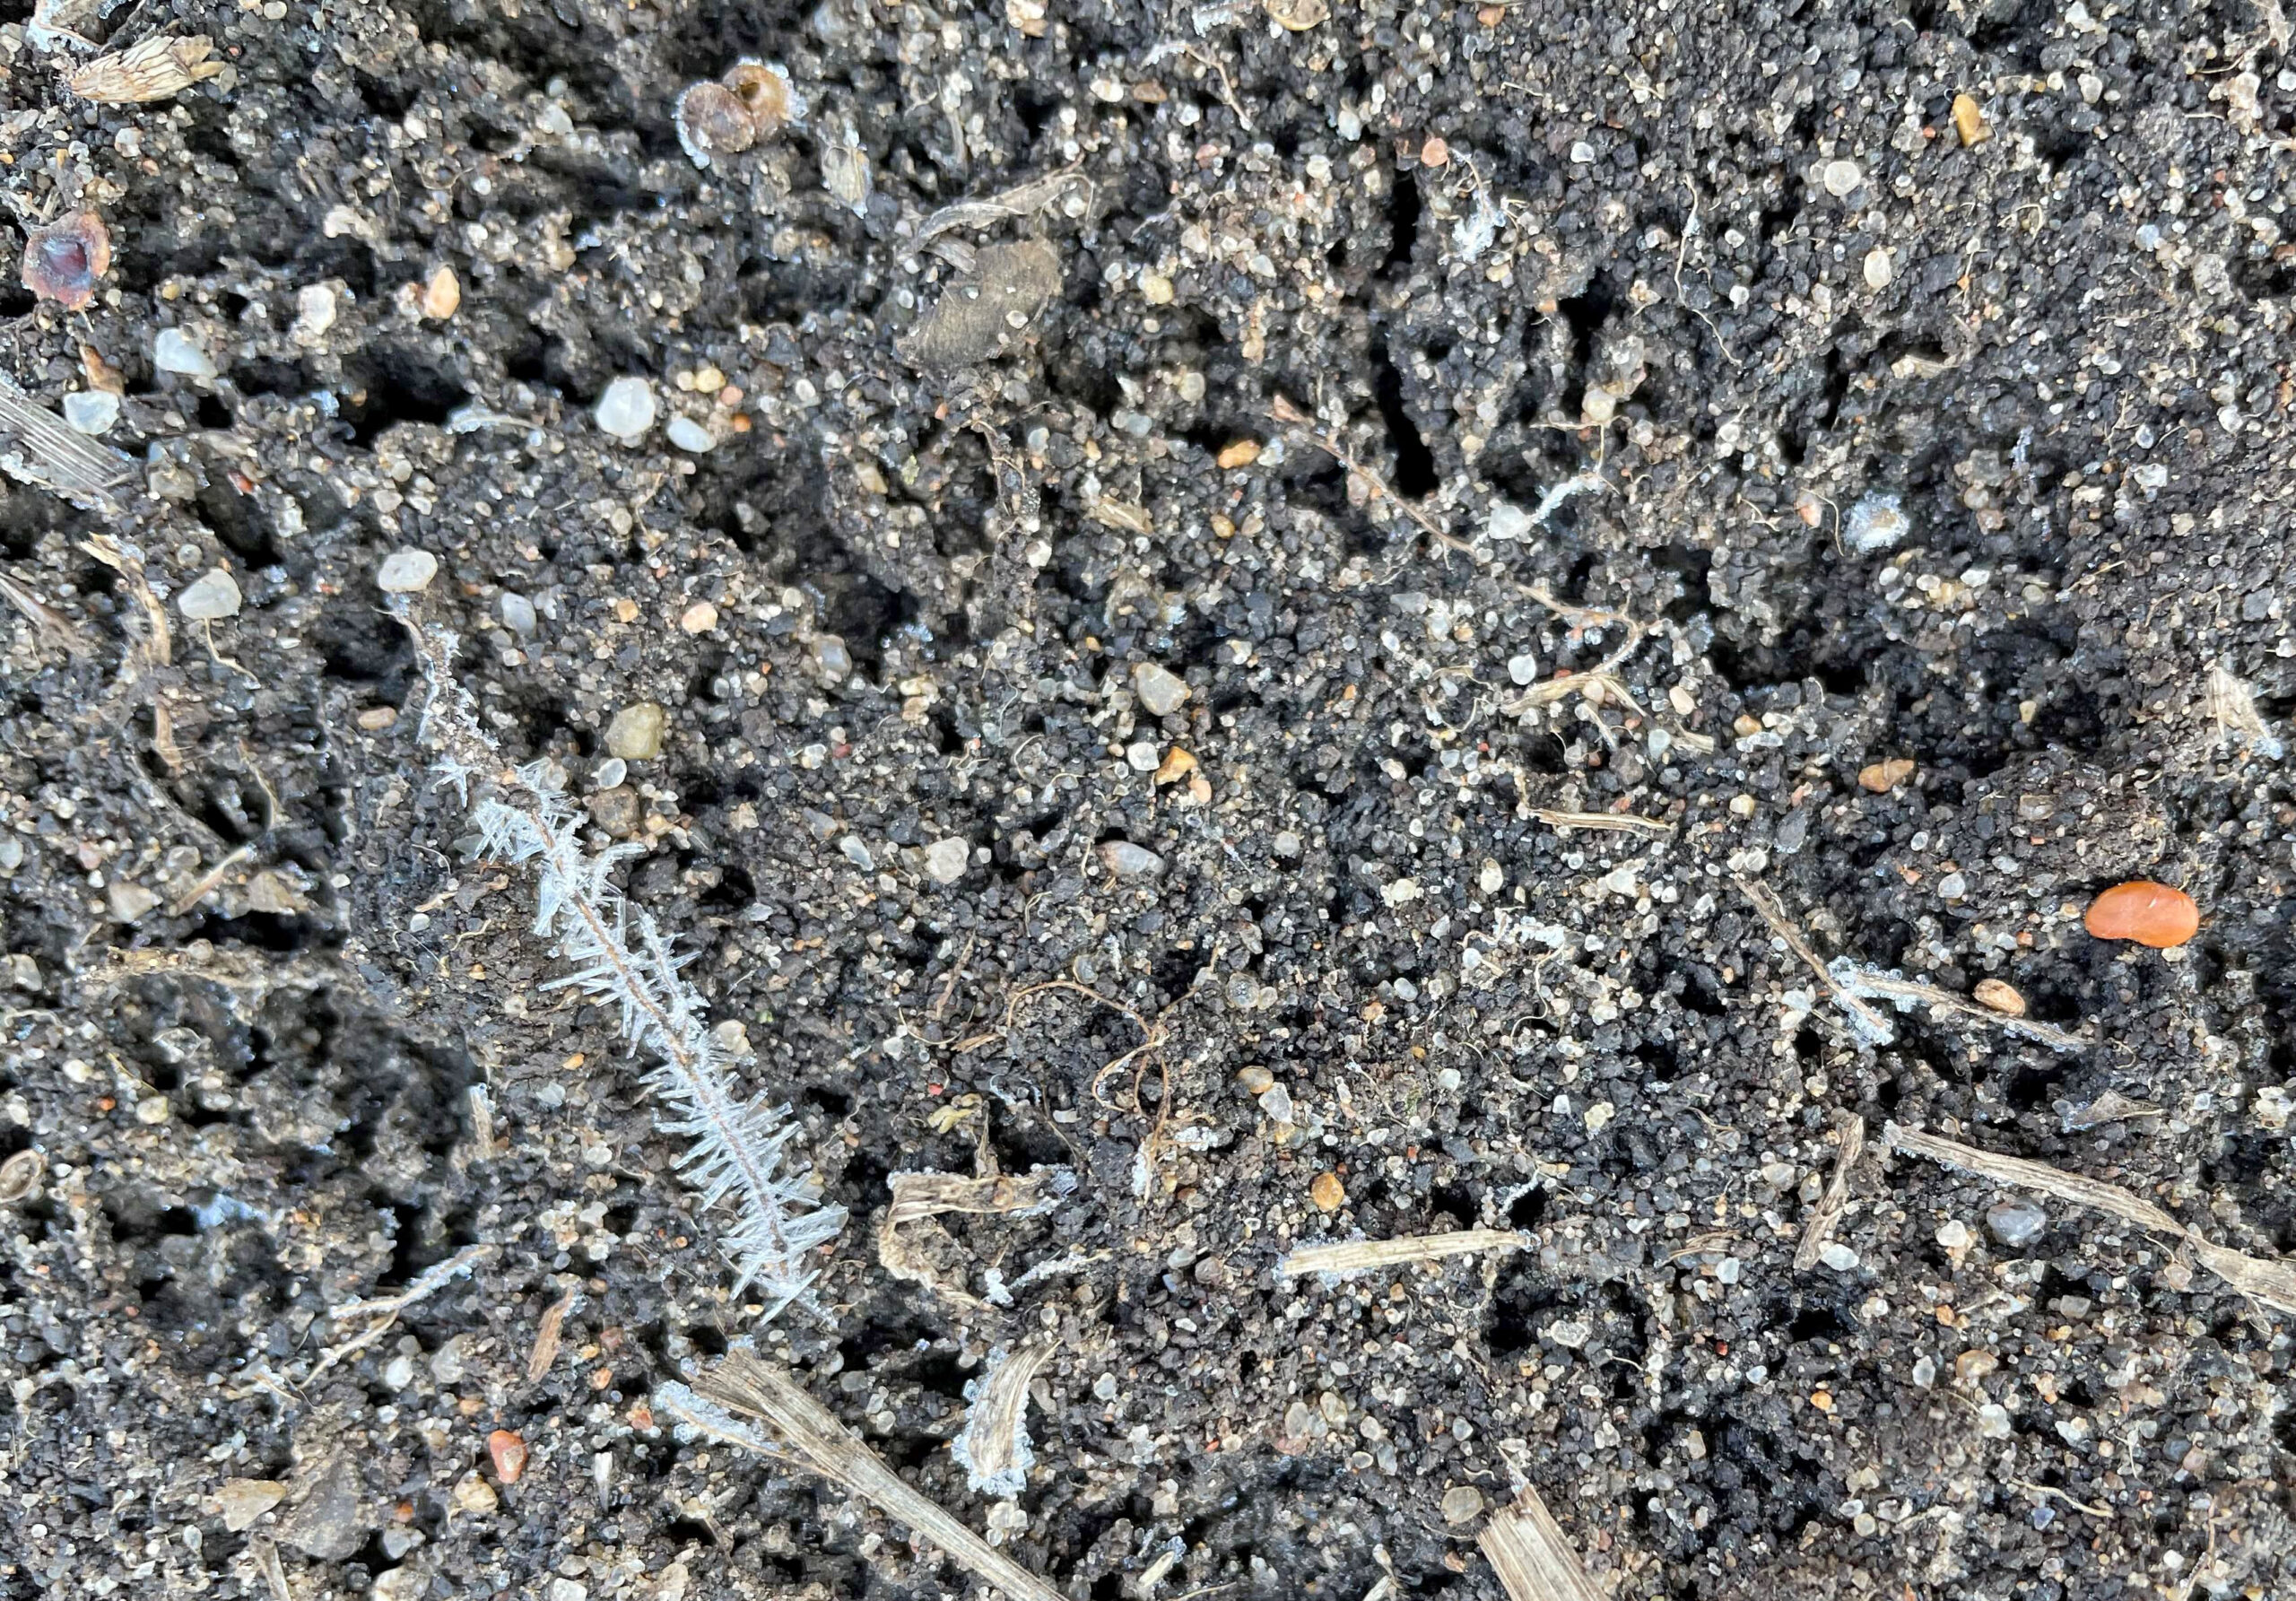
Good seed/soil contact is the goal to encourage seed moisture absorption and improve germination once an average soil temperature of 55 degrees F is reached in the spring. There was some dead plant debris covering our planting areas, so we raked the areas before planting.
Raking the planting area prior to seeding
Dispersing seed
Seed dispersal is easy by hand and probably most successful when conducted with bare hands so you can feel the seed mixture, if you can keep them warm on a cold day. But standard handheld or rolling push-behind broadcasters could also be effective. More sophisticated seed drills calibrated to specific seed sizes are not very effective with mixes containing various sizes and textures of seeds like we were dealing with.
A final raking
While not an essential step, we had the human power and time to do a light final raking after planting to barely cover the seed. You want to be careful to not bury small seeds too deeply. Seed planting experts often advocate for allowing nature and its powers of freezing/thawing, precipitation, and gravity to work the seeds into the top 1/8-inch of soil throughout the course of winter.
Follow-up
Moisture and frozen ground are now what we wish for
Most of the work is now finished with this planting and the main job in follow-up as we look forward to colorful, flowering wildflowers throughout the growing season is to have patience. While a few species like black-eyed susan, wild bergamot, and yellow partridge pea may flower in the first couple of years of this planting, most species in the mix won’t flower until year three or longer.
Photo used by permission from Nature Education-1995 Conservation Research Institute, Heidi Natura
It will be difficult to think of this planting as anything other than a complete and utter failure in the first year when all you can mostly see are weeds. However, careful inspection should show in this first growing season that small sprouts of prairie species hidden close to the ground are there. Prairie wildflowers develop deep, 5-15 foot root systems to help them survive for years and even decades through harsh Kansas summers and that process takes time. About all we can do is mow the planting area as high as possible once or twice each year in the first few years to keep annual weeds from going to seed and reduce their competition with prairie seedlings for light and water.
My friend often refers to the sage advice of Frog and Toad after a planting. I will follow her lead and leave you with this message as there is little left to do…
For a follow-up report on the progress of this planting roughly eight months later, see the blog post “Seeded Prairie Checkup“.
Every good piece of art deserves a good frame. The same goes for gardens! A well-designed, ecologically friendly landscape needs to have borders and edging keeping it in bounds, not only physically, but visually. Joan Nassauer of the University of Michigan makes this point better than anyone in her text ‘Messy Ecosystems, Orderly Frames’.
Novel landscape designs that improve ecological quality may not be appreciated or maintained if recognizable landscape language that communicates human intention is not part of the landscape.
Nassauer, 2007
In layman’s terms, no matter how wonderfully water-wise and pollinator-friendly your garden is, if it looks messy, all the neighbors will hate it.
Proper edging can make a garden look tidier and more intentional. For prairie gardens that may be prone to look unruly, framing and clean lines are very important. Photo from Our Mother’s Garden entrance.
Beauty Standards
Messy, in this usage, is a unique idea borne from our Eurocentric culture. These traditional gardens and landscapes need to be constantly in order, with straight lines, perfect symmetry, short lawns and hedges trimmed into unnatural shapes. Those standards of beauty and acceptability come from the aristocracy of Western Europe; castles and manors with hedge mazes, rose gardens, and endless formal lawns.
In our prairie home, these ideas do more harm than good. Trying to maintain those landscapes of the old country is costly, labor intensive, and destructive. Kansas is hot, dry, and extreme in her fluctuations, unlike the place of my ancestors from Europe – cooler, moist, and temperate. And trying to make the natural world bend to my ideas of perfect order is an uphill battle and a waste of resources. But we can achieve an orderly, formal aesthetic by using proper edging in native landscapes.
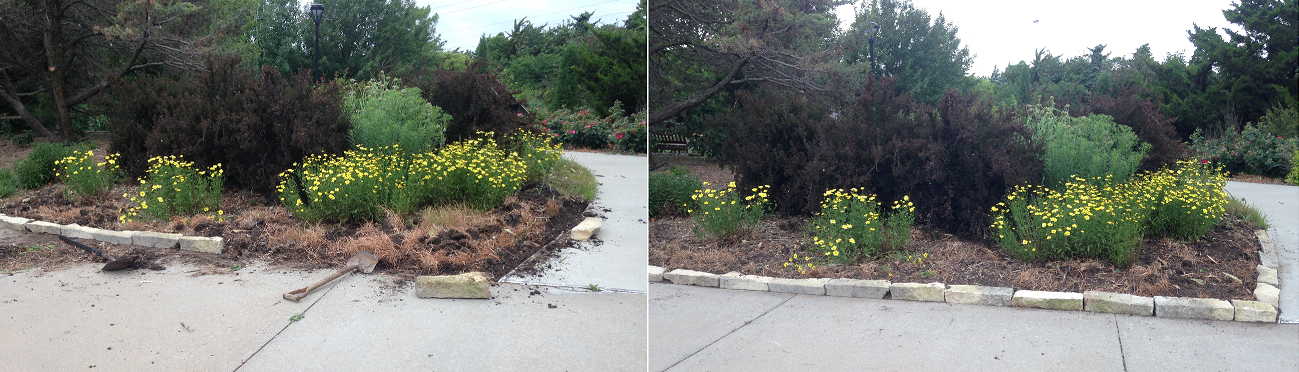
Steel edging makes a strong statement. It lends a degree of formality and tidiness, even if the plants inside the edging are aggressive natives! To install this stone edging, volunteers helped me dig a shallow trench against the sidewalk. We situated them an inch or so below the sidewalk, to make sure they sit tightly together and aren’t moved by heavy rains.
Choosing the Right Edging
Plastic. Metal. Wood. Stone. What is right for your space? This may depend on the design of your house, or the structure a garden is nearest to. It may also depend on the plants. For instance, species with vigorous underground spreaders that need control may require deep steel edging. My personal favorite is stone. If installed properly, stone never has to be replaced. Steel edging is becoming quite popular for its modern, industrial quality, but can be expensive for large spaces.
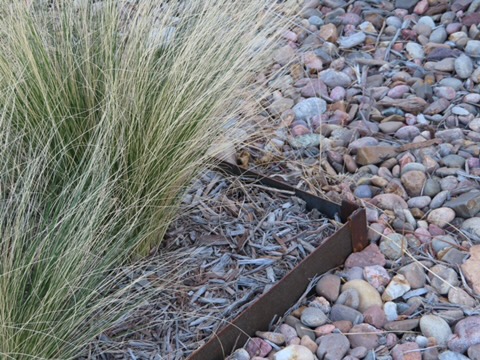
You can see here my own unfinished edging project. One side looks neat and tidy, and is holding its mulch and soil. The other side sans edging routinely erodes after rain events, sending my mulch and good garden soil into the gutter.Steel edging is installed by hammering the sections into the soil, then joining them with clips at corners or joints. Mulch or gravel is then added around the edging according to the style you are trying to achieve.
If you are concerned about how your pollinator garden or native landscaping may be perceived by passersby, consider edging it. Edging adds an easily recognizable human element. Onlookers will see this space is purposeful, cared for, and important. And it just might convince someone to create a prairie garden of their own.
Knowing how much light a plant needs to thrive should be a simple question, but it is often easily misunderstood. There are so many different descriptions for sun requirements or exposure found on plant labels, but they don’t provide all the information you may need to make the right selection for your yard. Are these descriptions for Kansas or Virginia? Can a plant survive in full sun with 30 inches of average rainfall or does it need 50 inches? Does it need full sun with protection from the hot afternoon sun?
Plant labeling has been getting better and more consistent, so understanding a few key terms will assist in selecting the right plant for your landscape conditions. Let’s take a closer look.
Terminology
Every plant in the landscape needs sunlight to grow. Even shade plants with their adaptations need a certain amount of light to grow and prosper. Plant labels identify the amount of sun a plant requires as full sun, part sun, part shade full shade, or dense shade:
Full sun – Plants need at least 6 hours of direct sun daily
Part sun – Plants thrive with between 3 and 6 hours of direct sun per day
Part shade – Plants require between 3 and 6 hours of sun per day, but need protection from intense mid-day sun
Full shade – Plants require less than 3 hours of direct sun per day
Dense shade – No direct sunlight and little indirect light reaches the ground.
A Closer Look at the Terms
Full Sun
Most prairie plants fall into this category of sunlight exposure. This light is bright, sunny for most of the day like in open areas and backyards. These spaces get at least six hours of direct sunlight and need to be planted with full sun plants. Their deep roots and natural adaptations for direct sunlight will help them thrive in this harsh environment. Silver or gray leaves, pubescent leaves, or leaf orientation are adaptations that help them prosper in these sunny areas.
There are other plants that appreciate some protection from the hottest part of the days, but they still need at least six hours of direct light. Keep in mind that full sun in the Smoky Mountains and full sun in Texas are different. So, think critically about your local site, because some experimentation may still be needed.
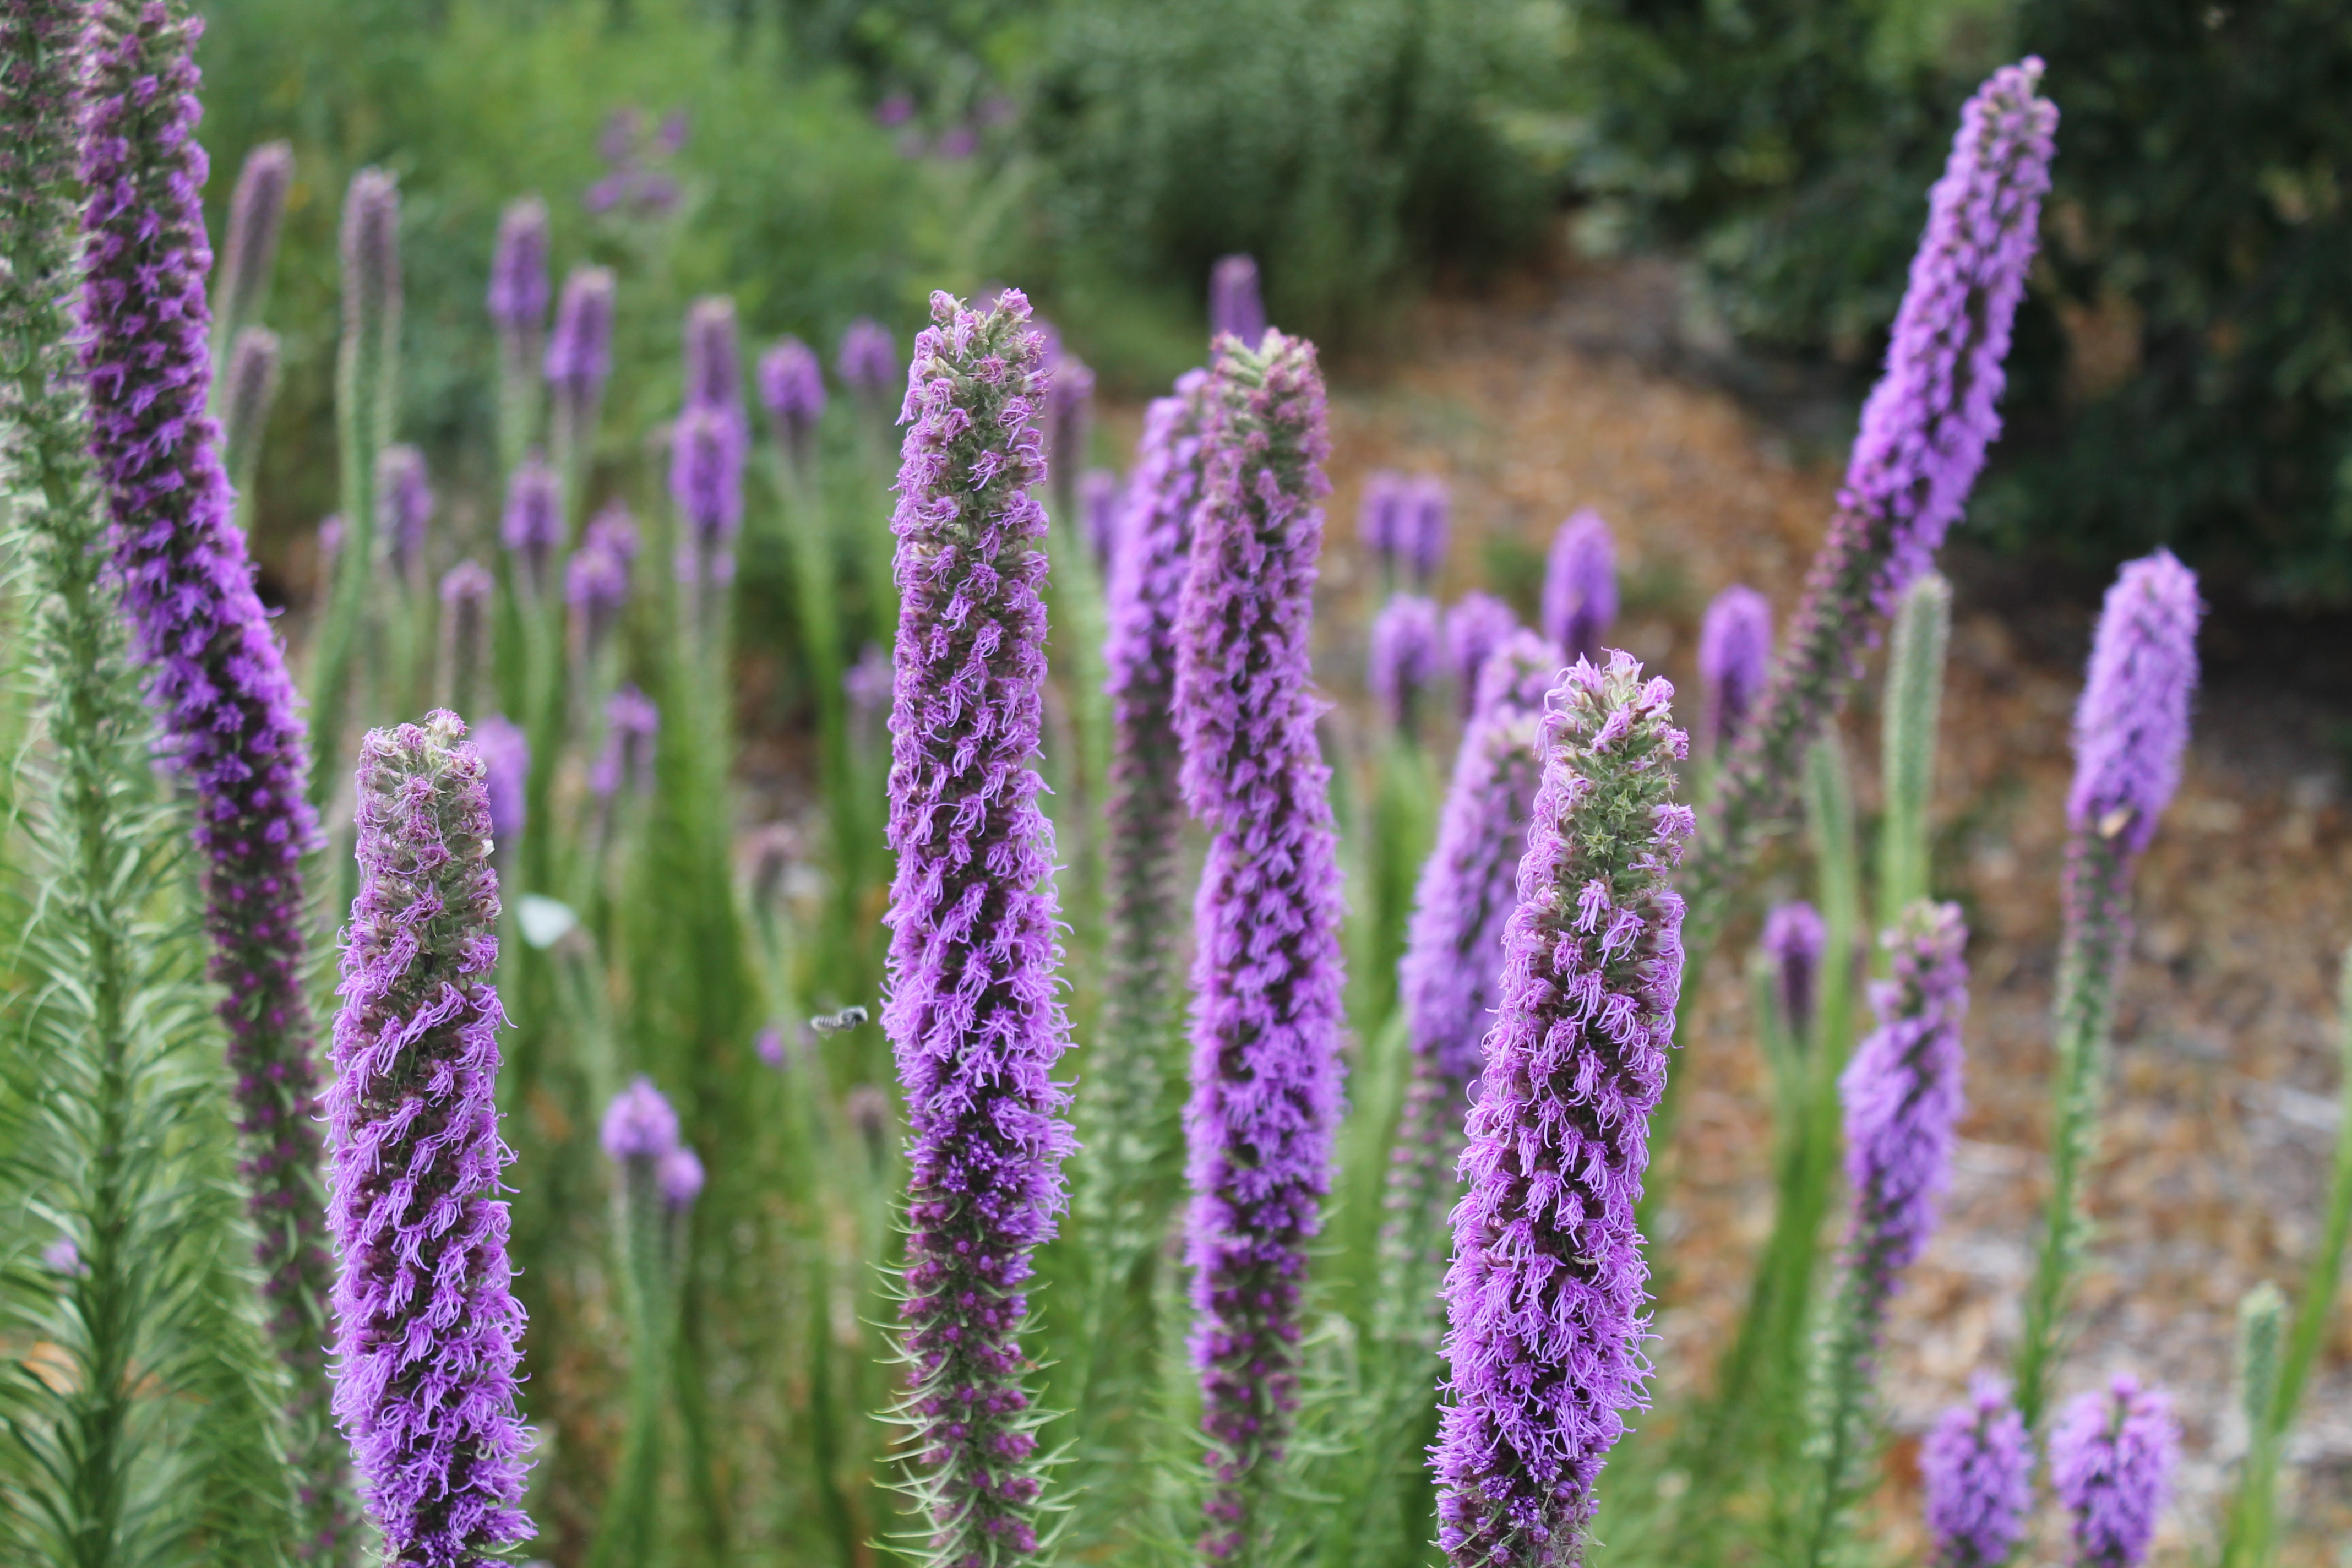
Kansas Gayfeather in full sun
Part Sun and Part Shade
When I think about part sun and part shade, savannah plants come to mind. They are tucked up close to the margins of the forest. They transition from prairie plants to woodland plants. Some will get sunlight for most of the day, but not often. It is not the hottest direct sun.
Part sun and part shade are very similar, but there are subtle differences. These two terms can be understood quite differently. Most plants requiring either part sun or part shade do well in filtered light for most of the day. In Kansas, a plant requiring part sun or part shade needs to be protected from the more intense afternoon sun. Give it morning sun to keep it happy.
Plants requiring part shade can be quite sensitive to too much direct sun, particularly in the afternoon, and will need shade during the hottest parts of the day.
Plants requiring part sun can usually tolerate more light and need a minimum amount of direct sun to thrive. These plants may bloom poorly if given too little sun.
For either group, providing a few hours of direct morning sun is a good choice.
Bumblebee on Echinacea purpurea-Purple coneflower appreciates partial sun conditions photo by Janelle Flory Schrock
Full Shade
Plants requiring full shade are the most challenging in Kansas. Essentially, we are trying to grow shade plants in a prairie environment with lots of sun and inconsistent moisture. Shaded areas typically stay dry and need supplemental moisture to grow full shade plants. Full shade plants require anything less than three hours of direct light such as morning sun and late evening sunlight. Protection from the hot midday sun is very important. Filtered light, such as that found beneath a tree canopy, is a good setting for full shade plants. This type of light is referred to as dappled shade and offers many gardening opportunities.
Native columbine thriving in the shade of an elm tree
Dense Shade
Dense shade may occur under a dense evergreen tree against a fence, or the north side of your house protected by a deck. These areas get little if any sunlight throughout the day. These problem areas are usually dark and can stay very wet or very dry. There is not much you can do under these conditions, but maybe a ground cover or decorative yard element would be a good choice. Plants need some light and you are fighting nature by trying to grow something without much light. Rather focus on the areas that do have some light to draw your eyes away from this area.
It is best to become familiar with sun exposure in your landscape by checking on light conditions throughout the day and over the course of a full growing season. Growing plants in Kansas can be a test of your will, so match plants up to your landscape based on light conditions in your landscape. I have found that if you get this requirement right, some of the other elements like soil, water and fertility will sort themselves out on their own.