Summer Garden Checklist

Kansas summers can discourage even the hardiest gardeners. However, taking time to manage your garden now will help your garden later. Here’s my Summer Garden Checklist for the Kansas gardener.

Control Warm Season Weeds

Summer brings with it a new set of weeds to control. Hot weather germinates summer annuals like crabgrass, foxtail. Nutsedge and other weeds invade your lawn and landscape as well. Manage weeds using nonchemical methods such as cultivation, hand weeding, or mowing; use toxic chemicals as a last resort. 

Mowing regularly and occasionally edging along sidewalks and walkways is needed to ensure your lawn is not overrun with weeds. In a landscaped bed, hand pull any of these weeds, especially if they have seed heads.  It is so important to not let these weeds go to seed. Stay vigilant even though the summer heat tries to squash your enthusiasm. A little extra effort now will make your garden better this fall and into next year. 
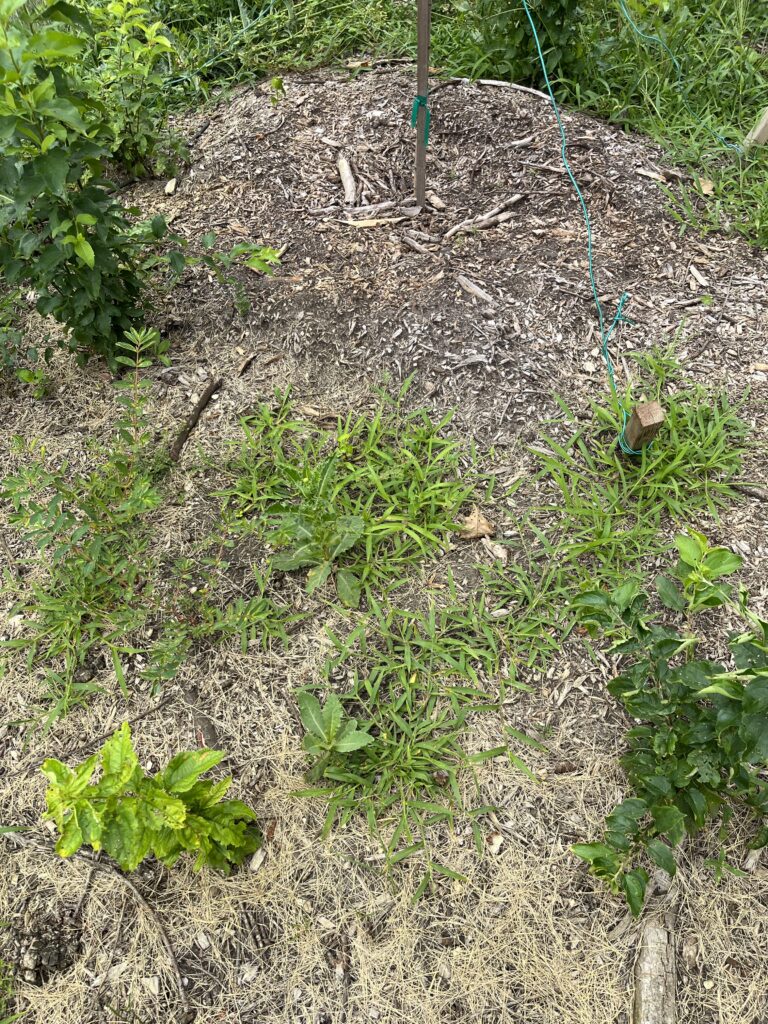
Crabgrass in tree mulch ring controlled with roundup: one treatment should clean up the mulched area and keep it weed free the rest of the season.

Be Water Wise

To reduce evaporation, water when temperatures are cooler and air is still, usually in the early morning. Water deeply to moisten the root zone, but infrequently. About an inch of water each week is a good rule of thumb!  If you have invested in container plants, they will need daily watering, as soil in pots can dry out quickly and damage plant roots on hot summer days.  Each of our gardens have indicator plants that show stress first, let these plants be your guide as when to water.  For new planting started this spring, water when the top one to two inches of soil is dry.  Remember it takes three to five years for sustaining roots systems to develop for most native plants.  Supplemental watering is necessary to encourage growth and root development in these young plants. 
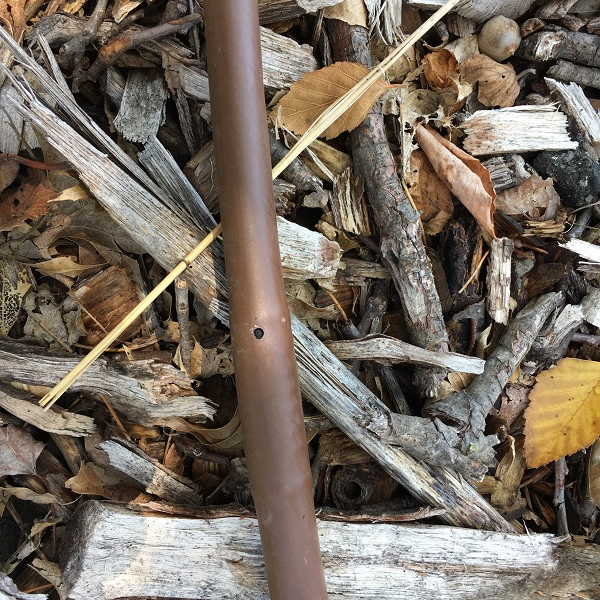
We use pressure compensating 1/2 inch soaker hoses to efficiently water trees, shrubs and a few flower beds. Each emitter puts out 1 gallon of water per hour.

Prepare for seeding

If you are wanting to establish native prairie plants from seed, now is a great time to prepare your area.  Mow your area short (1-2 inches). Control perennial weeds such as bindweed or Bermuda grass by carefully spraying the area with Roundup. It will take several applications to get these problematic weeds under control. If you can see soil, tillage is not necessary. If you can’t see soil, till lightly to expose some bare soil. Remember, each time you till, you bring up more weed seeds, so tread lightly. 

Measure your area and order a seed mixture that matches your site. A good seed mix ratio of wildflower to grass is 70% wildflowers to 30% grasses. Grasses tend to dominate over time, so this ratio will give the wildflowers a good start. We typically spread seed in November and December after the soil temperature has dropped enough to discourage germination. The natural freeze/thaw of the ground will work the seeds down into the soil to the proper depth for germination next spring. 
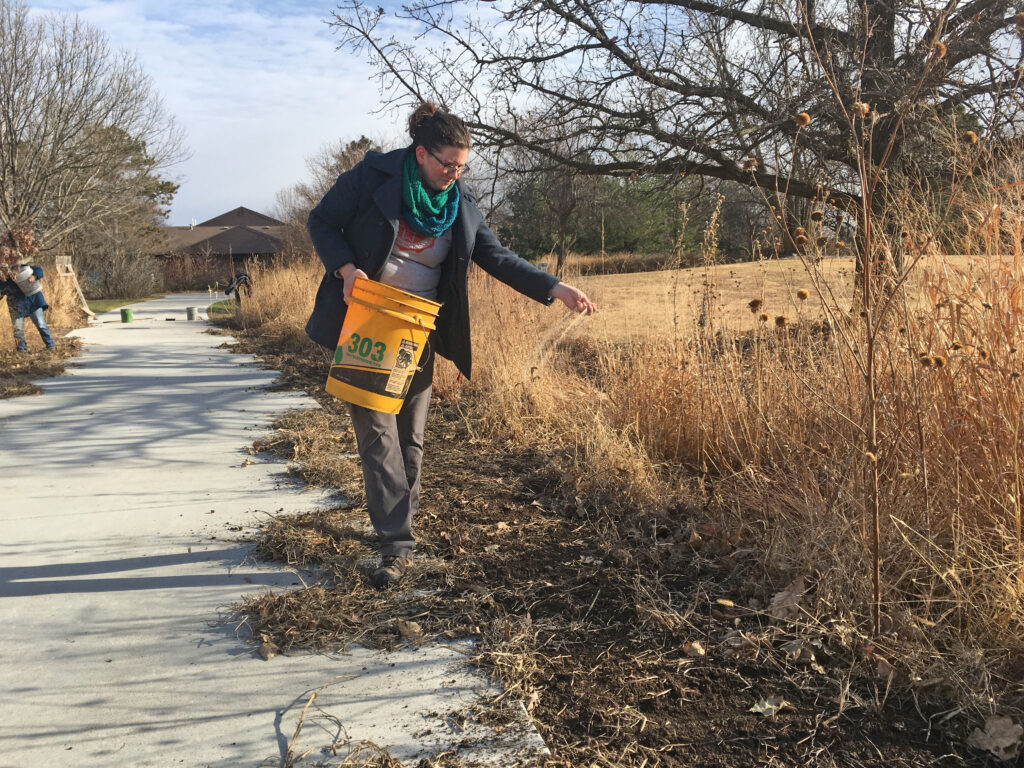
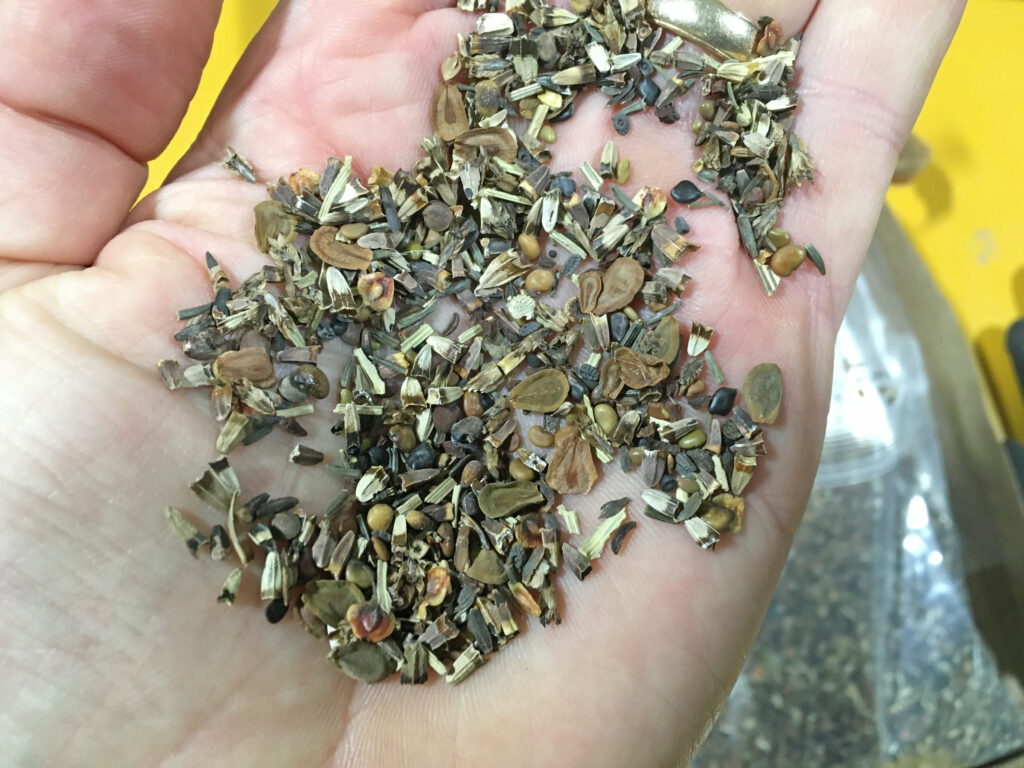
This is the seed mix we established along our newly renovated path.
Sidewalk edge planting: We mixed some sand with the seed mix to make it easier to distribute. We then let the natural freeze/thaw of the soil plant the seed for us through the winter. Germination occurred the following spring when soil temperatures rose above 60 degrees.

Trim

Now is a great time to trim back perennials that have become unruly. Perennial and grasses that are encroaching sidewalks, paths, and structures can be sheared back to size. If this is a problem every year, you may consider moving the taller plants to another spot. Plants can be divided next February or March before they start to actively grow. 

Low hanging branches from trees can also be pruned. It is getting late in the season to do much pruning on shrubs. New growth may not have enough time to get hardened off before cooler/colder weather.  If a branch or shoot is in the way, then prune it, but prune sooner rather than later. If you can wait until the shrub goes dormant this fall, then wait. 

As a general rule, early spring flowering shrubs such as forsythia, lilac and spirea should be pruned right after they are done blooming since they bloom on the previous year’s growth. Pruning right after blooming will allow the shrub to grow and develop a new set of buds for the next spring. 

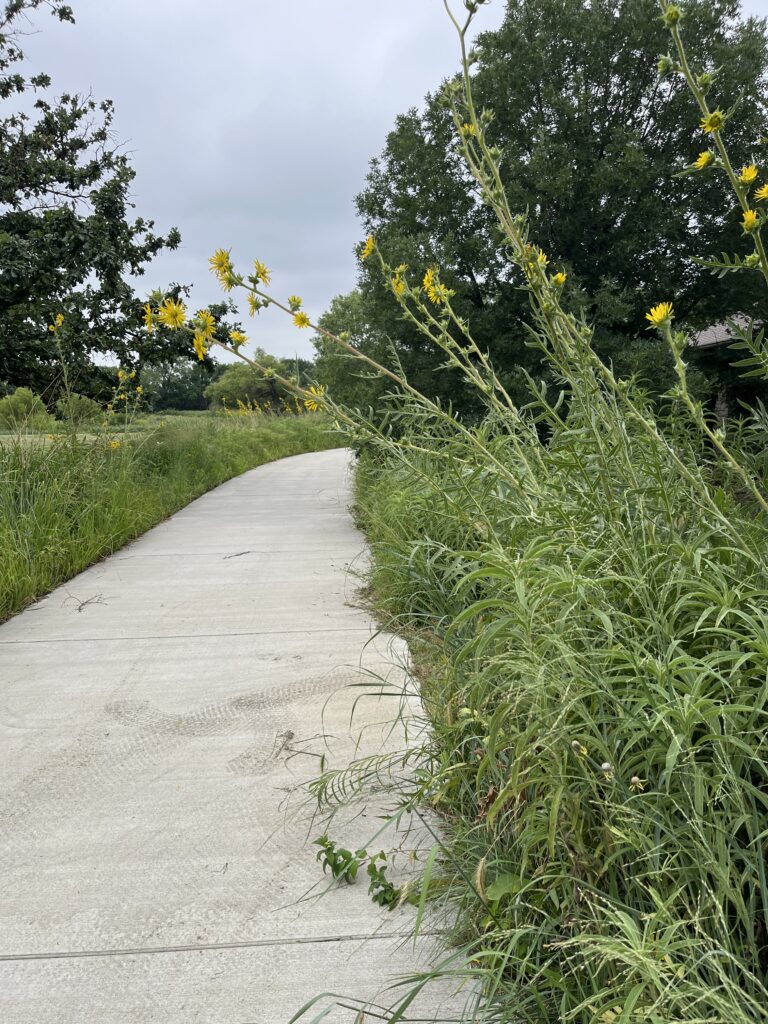
A large compass plant that needs to be trimmed away from the path.

Finally, remember “WHY” you are gardening; creating habitat, conserving water, aesthetics, attracting pollinators, attracting birds and other wildlife or curb appeal. Let your “WHY” reinvigorate you to take care of a few extra tasks that will give your landscape a boost. Don’t sweat the small stuff and don’t forget to step back to enjoy what you are trying to create. If it is all work and no enjoyment, then what is the point.

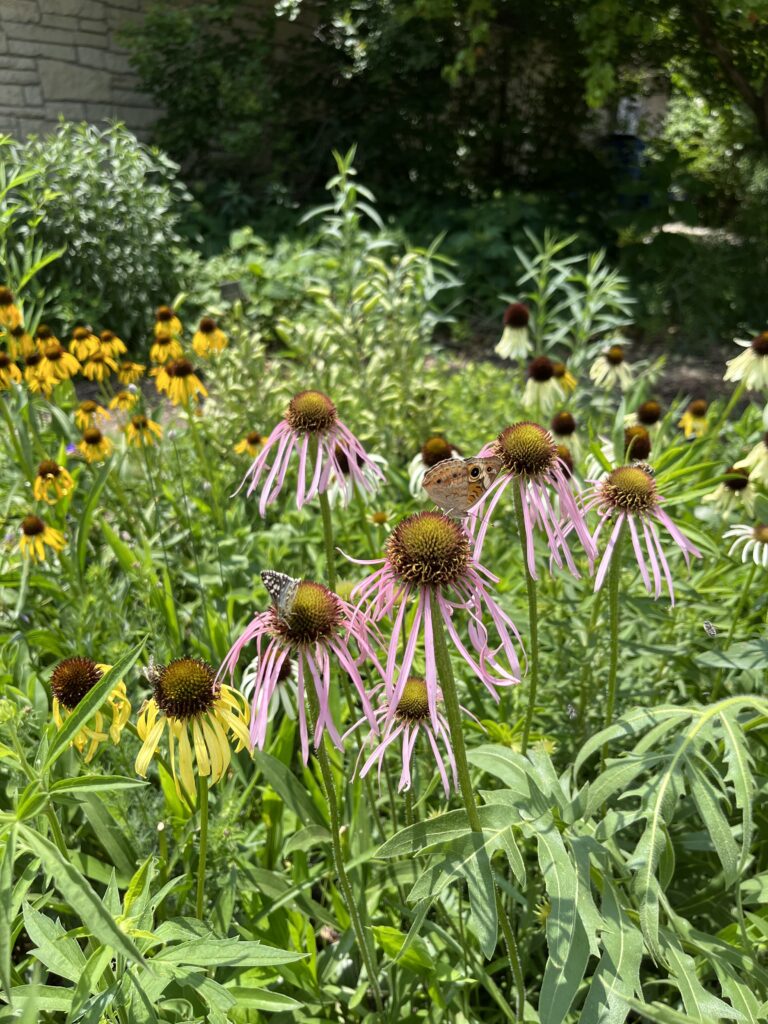
Pale purple coneflower with a common buckeye butterfly. Fun to watch!

Butterfly weed: Fun Facts

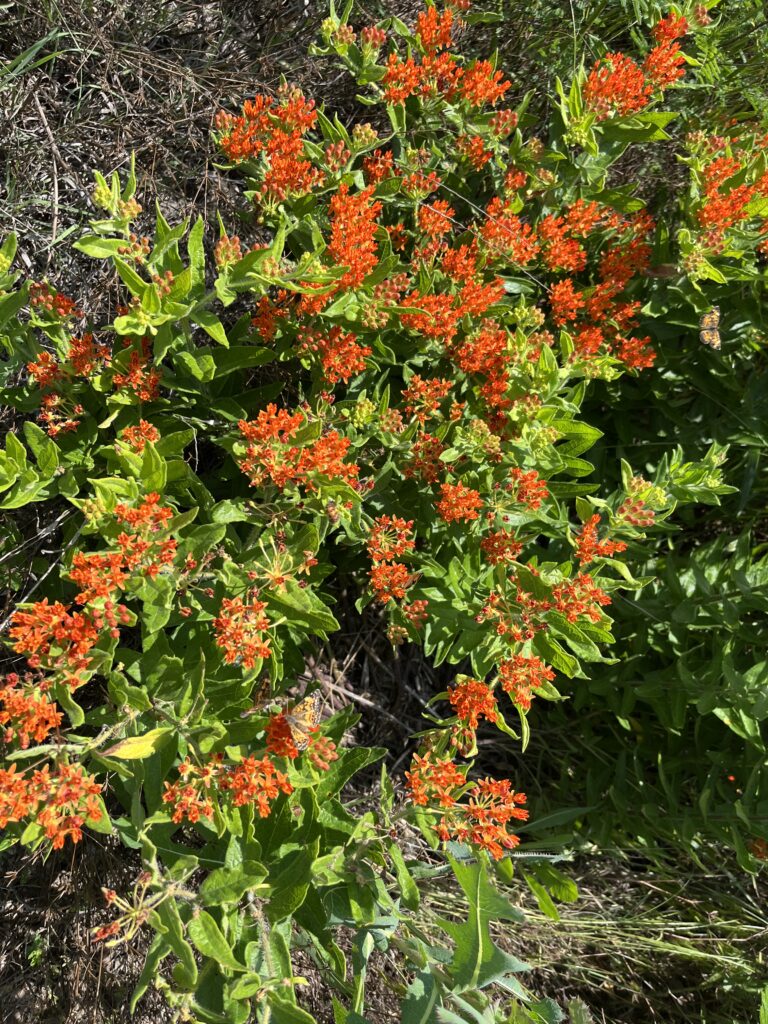
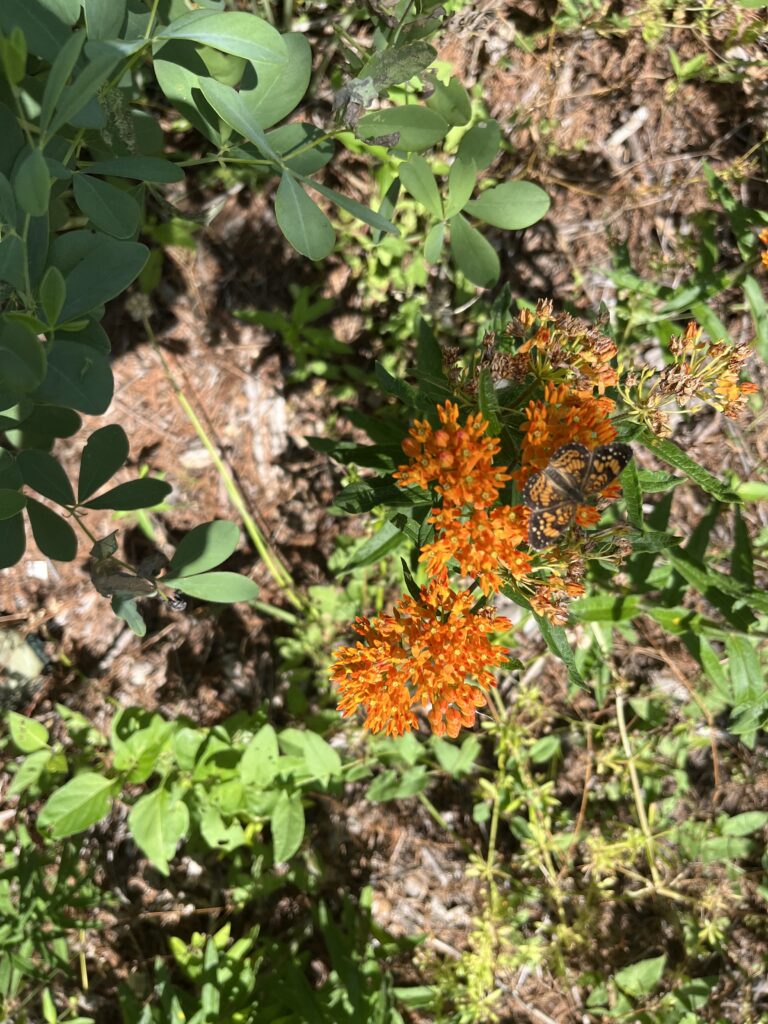
One of the most iconic prairie wildflowers is Asclepias tuberosa, commonly referred to as butterfly weed or butterfly milkweed.  From May to July, its bright orange flowers dot the prairie landscape. These attractive flowers are a magnet for many different pollinators, including the monarch butterfly.

Butterfly weed can be found in dry fields, meadows, prairies, open woodlands, canyons and on hillsides. It grows on loamy and sandy, well-drained soils, in areas that provide plenty of sun. It is consistently the most sought after prairie wildflower for a garden and the flowers work well in bouquets.

Darker orange blooms with red pigment in the flower

Butterfly weed (Asclepias tuberosa): Did You Know…?

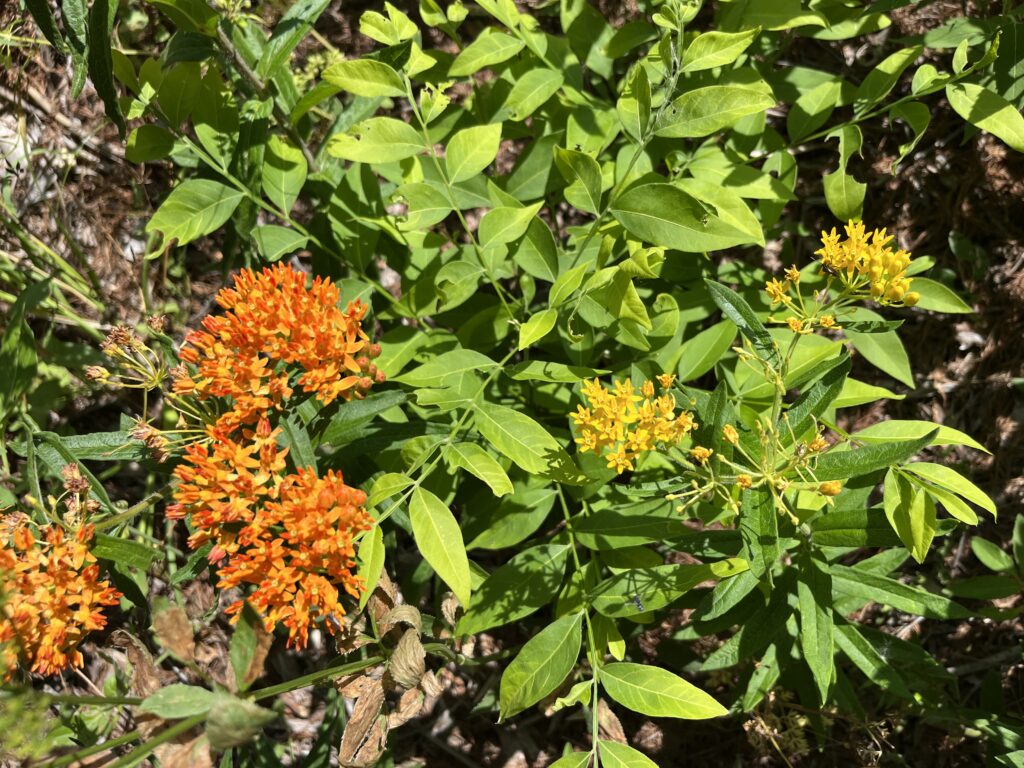
  • The flower color in Asclepias tuberosa ranges from deep red-orange to a rich yellow, depending on the amount of red pigment which is superimposed over the yellow carotenoid background pigments. The flower color has nothing to do with the soil type.
  • This species can be found in the eastern two-thirds of the state of Kansas.
  • Butterfly weed is also known as “butterfly milkweed”, even though it produces translucent (instead of milky) sap.
  • The scientific name Asclepias comes from Asklepios, the Greek god of medicine. tuberosa refers to thick tuberous roots which make it very difficult to transplant from the wild.  Please don’t dig mature plants from the prairie. 
  • Root of butterfly weed was used in treatment of pleurisy, bronchitis and other pulmonary disorders in the past. Don’t try this at home. 
  • Butterfly weed can be also used in treatment of diarrhea, snow blindness, snakebites, sore throat, colic and to stimulate production of milk in breastfeeding women. Again, don’t try this at home. 
  • The small individual flowers consist of 5 petals. Each milkweed blossom is equipped with a trap door, called a stigmatic slit. When insects land on their pendulous flowers, they must cling to the petals as they feed on nectar. As they forage on the flower for nectar, their foot slips into the stigmatic slit and comes in contact with a sticky ball of pollen, called a pollinium. When the insect pulls its foot out of the trap door, it brings the pollinium with it. Eventually, the insect will move on to the next flower. Should that same foot slip back into another milkweed flower’s stigmatic slit, the pollen can be transferred and pollination is completed.  This process is quite amazing to watch. 
  • Typically, it takes three years for a butterfly weed to start producing flowers.
  • The long narrow fruit pods develop later in summer. These hairy green pods ripen and ultimately turn a tannish-brown in the fall. Each pod contains hundreds of seed equipped with silky, white tufts of hair. As the pod dries and splits in the fall, the seeds are carried away by the breeze. Those white tufts of hair act as tiny parachute-like structures that disperse the seeds. 
  • As with other milkweeds, butterfly weed will attract aphids; you can leave them for ladybugs to eat or spray the insects and foliage with soapy water.
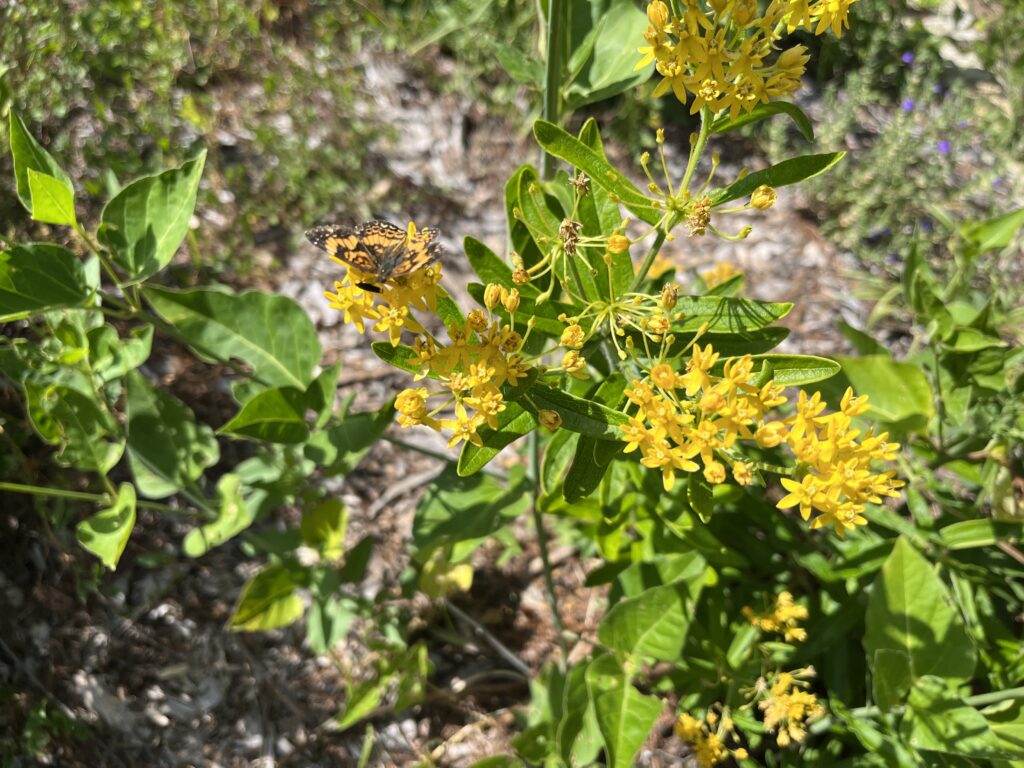
Gorgone Checkerspot

Butterfly weed is a garden worthy wildflower. It doesn’t spread aggressively like other milkweeds, but rather stays as a nice upright clump. Its many ornamental and functional assets, plus its rugged character will make it a focal point in the summer garden for years to come. You will be rewarded as pollinators seek out the beautiful iconic flowers of this native wildflower. Give it a try!

Orange and yellow butterfly weed blooming in the same flower bed
“Hello Yellow” butterfly weed

Do You Have Nutsedge?

This time of year, yellow nutsedge (Cyperus esculentus) and purple nutsedge (Cyperus rotundus) become problematic in the landscape. These problem weeds have triangular grass-like leaves and form colonies if left unchecked. It is not a grass, but rather a sedge. The key identifying feature is the triangular stem in cross section, as opposed to a round cross section in grasses. 

In Lawns

Nutsedge is a common weed in lawns with waterlogged soil, and its presence often indicates that drainage is poor, irrigation is too frequent, or sprinklers are leaky. Once established, however, it will tolerate normal irrigation conditions or drought.  Established nutsedge plants grow faster than many lawn grasses, so it is often noticed when it outgrows the surrounding grass. The leaves are bright green and have a waxy appearance in summer when surrounding lawn grass may be a lighter green.

Management in Lawns

As with most weeds in lawns, the best defense is to maintain a healthy, dense turf that can compete and prevent weed establishment.  Water lawns on an as-needed basis, not on a regular schedule. Overwatering increases disease and provides a better environment for nutsedge to grow. 
For larger infestations in lawns, spot spray with a liquid, selective herbicide that contains the active ingredient: Common Name: Halosulfuron; Trade Name: Manage, or Sedgehammer and others or Common Name: Sulfentrazone.  Mixing these herbicides with a non-ionic surfactant that breaks down the waxy leaf coating to the chemical is more effective. 

In Mulch

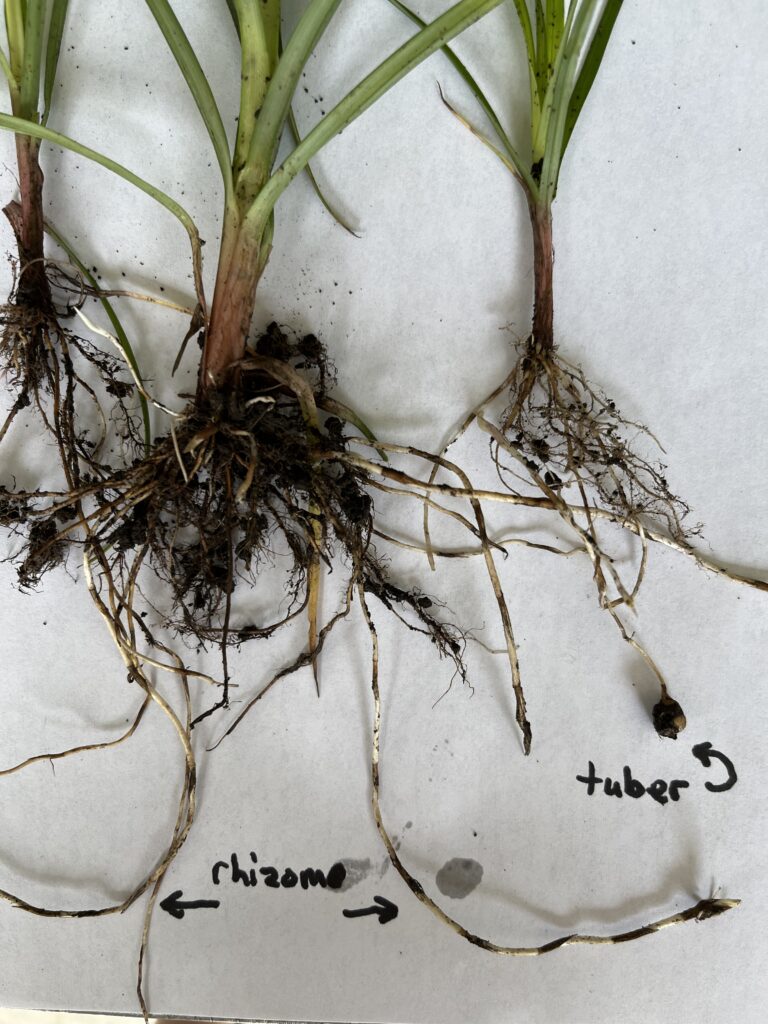
Nutsedges thrive in areas with little or no competition.  In mulch rings around trees and between flowers offer ideal conditions for large colonies to form. Actively growing stands of nutsedge have extensive root systems that can reach as deep as four feet. Nutsedges produce underground tubers and runners that make it difficult to pull out of the ground. Each of these can produce another plant if not completely removed.
Mechanical management

Digging out or using an appropriate weeding tool to remove the underground ‘nutlets’ is the primary means of mechanical control of nutsedge. This is a viable option at the beginning of an infestation and on young weeds.  If you want to avoid spraying chemicals for control of nutsedge, you need to relentlessly pull the plants every time a new plant emerges.  It is most active in May through October.  We have also smothered nutsedge with cardboard and two to four inches of mulch. Nutsedge may emerge again next year after the cardboard has decomposed.


Spraying

We have had success spraying nutsedge.  We use Manage™ (Sledgehammer) herbicide. It is a selective herbicide that only kills nutsedge and can be sprayed in close proximity to other perennials, shrubs and trees. It takes a few weeks for the plants to show decline, but Manage™ kills the whole plant including the runners and tubers. I have used Roundup as a control, but it is a non-selective contact herbicide that kills the weeds it contacts.   

Nutsedges are often unwelcome competition for our more desirable plants. These “weeds” can be controlled by a healthy, actively growing landscape. Competition and vigorous plantings will push these plants aside. If you do find it in your landscape, remove it immediately. If you have larger areas, be persistent, over time, you will get the upper hand.  Be as unrelenting as the weeds.  As they say on the Red Green Show, “We are all in this together. I am pulling for you.”

Seven Lessons I Have Learned About Native Plants

Over the 26 years that I have been at the Arboretum, I have made my share of mistakes. Some examples include planting prairie dock in a formal garden design, starting a garden too fast, and/or not knowing my site.  I had book knowledge about horticulture, but I had not learned much about native plants.  Through trial and error – mostly error – I learned some hard lessons and even killed a few plants along the way.  I am still learning, but here are seven lessons I believe are essential for a successful prairie garden.

1. Perennial and annual weed control

I have made this mistake too often. In a rush to plant, I don’t get problem weeds like bindweed and Bermudagrass under control before planting.  I am still fighting this issue to this day in some of these landscape settings. However, when I take the time to properly eradicate these weeds, the overall long-term success of the garden increases and the work to maintain it decreases. A little work at the beginning will save you many headaches down the road.

Bindweed

2. Plants should match your site.

This is the most important principle to follow in developing a successful landscape. Take a critical look at the area you want to landscape with native plants. Is it sunny?  It is shaded for part of the day? What type of soil do you have? Is there a microclimate? Is it exposed to wind? All these factors will guide you as you select plants for your site. This step requires some research and time as you familiarize yourself with the qualities and environmental needs of native plants.

Spiderwort (purple), coreopsis (yellow) and penstemon (white) in spring bloom

3. Succession of Bloom

There are no Wave Petunias in the prairie. If you visit a prairie landscape like the Konza Prairie every two to three weeks throughout the year, you will observe plants beginning to bloom, in full bloom or going out of bloom.  That is how you need to design your native landscape. Include plants that bloom in every season of the year and then strategically add grasses for movement and texture in the winter months. Take time to acquaint yourself with the life cycles of wildflowers and grasses.

4. Plan your garden for all seasons of the year

This lesson took the longest to learn, because it meant becoming familiar with the complete life cycle of each native plant. I needed to learn all about them – their bloom times, soil conditions they need to thrive, mature height and what they look like when not blooming, including seedheads and forms. Most of these characteristics had to be experienced over several years.  That information is vital to planning and developing a prairie garden.

5. Be Patient

A prairie garden does not magically appear overnight. I know this goes counter to our “instant everything” culture, but prairie plants don’t work that way. It takes time for those transplants or seedlings to develop root systems that will sustain them during the dry periods of the year. I remember visiting a prairie reconstruction in Wisconsin several years ago. It had been established from seed 20 years earlier and the prairie manager said it was just then really maturing into a true prairie. I have found that if you are patient, you will be rewarded by beautiful, strong and adapted native plants.

Graphic from Grow Native!

6. Start Small

Planting too much too soon – I have made this mistake many times. My eyes get bigger than I can manage. I like too many of these native plants and rather than working at a project in stages, I plant the whole area. I then spend the rest of the summer maintaining a planting that is too big for the time I can give it. It has a tendency to get out of hand in a hurry if I don’t keep up with it on at least a weekly basis. Plant an area that you can handle with your schedule.

7. Remember Why!

Most times we create something for our own enjoyment. A properly designed native garden can be very attractive to you aesthetically. What we often forget, but are quickly reminded of, is that native plants attract many different pollinators and other wildlife to our landscapes. If you plant them they will come.

Pollinators and wildflowers have a symbiotic relationship. Pollinators seek out the wildflowers they need and utilize them throughout the year. Monarch populations are declining. They need milkweed, and since we have milkweed in the Arboretum, they show up. Also, just like the monarchs, songbird populations are declining. They need prairie habitat for survival along with wildflower seeds to feed overwintering birds.

Obviously I have not figured everything out. Learn from my mistakes and maybe a few of your own. Gardening is not an exact science. What works for you may not work for me. Your site may be totally different from mine. The key is to keep learning. Try plants you believe will work in your landscape.

Besides learning lessons the hard way remember to connect with your WHY! The “WHY we do something” gets lost in the tasks of creating something new. I need to be reminded “WHY” from time to time to reset my focus. We each have our own unique perspective and motivation, but reconnecting with your “WHY” will move you ever closer to your native plant gardening goals.

Tree loss at the Arboretum

One of the hardships of being a gardener is the loss of a long established tree. It is no different here at the Arboretum. We have lost a few trees that were planted at the founding of the Arboretum. The loss of these large specimen trees leave a huge hole in the landscape that will take another few decades to fill.

Austrian Pines

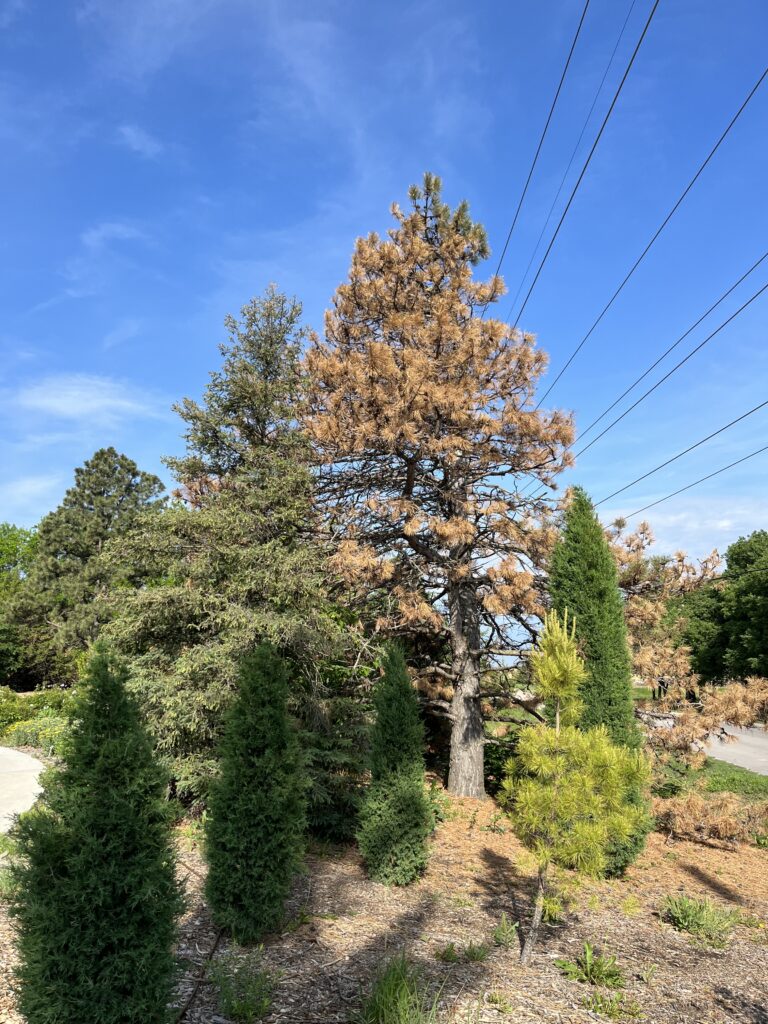
We continue to lose a few pine trees each year. All of our Scotch pines are gone due to pine wilt. We are now losing larger ponderosa and Austrian pines. We have a tree that is over 40 years old that was green last fall but is now totally brown, dead in less than six months. This could be due to a number of factors such as drought (although we watered it last summer into the fall), or some sort of tip blight. We believe this browning is blight. We are removing these trees as they die, which is heartbreaking.

Austrian Pine turning brown from the bottom to the top

Southwestern White Pine

This was one of the evergreen trees I recommended to plant a few years ago. It is no longer a viable alternative to some of the other two and three needle pines that have been lost to disease. We have lost a row of these due to pine wilt. Pine wilt causes a rapid decline of a pine tree in just a few months. The infected trees must be removed and burned to stop the spread.

River birch

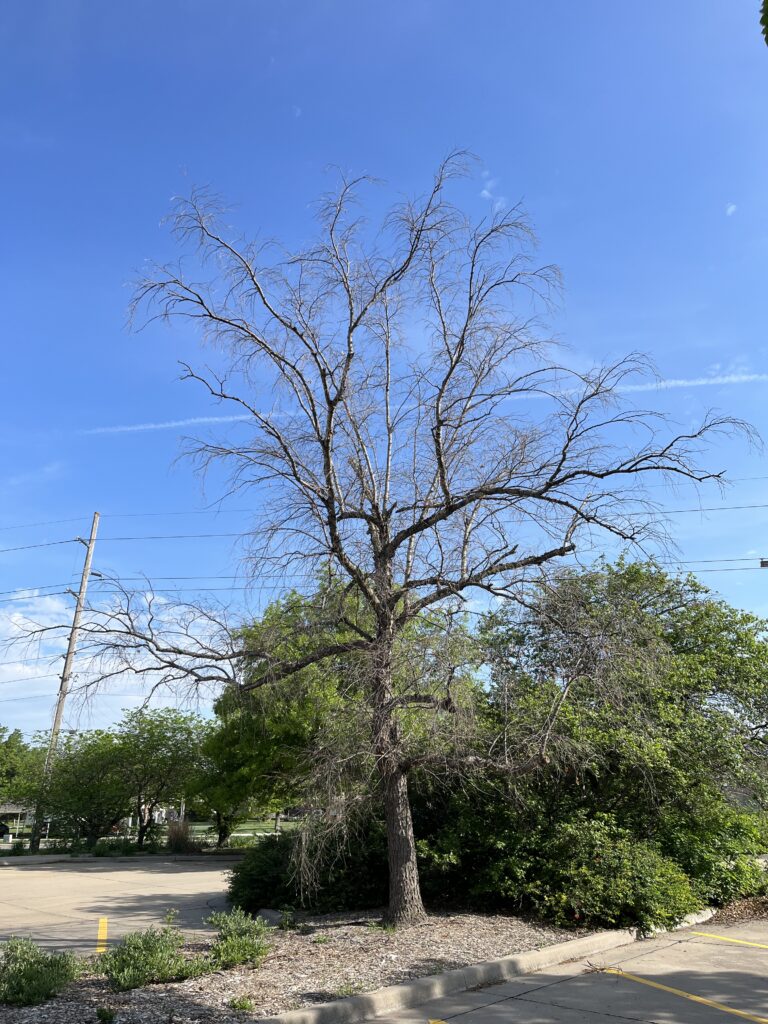
In our parking lot median, we have slowly been losing an original row of river birch. Admittedly, this was not the ideal location for river birch. We were watering these trees almost weekly in the summer since they are not very drought tolerant and have shallow roots, which leaves them stressed in the heat sink of the parking lot. I see this same river birch scenario in other landscapes with river birch planted front yards and drier areas. Often times, these trees are struggling just as ours were unless they are receiving frequent irrigation through the summer. As their name implies, they grow best in wetter areas along streams, swales and ponds. We are replacing our river birch with a variety of deeper rooted trees such as oaks.

River Birch in parking lot median

Autumn Purple Ash

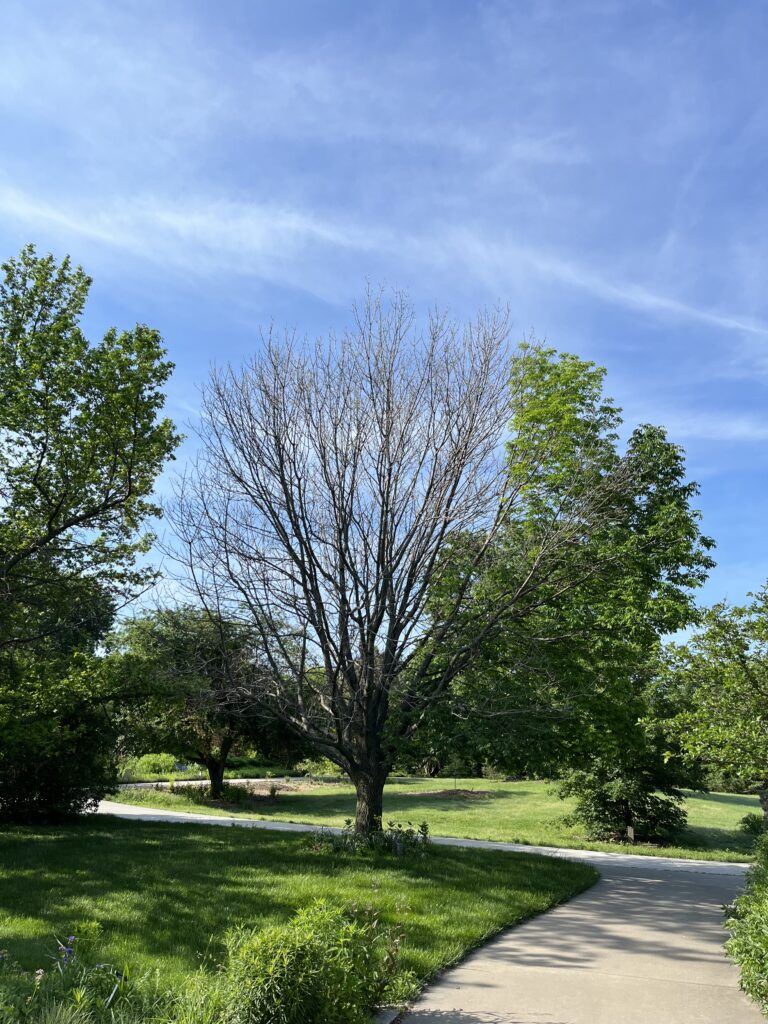
What a big surprise this spring when this large white ash didn’t leaf out. One side has leaves, but the other side is completely bare. It has been infested with borers with have damaged the trunk, branches and stems. It showed no signs of disease last year. Even if I had seen and diagnosed the problem last fall, the treatment would not have been very effective. The result would have been the same. We are holding out hope that it will miraculously leaf out yet this spring. If not, it will need to be removed.

Autumn purple ash struggling to leaf out

Pin Oak

It is well known that pin oaks suffer from iron chlorosis, which causes a yellowing of the leaves. Chlorosis in pin oaks is usually due to a deficiency of iron in the leaves. Iron is important for chlorophyll synthesis in plants, so when it is deficient, leaves cannot make chlorophyll, resulting in a yellow appearance. Chlorosis of pin oaks is typically associated with alkaline soil pH – pH greater than 7, which is common in our area. This iron deficiency eventually weakens the tree and stunts its growth. Trees can be treated by injecting iron into the trees or trying to change the pH of the soil. However, it is better to not plant these trees in our area. We are removing these trees and replacing them with varieties that don’t suffer from iron chlorosis.

Chlorotic Pin Oak that will eventually need to be replaced.

Bottom Line

Having trees in Kansas is a luxury, especially large long-lived trees that provide wonderful shade. Kansas weather – with its extremes-wet, dry, hot, cold, and wind – are all challenges for trees. The other thing to keep in mind is that our area was originally prairie. Prairie is what grew best here, with trees relegated to creek bottoms and wetter areas. So growing trees here will always be demanding and ambitious. Even if we do everything right regarding trees in the landscape, there is no guarantee that a tree will grow and thrive.

We will continue replacing and planting trees here at the Arboretum. I believe a diverse selection of trees – different from the trees we have lost – is the answer. We will continue to lose trees, because they are living organisms susceptible to all sorts of diseases and problems. But keep planting, folks!

Recommended trees and shrubs from Kansas Forest Service

Echinacea Hybrids

I read an interesting article about Echinacea (coneflowers) the other day. It highlighted the highs and lows of the newfangled coneflower cultivars over the last decade or so. You know – the ones in oranges, reds, yellows and every shade in between. It seems that many coneflower breeders are doing some soul searching and they are coming full circle, back to producing hardier varieties of our wonderful native prairie wildflowers. 

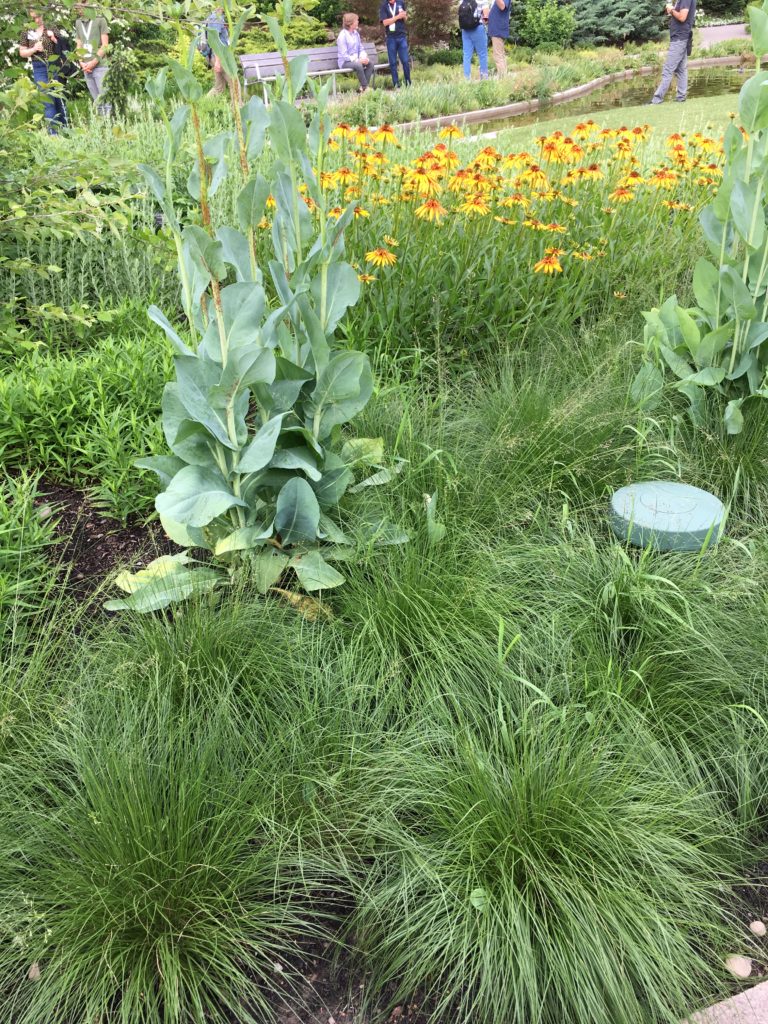
Yellow coneflowers with Rudbeckia maxima and prairie dropseed

The Problems   

One of the biggest criticisms of these bright colored coneflower hybrids has always been their (lack of) persistence in the landscape. If you were lucky, you could get one or two years out of them before they disappeared.  Maybe one survived, but often you couldn’t find that variety anymore, because it had been replaced with another new form.  You would have to go back and start over again with another new coneflower. 

These coneflowers had other problems too. Winter kill, color fading and short bloom times soured gardeners toward coneflowers. They were not as reliable or persistent as their parents from the prairie. 

‘Julia’ is a hybrid coneflower sporting vibrant orange flowers on strong stems. Photo courtesy of Walter’s Gardens.

Problem solving

I can still remember offering those first forms such as Orange Meadowbrite and Razzmatazz. These diverged from the adapted forms of Magnus, Ruby Star, White Swan and Kim’s Knee High in dramatic fashion. We no longer only had pink and white coneflowers, but a warm rainbow of colors available on the market. Everyone wanted to try some in their yards. 

The problems quickly became evident and the novelty wore off. The coneflower fad stalled. Breeders began to look at coneflowers from a “whole plant” approach. A “good” coneflower was no longer identified by its unique color, but by the extended bloom times, heavy flower count, longer life span, and vibrant colors that don’t fade. Winter survival and multiple growing points were a focus as well. 

Most of these colorful coneflowers are produced through tissue culture production. However, some seed forms with reliable color, such as Cheyenne Spirit and the Pow Wow series have become a cost effective alternative to tissue culture forms of coneflowers. These seeded forms are consistent, vibrant, and affordable.

Going Forward

The trend for new coneflowers forms and colors shows no sign of slowing.  Innovation drives sales and new styles are always on the horizon.  One of my recommendations is to always start with the true natives first.  Pale purple coneflower (Echinacea pallida), narrowleaf coneflower (E. angustifolia), yellow purple coneflower (E. paradoxa) and purple coneflower (E.purpruea) are adapted to our climate.  They are always a good bet in the landscape.  Remember, the pollinators prefer these forms too. 

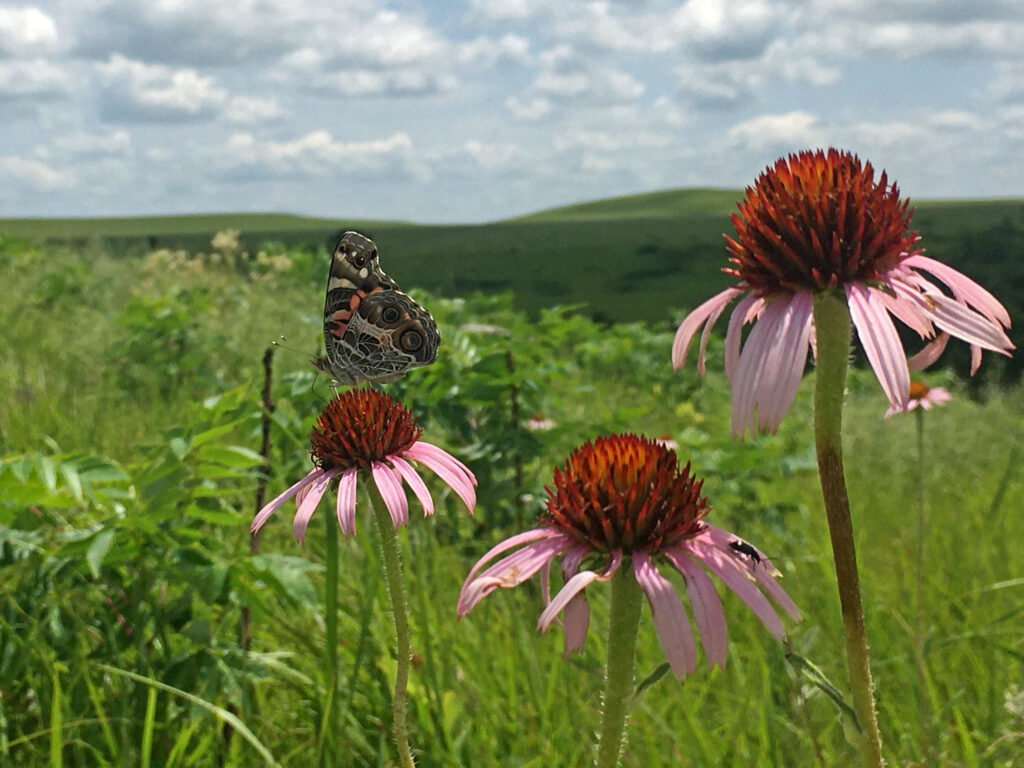
American lady butterfly on Echinacea angustifolia at Chase State Fishing Lake, near Cottonwood Falls, KS (Photo Credit: Brad Guhr)
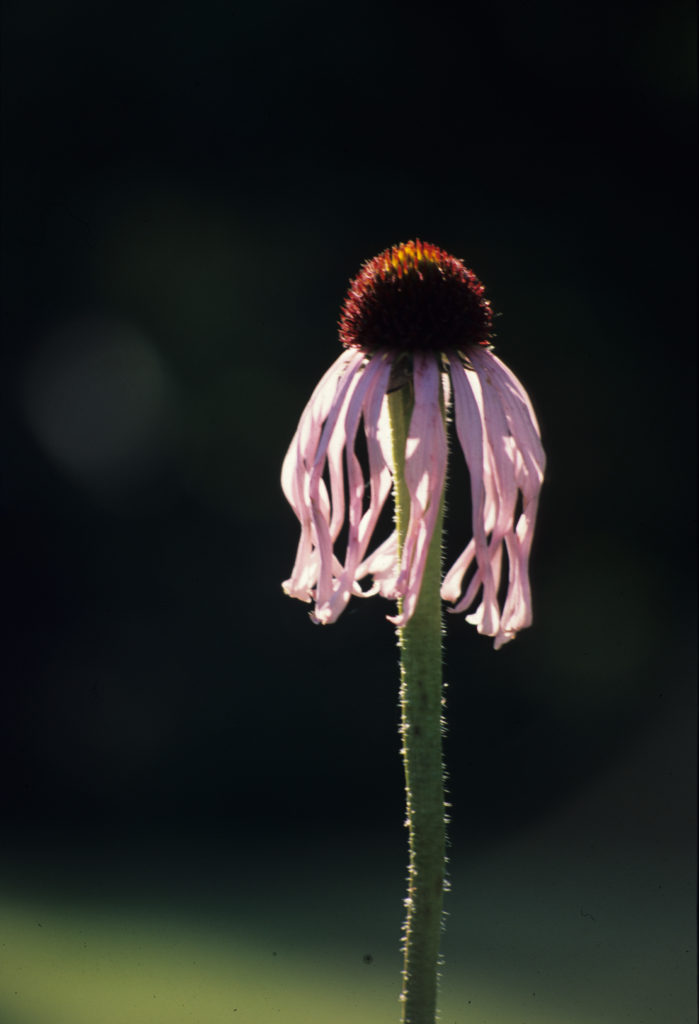
Our native Echinacea pallida always has thin, reflexed petals and a pale purple hue.

We have been tinkering with coneflowers for a long time and that will continue. The simple prairie coneflowers that we have moved into our landscapes often don’t look the same. I believe these changes come with a price. Sure you get uncommon colors, but it is obviously not the same prairie plant. Do pollinators recognize them? 

If you want to try some of these new colors, choose wisely after doing some research.  One of the best new coneflowers, according to the Mt. Cuba coneflower trials, is Sensation Pink.

(Photo Credit: Brad Guhr)
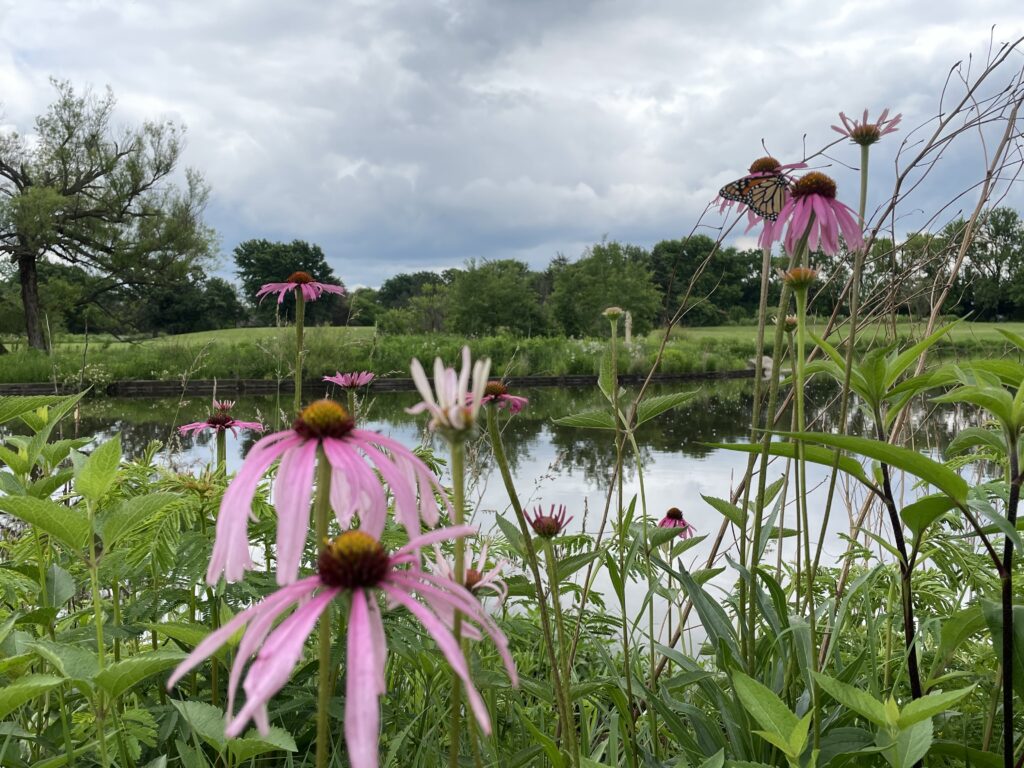
Echinacea blooming along pond at Dyck Arboretum (Photo Credit: Brad Guhr)

Preparing to Establish a Landscape with Native Plants

It’s obvious to me that interest in landscaping with native plants continues to expand.  More and more people are reconnecting with the natural world through their native landscapes.  Besides creating habitat for wildlife, including pollinators and insects, these newly developed gardens conserve water, reduce chemical and pesticide use and beautify the landscape.  As you think about preparing to establish a landscape with native plants, here are some things to consider.

Analyze the Location

You know your garden better than anyone. You know the soil type. Does it stay wet or is it extremely dry or something in between? You know how much sun your area receives during the day and throughout the year. You know where the water flows. Are there areas that you can utilize as a background or backdrop?  Is there something you are trying to screen? Is there an area you are trying to develop? These are important questions that ultimately determine the types of plants you will choose.

Prepare the Site

Site preparation doesn’t have much to do with plant selection, but it is an important step to consider any time you are preparing to establish a landscape. You need to get perennial weeds such as bindweed and Bermuda grass eradicated before you plant your garden. If these weeds are not eliminated, they will overrun and out compete anything you plant. Trust me on this. I am still fighting these weeds in certain areas in my yard because I didn’t complete this step.

It is also good to define the area with some kind of border. Start by laying out a garden hose and moving it around until you settle on size and shape that seems appropriate for the space. I recommend starting small. Develop an area you can manage and fits your lifestyle. You can always expand, but a bed that is too large can quickly become overwhelming. Once you have defined the border, I use metal edging, brick, limestone or landscape stone as a buffer for a mower or weed eater. Edging makes your native garden look intentional.

Choose the Plants

Once you have gathered all this information about your site and all the initial work has been done, you are ready to decide which plants will grow well together. The most important step in the selection process is matching plants to the site. There are a group of plants or a plant palette that will grow in your site with little or no water once fully established. You need to become familiar with every aspect of the plants through investigation, research and experience. I often start with one or two plants I know will grow in this location. Once I have established them as the foundation, the other plant combinations come easier.

I design each landscape with the finished picture in mind. I consider heights, bloom time, habit, forms and textures. We often only think about these plants when they are in bloom. But don’t forget their other qualities, such as seed heads that provide visual interest in the winter months. It provides you an opportunity to highlight these qualities with another perennials or native grasses (e.g. coneflower seed heads against little bluestem). 

I group plants together for visual affect and stagger blooms throughout the season. Conceptually, I lay out plants in such a way that plants with different bloom times are next to one another. For instance, I would not plant two spring bloomers next to one another, but rather a spring bloomer next to a fall bloomer next to a summer bloomer. I even like to mix some grasses with certain perennials so you have the structure of the grasses propping up the perennial. Also, you want something coming into bloom and going out of bloom from spring through fall. Grasses add wonderful texture and movement to the garden during the winter months.

Maintenance

One of the misconceptions about native plants is that you just plant it and forget it. That is generally not the case. Establishing native plants in your garden or landscape usually requires putting extra work in those first few years. It takes time for those root systems to fully develop. Over time, you will begin to reap the benefits of native plants, especially if you have done your homework before you put the first plant in the ground.

Those tiny plants are most vulnerable during the first two or three weeks after planting. You must water them daily and sometimes twice a day in warm, dry seasons until you start to see some new growth. There is a fine line between over watering and under watering. Generally, you try to rehydrate the potting soil of those plants each time you water. Many maintenance practices used for traditional cultivated plants also work for native plants.

The first couple of years, I try to keep the tags around the plants so I don’t accidentally pull a small wildflower or grass. Pull all the winter and summer annual weeds when they are small and certainly don’t let them go to seed. February or March is the time to prepare your bed for spring. 

Northwind Switchgrass cut back and ready for spring

Your native landscape connects you to the land. The economical, ecological and beautiful garden you create can be enjoyed for years to come. I predict that your native landscape will be a hub of pollinator and butterfly activity. It will be an important link to other gardens in your neighborhood. It may even inspire you to establish other prairie gardens in your landscape. 

Your success may influence others to follow your example. A native plant garden should be cherished, because you are helping the natural world in so many far-reaching ways. Believe it or not, your garden will have a positive impact. So get started! Let your imagination and creativity inspire your design.

Bearer of the Ammonite by Paul Friesen. Photo Courtesy of Jen LeFevre

Photo Credit

Plant Profile: Native Irises

When we think about spring, bearded irises often come to our minds. These resilient harbingers of spring often carry personal meaning for gardeners. Many have been shared and passed down from family and friends through the years.  For my family, we have nice yellow and white bearded irises from my wife’s mother. They are beautiful reminders of the past that now brighten the spring landscape. We also have some of the more traditional lavender and purple bearded iris. These imported forms come in thousands and thousands of colors and sizes, with more developed every year. 

There are over 300 species of irises in the world and there are six different sizes of bearded iris alone.  Most of these are native to Europe and Asia. Even though these exotic iris enliven the developing spring landscape, some of the native forms of iris deserve a place in the landscape too. Here are a few garden worthy native Irises that I would recommend.

Dwarf Crested Iris-Iris cristata

If you are looking for a shade tolerant groundcover, this diminutive mat-forming wildflower fits the bill.  The underground rhizomes slowly spread in and around other shade loving perennials.  It has the distinctive narrow pointed leaves that iris have only smaller. In spring, plants brighten the ground with myriads of small blue-violet irises.  This spring beauty prospers in woodland settings with average well drained soils.

Iris cristata ‘Eco Bluebird’ Photo credit https://en.wikipedia.org/wiki/Iris_cristata

Copper Iris-Iris fulva

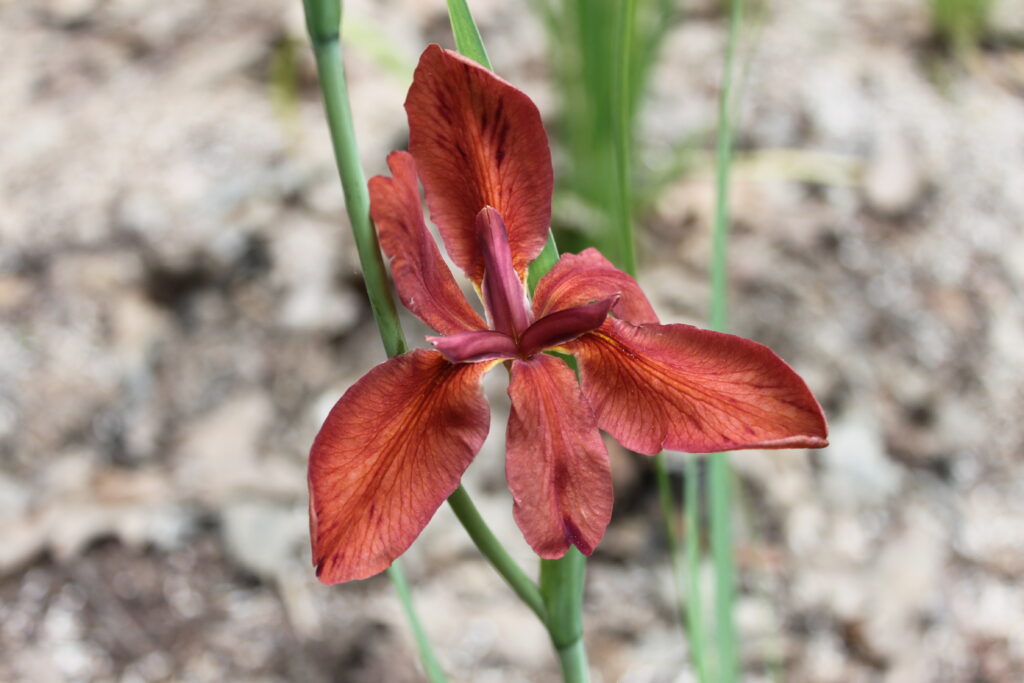
This unusual iris has coppery or reddish flowers in late April through June. The beautiful flowers have three sepals and three petals each arching away from the stem. Like traditional iris, copper iris has bladelike leaves along the flower stems that emerge from a rhizome. They grow two to three feet tall and spread one to two feet. They prefer wetter conditions and thrive in swamps and bottomland forests, and along the edges of sloughs, ditches, canals, and ponds, often in shallow water. It is a species that should be used more often in home gardens, rain gardens, ponds, and water features. 

Iris fulva

Photo Courtesy
Blue Flag Iris-Iris virginica shrevei

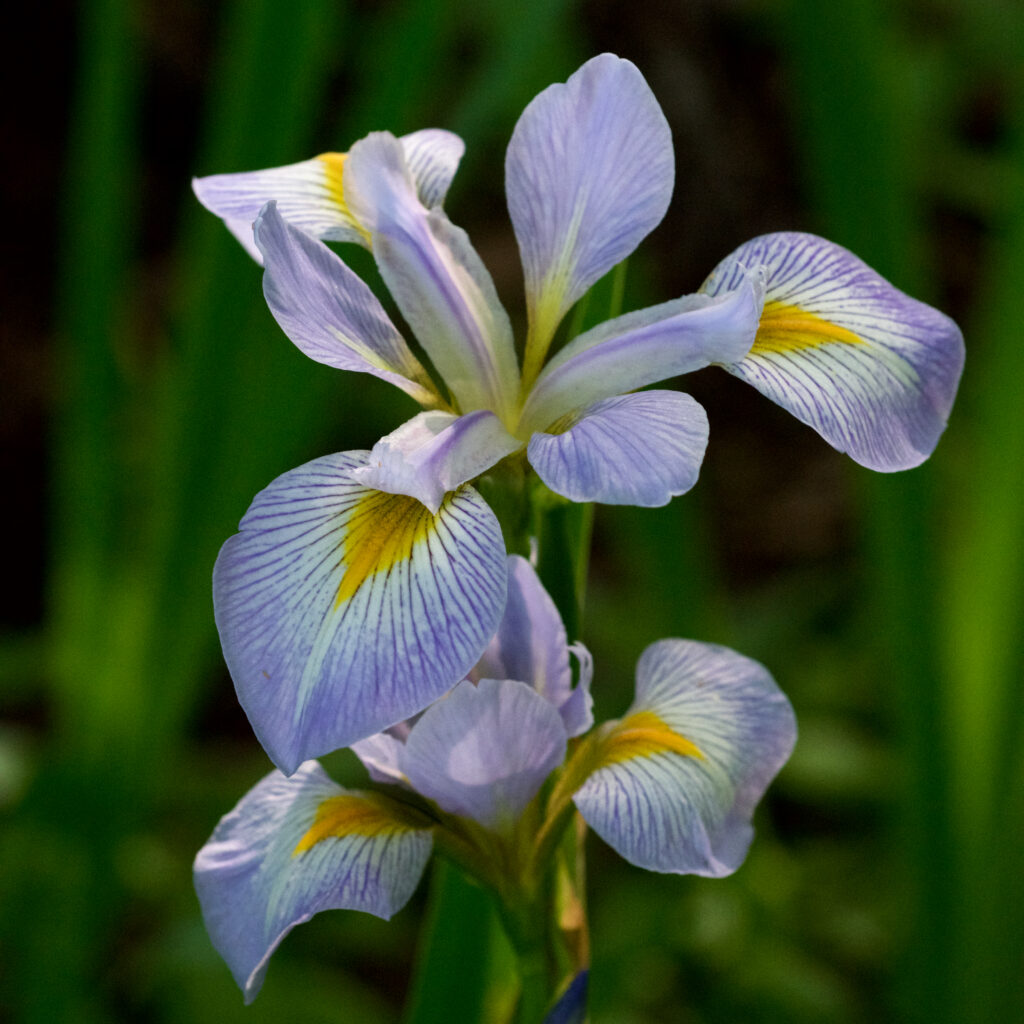
There are several native iris under the title of blue flag iris.  This iris, commonly known as “Southern Blue Flag”, has a native range in most of the Eastern United States in wetlands and marshes.  In June, the striking pale lavender blooms with yellow throats open above the foliage.  We have some of these growing on the pond edge in moist, sometimes shallow water.  It spread by rhizome to form attractive colonies.  Mature height is two to three feet with clumps spreading several feet from the original plant.  Give it full sun to partial shade. The key to success for this native iris is adequate or consistent moisture. 

Iris virginica-Southern Blue Flag Iris Photographed at Ranch North Woods Preserve, Pulaski County, Arkansas
http://By Eric Hunt – Own work, CC BY-SA 4.0, https://commons.wikimedia.org/w/index.php?curid=72555262

Other Irises

Iris ‘Black Gamecock’ (Louisiana hybrid), Iris versicolor (Northern blue flag), and Iris brevicaulis (blue flag).

Many of these native species of iris are threatened by habitat loss.  They are rare or are becoming more rare. Their fragile ecosystems can easily be damaged, so be careful not to disturb iris that you do find in the wild.  Admire and take pictures, but don’t try to dig them up because most native irises are extremely difficult to transplant. Most of these plants will not survive the shock of dividing and transplanting. For this reason, on national forest lands, it is illegal to dig or pick the irises.  If you have a spot, plant a few native irises grown by reputable nurseries, so you can appreciate, conserve and enjoy these beautiful wildflowers.

We will have several of these iris species available at FloraKansas Native Plant Days.

2023 Native Plant Guide

Fun facts from Bonnie Neubrand’s 2023 calendar:

  • Iris symbolize: Eloquence, hope, wisdom, communication and faith.
  • 325 species of iris worldwide
  • 50,000 registered varieties of iris
  • There are two groups of iris – bearded and beardless
  • Size varies from 5 feet tall to less than 8 inches tall
  • Origins in the United States trace to Virginia where bulbs were probably planted in the 1600’s
  • Iris bulbs can be toxic to pets

Keystone Natives for the Food Web

I have been reminded over the past few weeks about about the importance of keystone natives. There is a growing body of research that touts the benefits of keystone species of trees, shrubs, wildflowers and grasses to the food web. According to Doug Tallamy, landscapes without keystone plants will support 70–75% fewer caterpillar species than a landscape with keystone plants, even though it may contain 95% of the native plant genera in the area. Keystone plants must be included in your native garden design.

Take a look at Doug Tallamy’s book, Nature’s Best Hope: A New Approach to Conservation that Starts in Your Yard for more data.

The food web includes, plants, insects, pollinators, birds, lizards, toads, frogs, and mammals, from rodents up through bears.  Each is reliant on the other for their survival. Tallamy focuses much attention on trees that support the food web such as oaks, cherry, cottonwood, willow, and birch.  However, there are many native perennials that are also key components of this food web. To provide a solid foundation for a healthy food web in your garden, start with this list of native wildflowers to include in your landscape:

Goldenrods (Solidago sp.)

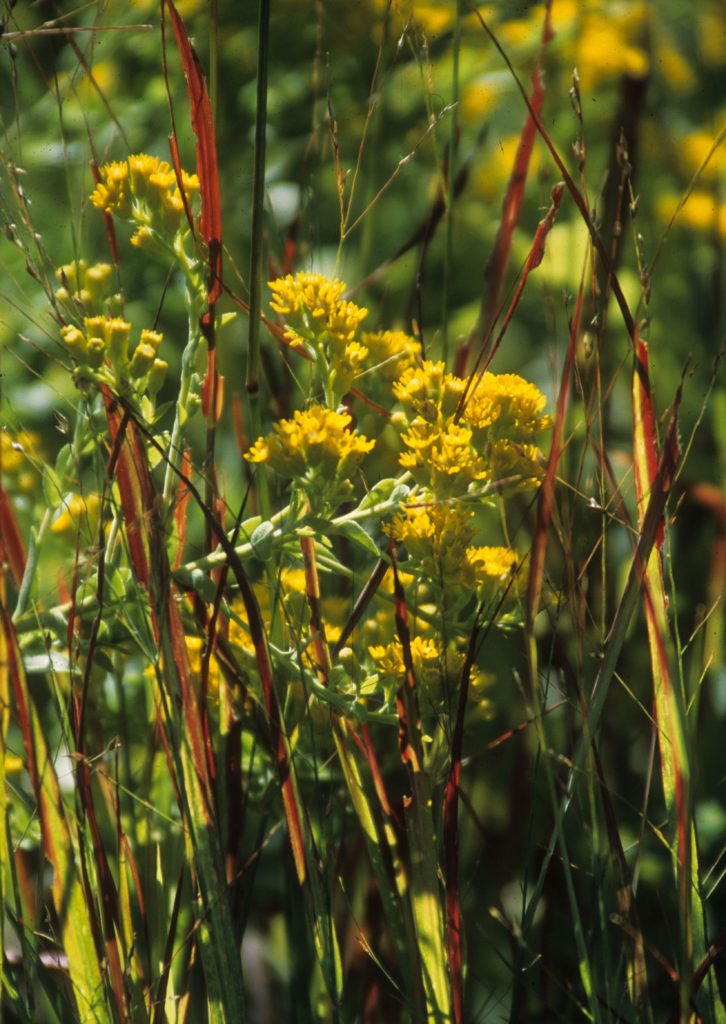
These summer blooming wildflowers with bright yellow flowers can be striking in the landscape. However, they have a reputation for causing allergies. In truth, this is unlikely because goldenrod pollen is large and heavy and is not carried by the wind. Rather, it is giant ragweed that is spreading pollen through the air at the same time. The plant is insect-pollinated by many wasps, moths, beetles, honey bees, monarch butterflies and other beneficial pollinators searching for a sip of nectar.  In total, 11 specialist bees and 115 different caterpillars need these plants. There are around 50 species of insects with immature forms that feed on the stems of goldenrod.

I like Solidago rigida, Solidago nemoralis, Solidago ‘Wichita Mountains’, Solidago canadensis ‘Golden Baby’, and Solidago ‘Fireworks’ for sunny areas. For shade, I choose to plant Solidago odora, Solidago ulmifolius or Solidago caesia.  It is safe to say that goldenrods are powerhouse plants that deserve a place in your native garden.

Rigid Goldenrod with red switchgrass

Asters

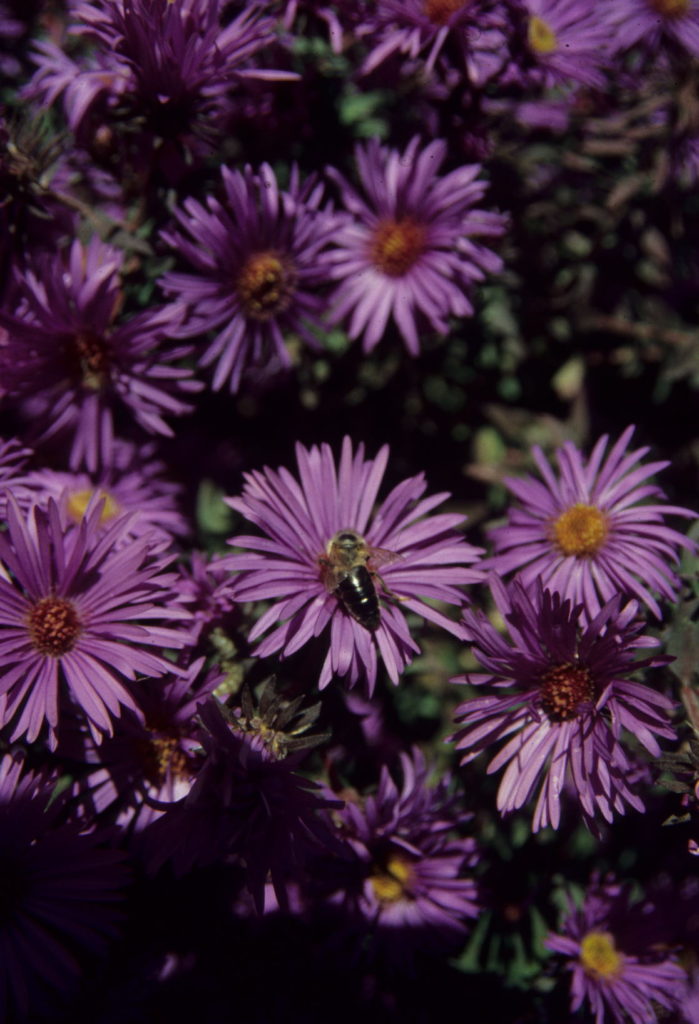
A diverse genus that supports 112 species of insects, asters are a valuable late-season (September – November) source of pollen for bees and nectar for bees and butterflies. During the summer, the asters are host plants to the caterpillars of some of the crescent and checkerspot butterflies. As summer wanes, asters start blooming with colors of white, purple, and pink depending on the species.  Fall provides a unique challenge for pollinators and asters help with both migration and overwintering butterflies and bees. 

A few of my recommended forms are Aster oblongifolius ‘Raydon’s Favorite’ and ‘October Skies’, Aster novae-angliae varieties, Aster laevis and Aster ericoides ‘Snow Flurry’ for sun.  In a shady area, try Aster divaricatus ‘Eastern Star’, Aster cordifolius, and Aster macrophyllus.

Aster ‘Raydon’s Favorite’

Sunflowers (Helianthus sp.)

There are eleven species of sunflower recorded in Kansas. These wildflowers are not usually fit for a formal garden setting, because they spread vigorously by seeding and rhizomes.  They have a tendency to push out other desirable plants.  However, they support 73 species of insects, so we maybe need to find a place for them. 

I’m not referring to the large-headed annual cultivars you see growing in a field, but rather the true native perennials with bright yellow flowers seen growing along the roadside in the late summer and early fall.  Plants provide lots of nectar and pollen, and the seeds are eaten by many birds and other wildlife. I would encourage you to try a few sunflowers in the peripheral areas of your yard where they can spread out and have room to roam. 

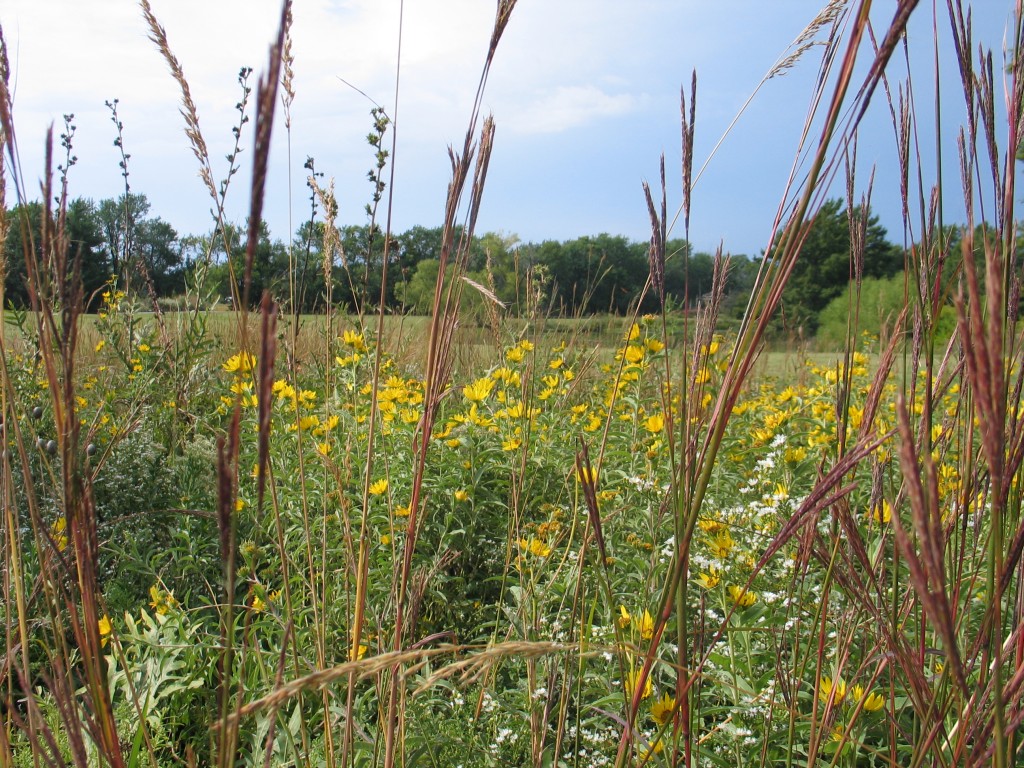
Maximillian Sunflower and Big Bluestem

Milkweeds

Monarchs are in peril. Milkweeds are one of the answers to reversing their plight. By planting more milkweeds, monarch will find these larval food sources more readily. Milkweeds are larval host plants for Monarch and Queen Butterflies and the Milkweed Tussock Moth. Many bees, wasps, butterflies and beetles visit milkweed flowers for the nectar. Milkweed plants typically produce a lot of nectar that it is replenished overnight. Nocturnal moths feast at night and other pollinators flock to these important plants during the day. 

Choose butterfly milkweed (Asclepias tuberosa) or green antelope horn milkweed for your formal garden and common, Sullivant’s, or whorled milkweeds for the outskirts of your property. 

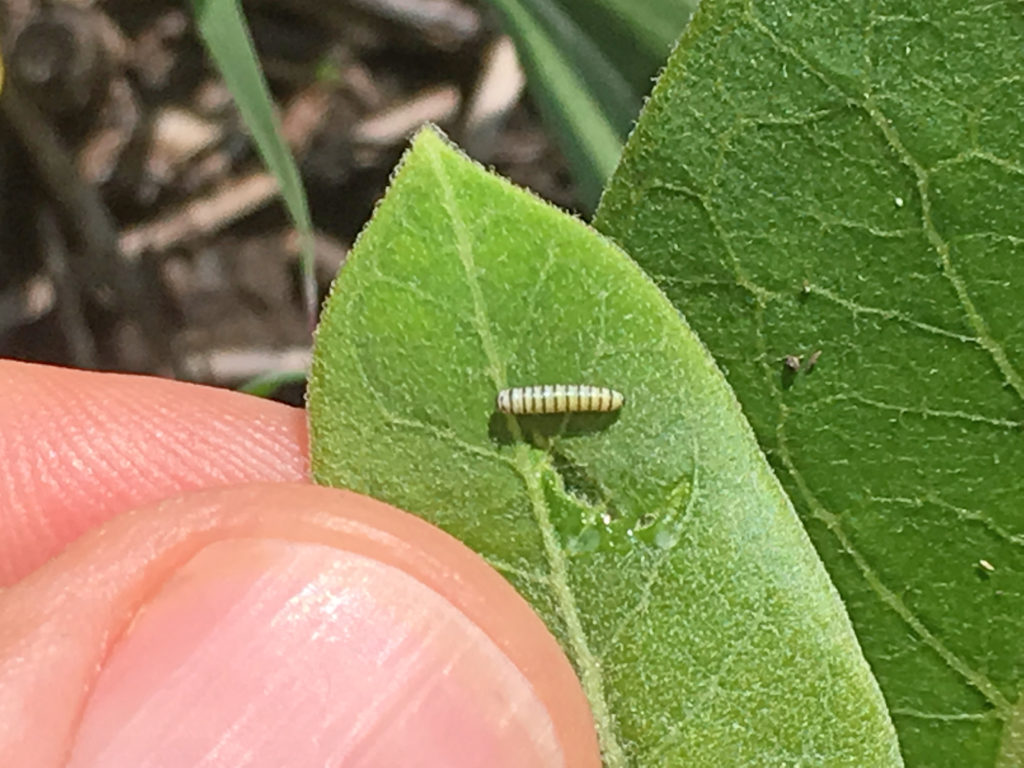
Newly hatched monarch caterpillar on common milkweed.

Blazing Stars (Liatris sp.)

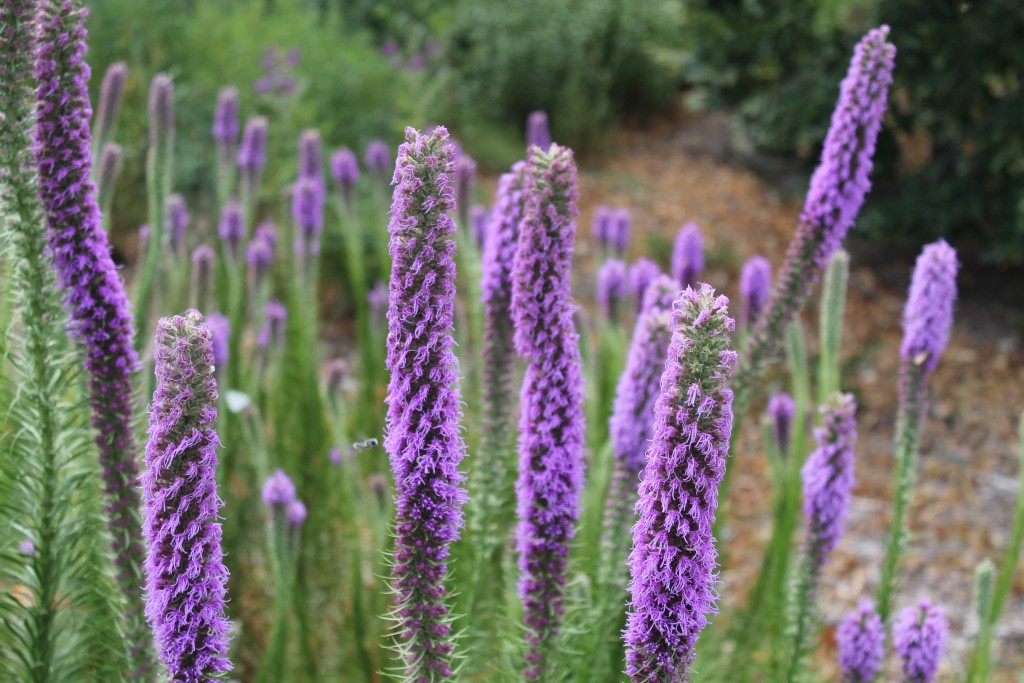
Liatris are very important wildflowers. The vibrant purple blooms in summer support many great insect species. They are quite adaptive with different species growing in dry to moist soil conditions. There is literally a blazing star for just about every garden setting. 

I prefer Liatris pycnostachya and Liatris aspera, but many others, including Liatris ligulistylis and Liatris punctata, are nice too.    

Liatris pycnostachya

Planting just natives is not enough. Garden designs and plant communities must contain at least some keystone plants to positively impact the food web. This is the start of a list, but there are certainly more plants to choose from.  Check out Keystone Natives for the Food Web-Part 2 and Keystone Natives for the Food Web-Shrubs.

March Gardening Checklist

While March can still be cold in Kansas and we can get some significant snow and ice, there are still opportunities to spend time in your garden. Here is a March gardening checklist that will prepare your garden to thrive in the coming year.

Prune trees and shrubs

This is a perfect time to be pruning trees and shrubs. Maybe there is a branch that is always in the way while you mow, or shrubs that are encroaching on a walkway. Cut them back. Keep in mind to only prune shrubs that flower on new wood. Pruning shrubs like forsythia and lilacs will remove blooms for this spring. Spring blooming shrubs can be pruned after they are done blooming in late April or May so they have time to set new buds for next year. Check out this blog by Katie, Old Wood, New Buds: A Pruning Guide.

Don’t lose your lilac blooms, prune at the perfect time! Photo by AnRo0002 (Own work) [CC0], via Wikimedia Commons.

Cut back flower beds

Now through March is the time to trim back ornamental perennials and grass stalks to clear room for new growth. By cutting these plants back it you allow sunlight to reach the crowns and warm the soil. We have talked about it several times, but it is worth repeating – if you can help it don’t carry stalks away from your garden. Leave them as natural mulch. These stems and stalks harbor native pollinators that you want to keep in your landscape. If thatch is too thick, remove it to an obscure place in your yard or along the alley.

Northwind Switchgrass cut back and ready for spring

Apply compost to soil

If you haven’t already, empty out your compost bin and put it on your garden. Prepare your garden soil if it’s dry enough to work. Dig in compost and other amendments when your soil can be worked. Only do this if your soil is dry enough.

How do you know when it’s safe to work the soil? When a ball of soil crumbles easily after being squeezed together in your hand, it’s dry enough. With our clay soils, avoid compacting your garden soil. Wait until it’s dried out before tilling, planting, or even walking in the garden beds.

Loosen mulch

Mulch has a tendency to fuse together, especially with mulch more than a couple inches thick. This cake layer along the top resists moisture penetration and seals off the soil, restricting good air exchange. It is good each year to rough up the mulch with a fork or rake to break that seal. This will open up the soil to moisture and positive air movement. Tree and shrub mulch rings and shrub borders will benefit the most from this exercise. While you are at it, maybe a fresh layer of mulch is needed. I typically have 2-3 inches of mulch around these woody plants.

Arizona Cypress nicely mulched on a berm.

Continue to gather ideas

There is so much information available to gardeners these days. Choose plants that create habitat and attract wildlife to your yard. Review your garden journal from last year. Read horticulture magazines. Attend the lectures and presentations at your local garden shows such as the Harvey County Garden Show on March 25 and 26 here at the Arboretum.

Regardless of what season the calendar says, there is always something to do in the garden. Spring is coming, so now is the time to get ready. I don’t know about you, but I am ready to see some blooming plants again.

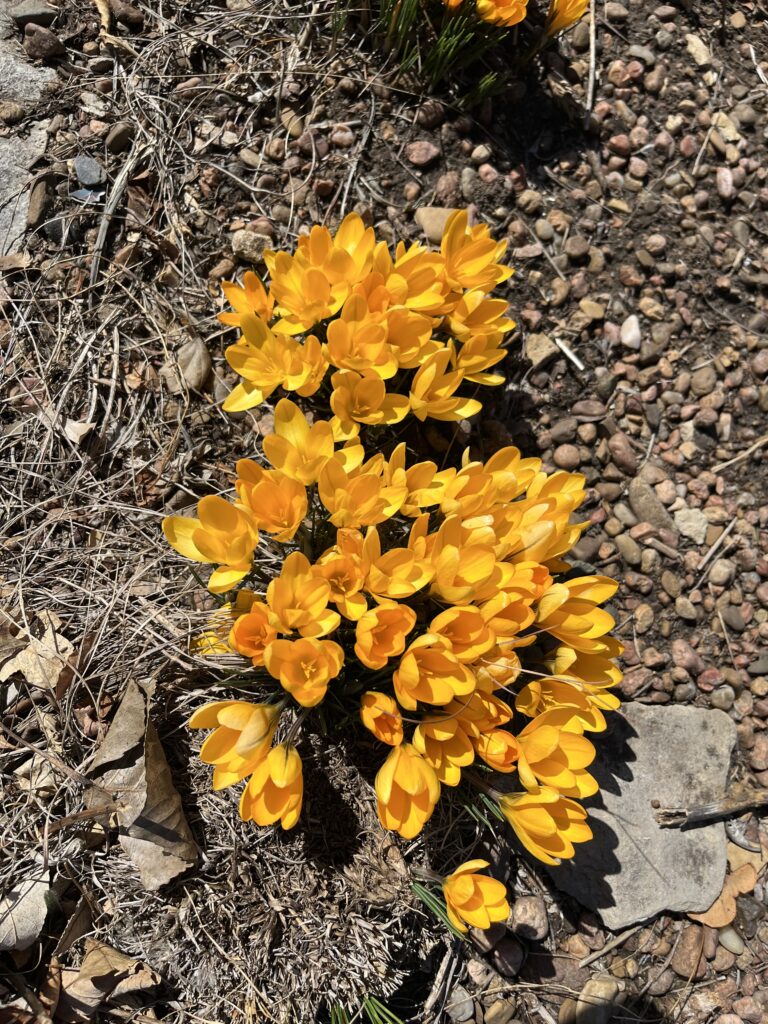
Yellow crocus in the xeric garden brighten a winter day