Solarization for Weed Control

At our Native Plant School sessions, the topic of weed control often comes up. When establishing new beds or planting buffalograss, eradicating weeds prior to planting is critical for success.  Hand weeding can be time consuming on these larger areas. Often we first use chemicals to control difficult weeds in our landscapes and garden areas without thinking about other options or ramifications of the chemicals we use. Solarization is another technique you can use without reaching for the chemicals to control problem weeds.  

What is solarization?

Solarization is the process of covering an area with clear plastic to heat the soil and kill weeds and seeds in the top six inches of soil. If done properly, the use of chemicals to control weeds is not necessary. 

File:SOIL SOLARIZATION.jpg
https://commons.wikimedia.org/wiki/File:SOIL_SOLARIZATION.jpg

What weeds can be controlled? 

Solarization can be an effective method of controlling many weeds such as bermudagrass, bindweed and other annual weeds. Keep in mind that some of these weeds have extensive root systems and many re-sprout, even after being subjected to super high temperatures.  It may take several solarization attempts to completely eliminate them from the area.  In the end, it may take a few more months before you are ready to plant, but you have not used chemicals to control these problem weeds. 

Steps to Solarization

  • It is best to use this method during the longest, hottest days of summer.  The goal is to get soil temperatures under the plastic above 140 degrees.  It is easier to reach these temperatures in June through August. 
  • This is a process that will last for a couple months.  Plan ahead in your planting schedule so solarization has enough time to work.  Some of the more aggressive weeds will not be eliminated in just a few weeks. 
  • It is best to remove existing growth and lightly till the entire area.
  • Remove stalks and debris that will puncture the plastic.
  • Rake the area smooth.  It is critical that the area is completely flat so plastic lays right on the soil with no air pockets. 
  • Irrigate the entire area so it conducts heat better.  The soil should be moist to 12 inches deep, but not muddy.  This is a real trick in clay soils.  This is a critical step in the process, because it is not recommended to re-irrigate after the solarization process has started.
  • Dig a 8-12 inch trench around the solarization area.   
  • Lay one entire piece of plastic over the area and tuck the edges into the trench you just dug. 
  • Cover the edges of plastic in the trench with soil, pulling plastic tight as you move across the whole area.  This makes a good seal around the entire site.       

Soil Solarization Illustration by W. Suckow, ucanr
Source: W. Suckow, ucanr.edu

Solarization incorporates the same principles of a hot compost pile to kill weed seeds and break down organic matter.  We have used this technique in smaller areas here at the Arboretum from time to time with mixed results.  Some have been very successful, but others have not completely eliminated some of the target weeds.  Smaller areas have had better results than larger areas especially when dealing with aggressive weeds like Bermudagrass. 

In the end, I think solarization should have a place in your weed control options. It is a nice alternative to using chemicals. Give it a try sometime.
Plant Profile: Southwest White Pine

When one thinks of classic and elegant conifers, Eastern white pine often comes to mind.  Unfortunately in the Great Plains, summer heat, wind and drought restrict growing Eastern white pine to only well protected sites.  We have a stand of Eastern white pines strategically planted with protection from these adverse conditions.  Even these few original Eastern white pines planted in the early 1980’s are slowly expiring because of environmental challenges. 

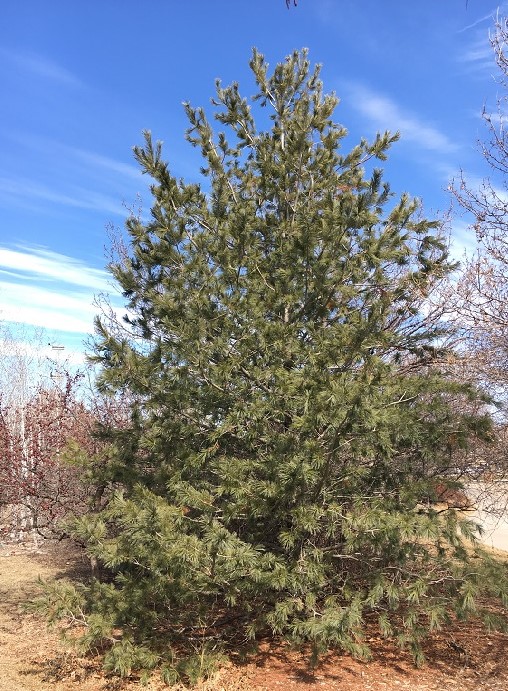
Fortunately, there is an alternative.  The Southwest white pine, Pinus strobiformis, is a tough, drought- and heat-tolerant conifer. Its native range extends from Texas to Arizona and south to Mexico.  They inhabit dry, rocky slopes in mountainous areas. 

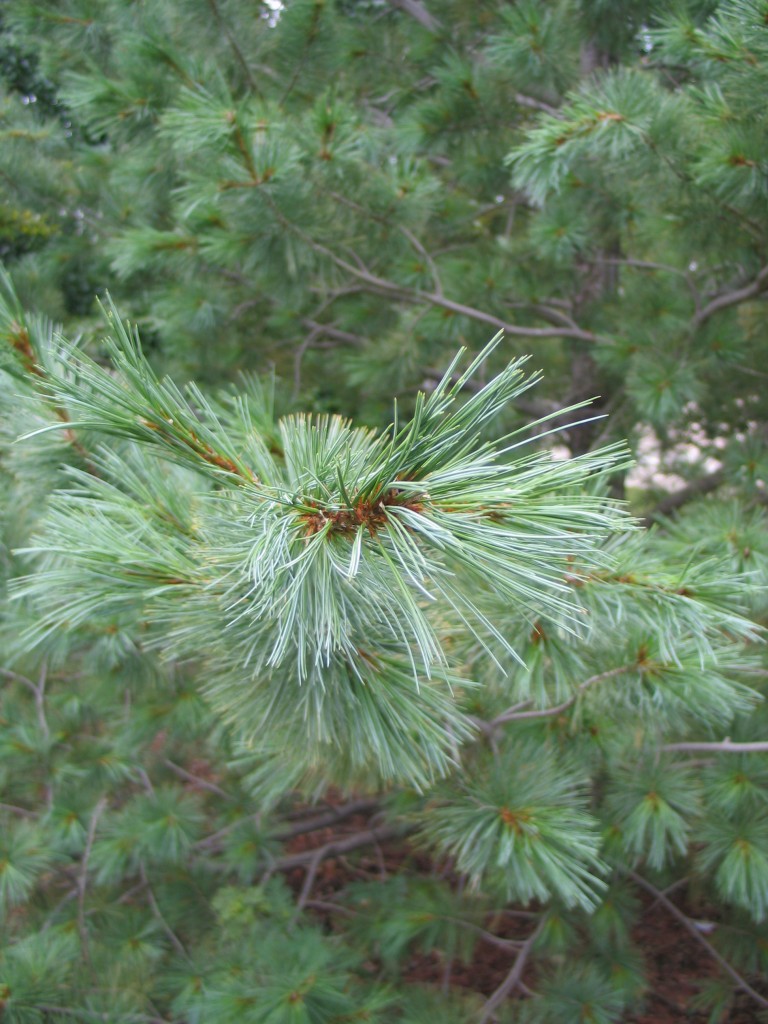
Southwest white pine planted in 2000

Habit

Somewhat shorter and broader than its eastern cousin, the Southwest white pine reaches 30-60 feet in height at maturity, with a broad, rounded crown.  Needles are five per bundle (fascicle), 1.5 to 3.5 inches in length with a dark green to blue-green color.  The top and bottom of the needles have somewhat distinct white stomatal lines.  Though not as long and soft as the needles of the Eastern white pine, the needles are very soft textured and pliant.  The long cylindrical cones mature in two years and produce a brown oval seed that is edible.

This image has an empty alt attribute; its file name is IMG_2207-768x1024.jpg

Culture 

Adaptable to our high pH soils, Southwest white pine prefers well-drained soil in full sun.  It is a moderate to fast grower. Young specimens in the Arboretum have grown 10-12 inches per year since they were planted in the mid-1990s.

Also consider a Southwest white pine as an alternative to Austrian pine, which has suffered from Sphaeropsis tip blight in the last decade.  It can be used as a large specimen or in a screen or windbreak planting. Its hardiness, drought resistance, and fast growth are definite attributes to consider in our challenging climate. 

Alternatives

Other evergreen and conifers we use here at the Arboretum: Arizona Cypress, ‘Taylor Juniper’, ‘Canaertii’ Juniper, Black Hills Spruce, Pinyon Pine and Vanderwolf’s Pyramid Limber Pine.  There are no guarantees on any of these.  They may develop blights, or other diseases in time.  Certainly they are all attractive to bag worms. 
The bottom line is that growing evergreens in Kansas will always be a challenge.  These are the best options for landscapers. Take a look at our 2020 Native Plant Guide for Spring FloraKansas Native Plant Festival for other landscape options.

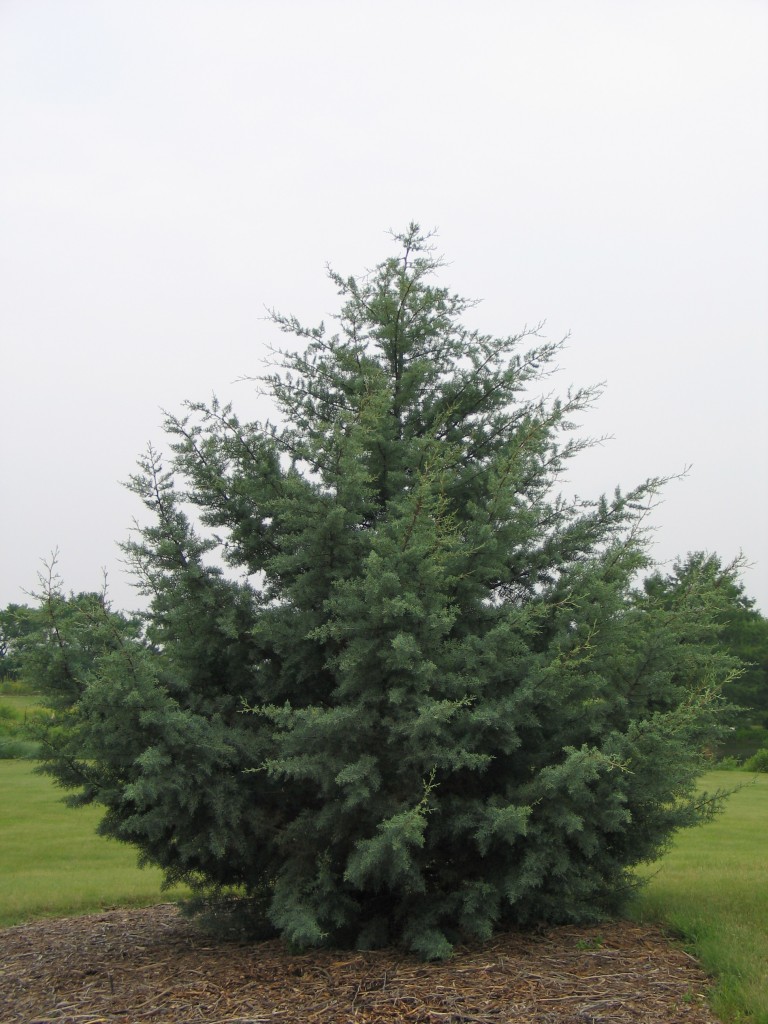
Arizona Cypress

Winter Watering Tips for Your Garden

Growing plants in Kansas can be a challenge.  This spring we had an abundance of moisture – too much in fact – and now we are experiencing expanding drought conditions throughout the state.  With the landscape in a state of dormancy, you may forget to water those parched plants.  With winter upon us, how do you keep your plants alive?  Here are some winter watering tips that will save your landscape investment.

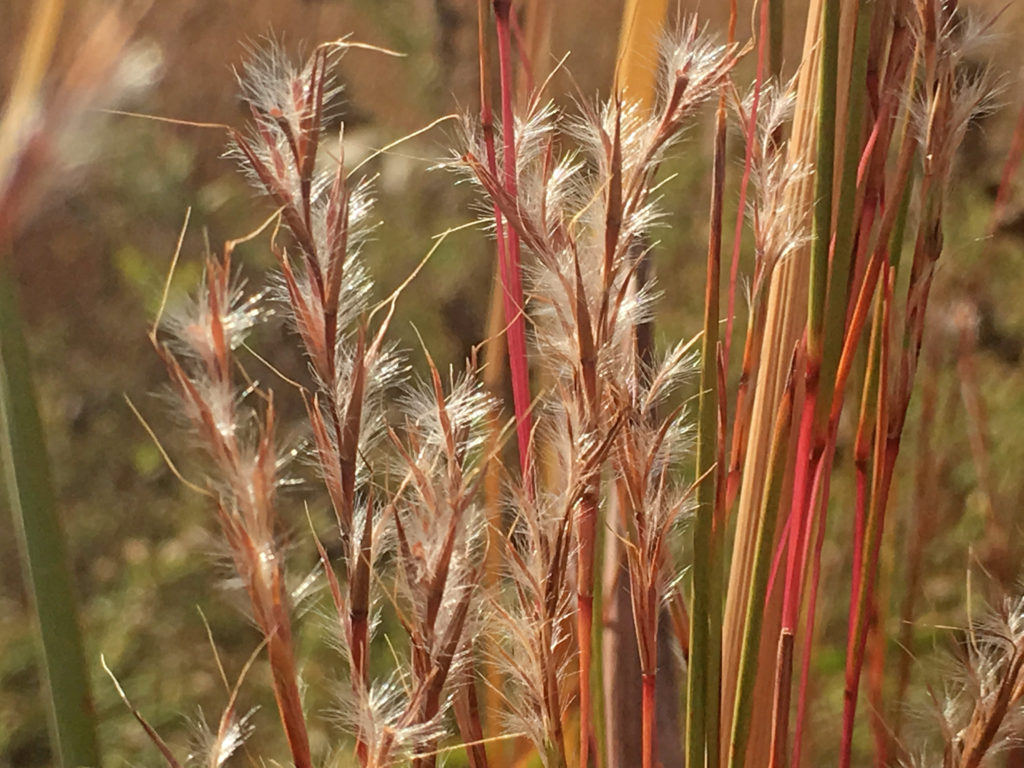
Little bluestem in late fall

Should I water my garden in winter?

Even though plants have gone dormant and lifeless, they should be watered periodically.  Newly planted perennials, trees and shrubs have not developed the extensive root systems to sustain them through a dry winter.  Dehydrated plants will struggle to survive the winter even when they are not actively growing.  Your plants are thirsty, so you will need to give them a drink. 

Cold weather watering tips

  • Look at the soil around your plants. If the top inch or two is dry you must water the plants.
  • If the soil is unfrozen, water on days above 40-45 degrees
  • Obviously, it is better to water after noon so water has time to infiltrate the soil before freezing at night. 
  • Water through the winter any time the top inch or two of soil is dry. 
  • Evaporation rates are slower during the winter, so you may only need to water once or twice a month.
  • If it stays dry through the winter months, it is critically important to water as the plants break dormancy next April and May.

What to water in winter

  • Plants installed this year (perennials, trees, shrubs and cool season turf)
  • Established cool season (fescue) turf, especially under trees and around shrubs.  Roots are competing for moisture with the grass roots
  • Pay special attention to evergreens as they are more susceptible to winter dry-out.
  • If it is especially dry, even established trees, shrubs and perennials will benefit from an occasional winter watering. 
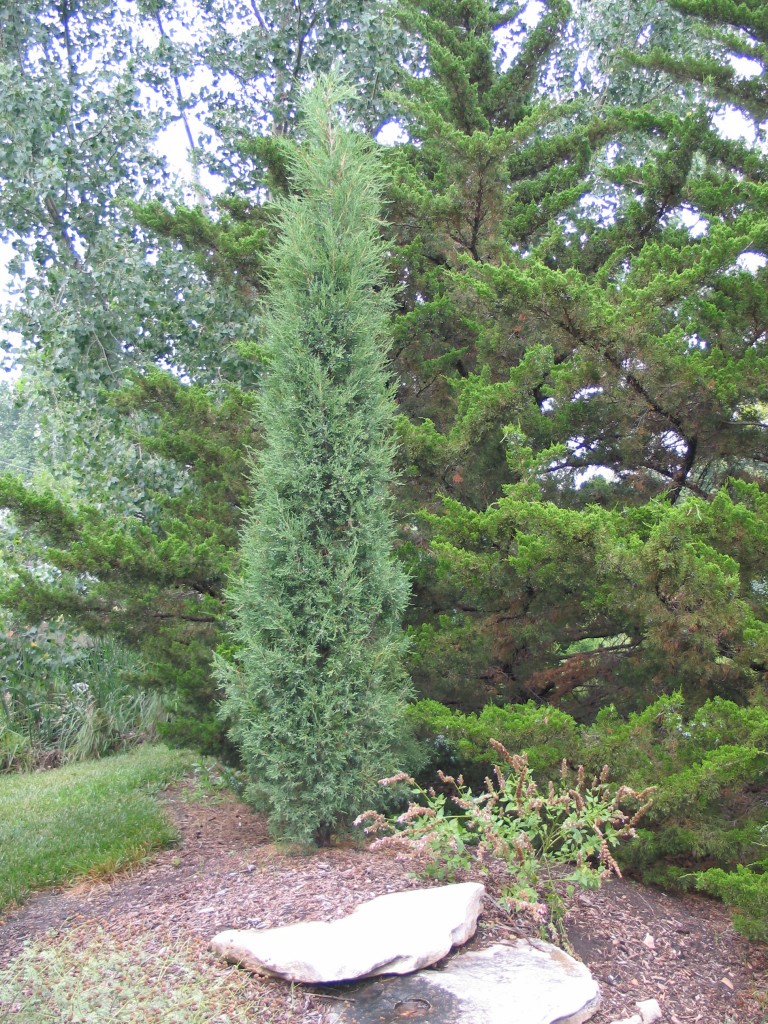
Taylor Juniper (foreground) and Canaertii Juniper (background) – Don’t let these evergreens get too dry!

How to water in winter

Use garden hoses to connect to sprinklers and water nozzles.  These can be easily disconnected from the hydrant.  Obviously, irrigation systems will be damaged by freezing temperatures, so don’t restart any underground automatic sprinkler systems.      

Established turf and trees, especially those in sunny, windy, or exposed areas should be a high priority. Watering prevents them from drying out due to unique environmental conditions.

Don’t overwater your plants.  Soggy soils and heavy clay soils that stay wet for long periods of time will cause root rot and fungal issues.

Water as needed with one-half inch to one inch of moisture to rehydrate the top few inches of soil. 

Remember to remove hoses from spigot so pipes don’t freeze. Drain hoses of water to eliminate freeze damage to hoses as well. 

The winter landscape can be stark and often forgetten since it is not producing flowers or new growth. However, dormant plants are still using water and can be damaged by prolonged periods without moisture. Hopefully, we get some rain or snowfall, but it takes around 10 inches of snow to equal one inch of rain.

Don’t forget about your plants in this busy season of the year, keep checking those plants and the soil around them.  We don’t want you to be surprised by dry, dead or desiccated plants next spring.  A little winter watering now will keep you from replacing plants next spring. 

Putting Your Garden to Bed for Winter

It seems that winter has come earlier than expected this year.  I don’t know about you, but I have been caught a little off guard.  I wish I could say we have everything ready for winter, but that would be untrue.  In preparation for colder weather, I have put a simple checklist together for putting the winter garden to bed.

Perennials

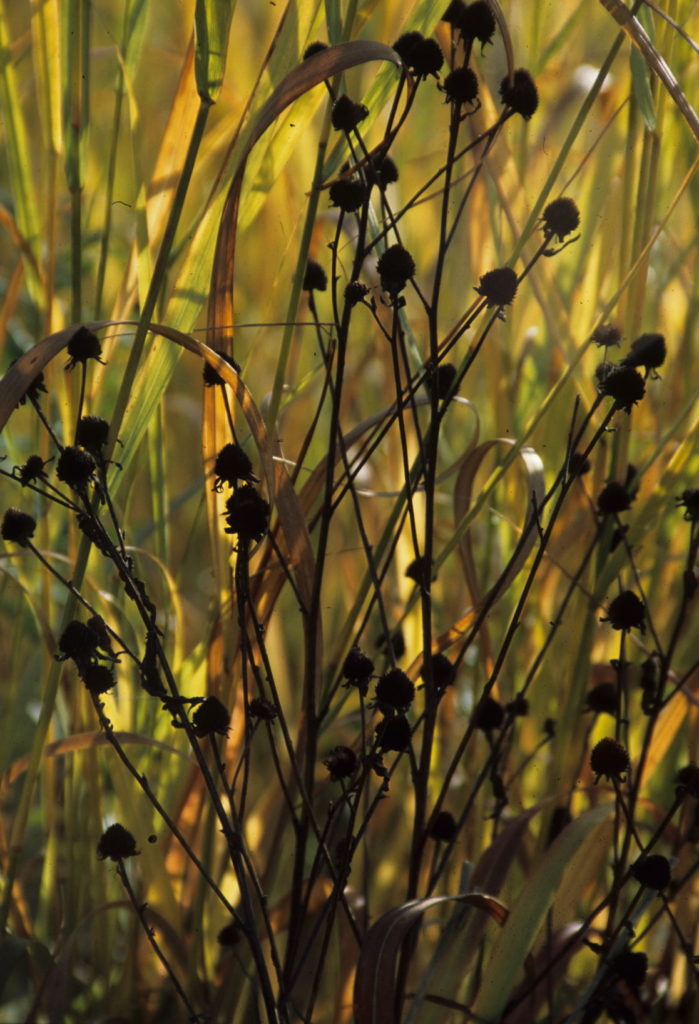
Every year we receive quite a few questions about when to cut back perennials.  As a general rule, I leave perennials such as wildflowers and grasses stand through the winter. The forms and textures of plants such as little bluestem and switchgrass provide movement in the winter garden and should be left standing. Coneflowers, black-eyed Susans and coreopsis are important seed sources for birds. The dark seed heads and stems look great with a backdrop of little bluestem.

I take note of plants that need to be divided and/or moved next February or March. Diseased plants with powdery mildew or rust should be removed. Those infected leaves will harm next year’s plants.

Black-eyed Susan with Switchgrass. Photo by Emily Weaver.

Lawns

Fall is an important time for lawn care. Obviously, the leaves that fall must be removed or composted into the lawn. More frequent mowing/composting can take care of a majority of the leaves, but if you have large trees, the leaves must be removed. A large covering of leaves will smother your lawn. It is also an ideal time to fertilize cool season grasses. The nutrients will be taken up and stored in the roots for vigorous growth next year. If you have a warm season lawn such as buffalograss, now is the perfect time to control winter annuals such as henbit, dandelions and bindweed. Spraying with a broadleaf weed killer such as 2,4-D will clean up your lawn for next season. Be sure you’re using a spray that is labeled for buffalograss.

Leaves

I purposefully don’t remove some leaves in perennial beds to insulate the plants. In a shade garden, they are perfect as mulch. Just don’t let them get so thick that they smother out your woodland plants. Leaves make great compost that can be used in your garden or flower beds.

Clean and sharpen tools

I often overlook this step in the fall garden prep checklist.  A little time cleaning your tools like shovels, spades and other digging tools will give you a jump start next season.  This simple practice will prolong the life of your tools.  Doing this will prevent rust and deterioration.  I like to use a wire brush in the cleaning process before I sharpen each tool.  By cleaning off dirt and debris and applying a thin coat of oil, you will extend the life of each tool.

Store power tools

We always have trouble with our gas powered tools in spring.  We forget that they need to be drained of standard pump gasoline before being stored for long periods of time.  Today’s gas deteriorates relatively quickly and gums up the carburetors.  Empty your fuel tanks into storage containers of fuel, oil, and fuel mix if you are not going to be using the equipment in the next 30 days.  We add fuel stabilizer to the stored fuel over winter.  We like to run the engine completely out of fuel before we put it away. 

Disconnect and drain garden hoses

Obviously, garden hoses that remain attached to the spigot during cold weather will create problems. This connection and the trapped water in the hose will freeze not only the hose, but the spigot on your home.  I have seen these freeze and then burst as they thaw out.  It can be a mess and quite costly. 

Drain garden hoses before you store them for the winter.  It is best to bring them inside so they are not deteriorated by the winter sun.  Extreme winter conditions also break down the inner lining of the hose, weakening it over time.  We like to loop each hose into two to three foot loops. Create flat stacks of coiled hoses.  Hanging hoses will put stress on the areas where they are attached to the wall.

Spring seems like it is so far away, but it will be here before we know it. By doing a few simple tasks in your garden this fall, you will save yourself time and effort next season. Why not put your garden properly to bed this fall so you can enjoy it more next year? It will be worth your time.

Spring is only six months away!

To Mulch or Not to Mulch

We are coming to the end of another growing season in Kansas.  Here at the Arboretum we have seen highs and lows as far as moisture is concerned, but all in all it has been a nice year.  The grasses are at their peak now with beautiful plumage and incredible fall colors.  As we prepare our gardens for winter, it’s a good time to evaluate how your garden performed this year and what it needs for winter or next year. Many gardens will need a fresh layer of mulch.

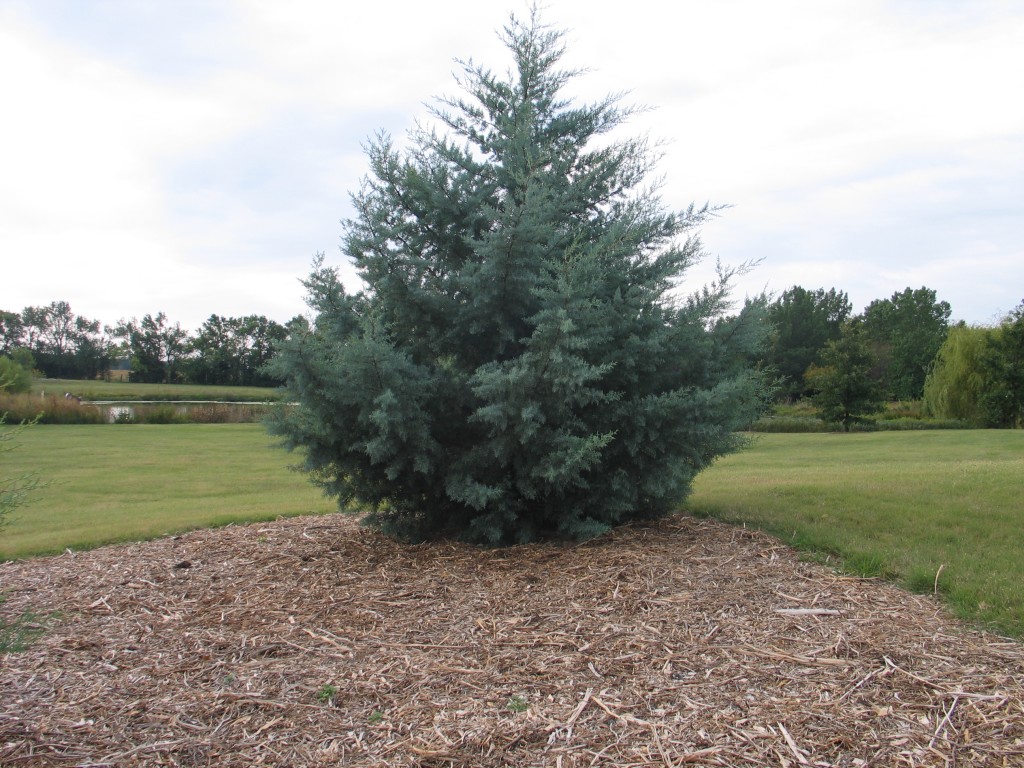
Arizona Cypress nicely mulched on a berm.

What needs to be mulched?

I typically focus on trees and shrubs because they benefit most from a new layer of mulch this time of year.  I tend to only mulch perennial beds as they are initially planted. More recently, we are planting new beds denser (plants closer together) so that the lower ground level plants fill in and out compete the weeds, making a thick wood chip layer less necessary.  In a prairie, there is no mulch in between the plants — low grasses, wildflowers and sedges cover the ground so weeds don’t germinate and cause problems. We are working to mimic that layered planting style.

What are the benefits?

Obviously, mulch is good at stabilizing soil temperatures which is important as colder weather sets in. It is also good for holding moisture and reducing weeds around the base of the trees and shrubs.  Aesthetically, mulch gives your landscape a finished look that distinguishes it during all seasons of the year.  An often overlooked benefit of mulch is that it keeps the mower and string trimmer away from the base of the plants.  As the mulch slowly breaks down, it releases nutrients into the soil and increases the water holding capacity of the soil.

How much mulch is needed?

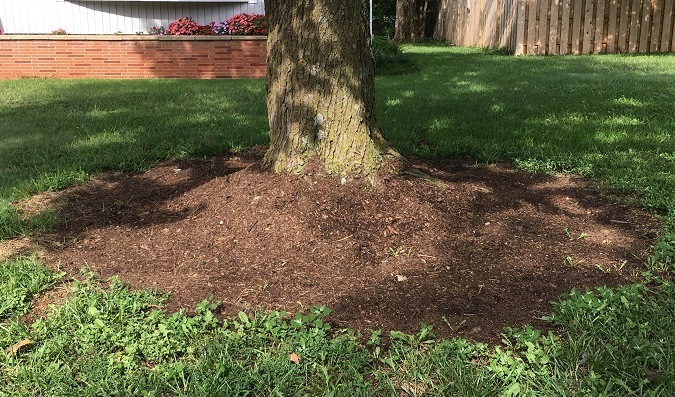
For trees and shrubs, I prefer to use between two and four inches of mulch.  It is important to keep it away from the base of the trees and shrubs so insects and rot don’t become a problem at the stem or trunk.  Please don’t create mulch volcanoes, which are death to trees. An evenly spread ring around the base of the plants, replenished regularly, will help them tremendously.  For perennials, we only place one to two inches of mulch down and again we keep it away from the stems.  This is fine as the beds are first established but as they mature, less mulch is needed because, with the right care, the plants become the mulch. 

Too much mulch piled up at the base of the tree can lead to fungus, rot, low oxygen levels and tree death.

Should you use landscape fabric? 

I am not a fan of landscape fabric.  I have seen it do more harm than good especially for many of our native plants.  One problem is that it keeps our clay soils too wet, leading to crown rot and other fungus growth. Using landscape fabric also makes it challenging to change your landscape plan in the future.  As an alternative to fabric, we encourage the use of large pieces of cardboard covered by mulch.  It still provides weed control during establishment but breaks down over time to be incorporated into the soil.  Just slice holes in the cardboard to install your plants. 

What type of mulch should be used?

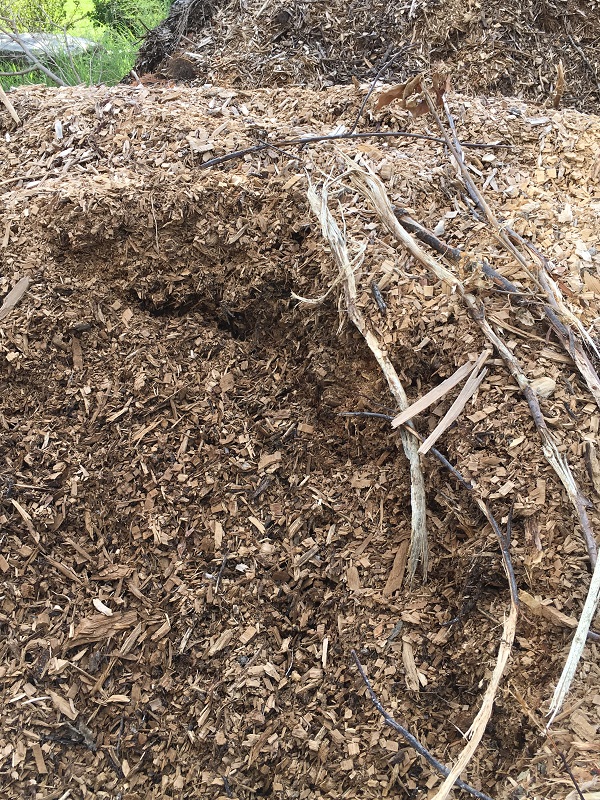
Here at the Arboretum, we use wood chips from local tree trimming services.  We like it too be fairly coarse so it breaks down slower and is less susceptible to wind.  The type of mulch is not really important but texture is important. Finer mulches tend to cake up and seal off the soil which can be problematic to the plants root systems. Many municipalities have wood chip piles that can be loaded and used at little or no cost to you.  Why spend money on fancy wood chips when you can get it for next to nothing?  Most mulch looks the same after a few weeks in the sun anyway.

Mulch pile shown here is rough and natural colored, showing our prefered texture and style

 It is no secret that mulch is great for the landscape.  There are so many benefits when you add it to your landscaping routine.  A little work now will pay dividends next year.   

Rethinking Garden Clean Up

It may not feel like fall yet, but it is coming.  I am ready for some cooler north winds to blow and the leaves to begin changing on the trees. In the back of my mind, I am grudgingly starting to think about garden clean up.

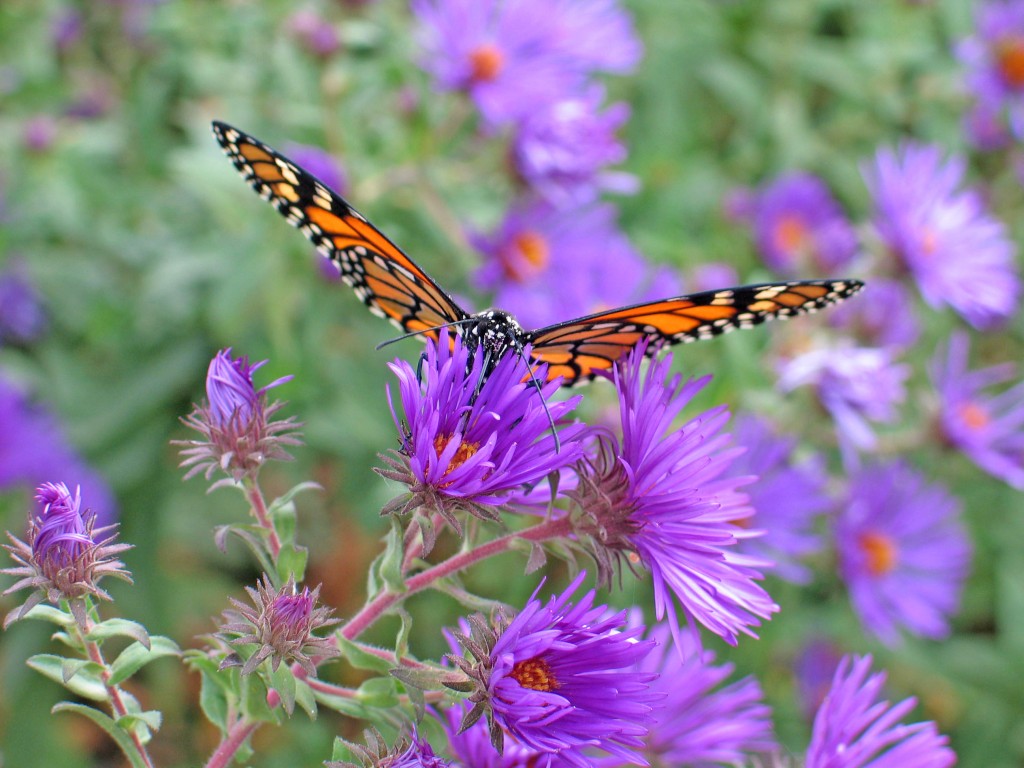
Things are winding down in the garden, except for the asters.  ‘Raydon’s Favorite’ aster, New England asters and ‘October Skies’ aster are a bright spot in the October prairie garden. Pollinators are covering these nectar rich flowers during the warm afternoons. It is fun to watch so many happy pollinators in the garden.  The grasses are spectacular this year too.   

Monarch on New England Aster

Soon these flowers will fade and the growing season will officially come to an end. The grasses that are so beautiful now will blend into the landscape.  It will be time for the prairie to sleep.  Before we settle in for the winter, there are a few things to take care of in the garden so that it’s ready for next spring.

Taking stock

I know we don’t want to think too much about the landscape, but if you don’t take a few notes now, you will forget by spring.  I know that will happen to me, so I like to spend a few moments reflecting on what has worked and what didn’t in the gardens. 

Do I need to add a few plants to fill or augment my current design? Should I move some plants to make them happier? I take note of plants that need to be divided and/or moved next February or March.  What areas am I going to focus on next year?  Do some of my trees and shrubs need pruning?  What plants have I seen that I believe would work well in the landscape?  What do I need to do to create habitat for wildlife? 

Fall is also a great time to appreciate what you have accomplished.  Even a few steps toward a more sustainable landscape should be recognized.  Your project may not be complete, but you can see progress.  Give yourself a pat on the back.  Your stewardship efforts are making a difference.  Hopefully, you know this and have seen evidence of it in your garden. 

Perennials

We have been rethinking how, when and why we do cleanup of our perennial beds.  It is generally better to leave perennials such as wildflowers and grasses as they are through the winter. The forms and textures of plants such as little bluestem and switchgrass provide movement in the garden and should be left standing. The dark seed heads and stems look great with a back drop of little bluestem.  Enjoy these autumnal combinations. 

Little Bluestem

Wait! Don’t clean up your garden too early.  Cleaning up beds often removes natural food and shelter that wildlife need to survive the winter months.   Coneflowers, black-eyed susans and coreopsis are important seed sources for birds.  Many pollinators and other insects overwinter in stems and tufts of grass in the landscape.  By prematurely removing all dead vegetation you are removing overwintering wildlife.  We have found that it is better to cut these plants down in February and March, but leave the stems in the garden as mulch.  Overwintering pollinators and insects hatch in the spring and these composted plants are a fantastic mulch that add nutrients back to the soil.  In our experience, overzealous cleaning often does more harm than good. 

Leaves

I love the fall color of the trees in October. However, once the leaves have fallen, what should be done with them? I purposely don’t remove some leaves in perennial beds so they can insulate the plants. Keep in mind that too many leaves or larger leaves tend to cake up and seal off the soil. This will keep the soil too wet through the winter for many perennials.

When you are dealing with large quantities of leaves you may need to remove them or shred them so they break down quickly. In a shade garden, they are perfect as mulch. Just don’t let them get too thick that they smother out your woodland plants, too. Remove leaves from your turf areas, but don’t haul them away.  They make great compost that can be used in your garden or flower beds.   

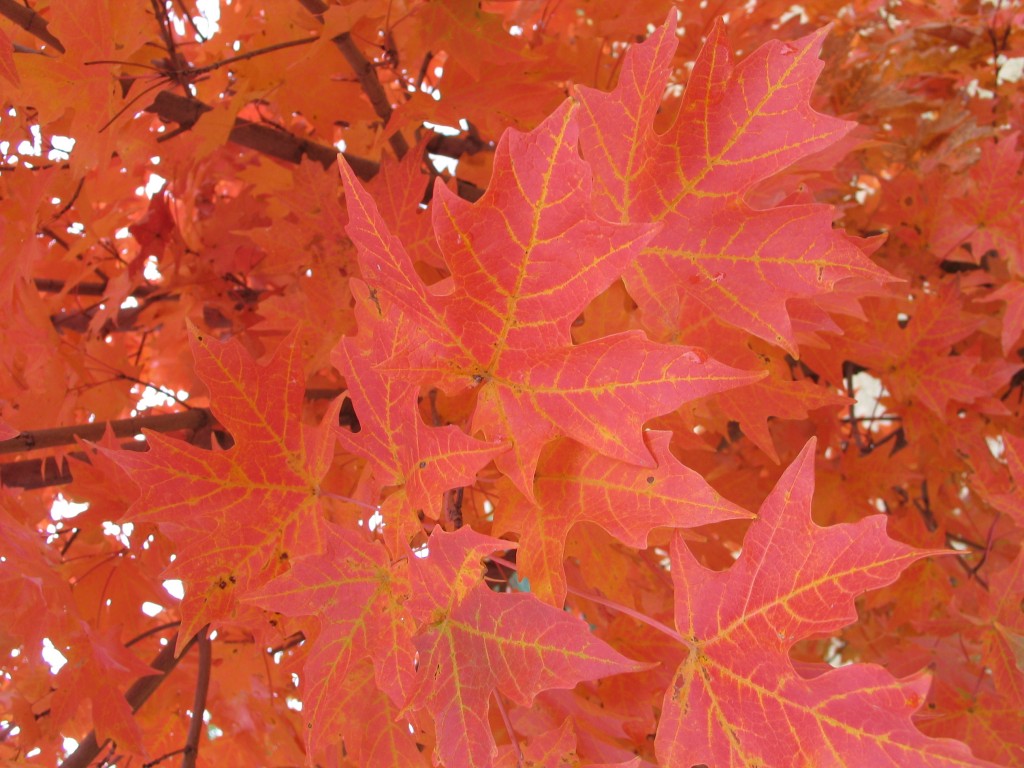
Tablerock Sugar Maple

Trees

This is the worst time of the year to prune trees. Trees are going dormant and pruning now will encourage new growth that will not get hardened off before cold weather. It is better to take note of trees that need pruning and remove suckers or limbs when the trees are completely dormant in November through January. Pruning now will only weaken the tree and reduce its winter hardiness.

Spring seems like it is so far away, but it will be here before we know it. By doing a few simple tasks in your garden this fall, you will save yourself time and effort next season. Why not put your garden properly to bed this fall so you can enjoy it more next year? It will be worth your time.

What will all this rain do to my native plants?

The spring of 2019 has been an unusually cool and wet spring here in Kansas. I don’t like to complain about rain, because I know at some point it will quit.  Conditions will get hotter and dryer through the summer.  I don’t know what normal is anymore. For many of us, a short reprieve from the rain would be welcome.  It would give us a chance to catch up and let our basements dry out. 

All this rain made me think about what it does to plants.  Many of you have newly-planted gardens or established flower beds and you, too, may be asking yourself – what will all this rain do to my native plants?

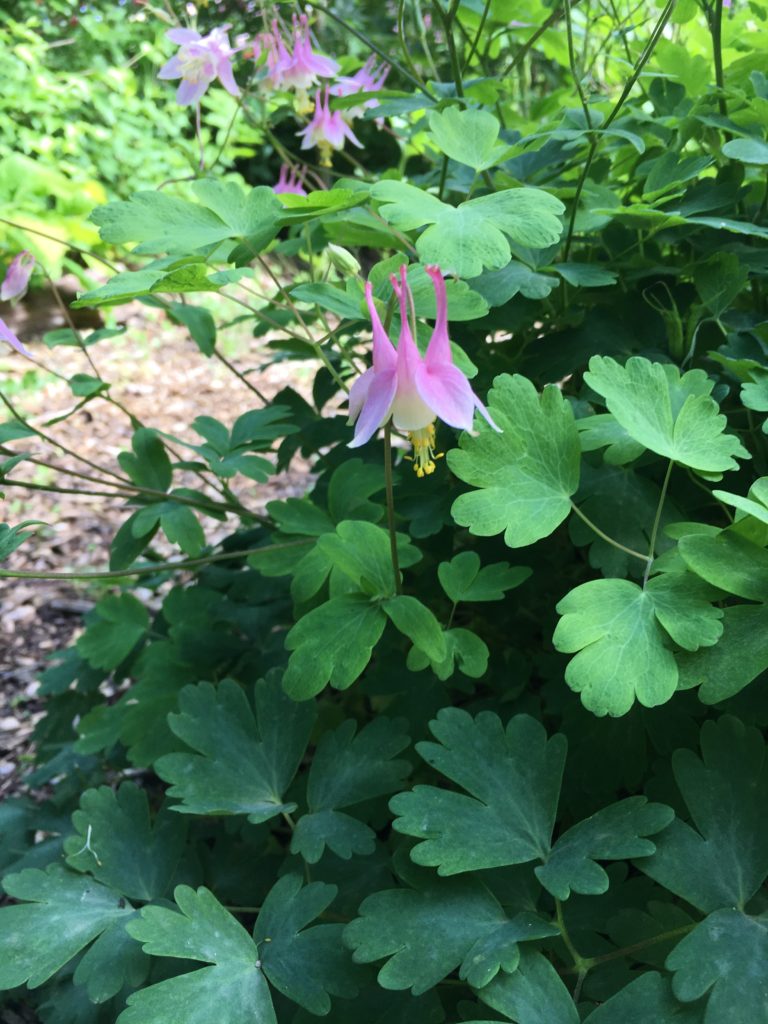
Native Pink Columbine

Excessive growth

Rain obviously causes the plants to grow.  One of the downfalls of excessive growth so early in the season is that it will need to maintain that growth the rest of the year.  Certainly, native plants are adapted to our prairie conditions and have root systems that can sustain the plants.  It makes the placement of plants even more critical and important as we work to match the plants with our sites.  If the plants are properly situated, it should not be a problem. 

Use this season as an opportunity to observe your plants. If you see some wilting over the next few weeks, it may be an indication that the roots have been damaged or that the plants are not happy where they are planted. 

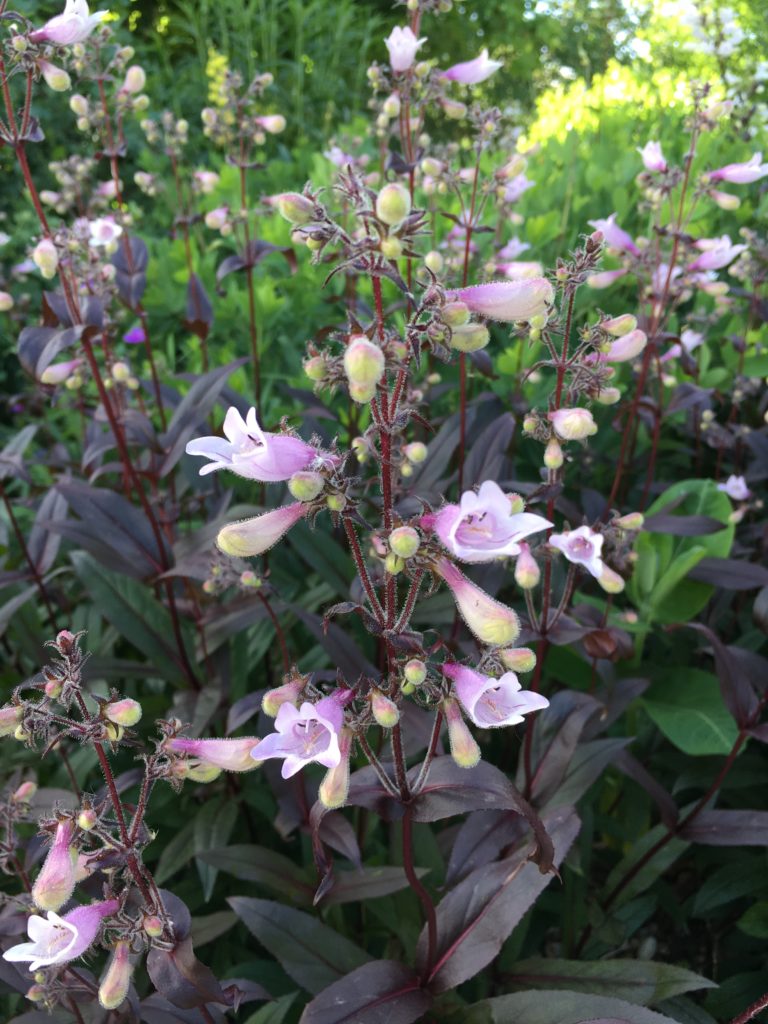
Penstemon ‘Dark Towers’

Plant diseases

All this rain has created perfect conditions for plant diseases like bacteria and fungi to flourish.  There hasn’t been much time for plants to dry out in between rains.  Prolonged periods of leaf wetness and excess moisture around the plant root zone can damage leaves and the crowns of plants.  A few days of sunlight will help, but we need to make sure these plants are not smothered by mulch and the crowns of the plants have a chance to dry. Many plants, including trees and shrubs, have been slow to leaf out. Excessive rainfall and overcast skies has slowed the plant’s growth and can affect the timing and intensity of the blooms for the rest of the season. With rainfall like we have had, it makes us more aware of drainage issues, air circulation, plant selection and planting depth within our landscapes.  

Nutrient leaching

Native plants don’t typically need to be fertilized.  Their extensive root systems tap into nutrients that most plants can’t reach. 

Your plants may have a yellow cast to them, but that doesn’t mean you should fertilize them.  It is a result of lack of sunlight and too much water.  Let them develop new roots and they will begin to green up on their own.  By adding fertilizer, native plants have a tendency to flop and outgrow their root systems. Resist the temptation to fertilize your plants. While heavy rains have leached nutrients out of the soil, affecting the plant growth, these conditions will usually only cause temporary nutrient deficiency.  

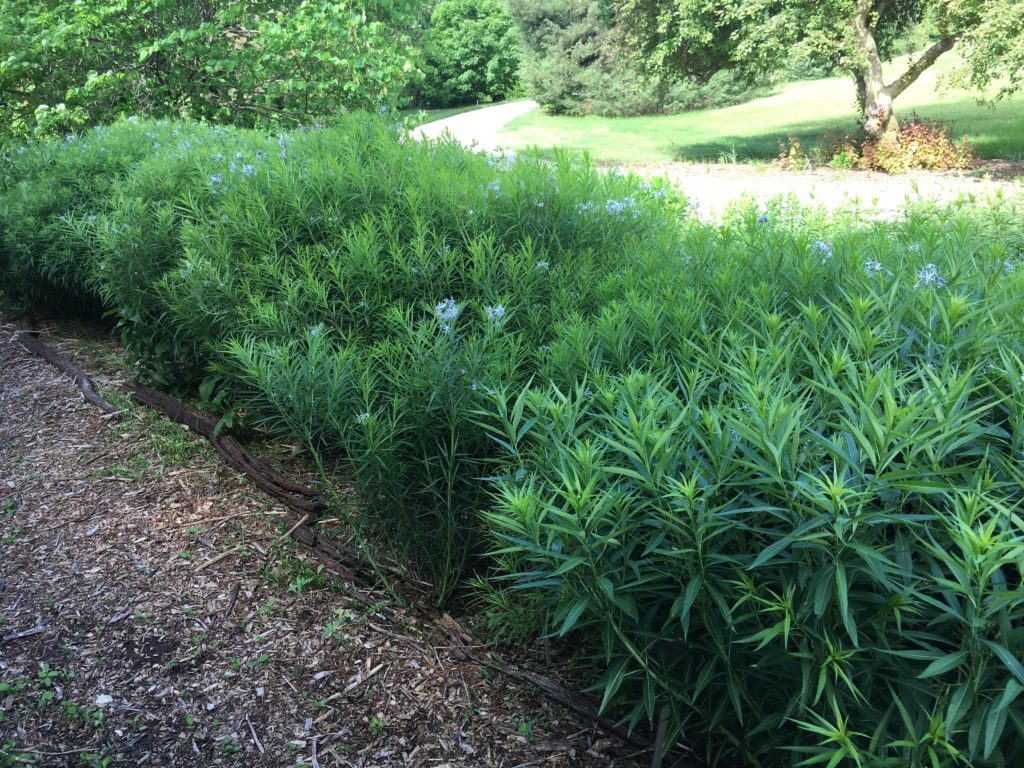
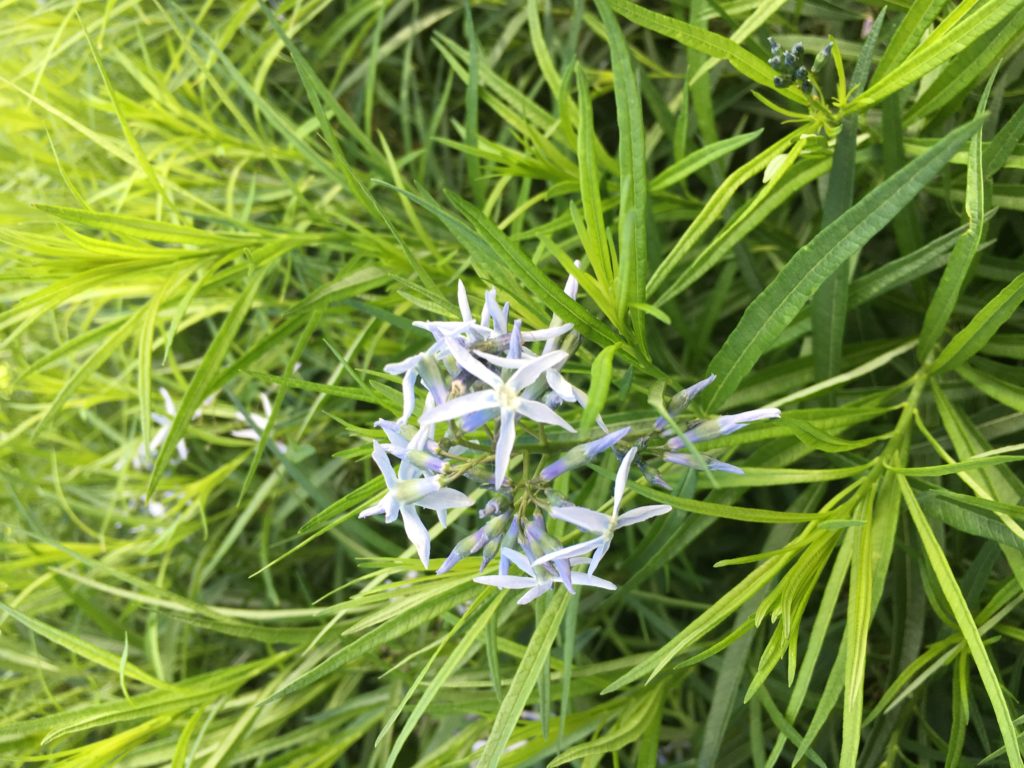
Bank of Amsonia

Plants are resilient and quite adaptable.  They should recover over time.  The long term effects of all this rain may not be fully known until later this year or even next year, but a majority of them will be fine.  One reward is that we haven’t had to water much.  We established some plants here at the Arboretum and never had to water them other than the first watering.  That is very rare in Kansas.  I love the sunshine today.  All the lush plants are loving it too.       

Katie’s Weeding Guide Part II

In a previous blog post I discussed tips for common weed identification, but hinted at a second installment covering plants that don’t quite qualify as weeds. After all, a weed is just a plant out of place! Some lovely native flowers have ‘weedy’ tendencies but don’t deserve total eradication from the garden. Here is an introduction to a few of those characters, and what you can do to control them when weeding your gardens.

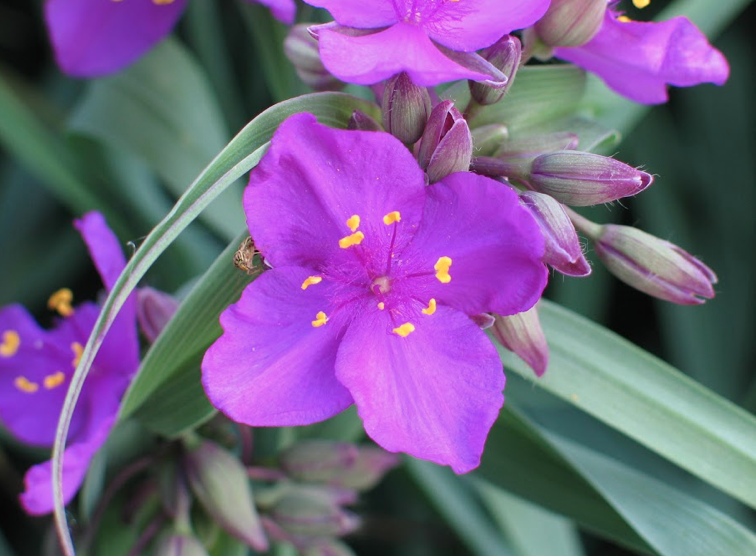
Spiderwort – Tradescantia ohiensis or T. tharpii

A lovely member of the dayflower family, spiderwort puts on a wonderful show throughout spring.

Ranging from true blue to purple, spiderwort germinates readily from seed and can quickly take over a garden. I find it in every garden we have here at the Arboretum. Hairy leaves with purple veins and a pronounced fold along the mid vein are easy ways to identify spiderwort. The short stemmed species (T. tharpii) is a nice filler around other perennials and will grow as a ground cover. T. ohiensis is taller and more unwieldy, crowding out desirable plants. When Arboretum volunteers are weeding, I ask them to remove all but a few intentional clumps. I cut the flowers frequently to prevent those clumps from seeding.

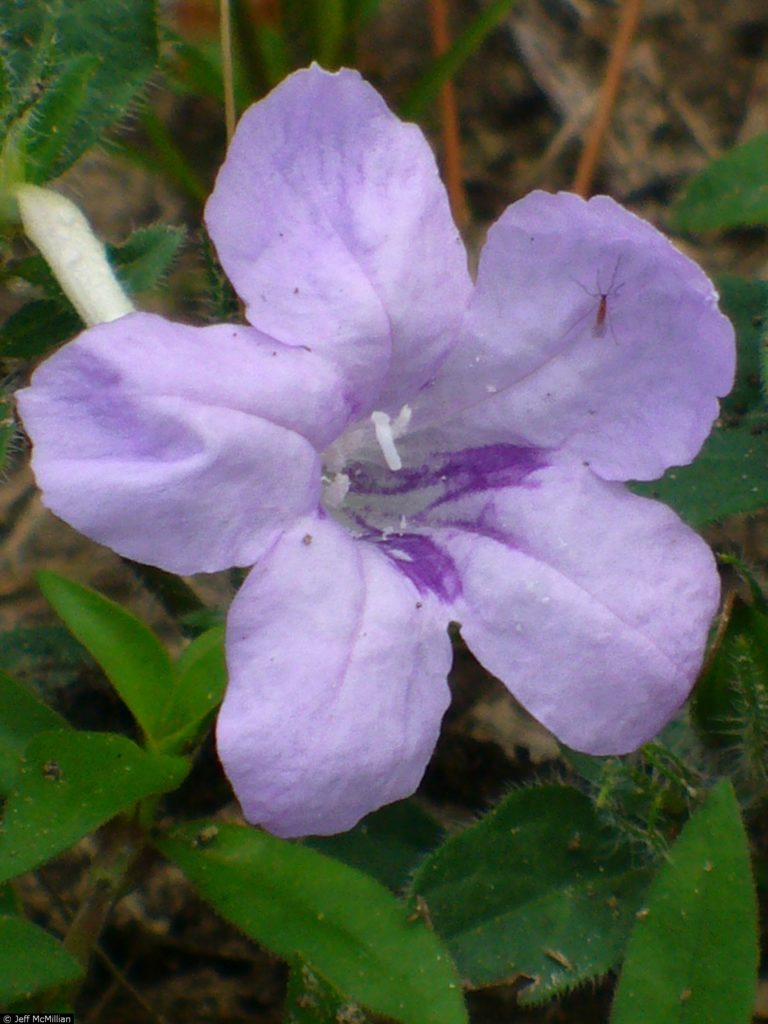
Prairie Petunia – Ruella humilis

So petite but not so polite, Ruella spreads rapidly and travels all over the garden, thanks to its exploding seeds pods. White, pink, or lilac flowers are borne on purple stems with deep green foliage. With a mainly prostrate habit, this creeper makes a nice border plant, especially spilling over rock edging. Deep rooted, it is hard to pull once mature. If these fellas get started in your garden, regular weeding won’t do it – you will need to dig them out. But maybe they are the free, fast growing ground cover you have been looking for!

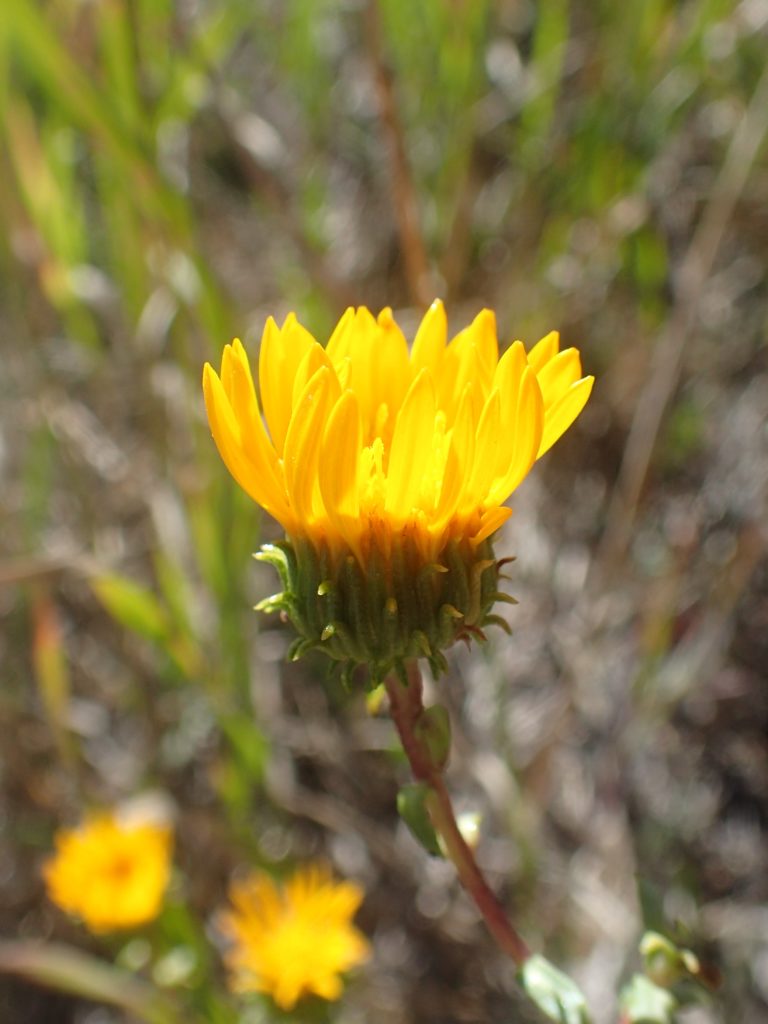
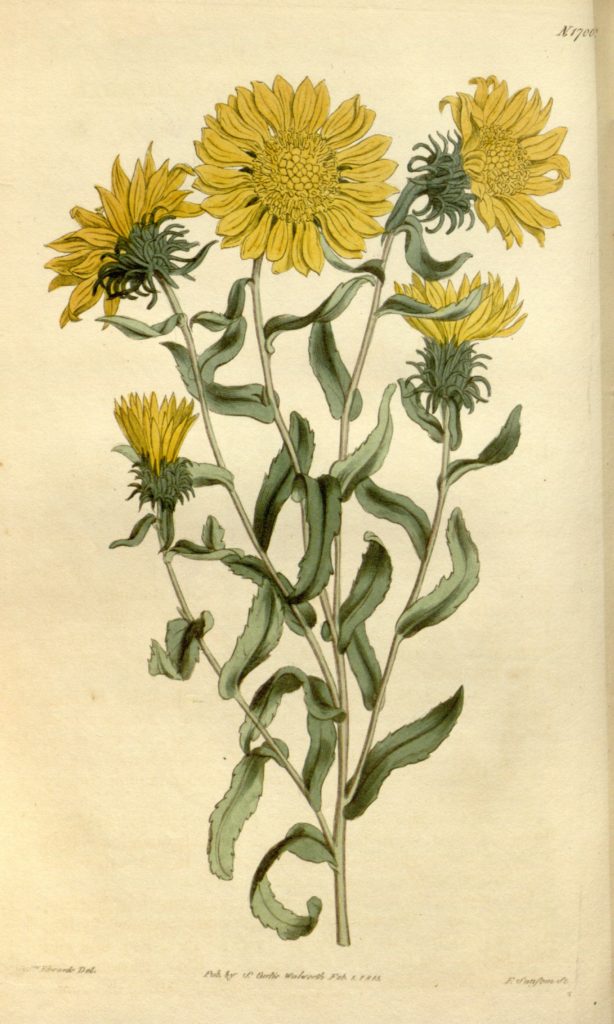
Curly Cup Gumweed – Grindelia squarosa

Gumweed can be found growing north of our Prairie Pavilion, but not for long! I am overdue in weeding them out. This western US native is cheery and adorable, but too wild to be running amuck in our formal gardens. I’d be much happier to see it growing in our prairie or around the pond edge. If you have the space, don’t pull them all out – it is attractive to pollinators and can be controlled by cutting the flowers before they seed. 

Public domain image, USA

These are just a few of the weedy native flowers that your soil’s seed bank may be harboring. Perhaps they can find a happy home in your garden, as long as you are willing to tame their bad habits. 

Katie’s Weeding Guide

Spring is finally here and what a great feeling it is to be out in the gardens again, seeing supple green buds and new growth. But that is not all I am seeing these days — weeds, weeds, everywhere! Tons of henbit, chickweed, and bindweed invading our gardens faster than I can pluck them out.

Here I provide a pictorial guide of our biggest offenders so that you might correctly identify these pests in your own garden and dispatch them quickly before they go to seed.

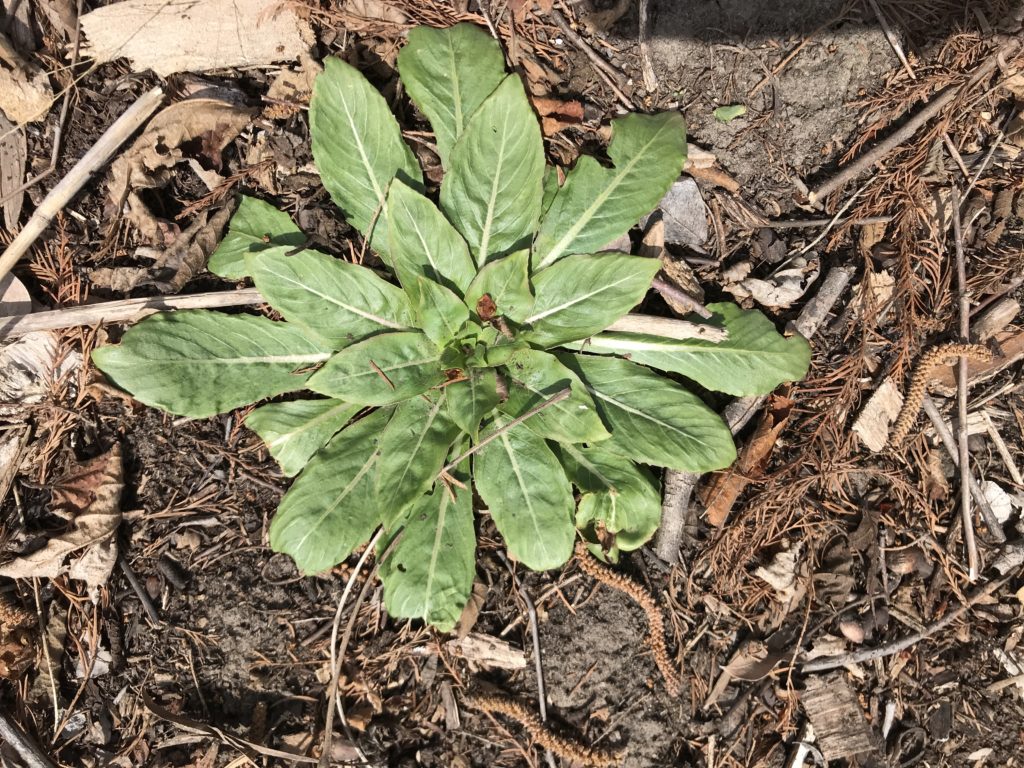
Oenothera biennis, common evening primrose, is not the well behaved, short statured primrose we use in landscaping. This garden bully is tall, lanky, and spreads seeds everywhere! Identification trick: looks for the prominent white vein and semi-pointed leaf tips.

What is a Weed?

I don’t like to throw that word around, and if you are unclear about what I mean by ‘weeds’ feel free to revisit my blog about proper lingo related to pest plants. In this post, I am simply meaning undesirable plants. This includes plants that may be native or naturalized, but are too aggressive or unattractive to be allowed in the gardens. This is a very subjective definition, but to keep this post brief, it must suffice!

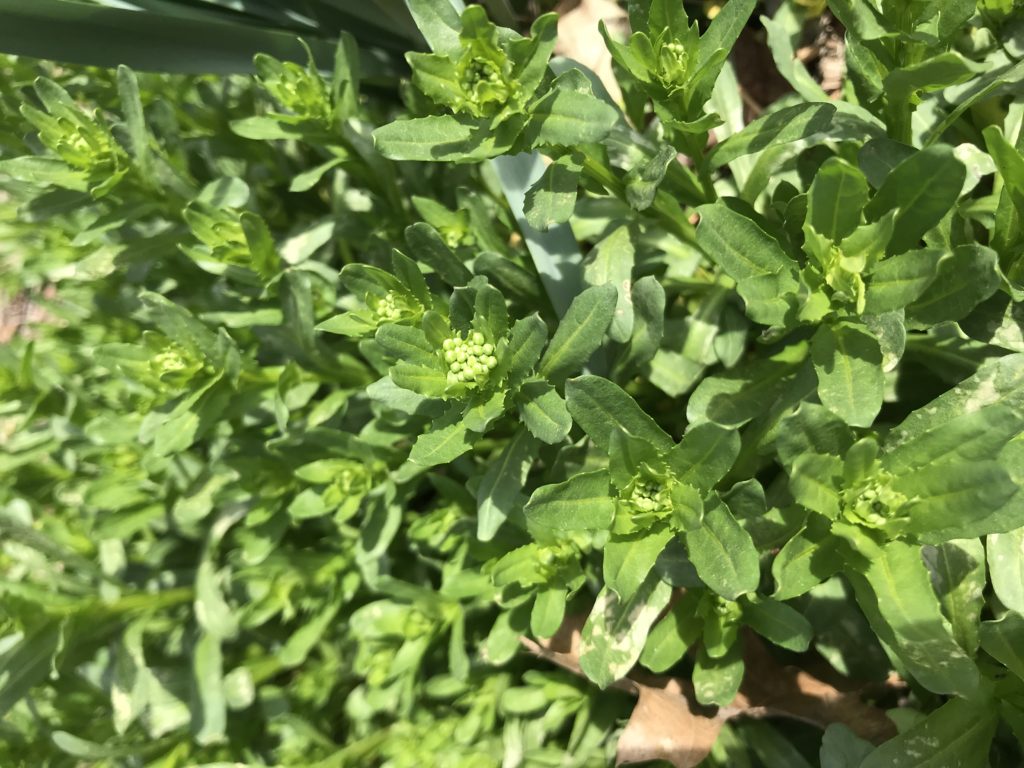
Pennycress, Thlaspi arvense, forms many leaves on its rosette before it flowers. ID tip: leaves are hairless and elongated, and they form a sort of nest for the budding flower.
Wild carrot (Daucus carota) and spanish needles (Bidens bipinnata) are very hard to tell apart when they are young. No problem, because I don’t want either of them in this garden! This photo shows wild carrot. ID tip: look for hairy stems and smell the crushed foliage. It should smell like a bitter carrot. DO NOT TASTE THIS PLANT! Wild carrot is very similar to poison hemlock, so do your homework and be safe.

Fool Me Not

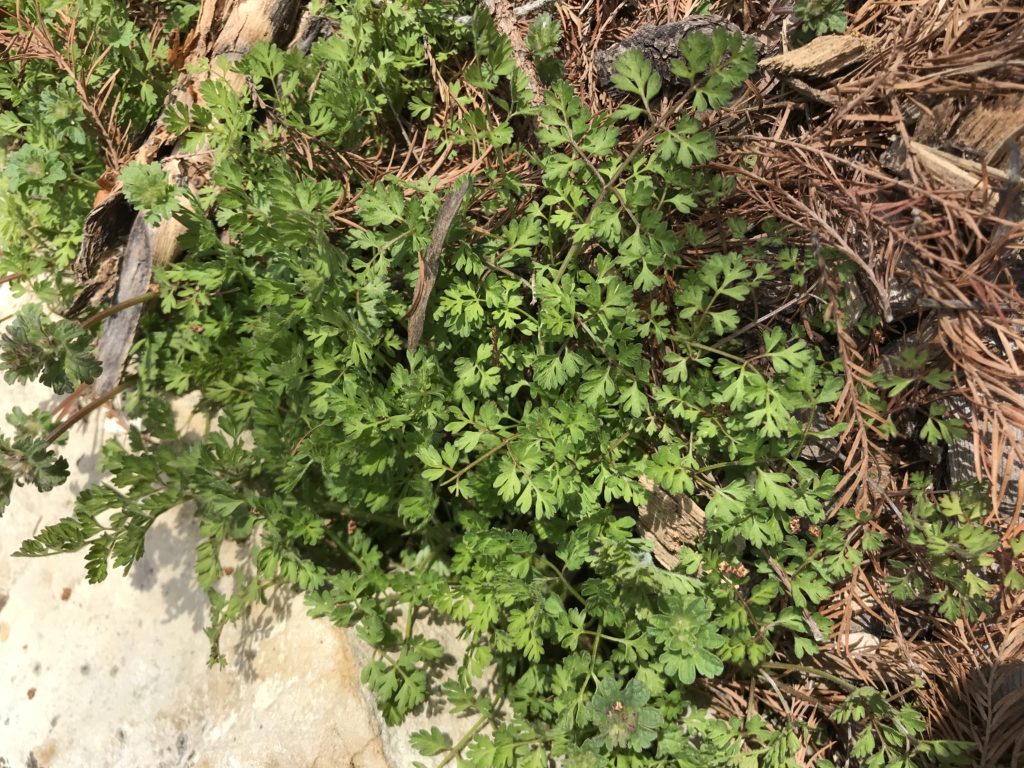
Plants are wonderful tricksters. It is often too hard to positively identify them in their early growth stages. In this way, weeds and desirable plants alike commingle in our gardens because we are afraid to accidentally pluck out something we want! Many young plants have basic, nondescript leaves and haven’t developed hairs, waxy coatings, or conspicuous colors that help humans tell them apart. Many weeds right now are in their rosette stage, without flower stems to distinguish them. So you must find other ways to suss them out! Each photo caption includes an ID tip to help you out.

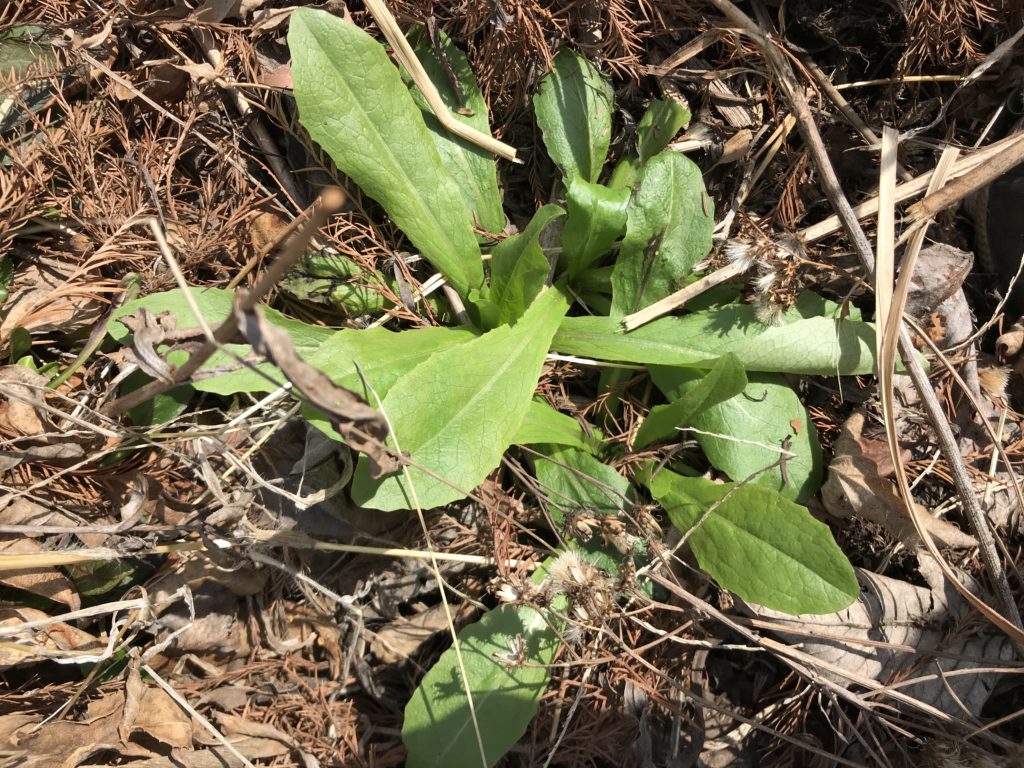
Wild lettuce (Lactuca serriola) is a rather pernicious weed that has weasled its way into our Birdwatch Garden. Some people use this plant as a wild-foraged addition to their salads, but I will stick with my garden spinach! ID tip: Wild lettuce will have spines on the underside of the leaves along the center vein. As it matures, its leaves stiffen and take on a bluish cast.
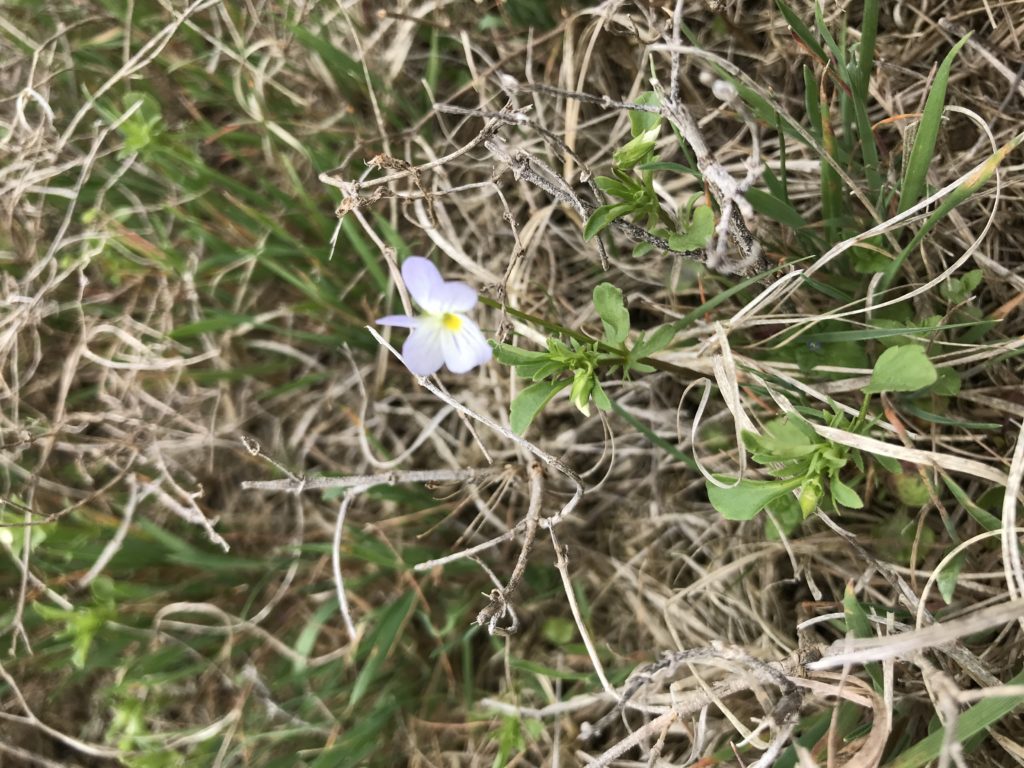
Field pansy (Viola bicolor) are a member of the Viola genus, just like pansy flowers from your nearby garden center. These adorable tiny flowers invade lawns and gardens alike. Could you stand to pull up something this cute? I don’t even bother. These add to the diversity of our lawns and they die away before the buffalo grass greens up.

Keep an eye out for part two of this topic, wherein I dive deeper ‘into the weeds’ about which weed species are truly pests and which should be allowed to happily coexist in your landscape.

Happy weeding!

An Outing for the Birds

When considering attracting wildlife to a landscape, native plants matter. More diversity of native plant species and greater area of that native vegetation coverage both translate to a higher diversity of wildlife species attracted. Add water into the habitat offerings and your wildlife species attracted will go up even more. We probably all learned these pretty simple ecological concepts in high school. I enjoyed seeing these concepts on display this last Saturday while participating in the annual ritual of the Christmas Bird Count (CBC).

CBC History

Frank M. Chapman

It was the 70th annual CBC for the Halstead-Newton area, and the 118th national CBC for the Audubon Society. The national Christmas Bird Count has a long history. The first CBC was initiated as a response to unfettered sport shooting of the mid to late 1800s. A Christmas Day bird hunting competition to see who could bring back the most birds was a common pastime. Following a concern for declining bird populations amidst a new conservation trend, ornithologist Frank M. Chapman, an early officer of the Audubon Society, proposed a new holiday tradition. The “Christmas Bird Census” that would count birds during the holidays rather than hunt them was born (see History of the Christmas Bird Count for more). The citizen science data collected by Christmas Bird Counts allow for the study of long-term health and status of bird populations across North America.

Halstead-Newton 70th Annual Count

Dr. Dwight Platt

Dwight Platt was a freshman at Bethel College when he helped start the Halstead-Newton CBC. He has organized/participated in nearly all of the 70 Halstead-Newton CBCs. This Wichita Eagle article tells more about the count history. The 16-mile diameter circle Newton-Halstead CBC sampling area stretches from Harvey Co. West Park to the eastern limits of Newton. Count organizer Lorna Harder gave us our CBC assignments. My group of six, led by master birder Gregg Friesen, observed the sunrise as we set out to our designated count area of western Harvey County.

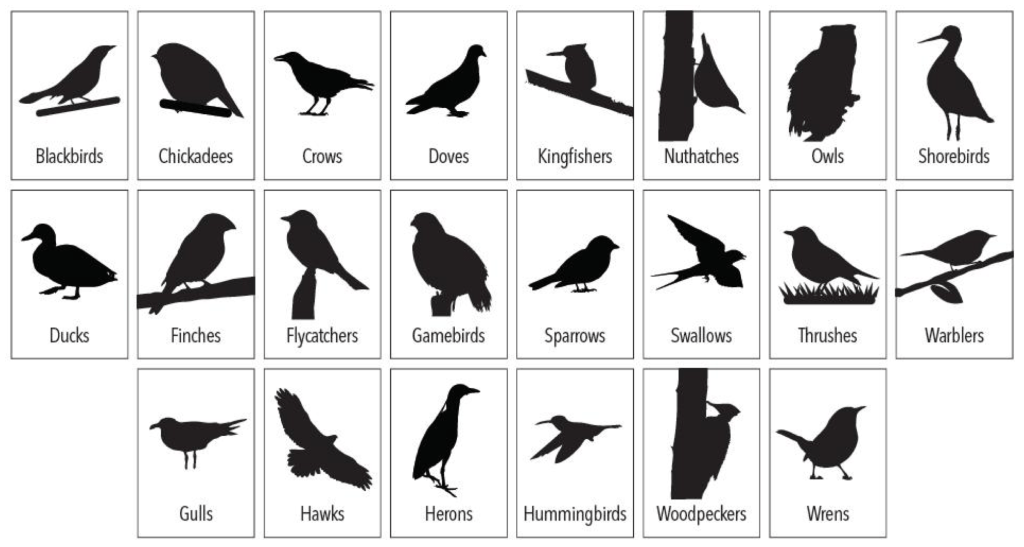
I took the job of recorder and quickly realized that I would be kept busy. The remainder of our group included experienced birders Harv Hiebert, Fred Bartel, Greta Hiebert, and Kyle Miller Hesed, who rarely had to refer to a field guide. With five pairs of eyes scanning the skies, the bird sightings came rapidly. Good bird identification utilizes perception of visual silhouette shape, flight pattern, colors/marking patterns, habitat association, and the audible patterns of calls. Even subtle variations in little “chip” and “pish” sounds can help discern species differences. My group mates incorporated all of these identification skills in ways that were quick, accurate, and impressive.

Bird silhouettes – from https://www.teacuprex.com

We started by counting what we saw from the van along roadsides, in fields, and farmyards. When we came to an area that included more adjacent habitat than farm fields, we would park roadside and spend a bit more time watching and listening. We eventually walked the roads and trails of the 310-acre Harvey County West Park, which included both sides of the Little Arkansas River and a nature trail around the 10-acre lake. Nearby “Sand Prairie,” an 80-acre parcel of sand prairie, ephemeral wetlands, shrubby areas, and woodlands co-owned by Bethel College and The Nature Conservancy of Kansas, also provides valuable bird habitat. Click on this summary of the habitat of Harvey County if you would like to know about its birding hotspots.

Data collection sheet for Sections 3 and 4 of the 2018 Halstead-Newton CBC

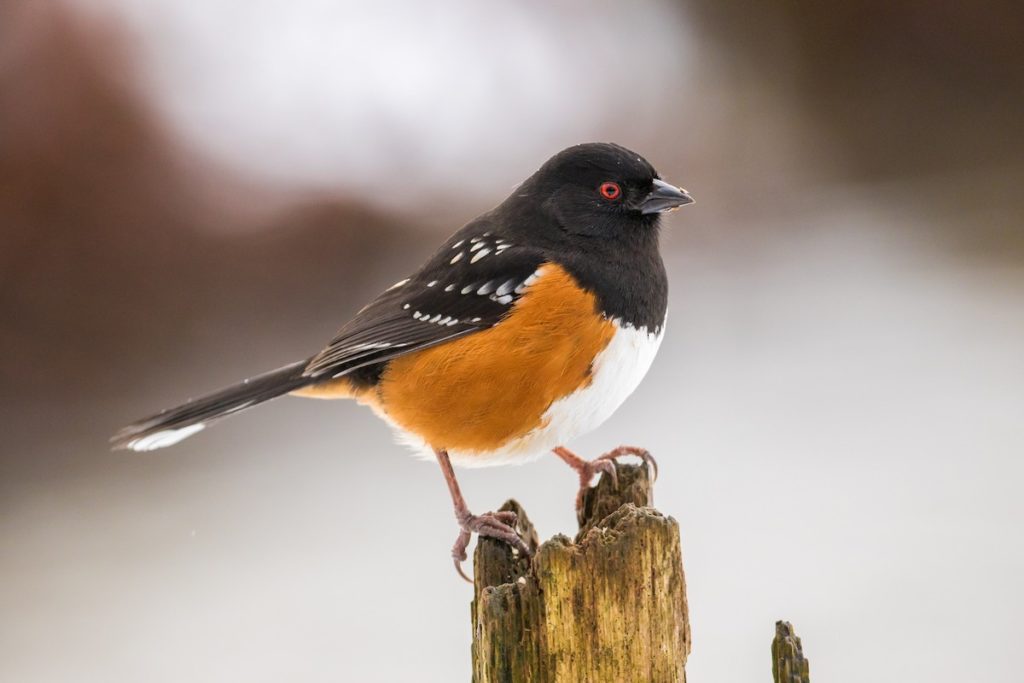
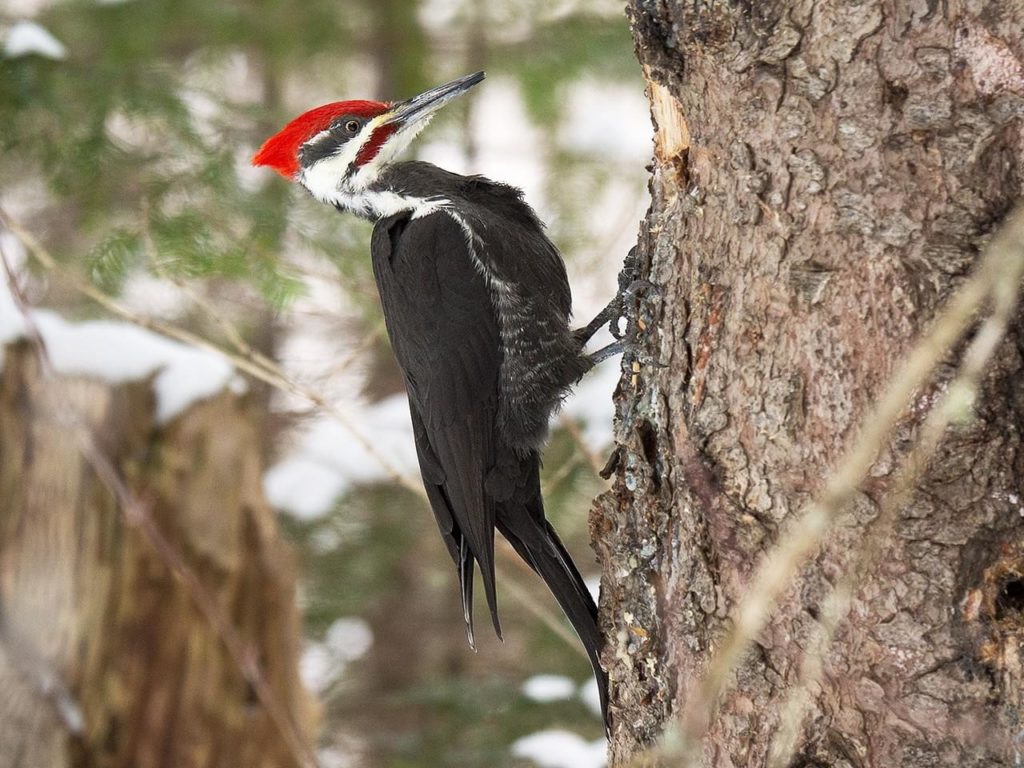
The above data sheet is a compilation of the 48 species we observed throughout the day and generally where we saw them. Red-winged blackbirds were most common and seen and heard by the thousands as their flying blackbird ribbons passed overhead. We estimated seeing 25,000 blackbirds and our estimates were probably low. Some highlight birds for me included a pair of spotted towhees, a pair of pileated woodpeckers, and a marsh wren. The spotted towhee is a pretty bird I don’t see often. A pileated woodpecker is the largest of our woodpeckers that used to be rare in Kansas. With fire suppression allowing more growth of woodlands, pileated woodpeckers are becoming more common. Gregg turned to technology to confirm the recluse marsh wren for which we only had a brief glimpse that was not adequate for identification. A quick playing of the marsh wren song from his iPhone initiated a replica response from the bird hidden in the brush.

Spotted towhee – Photograph by John Reynolds, Cornell Lab of Ornithology-Macaulay Library

Most of the birds we saw are habitat specific – they can be predictably spotted looking for food in their preferred habitats. Kingfishers and great blue herons are found around the river where they catch fish. Grassland sparrows are found in the prairies. Woodpeckers are found exploring dead limbs of trees. The spotted towhee hangs out in tangled thickets and the tufted titmouse frequents woodlands. Northern harriers or “marsh hawks” are seen flying over wetlands, and red-tailed hawks perch in the tops of trees looking for prey.

Pileated woodpecker – Photograph by David Turgeon, Cornell Lab of Ornithology-Macaulay Library

Changes in Habitat

Bird populations are affected by changes in the quality or acreage of their specific habitats. The area certainly has more trees, shrubs and woody vines today than it did 70 years ago. This change has shifted composition of bird species observed during the CBC. Management tools, including grazing, herbicide application, and prescribed burning, are needed to maintain grassland integrity in certain areas. But regardless of where you find yourself in the grassland to woodland spectrum, Kansas native vegetation still provides essential habitat of food and shelter for various bird species.

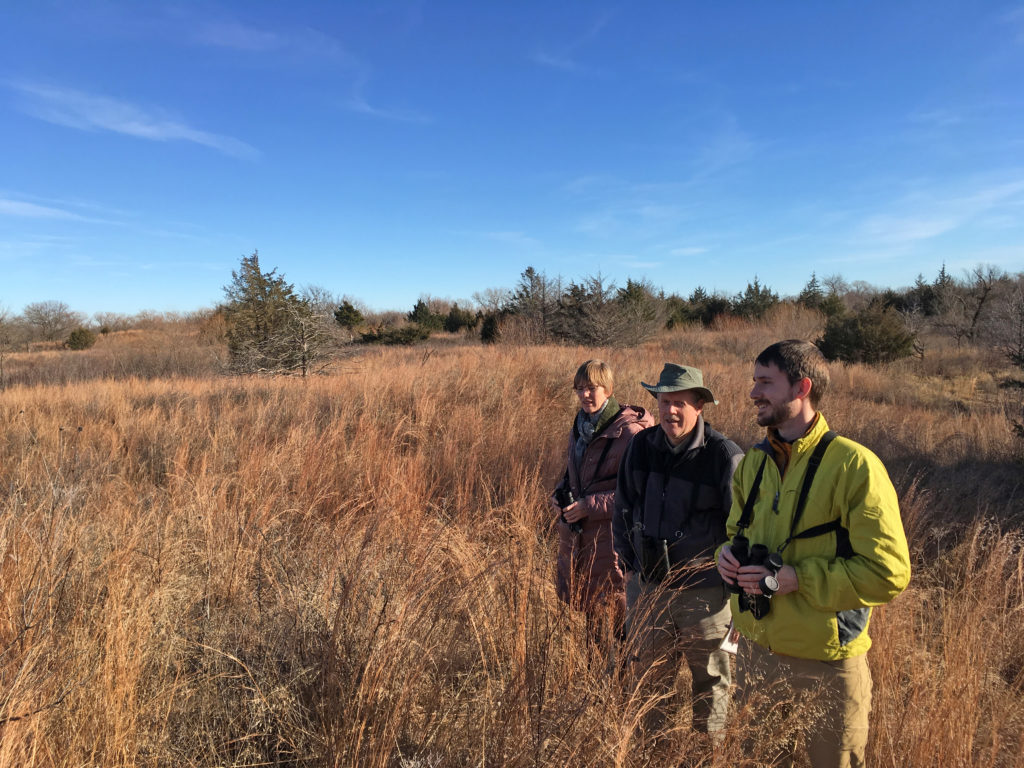
Greta Hiebert, Gregg Friesen, and Kyle Miller Hesed birding Sand Prairie

We finished the count day with listening ears for the calls of owls. Standing roadside while overlooking a marshy prairie, we watched the sunset and enjoyed a rare windless Kansas stillness. It was a perfect end to an enjoyable day of citizen science. Then, a far-off pair of great horned owls bid us a faint goodnight.