
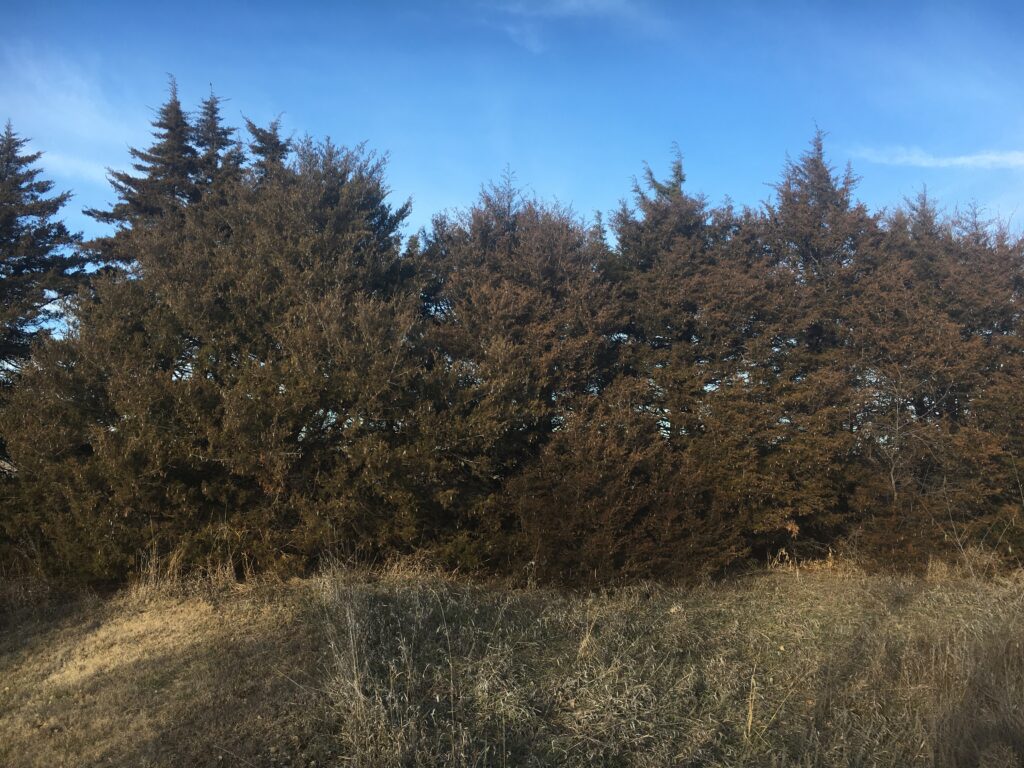
Bagworms have done tremendous damage this year. Here at the Arboretum, we made multiple applications to our junipers and spruce to get them under control. Thankfully, we have not had to manage bagworms the past five years too much. However, across the countryside this year, juniper shelter belts are covered with thousands of brown bags dangling from the branches. These are not very festive and don’t bode well for 2021.
Bagworm Life Cycle
Here is a glimpse into the various bagworm life cycle stages throughout the year:
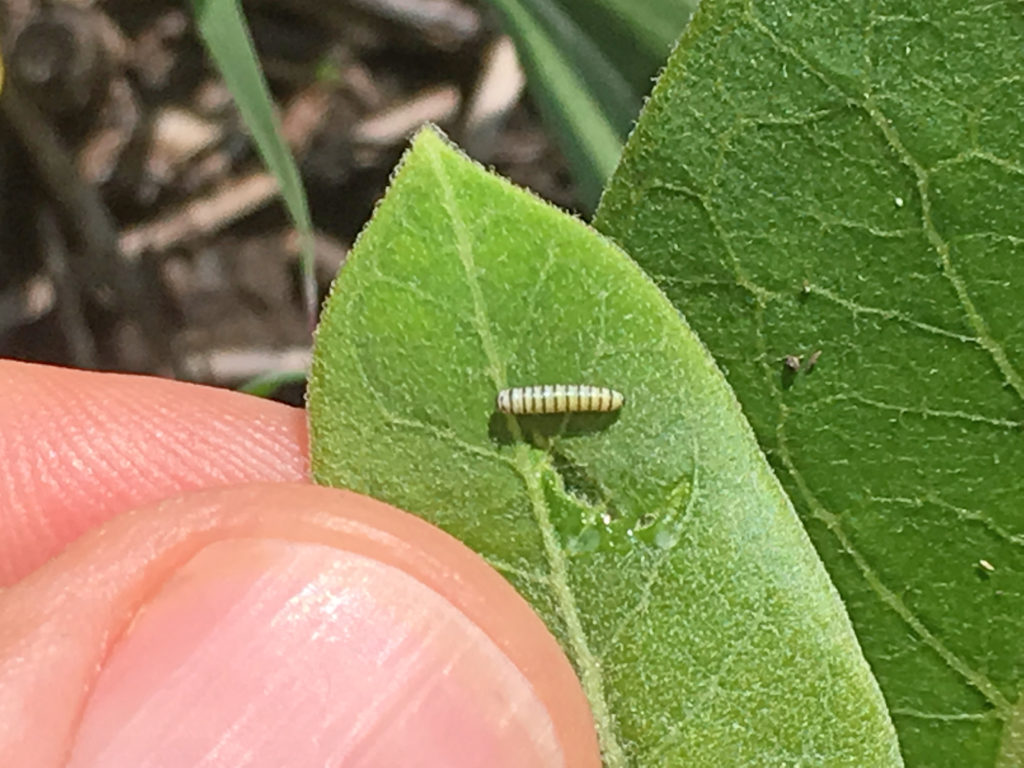
In late May through early June, the eggs deposited in the bags the previous fall begin to hatch. Once the eggs hatch, the larva spins a silk strand that hangs down. These larva begin eating immediately or wind transports them to nearby plants.
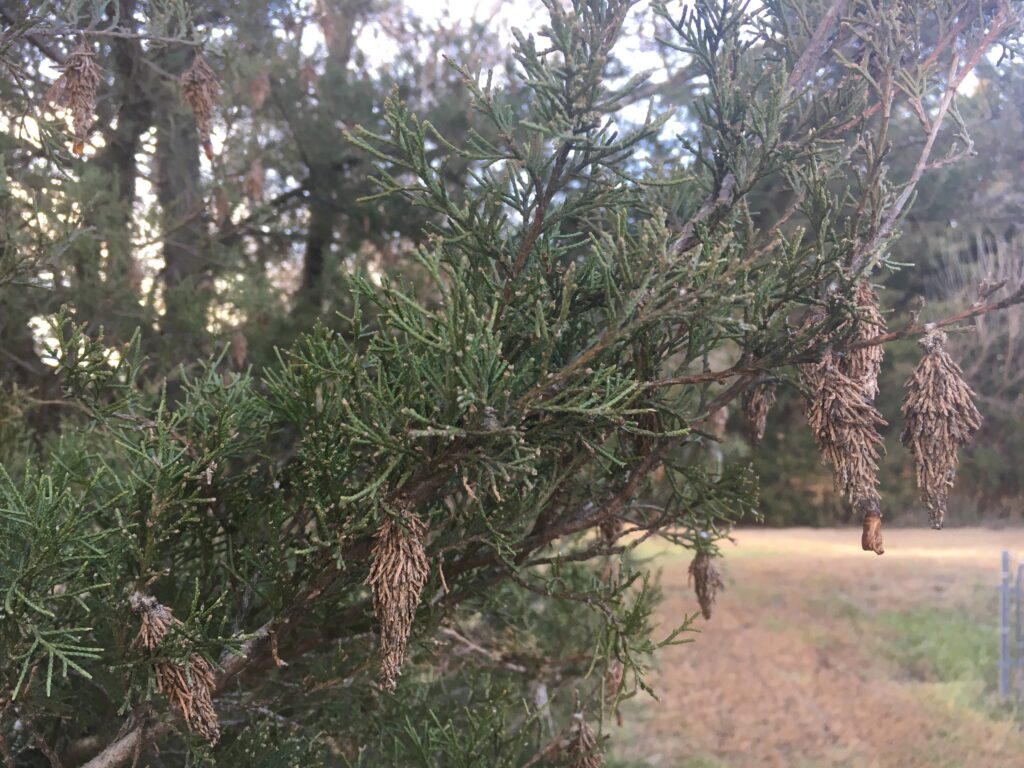
Once the larva finds a host, it starts to make a new protective bag around itself. It remains inside this bag, sticking only its head out to eat from the host. If large populations exist on the same plant, they can do tremendous damage as they continue to mature.
The larva continues feeding until it matures by the end of August. It then attaches the bag they are in to a branch with a strand of silk and starts developing into a pupa.
Adult male worms appear in September. These are tiny, grayish, moth-like insects with fur on their body and transparent wings. Adult bagworm females are wingless. They never leave the protective bag.
Mature male and female worms mate with each other to produce offspring. Strikingly, these pests die after mating. Male moths die outside the bag while females die inside the bag and get mummified around the mass of up to 1000 eggs in her case. The eggs hatch in end-May or beginning of June the following year.
Only one generation of bagworm eggs are produced every year.
Bagworm Hosts
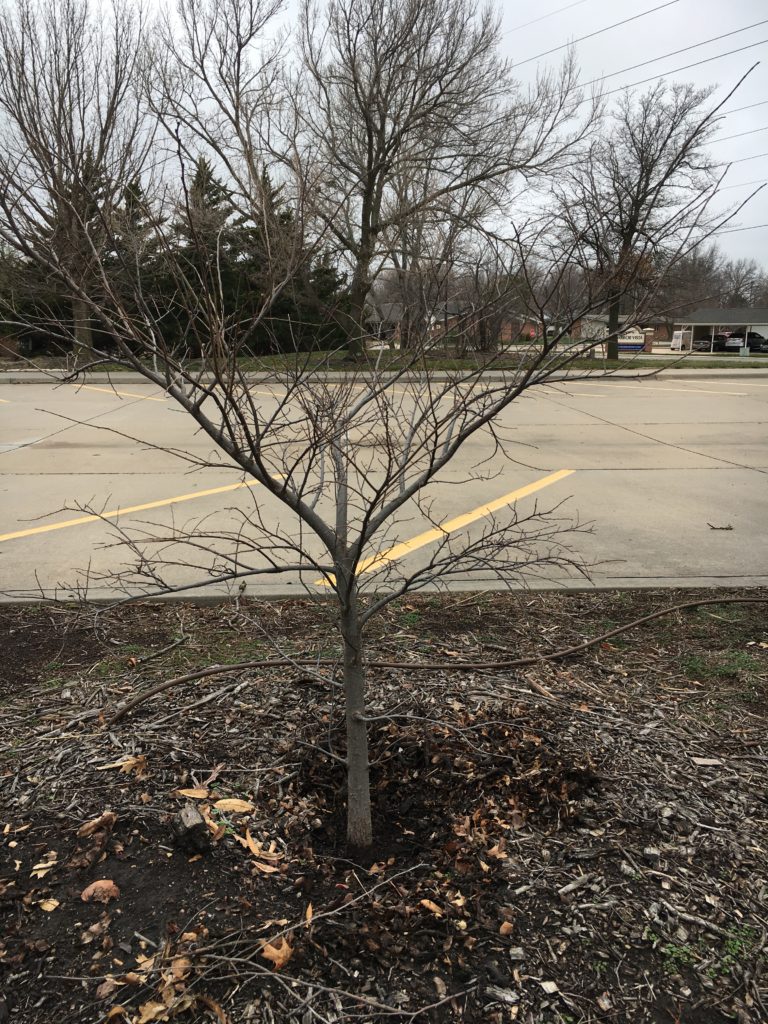
Bagworms feed on a wide variety of trees and shrubs, but is primarily a pest on evergreens such as arborvitae and Eastern red cedar, cypress, and spruce. Bagworms are quite adaptive. In the absence of these preferred hosts, bagworm will eat the foliage of just about any tree: fir, pine, hemlock, sweetgum, sycamore, honey locust, black locust, willow. Adult moths do not feed, living just long enough to mate. I have even seen them hanging off brick foundations, signs, and houses. They use the paint flecks to camouflage themselves.
Natural Controls
Each year, bagworm populations vary widely. Parasitic wasps, diseases, low winter temperatures, bird predation affect population size. Sometimes large populations are shortlived and let’s hope that is the case this year. With large populations existing this year, we are set for another bagworm problem in 2021 if some of these other controls don’t happen.
Manual Controls
Because bagworms are so conspicuous, overwintering bags and the eggs they contain can be picked from small trees and shrubs now and then destroyed. This is a viable option on small areas and smaller trees. You must discard, the bags completely because any surviving eggs will hatch and disperse larvae to re-infest trees.
Spraying for Bagworms
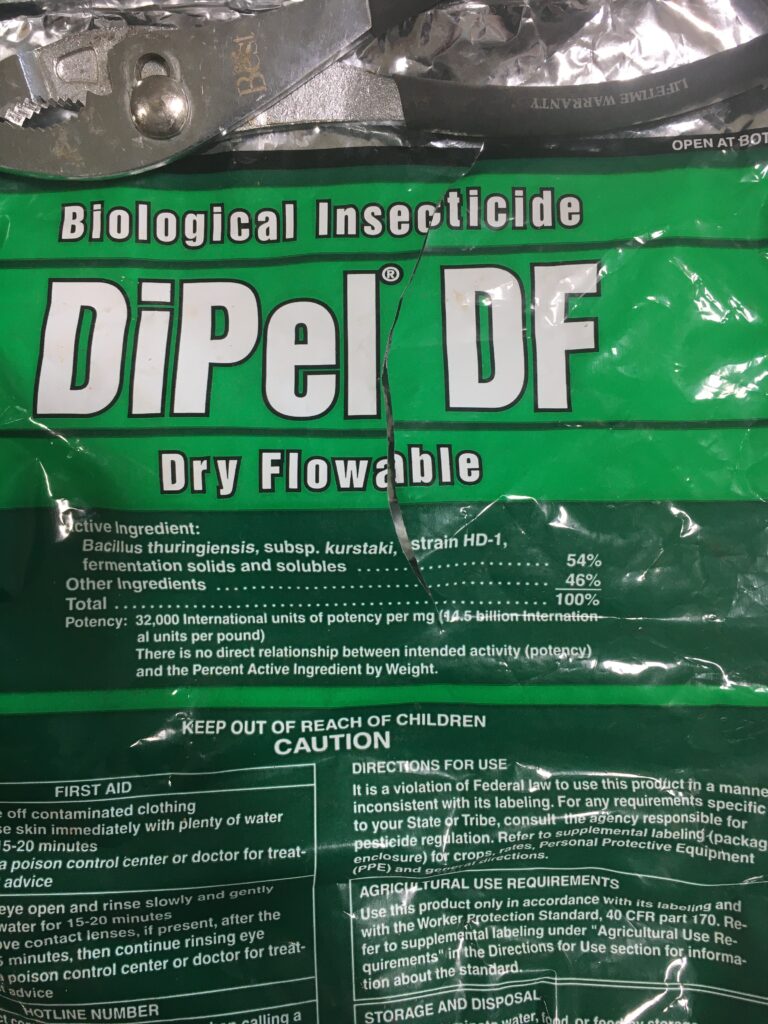
It is critical that you monitor your trees in June for bagworms. The most effective time to control them with spraying is when the bags are less than ¼ inch in length. We use DiPel® DF biological insecticide dry flowable on the bagworms. This proven insecticide is derived from a soil bacterium that selectively targets destructive caterpillars and worms. This product is highly selective and will not harm beneficial insects. It contains Bacillus thuringiensis (Bt) that the larvae ingest, giving them a terminal stomach ache. It usually requires several applications with a high pressure sprayer to get the spray to the tops of the tree but it is very effective and safe.
There are other labeled, registered insecticides available to use as an alternative means of control against small bagworm larvae in spring or early summer. These are usually not the best option because these chemicals not only kill the bagworms but other beneficial insects. We encourage you to use these as a last resort. When larvae are more than 1/2 inch (13 mm) long, it is nearly impossible to kill them using insecticide. It is often at this time or later when bagworm infestations and associated defoliation become apparent and it is too late.
With everything else going on this year, why wouldn’t we have a bagworm problem? It seems rather fitting. Hopefully, this information will help you plan for 2021 to keep bagworms in check.


