Water Smart: Steps to Establishing Your Native Plants

Originally published on April 29, 2015, here are some helpful hints from our Executive Director Scott Vogt on getting your native plants established using “waterwise” methods.

Also, due to the rainy weather during our FloraKansas Native Plant Sale last weekend, we are happy to announce we will be having a “rain check” native plant blitz this coming Saturday, May 6, from 9 a.m. to 2 p.m. If you missed the weekend sale, come enjoy the lovely weather and consult with Scott and our other native plant experts in the greenhouse.


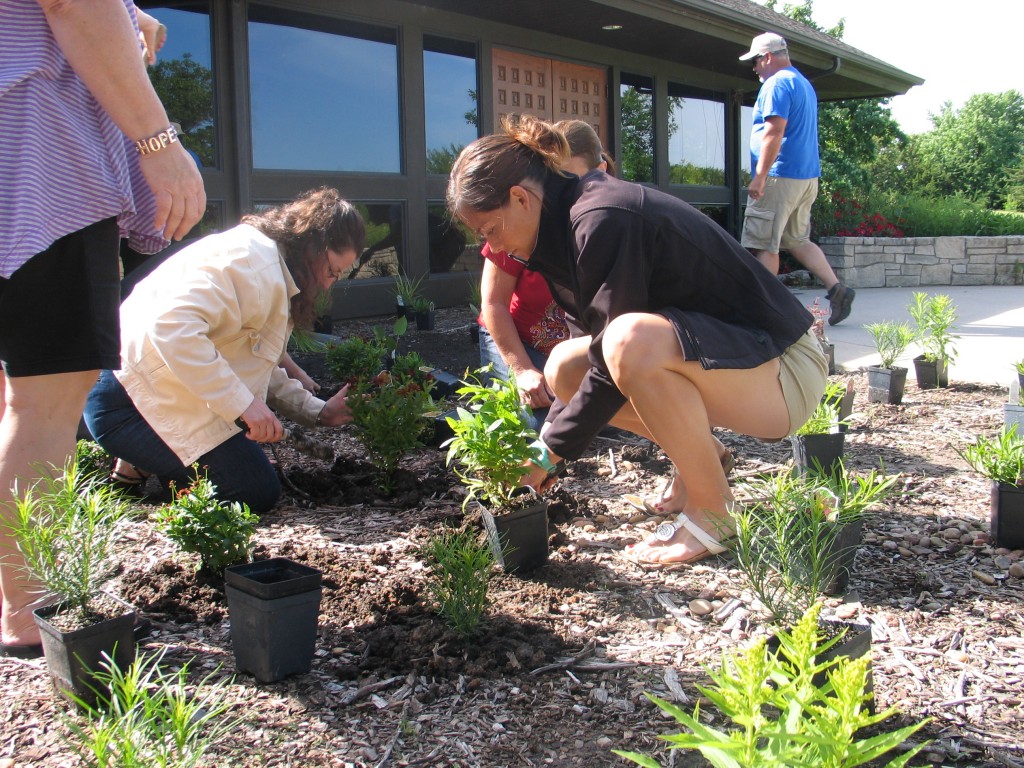
Now that you have purchased your plants at our FloraKansas plant sale and hopefully gotten them planted in your landscape, you’ll want to be intentional about watering methods. It’s true, native plants are more drought-tolerant than you may be used to. However, in order to get your plants successfully established, they will still need some careful attention these first few weeks and through the summer.

Follow these steps to be “water smart” as you establish your native plants:

4-23 photo 2

The First Year

When planting: Water plants as soon as you get them in the ground. Allow the water to soak in, then water again until the soil is thoroughly moistened.

First Two Weeks: Water plants daily depending on the weather.   If it rains, skip a watering.  Just-planted roots are only able to absorb soil moisture from the potting soil.  They have not attached to their surrounding soil.  When you see new growth, the plants have begun to get established.

First Month: Unless the weather is extremely hot and dry, you may be able to decrease watering frequency to two or three times per week.  Generally, you want the soil to be dry an inch or two below the surface before you water. Too much water leads to foliar and root problems.  It is optimal to allow the soil to dry between watering because this encourages roots to grow deep.

Following Months: Water only when top inch or two of soil dries or when plants display signs of being dry.  Water deeply and infrequently.  How much water will depend on your soil and environmental conditions.  Don’t forget to check your plants during the winter months.

IMG_0380


The Second Year

Water deeply as needed.  During prolonged periods of dry weather water once or twice per week.  Generally, it takes plants at least two years to fully develop a sustaining root system.

The Following Years

Properly planted and watered plants should be fairly well established, and can thrive with less watering than you may expect. Drought-tolerant plants may need no supplemental water, whereas shallow-rooted plants or plants with greater water needs may need water weekly. Many plants, when selected for the conditions in your yard, may need watering only once or twice a month in dry weather.

Picture1

Best Management Practices for Native Plants (BMPs)

Drought-tolerant plants: Even drought-tolerant plants need regular water until they are established!

Young Trees and Shrubs: Young trees and shrubs need deep regular watering. During times of little or no rain, water deeply once a week until trees become established.

Fertilization: Don’t fertilize new plants.  Fertilizing during establishment encourages rapid top growth that is not sustainable by the root system.

Mulch: Mulch new plantings with 1-3 inches of mulch and keep mulch away from plant stems.

Water in the morning: Less water is lost to evaporation.

Choose the right watering method: A soaker hose applies water directly to the soil and reduces evaporation. If you are planting a few plants in an existing planting bed, hand watering can get the new plants the water they need while not overwatering the rest of the bed.

Get to know your soil: Is your soil sand or clay?  It greatly affects watering frequency and duration.  Our clay soils can only take in about an inch of rain per hour.

Check soil moisture before watering: Check soil moisture with finger or spade.  Soil should be dry an inch or two below the surface before you water.

Recheck soil after watering: At least an hour after you water (or two hours with clay soil), probe soil to see how deeply the water penetrated. If it didn’t reach the root zone, you may need to increase your watering.  If the area is soggy, try cutting back on watering next time.

Pick the right plant for the right place: Choose plants that are pest-resistant, require less water, and match the sun, shade, and soil in your yard.

Avoid planting in hot, dry weather: Plants will easily stress and not develop healthy roots under hot, dry conditions.  If you must plant in summer, plant in the cool of the morning when less water is lost to evaporation.

A Land Ethic is Alive and Well in Kansas

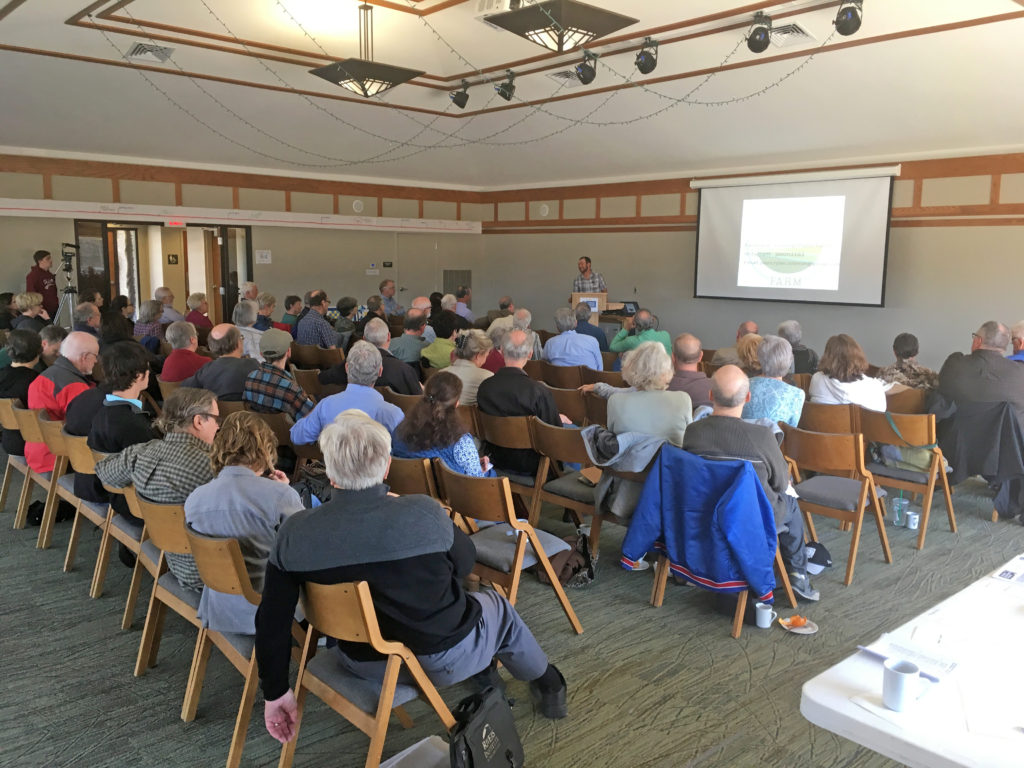
On Saturday, March 18, we held our 11th annual spring education symposium entitled Living the Land Ethic in Kansas, and learned how much we have to celebrate in Kansas. This symposium was many months in the making and it went smoothly thanks to our four staff, help from a number of board members, the assistance of many volunteers, and underwriting support from Kansas Humanities Council.

The speakers were top-notch and their messages were filled with immense knowledge and passion. Those among the 85 registered attendees were literate, engaged, and full of great questions. The homemade baked goods for breakfast, Lorna Harder’s venison stew for lunch, and nice day outside to enjoy during breaks all helped round out a perfect day.

Rolfe Mandel

Craig Freeman

Michael Pearce

Jason Schmidt

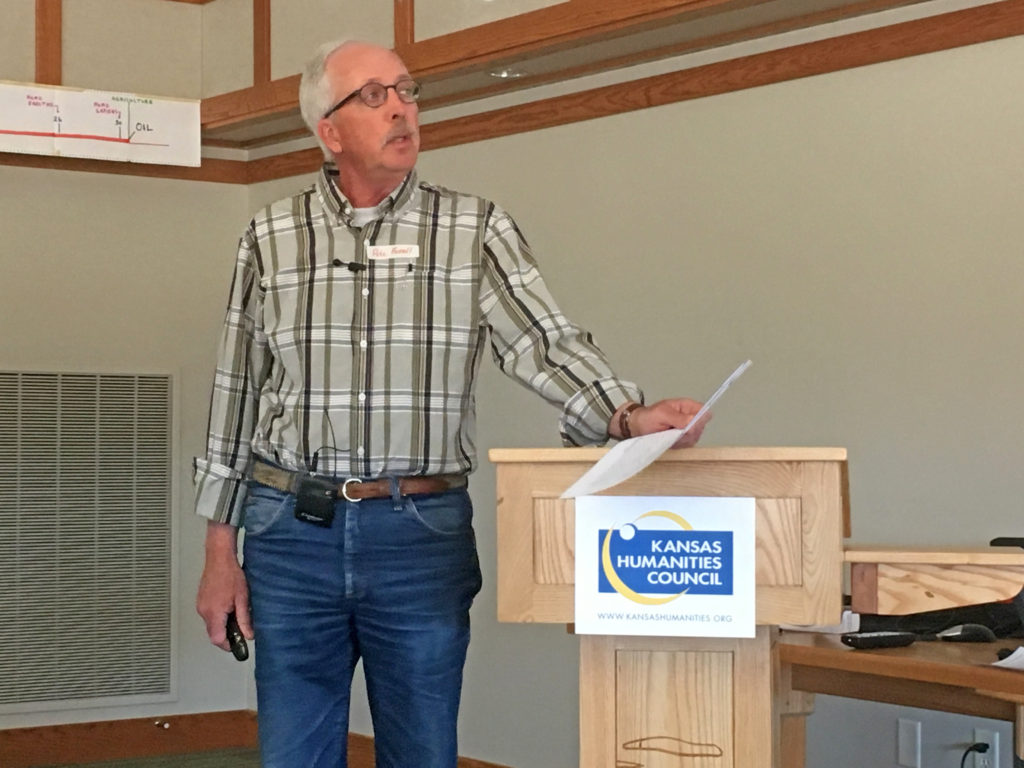
Pete Ferrell

Brian Obermeyer

Erin Dowell

Wes Jackson

I gave a brief introduction of how this symposium developed as part of our year-long Dyck Arboretum 35th anniversary celebration with a focus on Aldo Leopold’s Land Ethic chapter in his famous book A Sand County Almanac. We then heard presentations about the essential Kansas natural elements of “The Land” from educators and writers, Rolfe Mandel (soils), Craig Freeman (vegetation), and Michael Pearce (wildlife) and how these elements are foundational to our Kansas natural history, agriculture/ranching-based economy, food systems, and land-based enjoyment and recreation. Land stewards Jason Schmidt, Pete Ferrell, and Brian Obermeyer told their stories of how being a land caretaker is not only a way to make a living but that it is part of a cherished way of life through which one strives to sustainably pass along stewardship responsibilities to future generations. Elementary school teacher, Erin Dowell explained how critical it is to instill a land ethic in our children that will be our future land stewards. And visionary, Wes Jackson, rounded out the day with a presentation about how we as agricultural agents must steward the land as part of a living ecosphere.

The day was filled with dialog and rich with a variety of science as well as humanities topics about the important interplay between the land and people. Thank you to all participants!

Spring Native Planting Guide

As winter fades and the warm moist winds of spring begin to blow, or have been blowing, those of us who love gardening are eager to get our hands dirty planting something in the ground.  We long to see something green, to see something in bloom, and to see pollinators and birds foraging in our yards.  There are so many wonderful aspects to look forward to in the garden.  As you anticipate spring and put together your plant shopping list, here are a few tips that will be a helpful guide as you plan your landscape.

Investigate

Learn about the plants you want to include in your overall landscape plan.  The web is a valuable source of information along with our Native Plant Guide 2017.  I like to read several websites from various places to determine how plants have performed in other gardens.  Plant labels can be deceiving, because they give a broad perspective of the plant, with little or no specific information on how the plant will perform in your area.  Rarely do plants grow as large or as full as the label describes.

Watch the weather

As much as I want to put something in the ground, native plants – particularly native grasses – need warm soil to get them started.  If soil temperatures are below 60⁰, they will not root or begin to grow.  It is better to wait until the soil is warm than to plant too early.  Resist the urge to plant too soon.

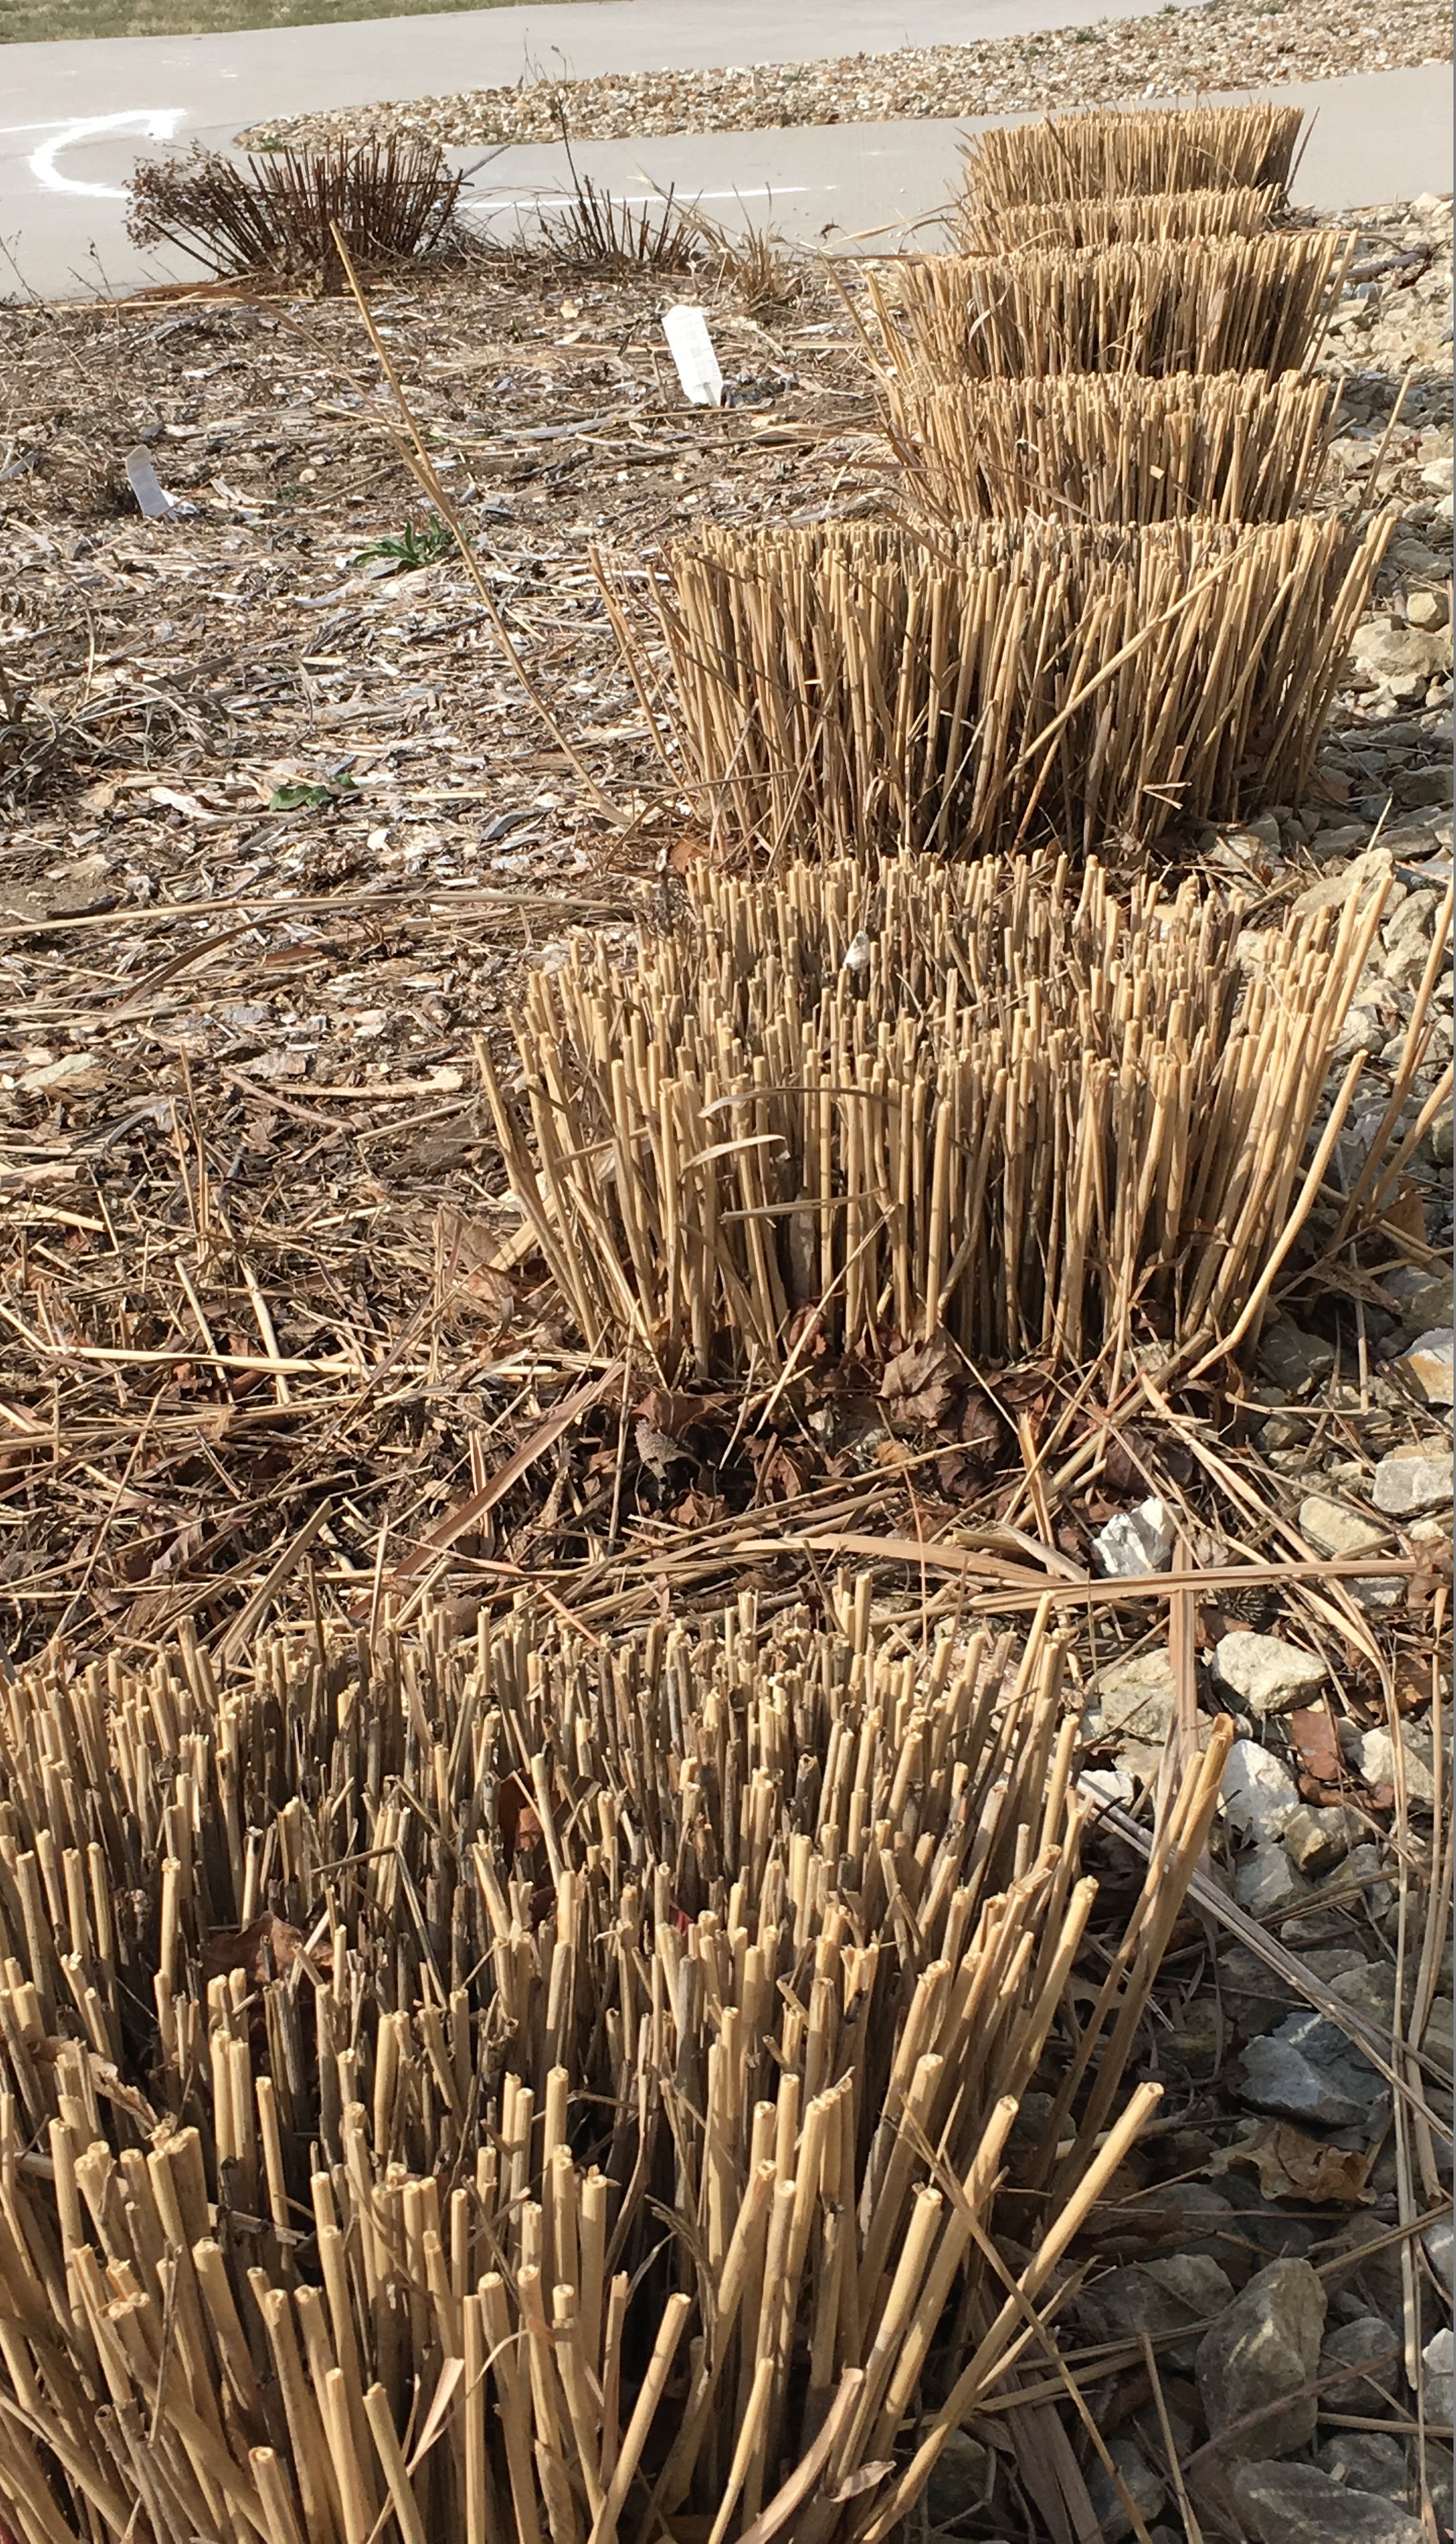
Dormant Panicum ‘Northwind’ Switchgrass trimmed and ready for warmer days.


Observe your site

I have said this many times, but it bears repeating – the most important step in planning and designing a native garden is to match the plant up with your site.  Take time to observe your area.  Is it sunny or shady?  Does it stay wet or dry?  Is your soil sandy, clay, like concrete, or some other mixture?  Does it get morning sun and afternoon shade or vice versa?  What is your hardiness zone?  Can plants withstand a cold winter?  Choosing the right plant for your landscape will save you time, energy and resources in the long run, because these newly established plants will need less care throughout the growing season.

Sun Guide

“Full sun” means an area receives at least six full hours of direct sunlight each day.  Most wildflowers and grasses, including buffalograss, grow best under these conditions.  A south or west exposure is most common.  These plants can endure sun through the hottest part of the day.

“Part sun” means four to six hours of sun each day.

“Part shade” means four to six hours each day.  Most plants that need protection from the hot afternoon sun fit into this category.  East or northeast exposure is most common.

“Full shade” means less than four hours of sun per day.  Spring ephemerals and woodland species require this type of setting.

Grouping plants

One of the design principles that I remember most from college was that plants grouped in odd numbers are more appealing to the eye.  Plant three, five, or seven of the same wildflower or grass.  They will stand out in the garden, be easier for pollinators to find and look better together than one single plant blooming by itself.  It may cost a little more, but the visual impact will be that much greater.  Also, plan your garden so wildflowers are blooming throughout the year, spring, summer and fall.

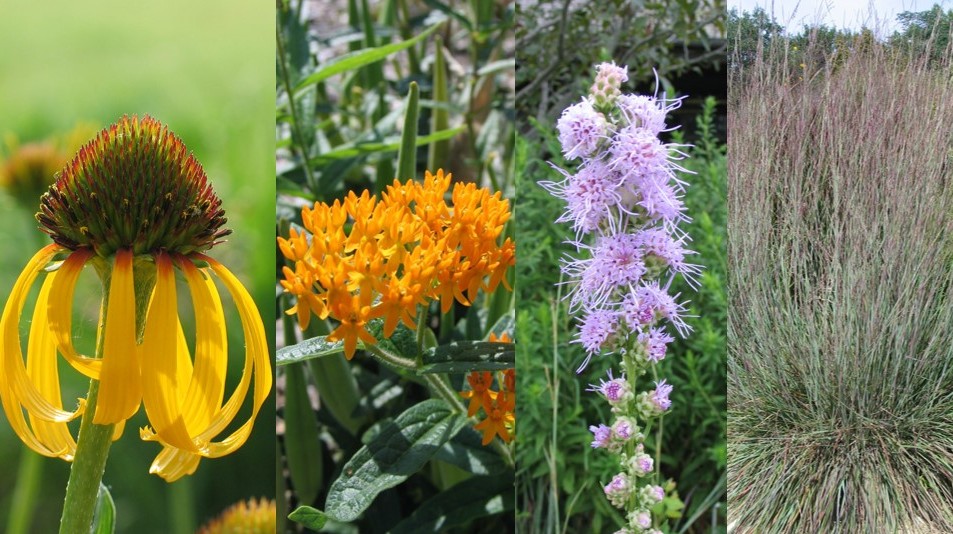
From left to right: yellow coneflower (spring), butterfly weed (summer), button blazing star (fall) and little bluestem (fall/winter)

Plant spacing and scale

Give each plant the room it needs.  Think of the mature height, width and scale of the plants you are establishing.  Is it too large for your area?  To keep plants in scale means choosing plants that don’t grow larger than half the bed width (for a 6 ft. wide bed, choose plants that are no more than 3 ft. tall, not a compass plant that gets 10 ft. tall).  Some wildflowers look good individually, such as asters, while others look better grouped together, such as coneflowers or blazing stars.  Also, you might consider using taller wildflowers or grasses as specimen plants to frame other perennials.

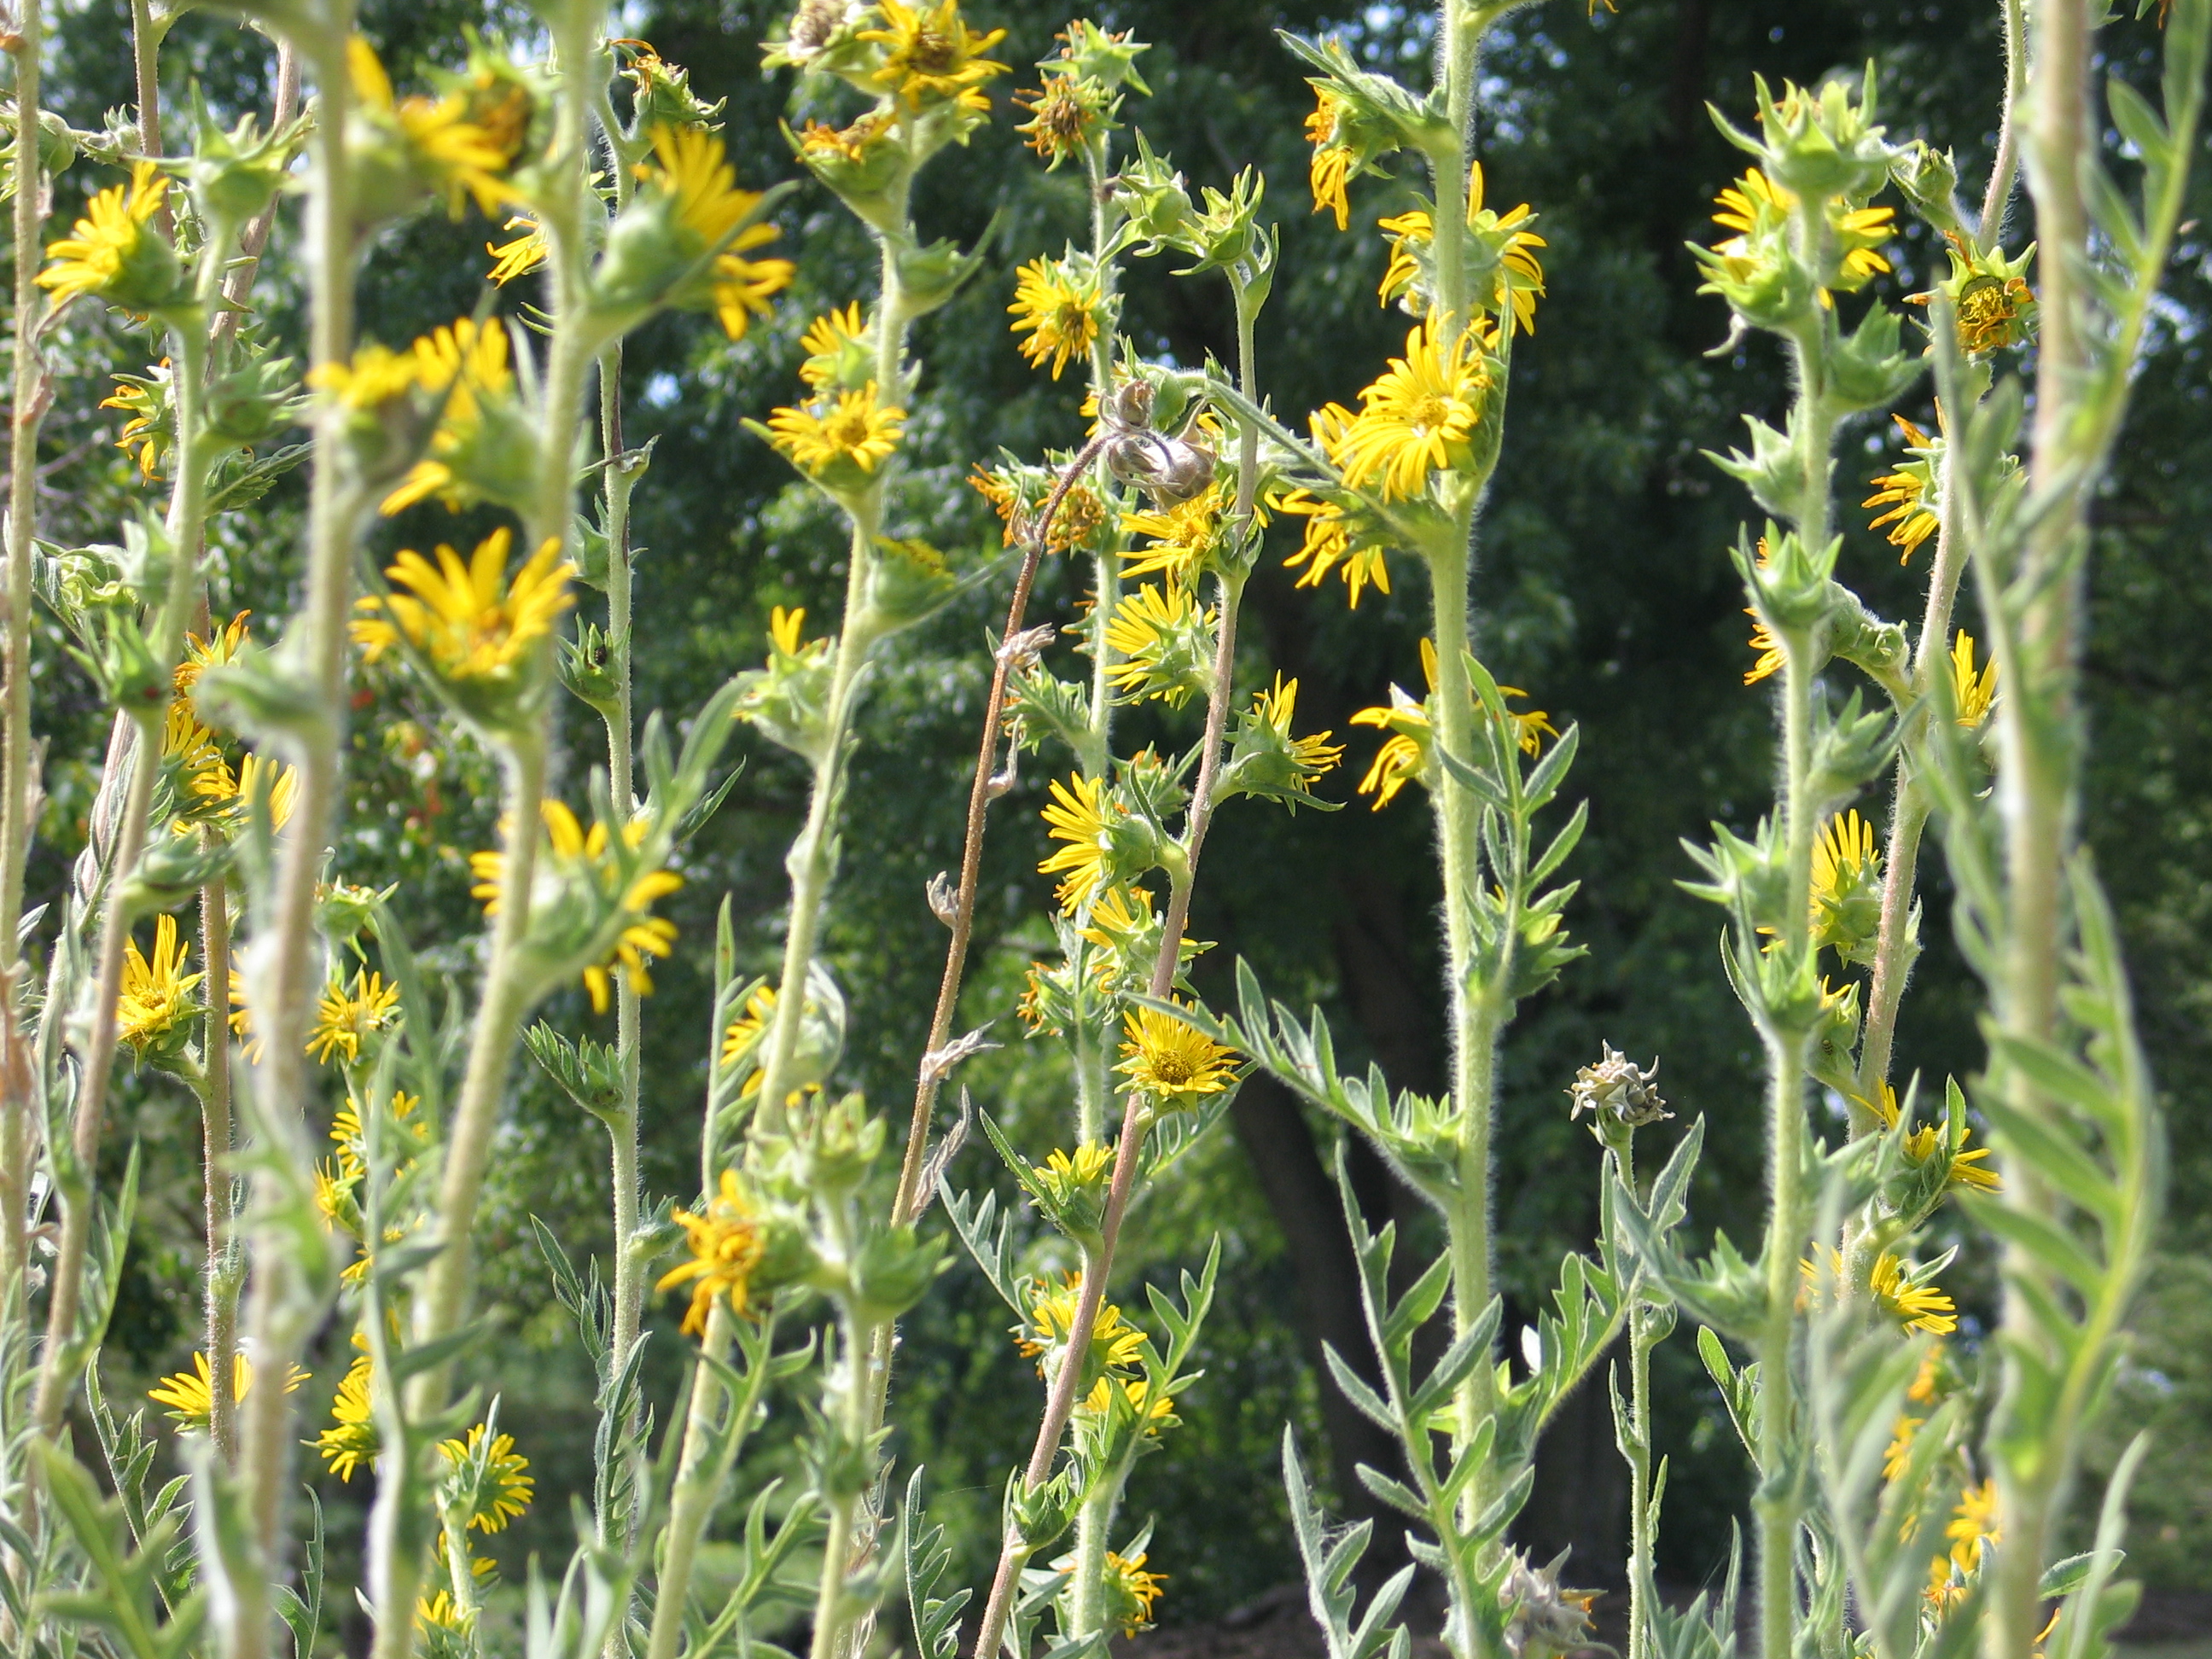
Compass plant is a beautiful tall wildflower, but not for a small garden. It needs plenty of space since it can grow ten feet tall.

If you purchase plants early, carefully tend them until you can get them in the ground.  Watch the weather and move them into shelter when freezing temperatures are in the forecast. Don’t over water them, but keep soil moist until they are planted. Here is our watering guide that provides step by step instructions to successfully get your new plants established.

Now is the time to prepare your area for plants so you are ready when conditions are right. Typically, I wait until after April 15 (average last frost date) before I plant. Even then it is no guarantee that cold weather will not return. Good luck and enjoy the spring.

Needy Seeds: How to Germinate Prairie Species

January and February can be dull months for a gardener. When the north wind whips and the drizzle freezes, spring seems a lifetime away. But here at the Arboretum these cold months are a busy time for seed treatment. Seeds we’ve collected and ordered are prepared according to their species-specific needs.

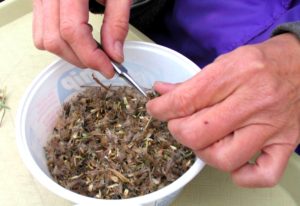
Photo from Dyck Arb

Seeds collected for the Prairie Window project being cleaned and sorted

Stratification

There are many specific types of stratification: warm-moist, cold-dry, cold-moist, water-soak, etc. Many prairie wildflower species require a cold-moist stratification period, a sort of “man-made winter”. Seeds are amazingly self governing, with built-in mechanisms to prevent germination until conditions are suitable. For species that have spent thousands of years adapting to the Great Plains, this means reading and reacting to seasons: long, cold, moist winter gives way to spring. Aha, time to sprout! It is the stratifyer’s job to convince the seed that winter has come and gone.

Cold stratification involves

  • first, mixing the seeds with media (sterile soil, sand, sphagnum moss, vermiculite)
  • wetting it slightly (too much moisture and the seeds will rot, too dry and they won’t germinate)
  • then storing in a refrigerator for a specified length of time

Each species is a little different – some need 60 days of cold, some need 120, and some just 10. Be sure to look up the requirements of each species if you are stratifying your favorites at home.

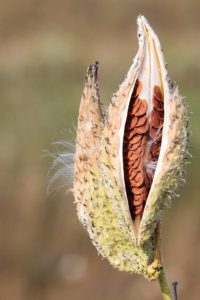
Common milkweed (Asclepias syriaca) seeds waiting to catch a breeze. 30 days of cold, moist stratification is all you need to germinate them for yourself.
Photo from: https://commons.wikimedia.org/wiki/File%3AMilkweed-in-seed.jpg

Scarification

Scarification is any process that weakens the seed coat, purposely making it more permeable to gases and water that trigger germination. In the wild, these seeds would only sprout after many years of freezing and thawing, or perhaps after being passed through the digestive tract of a seed eating animal. If you want to germinate tough-coated seeds for your own garden (and you don’t have the digestive tract of a bird) then you will need to simulate nature’s scarification processes. This is done by nicking seeds with a knife or rubbing with sand paper. Seeds naturally activated by wildfire may need to be treated with nearly-boiling water. Some seeds perform best after an acid bath! Every seed is unique.

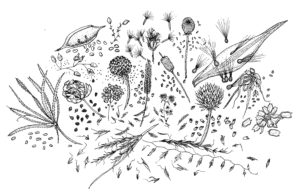
Line drawing of prairie seeds by Lorna Harder. This is the featured graphic on our “Prairie Restoration” informational sign on the Arboretum grounds.

Fall Sowing Alternative

Fall sowing is often less work intensive than manual seed treatment. Let mother nature do the work of breaking the seed coat by sowing your seeds in late fall. The cycles of freezing and thawing mixed with intermittent winter moisture will produce much the same effect as the previously mentioned methods. But be patient – some seeds may take several years to germinate this way.

If you are looking for high quality native seed, Prairie Moon Nursery is a good source.

To find species-specific information on seed treatment, check out Growing Native Wildflowers by Dwight Platt and Lorna Harder, available in our gift shop.


Christmas Lights – Tips and Tricks

Christmas lights make this time of year festive and bright… but oh so frustrating! Here at the Arboretum we put up thousands of lights every year in preparation for our annual Luminary Walk. We put them on the buildings, string them in the grass and hang them in trees. We know a thing or two about the misery those little twinkle lights can bring. Impossible to fix and eternally tangled, and how do you store them for next year so they don’t drive you crazy all over again?

Cartoon by Mark Parisi – more Christmas funnies at https://www.offthemark.com/

Fear not, Christmas merrymakers! Here are a few tips to keep you from turning into a Christmas light scrooge.

Invest in the Right Tools

When light strands go on the fritz, there is no sense in wiggling every single bulb to see which is the troublemaker. That is the way of the past! If you, like me, have A LOT of lights to fiddle with, the best way to handle it is with a LightKeeper tool. This is what we use here to diagnose our strands of lights. It has a fuse/bulb/socket tester and current detector. Usually sold for about $20, it can save you a lot of time and trouble, preventing you from throwing lights in the garbage out of exasperation. This is most useful for incandescent types and only ‘kinda-sorta’ works on LEDs.

Note: In general LED lights seem to have less problems than the older style incandescent and the bulbs break much less often because they are plastic instead of glass. If you buying new, buy LED – less fixing and less energy usage.

Step by step, this is how I doctor our mini-incandescent Christmas lights:

  1. First look for obvious broken bulbs somewhere within in the section that isn’t working. Broken bulbs can disrupt the current.
  2. Inspect for chewed/broken wires (see next paragraph regarding rodents)
  3. Use LightKeeper tool to detect where the current stops — locate the problem area and test a few of those bulbs and sockets to find which one is burnt out/stopping current.

Step 3 is where you will spend most of your time, but what a feeling when it all finally lights up – you become Master of the Lights!

Me and my LightKeeper tool. If you want to be this happy, find a light fixing tool that works for you! Perhaps they will hire me for an infomercial….

Never Underestimate Your Resident Rodents

If you store your Christmas lights in an attic, garage, or shed, you may have rodent problems. These green and white wires are irresistible to little nibbling creatures – mice, rats, squirrels and bunnies. Even after you put them outside on your roof and shrubs you are still vulnerable to those maniacal munchers. You can change every bulb in that strand of lights but if a mouse or rabbit has chewed through one of the wires, no go! Before giving up on a particularly stubborn set of lights, run the entire length of it through your hands (unplugged) and check for any exposed wires that might be causing the issue. It can be easily fixed by stripping the plastic off the wire and twisting them back together with a wire nut from the local hardware store.

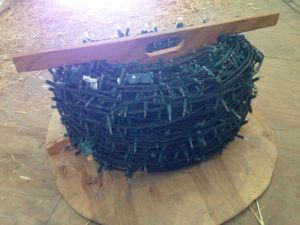
These are the wooden spools we use to keep our lights detangled and damage-free while in storage.

Take a Break and Dry Out

If your lights quit working in the wet weather, don’t force it. Many of our older sets of lights act up in sleet and slush, probably due to loose bulbs allowing minuscule amounts of moisture into the connections. It can also be caused by a weak spot in the extension cords exposed to wet conditions and tripping your safety functions at the outlet. The best option here is to let the lights and cords dry out and get back to fixing them when you actually have a chance!

Smart Storage

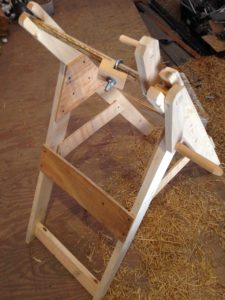
All the work you did this year will be for not if you don’t store your lights properly! Organization is the name of the game. Broken bulbs will result from over stacking or crunching. Tangles will re-form if you just throw them in boxes or roll them up without securing the loop. We have created a stand and roller system for neatly and carefully rolling up the our strings of lights.

For fewer lights you may consider wrapping them around a piece of cardboard/wood or around cylinders (coffee cans? giant spools?) for storage. We keep all our lights coiled and shelved for the off season, many sets labeled for their specific area so there is no guessing about what fits where next year.

One of our volunteers constructed a standing crank for us to spool the Christmas lights onto. Very handy and easy on my back!

I hope you all spend less time fixing your decorations and more time enjoying them. Merry Christmas friends, may it be bright!


Finding Common Ground with Native Landscaping

In the gardening off season now, you have a chance to think about the big picture of what you want for your landscape. Consider a plan that resonates with the general public by finding common ground with native landscaping. I will offer some suggestions that help keep your native landscaping from looking like a “weed patch”.

Let’s start with some perspective. Landscaping in the United States has many different influences and varies greatly from formal to wild/ecological. You have a whole spectrum of styles to consider.

Formal Gardening

Many of us were taught to appreciate the formal landscapes and garden designs made famous in Europe and France centuries ago featuring rectilinear lines with meticulously-trimmed lawns and hedges. Much of our society today still prefers this landscaping style as is evident in city codes and homeowner association regulations that encourage and even mandate manicured vegetation. With this style, we value leaves over flowers, vegetation simplicity, order, control and tidiness. Intensive use of mowers, trimmers, water, fertilizer, herbicides, fungicides, and pesticides, help efficiently maintain this style of landscaping that symbolizes human domination of nature.

schlossvillandrygarten10deshadowed

Gardens of Château de Villandry, France. Photo by Peter Dutton.

Ecological Restoration

On the other end of the landscaping spectrum is ecological restoration. Plant communities native to a place are used as the blueprint to reconstruct a functioning ecosystem. Seeds of that plant community (i.e., prairie grasses and wildflowers in South Central Kansas) are planted and disturbance vectors (i.e., fire and grazing) that originally maintained that plant community are restored. While intensive preparation and planning go into reconstructing a prairie, this style of landscaping is eventually low maintenance, requires only implementing/simulating occasional disturbance, and mostly embodies working in sync with nature.
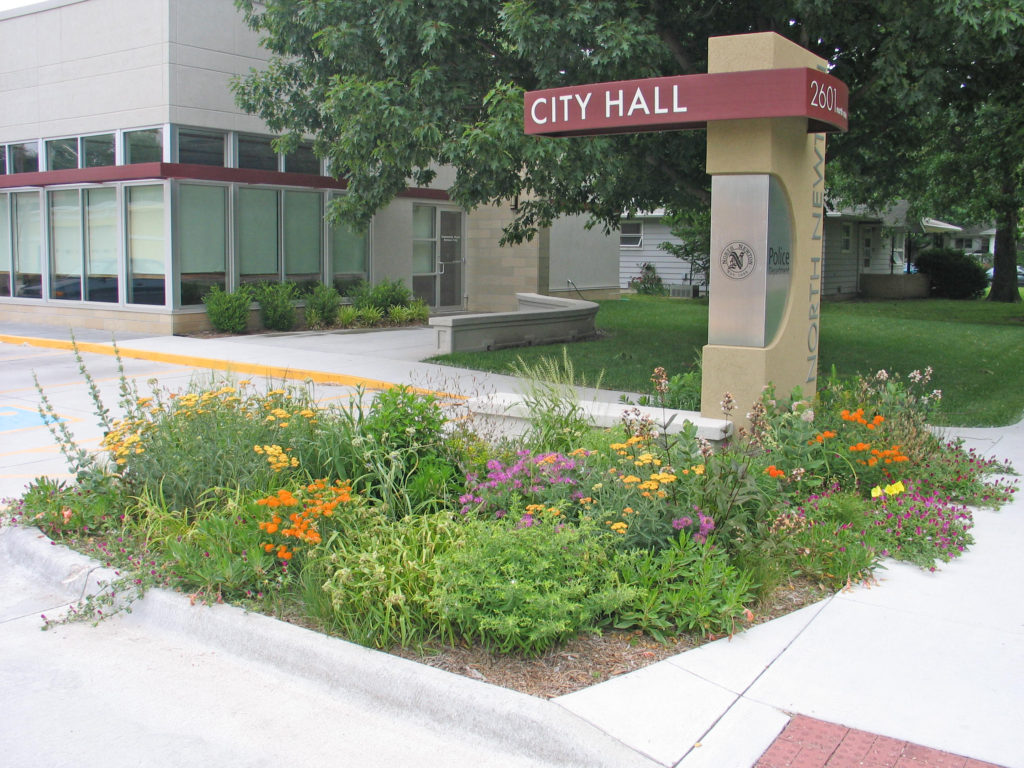
Reconstructed Prairie at Dyck Arboretum of the Plains.

Reconstructed Prairie at Dyck Arboretum of the Plains.

Native landscaping advocates, promote many benefits of this latter landscaping style:

  • Colorful flowers and seed heads with varied shapes and textures
  • Diverse habitats with food and shelter that attract various forms of wildlife
  • Dynamic landscapes that provide year-round visual enjoyment
  • Long-term low input needs with regard to water, fertilizer, herbicides and pesticides
  • Adaptation to natural environmental conditions
  • A cultural connection to earlier inhabitants that used native vegetation for food, medicine, and ritual; building a “sense of place”

There are barriers, however, to landscaping this way in cities. Fires and grazing are not practical in urban areas. Annual mowing adequately simulates these activities, but dealing with that much biomass can still be cumbersome. Codes limiting vegetation height and social expectations driven by the formal garden mindset are hurdles for folks wanting to landscape with native plants. Native plantings are often seen as messy “weed patches”.

But you can still landscape with native plants in publicly palatable ways and enjoy many of the listed benefits. While my training and education are in ecological restoration and I used to be an advocate for restoring diverse prairies in urban areas, I realize that is not usually practical. I’ve moved towards the middle of the landscaping spectrum when it comes to recommendations on landscaping with native plants, to find common ground between formal and ecological styles.

With more than a decade of lessons learned from helping schools implement native plant gardens, I’d like to offer some of the following management practices to make native plant gardens more visually appealing to the general public.

Native Plant Garden Best Management Practices

  1. Define Garden Goals – Wildlife habitat in general? Single species habitat (e.g., monarch)? Rain garden? High profile or in backyard? Prairie or woodland?
  2. Start Small – I plan for about one plant per 2-3 square feet. Hand irrigation to establish plants in the first year is important as well as establishing a regular weeding routine takes time. Keep the workload manageable. You can always enlarge/add more gardens later.
  3. Prepare the Site – Eradicate existing perennials with a couple of Glyphosate treatments in summer, especially important for getting rid of weed enemy #1, Bermuda grass.
  4. Consider Height Proportions – Think about being able to see layers of plants. Island gardens are visually more appealing with shorter plants and there are many short to medium height native options to consider. Gardens against building walls do allow for taller vegetation in the back.

    signplanting-june2009v2_-002_deshadowed

    Be sure that plants are not too tall for the scale of small island plantings.

  5. Add Hardscaping – Include features such as bird baths, feeders, houses, artwork, and benches for human enjoyment.
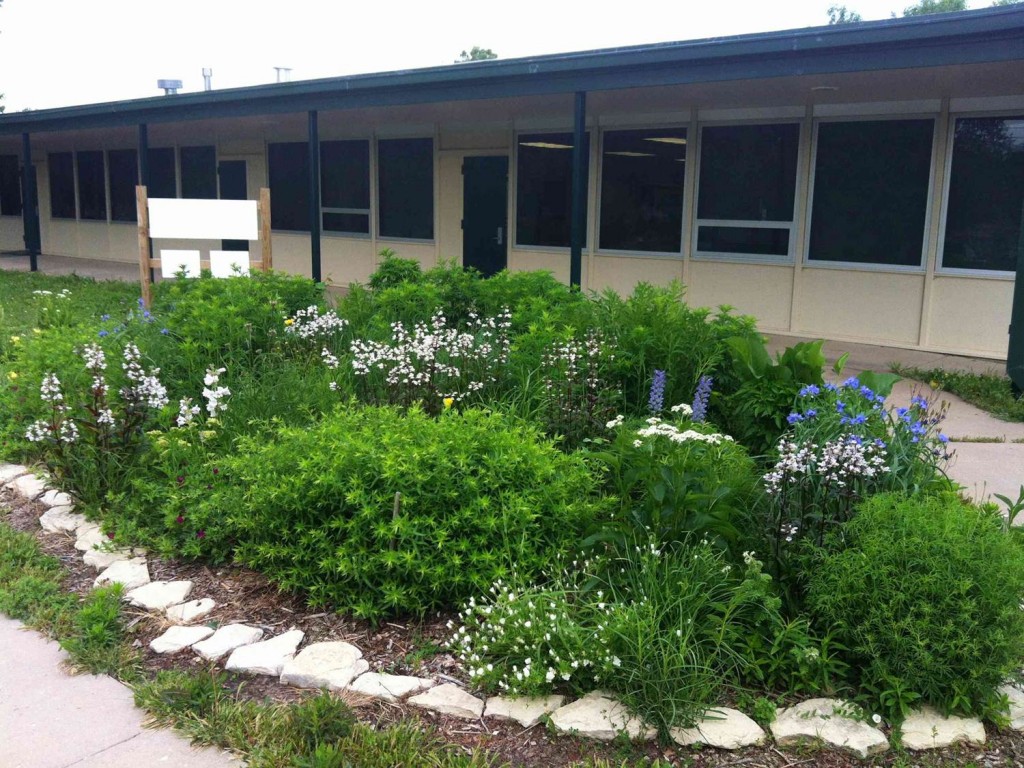
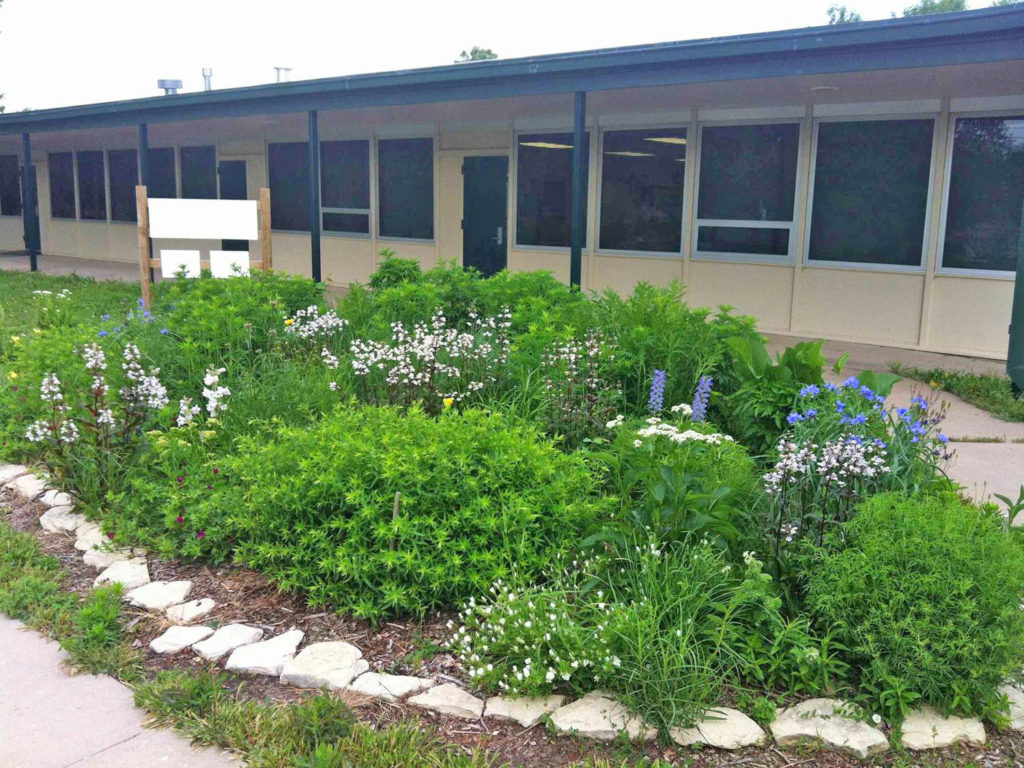
  6. Get Edgy – Establish the boundary where weeding meets mowing. A flexible edge such as flat pieces of limestone is a favorite. A visible edge also conveys that this garden is purposeful.

    Limestone edging helps define this garden.

    Limestone edging helps define this garden.

  7. Clumping of Species – When a garden has high visibility for the public, choose fewer species and plant them in clumps or waves to convey that this garden is intentional. Too many species planted will appear random and thrown together over time.

    new-picture

    Suggestions for planting in waves or clumps.

  8. Don’t Fertilize – Native plants will survive fine without fertilizer. Extra nutrients benefit weeds and only make native plants taller (and more wild looking).
  9. Mulch Is Your Friend – One or two applications (2”-4” deep) of free wood chip mulch from the municipal pile or delivered by a tree trimmer keeps the native garden looking good and helps control weeds. A layer or two of newspaper under the mulch also minimizes weeds.
  10. Signage Educates – Whether a wildlife certification sign or species identification labels, signage helps convey that this garden is intended to be there. Education leads to acceptance.
  11. Weeding Is Mandatory –Weeding regularly and often minimizes the need for a long backbreaking weeding session that will make you hate your garden. It is therapeutic and good exercise. Plus, a high frequency of visits to your garden will add to your appreciation and enjoyment.

    picture1_deshadowed

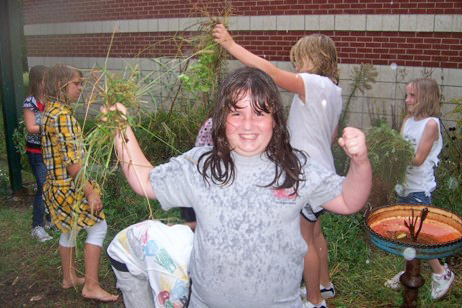
    Weeding can be fun!

Now, resume your planning and consider going native. Do so in a visually pleasing way and maybe your neighbors will follow suit.

Photo Credits

Pest Profile: Oak Leaf Itch Mites

If you have oak trees, particularly pin oak trees, in your landscape, it is not safe to go outside.  Invisible mites fall out of these oak trees and land on anything and anyone under the branches.  They bite and cause severe itching and extreme discomfort.  I liken the bites to a chigger bite on steroids.  These bites are not pleasant.

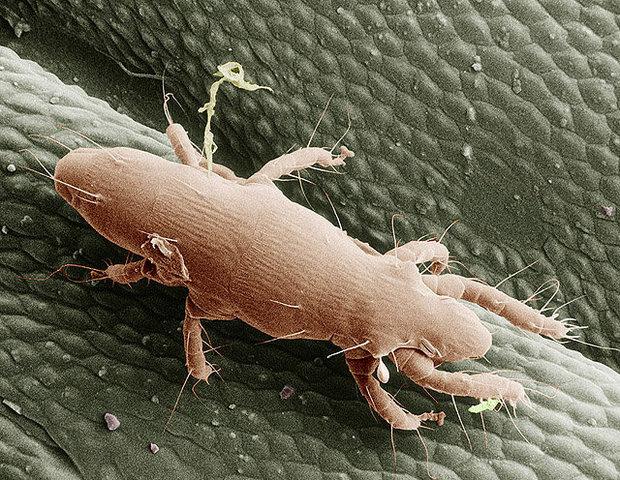
Oak leaf itch mites are microscopic, making them nearly invisible to the naked eye.  They land on your body and instinctively start to bite.  And ouch do they bite.  To me they are new, but evidently there have been outbreaks of oak leaf mites in 2004, 2009, 2015 and 2016.  The tiny spider-like creatures came to the U.S. from Central Europe in the 1990’s to Kansas City.  Since that time, they have spread throughout the Midwest causing misery wherever they land.

oakitchmiteusda_2016

Oak Leaf Gall Mite-USDA

The last two years, my oak trees have been attacked by a small midges that causes raised areas along the veins of the leaf.  These vein pocket galls are not harmful to the oak tree, but oak leaf itch mites will feed on the larvae of these gall formers.  My oak trees have been covered with these deformed leafs.  It makes my yard ground zero for oak mites.  I would love to enjoy these beautiful evenings outside on my deck, but not with oak leaf itch mites waiting to bite me again.  Their bites are not worth going outside.

img_0836

Vein pocket galls

What can be done?  Should we avoid going outside?  Does bug repellent work on oak leaf itch mites?  There are no easy answers.  Ultimately, it is best to avoid contact with them as much as possible.  That may be difficult since nearly 300,000 oak leaf itch mites fall from one tree per day.  Windy days can drop more of them.  If you are outside to rake leaves or mow your lawn, wear a hat, a long sleeve shirt and jeans.  I would even spray some bug repellent on my shoulders and arms.  It is also critical that you bathe after exposure to the mites and wash your clothes immediately, because they can crawl off and stay alive in your house.

I want these mites to go away forever, but it seems they are here to stay.  A hard freeze will hasten their disappearance but they can overwinter and come back next year.  Only a prolonged period of cold weather will adversely affect them.  Right now, it doesn’t feel like that will happen any time soon.  I wish I had better news.  I guess we need an extended polar vortex to freeze them to death.  That doesn’t sound very pleasant either.

oak-leaf-gall-mite

Problem Weeds: Best Management Practices

The problem with weeds is that they grow so well.  If only the plants I love would flourish like the weeds in my yard do.  Weeds can take the fun out of gardening, and during years with so much moisture, like 2016, they spread like a wildfire.

Here are some weeds we are waging war against in our perennial gardens.  The difficulty is that every weed seems to require a different control measure.  The common themes are that these weeds demand immediate eradication or ruthless elimination.  As soon as you see them, spray, pull, hoe, or dig them out.  These weeds can be relentless and you need to remove them from your garden as if you were trying to remove the plague.

Bindweed

I was at the state fair this weekend and stopped by the noxious weed booth.  (Don’t judge me because I am a plant geek.)  The thing that struck me was the display of how much one bindweed seed can grow in one year.  It’s amazing that it was able to produce so many new plants and that the roots could grow 30 feet deep.  No wonder it is so hard to get rid of in a garden.

IMG_0764

Obviously, the best time to eradicate bindweed is before you plant.  I spray the area with Roundup™ several times starting in July and August.  Anytime we see green, the area is sprayed.  This is the best time to spray because the plant is moving energy from the leaves into the roots for winter storage.  The chemical is also moved throughout the extensive root system, killing even those deep roots.  On the other hand, spring is not a good time to spray bindweed, because the plant is moving everything from the roots upward to produce new growth.  If you spray at that time, you will not kill the roots.  Make sure it is completely gone before planting.  Trust me, it is worth waiting to plant until this weed is removed permanently.

We have had limited success controlling bindweed by solarizing an area with clear plastic.  This process starts by laying a clear tarp on the soil surface and anchoring the edges with soil or bricks and leaving it in place for several months.  The problem with this method is that it kills the surface roots, but does nothing to the deep roots that will sprout after the plastic is removed.  The plant may be weakened but not completely eliminated.

Small patches can be hand pulled but you have to stay on it.  Every sprig that pops up must be pulled immediately.  We have also had limited success with hand painting the leaves with Round-up.  Again, every new plant must be found and painted.  Essentially, you have to be as ruthless and relentless as this weed is to completely remove it from your garden.  I thank my ancestors for bringing this over to America with their wheat seed.

Bermuda grass

This perennial grass is a problem because of its vigorous creeping habit.  The plant spreads by seeds and by above and below ground stems that can take over a garden in one season.  It is drought tolerant and thrives with neglect.

Like bindweed, bermudagrass is best removed before planting (same as bindweed).  If you have it growing next to your gardens, a buffer must be maintained between the perennial display and the lawn area.  This buffer can be sprayed every few weeks with Roundup™ to burn back any new runners toward the garden.  Raised beds are another defense against bermuda grass.  Don’t blow bermuda grass clippings into your gardens.

People have had success with solarizing their area before planting, because the roots are not as deep as bindweed.  Another method requires mowing the area closely.  Next, put down a layer of thick cardboard making sure to leave no gaps.  Next, spread a layer of leaves at least 6 inches deep.  As time goes on make sure no plants emerge through the leaves.  The area can be planted in 6-8 weeks by cutting small holes through the cardboard.

IMG_0771

IMG_0769

Nutsedge

This weed loves our mulched beds.  The yellow nutsedge and purple nutsedge spread quickly in areas with little or no competition, garden areas that are regularly watered and poorly drained, rich soil.

This problem weed has triangular grass-like leaves and forms a colony if left unchecked.  Nutsedges produce underground tubers, and runners that make it difficult to pull out of the ground.  Each of these can produce another plant if not completely removed.  Again, you need to relentlessly pull the plants every time a new plant emerges.  It is most active in May through October.

We have had more success spraying nutsedge.  We use Manage™ (Sledgehammer) herbicide.  It is a selective herbicide that only kills nut sedge.  It can be sprayed in close proximity to other perennials, shrubs and trees.  It takes a few weeks for the plants to show decline, but Manage™ kills the whole plant including the runners and tubers.

IMG_0766

“Weeds” are plants out of place.  Some of us have more plants out of place than others, but we all can have success in controlling them.  It takes time.  It takes persistence.  It takes endurance to ultimately get these weeds controlled.  If you have them, I am sorry.  If they are out of control, you will need to evaluate whether it is easier to start over or systematically begin to remove these weeds.  It can be done.  Hang in there, but be as unrelenting as the weeds.  I wish I had better news. As they say on the Red Green Show, “We are all in this together. I am pulling for you.”

More Than Monarchs – All Pollinators Need Our Attention

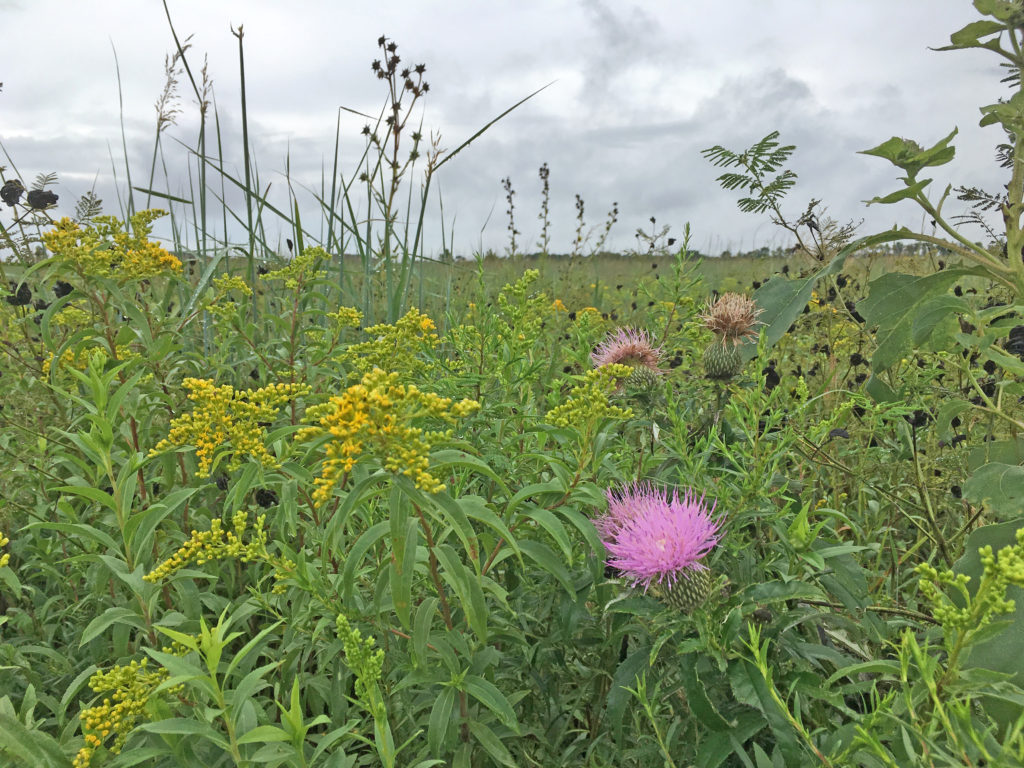
Milkweed is always a sellout item at our plant sales. The plight of the monarch has caught the public’s attention as few conservation efforts ever have. It is encouraging to see citizens so galvanized behind an environmental cause!
But I wonder if by focusing on one favored butterfly we aren’t seeing the bigger picture – many pollinators are in trouble, not just the cute ones. Bees, beetles, flies, moths … numerous species are in frightening decline. Even the beloved firefly is struggling. These important critters contribute to our way of life through agriculture, science, and stabilization of food webs. It is going to take more than milkweeds to help bring back our pollinator populations. Following are links to organizations and reference information that can help you be effective in the fight against pollinator loss.

Pollinators Come in All Shapes and Sizes

Ants are pollinators, wasps are pollinators …beetles and midges and even bats! Butterflies may be the most flashy and charismatic pollinator, but let’s not make it a popularity contest. If you are interested in being part of the pollinator conservation movement, be sure your efforts include multiple pollinator species.  Click here for a slideshow of pollinator facts, or here to learn about the many different species of pollinators in Kansas.

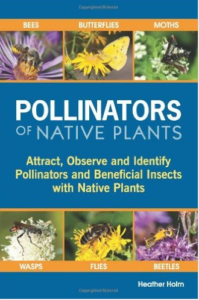
Find this book by Heather Holm in our gift shop - plant and insect profiles to help you host a pollinator palloza!

Find this book by Heather Holm in our gift shop – plant and insect profiles to help you host a pollinator palloza!

Season Long Nectar is Critical

Variety is the spice of life! Try to plant several species of wildflowers with varying bloom times, providing nectar sources that stretch through the season. Different pollinator populations peak at various times through the warm months, so provide for them by having a long blooming garden. Early spring and late fall flowers can help sustain migrating species in the difficult stages of their journey. Research from Cornell concerning east coast monarch migration suggests lack of late season nectar is more crucial to their success than milkweed. Help these insects get the energy they need all through year!

Host Plants that Work in Your Area

Want to nurse some larvae in your backyard? Find the host plants that cater to pollinators in your area. Milkweeds (Asclepias sp.) host monarch caterpillars, yes, but another plant to try is spicebush (Lindera benzoin) for the tiger swallowtail. Rattlesnake master (Eryngium yuccafolium) hosts the borer moth (Papaipema eryngii), also a favorite of wasps. Do your research before you plant to ensure that your garden will be appealing to pollinators native to your region. This link has great information on how to create pollinator habitat in the Great Plains region. This one has planting guides for US ecoregions.

Tiger Swallotail By BLM Nevada (Tiger Swallowtail Butterfly) [CC BY 2.0 (http://creativecommons.org/licenses/by/2.0)], via Wikimedia Commons

Tiger Swallowtail, By BLM Nevada (Tiger Swallowtail Butterfly) [CC BY 2.0 (http://creativecommons.org/licenses/by/2.0)], via Wikimedia Commons

Great golden digger wasp with sand wasp in background

“Great golden digger wasp with sand wasp in background” on a rattlesnake master flower. Image from North Carolina Museum of Natural Sciences

Team Up With The Little Guys

We have all heard of organizations that rescue cats and dogs or save pandas from poaching. But who is looking out for the little guys? There are some wonderful organizations fighting to protect threatened species of insects and other invertebrates. Consider giving your time, talents or money to these organizations to help them carry out conservation projects. Check out their websites for helpful resources.
The Xerces Society “is a nonprofit organization that protects wildlife through the conservation of invertebrates and their habitat.” They have ongoing programs for butterfly and pollinator conservation. Monarch Watch is a nonprofit that focuses on education and conservation efforts for the monarch butterfly, based at the University of Kansas.
Pollinator Partnership is “dedicated exclusively to the protection and promotion of pollinators and their ecosystems.”

As you continue to create monarch weigh stations with proud stands of milkweed, remember that there are lots of other less popular pollinators that need our care and concern. Wasps, bees, ants and beetles may not be as beautiful as butterflies, but they too contribute to the balance of our ecosystem.

Five Reasons Why Fall is for Planting

I have people ask me all the time at our FloraKansas plant sale if fall is a good time to establish plants.  My answer is “Yes, it is a GREAT time to plant!”  In fact, it’s a perfect time to plant just about anything other than annuals, but especially trees and shrubs. (Be sure to download our TREE COUPON and bring it with you to FloraKansas.)

I don’t know why this fall planting message is not resonating with all gardeners.  We may be worn out from managing the plants we installed in the spring or we are busy with other things and not focused on what our gardens will need to be ready for next year.  Whatever the reasons, experience tells me that you will be rewarded for working on your landscape this fall. Here are five reasons why:

#1 Warm Soils

Because the soil is still warm from the summer, the roots will continue to develop until the first frost.  In our area, this occurs around mid-October.  However, trees and shrubs will root until the ground freezes.  In the spring, these plants will have developed root systems that are actively growing and ready to produce flowers and survive the hot summer months.  Two years ago, we planted twenty-five butterfly milkweed and twenty-three survived the winter.  All of these plants bloomed again this summer.

WhatsBlooming6.13.2015 (20)

#2 Reduced stress

Transplanting causes stress on plants as they are introduced to a new environment.  This shock is reduced by planting in the fall because the plant is entering dormancy.  The growth is moving from above ground to below ground and root systems are storing energy reserves for next year.  Fall transplants have this vital time for root development before winter.  Transplanting in the spring, on the other hand, causes additional stress and plants may hardly recover from transplant shock before the demands of summer set in.  The overall plant health is improved for next year by starting with transplanting this fall.


#3 Less weed competition

We have found that when planting in September there are fewer problems with weeds such as crabgrass and foxtail.  Transplanting in fall allows plants to get a head start for next season without competing with problematic weeds.   Remember to mulch around the plants after the first freeze to help moderate soil temperatures, control winter annual weeds such as henbit, and hold soil moisture through the winter.  Keep mulch away from the base of plants to allow proper air exchange.

ArbinJune_0001

Pale coneflowers blooming the next spring after planting.

#4 Fewer Pests

All those pesky bugs are less active in the fall.  They are not nibbling or sipping on your plants.  With their life cycles nearly complete, they are looking for homes to survive the winter.   Fewer bugs means less-stressed plants that will have a chance to get properly rooted.

#5 Beneficial Rains

Warm days and cool nights provide an ideal environment for transplanting and growth.   Typically, fall brings many cool, cloudy days with frequent precipitation.  Warm sunny days can cause stress on new transplants.  Cooler nights and morning dew allow plants to recover each night.  Beneficial autumn rains will eliminate some daily watering.
Here at the Arboretum, we prefer to plant in the fall because we have more time and have seen the benefits first hand.  We are usually very busy in the spring readying the gardens.  It is nice to see plants that were started in the fall jumping to life and even blooming that next year.  As an encouragement to plant trees this fall, bring this TREE COUPON to the sale to receive an additional discount.

Whenever you plant, whether spring or fall, the ultimate goal is to create a landscape you can enjoy. If you need some ideas to get you started, check out these sample landscape designs and our 2016 Native Plant Guide.