Pathways in Your Garden

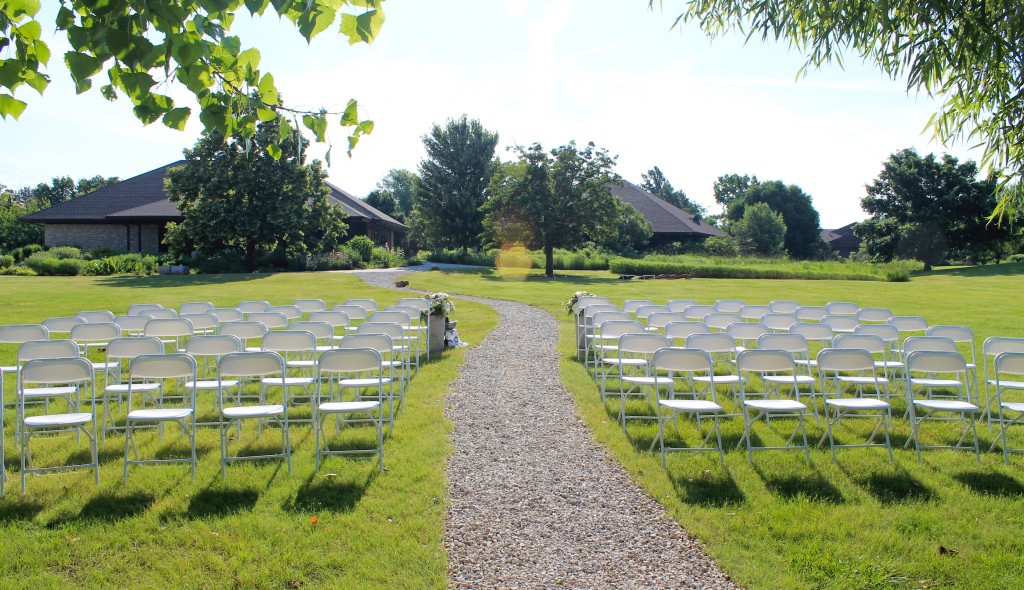
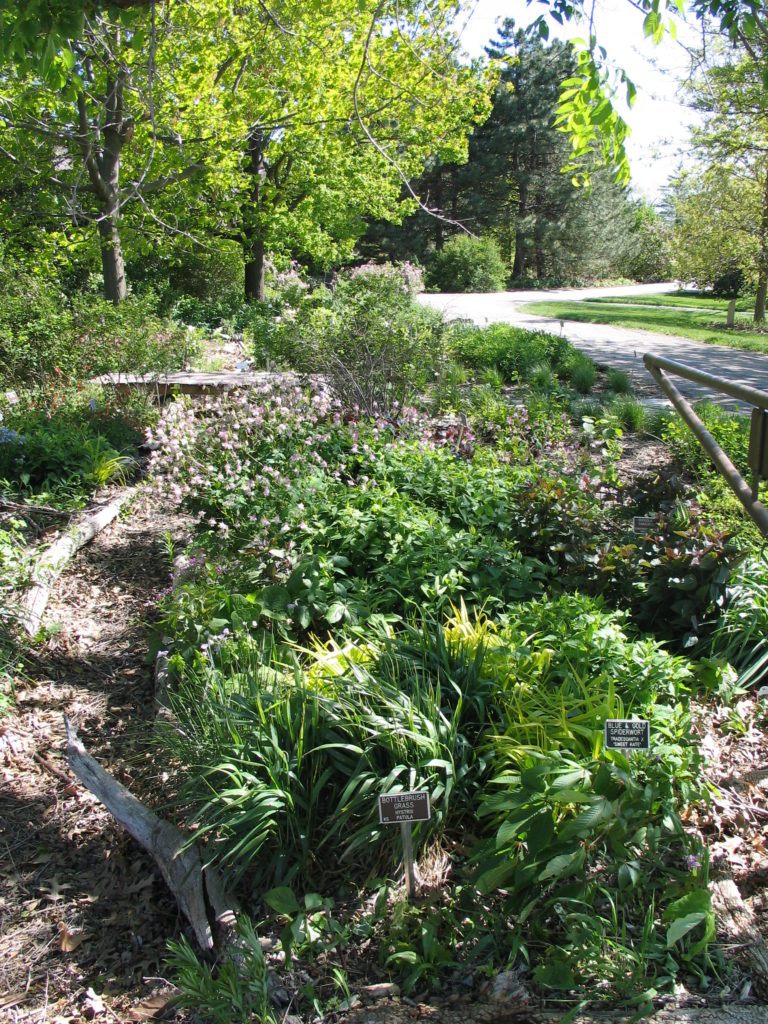
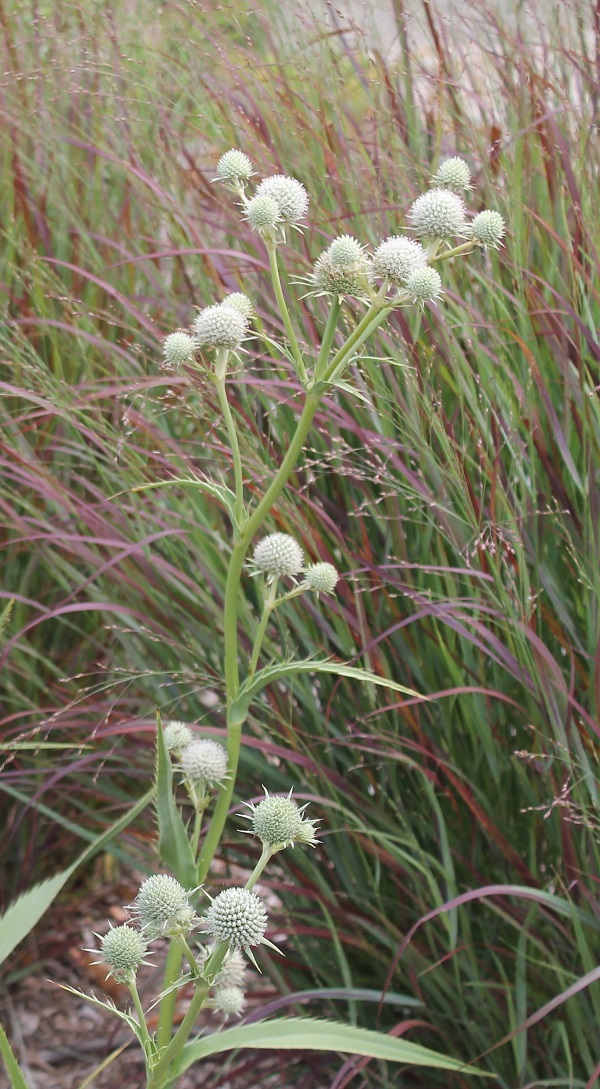
On a cool crisp morning in October, I meandered through the Prairie Window Project here at the Arboretum.  The frost was clinging heavily on all the plants.  I would have been wet if not for the pathway leading me between the tall grasses. It made me thankful for that wide gravel path.

This path is less than ideal, because the rocks are loose and make it hard to walk.  It will take smaller stones and work compacting the path to make it easier to navigate.  It made me think about garden paths in general.  What are the best paths for gardens?

Rock Paths

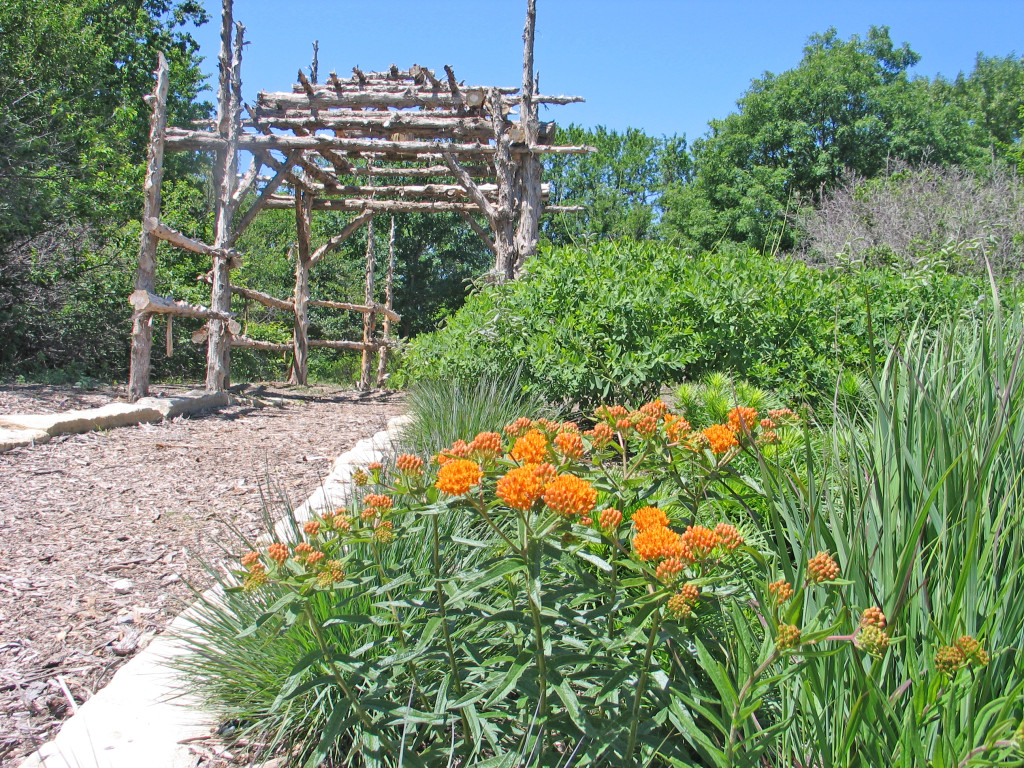
Stone is a fantastic pathway material.  It has a natural look and can be made very hard and stable.  We have many paths with stone and they seem to hold up to our climate well.

To establish a stone path, we often dig out the soil two to three inches deep to get a good base for the path.  We have used edging (metal, wood, or larger stone) or established paths without edging. Both strategies work fine. Edged paths look more formal, while non-edged paths tend to blend into their surroundings better.  We spread larger limestone (1-2 inch stone) in the bottom of the trench and then cover with smaller limestone (3/4 inch) with fine pieces to weave and bind the path together. It is good to have the path slightly higher than the ground so that water does not stand on the path.  Also, consider drainage and water flow to make sure your path does not become a dam and impede water movement.  We usually add new limestone every two to three years as needed, because the stone will naturally breakdown over time.

Note about other stone: We have used pea gravel and sand, but neither makes a stable walking surface.

Mulch Paths

Mulch paths are the most organic substrate.  They naturally blend into the landscape, while softening the edges of display beds and lawns.  Developing a new path is similar to rock paths.  As with rock, mulch decomposes over time and needs to be replenished.  Larger pieces mixed with finer pieces interlock the mulch and keep it firm.  It will never be as firm and hard as a rock path, but makes a nice cushy surface in which to walk through your garden.

Straw Paths

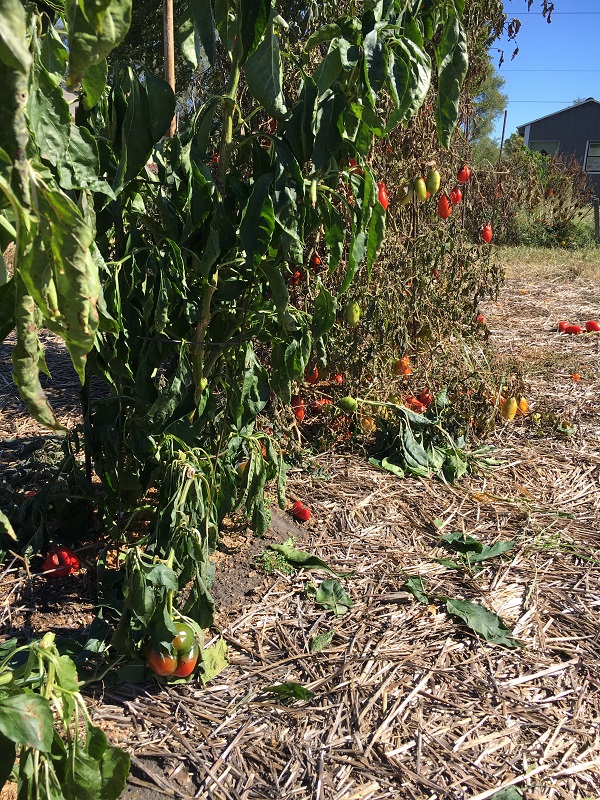
I have used straw in my garden and it makes a wonderful path.  The advantage of straw in this setting is that at the end of the growing season, it can be tilled into the soil to add organic matter to the soil.  A layer of two to three inches of straw will help with weed control and keep your feet from getting muddy.  I have seen it used around most vegetables.  Straw moderates soil temperatures and reduces evaporation.

Semi-permeable pavement

Permeable interlocking concrete pavers

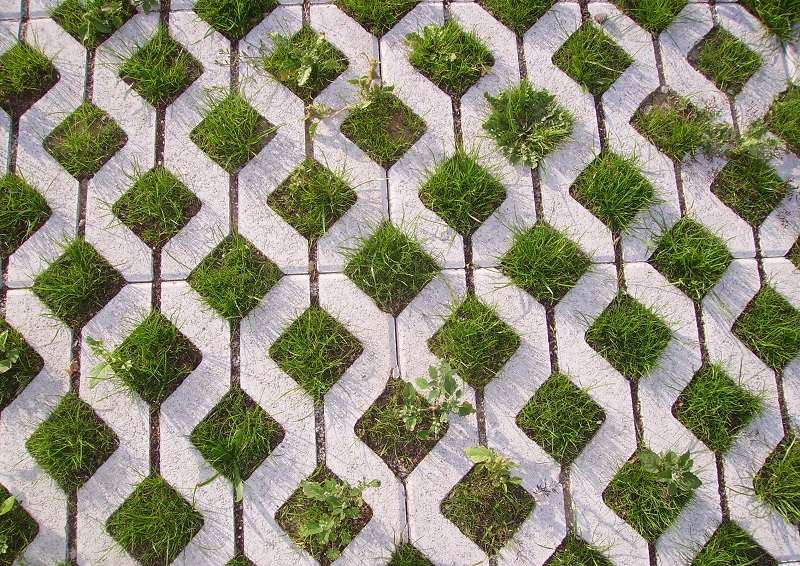
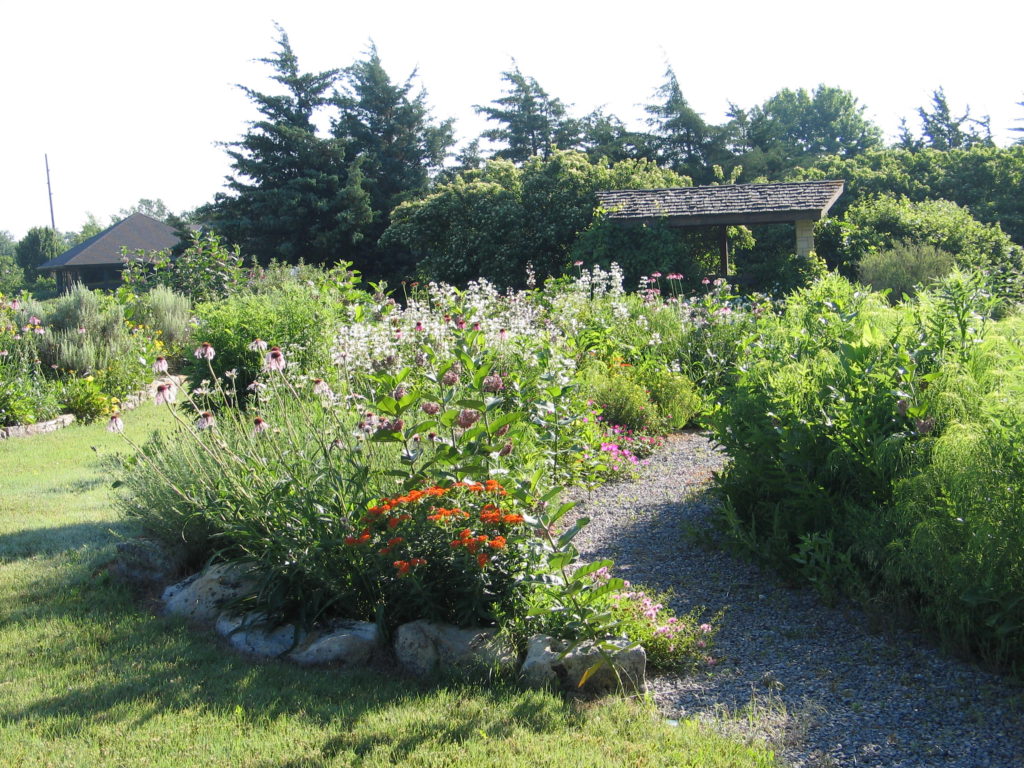
The use of porous concrete or concrete with holes filled with sand is becoming popular. These solutions allow water to infiltrate quickly and then be held, released slowly and/or diverted to holding basins.  This has merit as we think about rain gardens and capturing water from our landscapes.  The concrete with holes are filled with sand and can be planted with grass, sedges, or some other low growing vegetation that can be walked on.  These stepable plants quickly blend the path into the landscape.  Certainly, this is the most costly of the path options, but it can do so much more than just a rock or mulch path.

Pathways are an important component of any landscape.  They lead you through the garden.  A well designed landscape has paths you don’t notice. Paths complement the garden and harmonize everything within your yard.

Semi-permeable Pavement


Mindfulness in the Garden

One of the greatest experiences I have while gardening is a heightened sense of awareness.  For some reason, I notice obscure things that are happening in my landscape. I observe how our garden has changed throughout year. I notice the wildlife that it attracts, the sights and sounds of the garden.  Each day there can be a new discovery.  Gardening is an adventure.  Some people spend time in the garden for what they get from it, like flowers or vegetables, but I garden for what it gives back to me personally.

I spend so much time indoors these days that I relish my time outdoors.  Whether in a garden or walking through a natural setting, the stress of the day seems to melt away.  The sunshine and breeze on my face tend to carry the anxiety, weight of responsibilities and depression far from my thoughts.  I become mindful in these situations – more so than any other place.

It goes without saying, but gardening is good for your health.   Here’s how I practice mindfulness in the garden.

Make it a priority

What gets scheduled gets done. In the hustle and bustle of life, time in the garden will get pushed aside by other good things if you don’t make it a habit.  Don’t neglect your garden, but walk through it in the morning or after work as part of a regular schedule.  Pull a few weeds, pick some flowers, water the vegetables or watch pollinators fly from plant to plant. Become aware of how your countenance changes. You will be amazed how it can rejuvenate and lift your spirit.

Photo by Brad Guhr

Observe

It is incredible to see the insect activity in my garden right now.  Those tiny pollinators are busily working the flowers as a last dash before cold weather sets in for the year.  The leaves are changing to beautiful shades. The musty smell of the compost pile wafts through the air. The wonderful smell after a rain is called petrichor.  Feel the textures of the plants and taste the harvest.  Awareness awakens the senses.

Use your phone for pictures only

Our phones can be a constant distraction. It is either buzzing, beeping or ringing all day long and we need to disconnect from it for mindfulness to happen.  Nothing can ruin a reflective moment quicker than to have your phone ring.  Put it up and disconnect for a few moments.  You will not be sorry for doing so.  The quietness of the garden is calming.

Get Busy Doing

Mindfulness can be achieved in two ways – stillness or in action.  In action, you focus on a task and make it happen.  Whether in the garden or around the house, the simple approach to everyday life can deepen your appreciation and awareness of the world around you.  Being mindful allows you to be fully in the task without distractions and other thoughts.  Fixating on the task at hand will make you more mindful and self-aware.

Planting our prairie

Develop empathy

One of the thoughts that came to us as we worked on our new mission statement was the idea that the more we know and understand, the more empathy we have.  The more we understand the plight of many of our pollinators, the more we want to do something about it.  We have lost 99 percent of the prairie, but I can plant some prairie in my yard and it will make a difference.  An appreciation of the few tracts of prairie that still exist makes me long for that lost landscape.  Stillness in the garden will bring you closer to your garden.  Understanding something develops awareness and ultimately brings empathy.

Mindfulness relates to the many health benefits of gardening.  It reduces stress, increases your self-esteem, boosts the immune system, provides exercise for the heart and decreases stroke risk, makes you happier reducing depression symptoms, and increases brain health. By taking a mindful approach to your landscape, you will grow in so many wonderful ways.  Try it for your health.

The Best Trees for Fall Color

‘The best time to plant a tree was 20 years ago. The next best time is now.’

– Chinese Proverb


For many reasons, fall is my favorite time of the year.  I love the cooler weather and changing landscapes.  This signals the end of another growing season, but there are still a few highlights to come. The beauty of the fall wildflowers like asters and goldenrods makes them stand out in a sea of grass.  The native grasses are at their peak with attractive seed heads and brilliant fall color.  It is also a time when trees begin to change, developing shades of red, orange, yellow, and tan.  I know winter is coming, but the crescendo of our gardens is fun to watch.

Native Blackhaw Viburnum (Viburnum prunifolium)

How do trees develop fall color?

Fall color in trees is a result of a complex process of removing the green pigment, chlorophyll, from the leaves, which allows the other pigments to be seen.  For instance, carotene and xanthophyll (carotenoids) are yellow pigments that are produced all year long with chlorophyll.  With the shorter days and cooler fall temperatures, chlorophyll production is slowed and the green color slowly disappears revealing the yellow pigments that have been there all year long.  Green ash and ginkgo are good examples of trees with nice yellow fall color.

Other trees produce red and purple pigments called anthocyanins, which tend to cover the yellow pigments present in leaves during the fall.  As the fall season progresses, the increased sugar content in these leaves works to intensify these reddish-purple leaves.  American ash, shingle oak and shumard oak are nice trees with red fall color.

In trees with a combination of carotenoid and anthocyanin pigments, an orange fall color develops.  Sugar maples, smoke trees, and sweet gum trees are wonderful examples with orange fall colors.

Some of our trees have no vibrant fall color, but rather the leaves turn to tans and browns. This is caused by tannins in the leaves, which accumulate as the chlorophyll is removed from the leaves.

Fall color can be a little different every year.  Plant genetics, and environmental conditions make subtle changes from year to year fun to watch.  Each year, there is a unique beauty in the landscape that should be savored, enjoyed and not taken for granted.

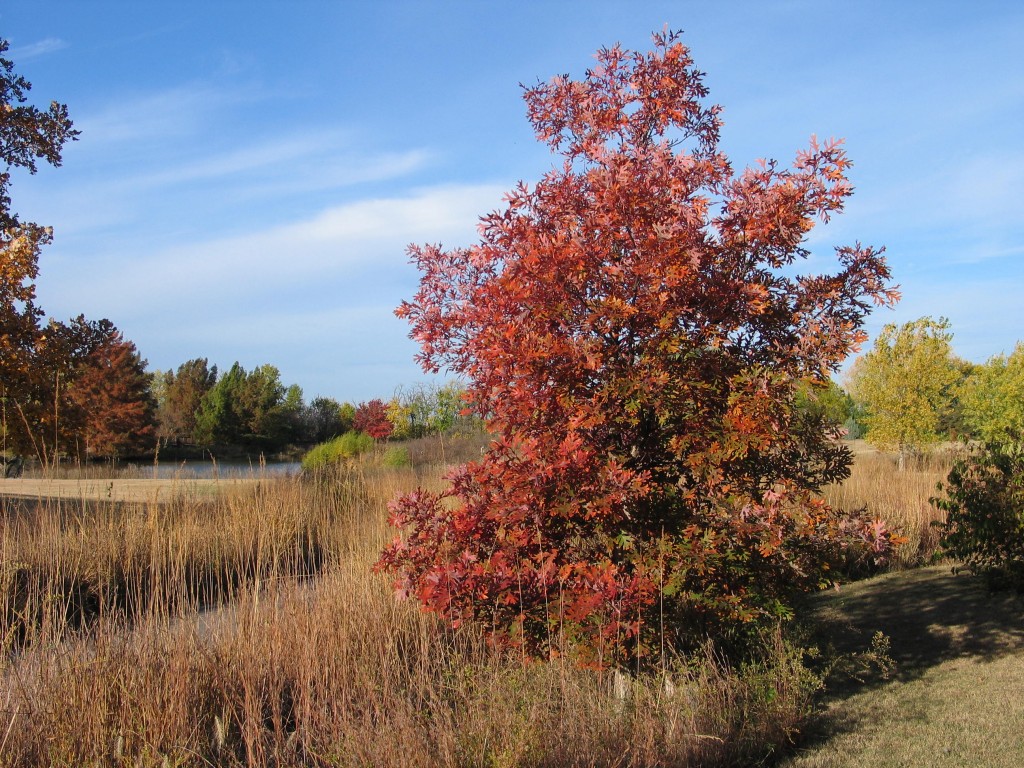
White oak

My Favorite Trees for Fall Color

Shumard Red Oak (Quercus shumardii)

This oak tree will reach a height of 40-60 ft. with a nice rounded-pyramidal habit.  It is a stately tree that produces a wonderful range of colors from deep red and maroon to dark oranges.  Fall color can be quite variable from year to year depending on environmental conditions.  Other oaks worth trying: shingle oak, white oak and black oak.

Sugar Maple (Acer saccharum)

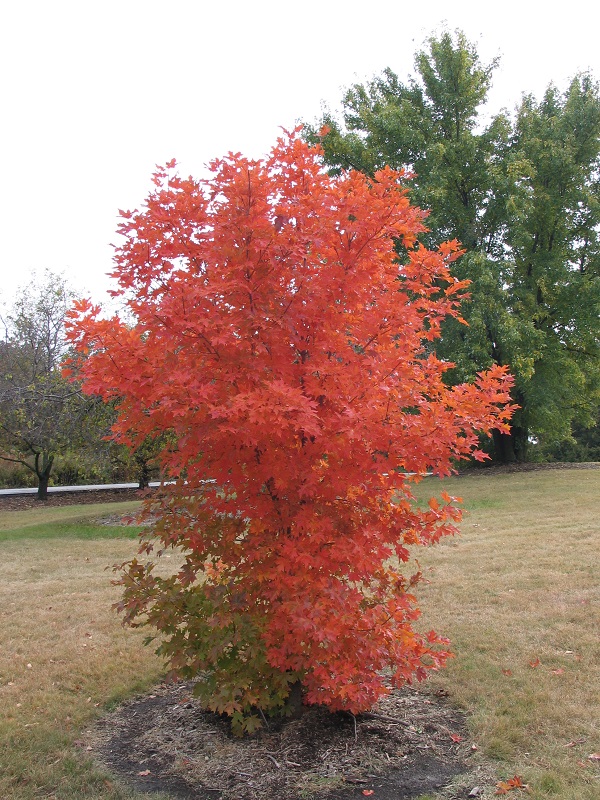
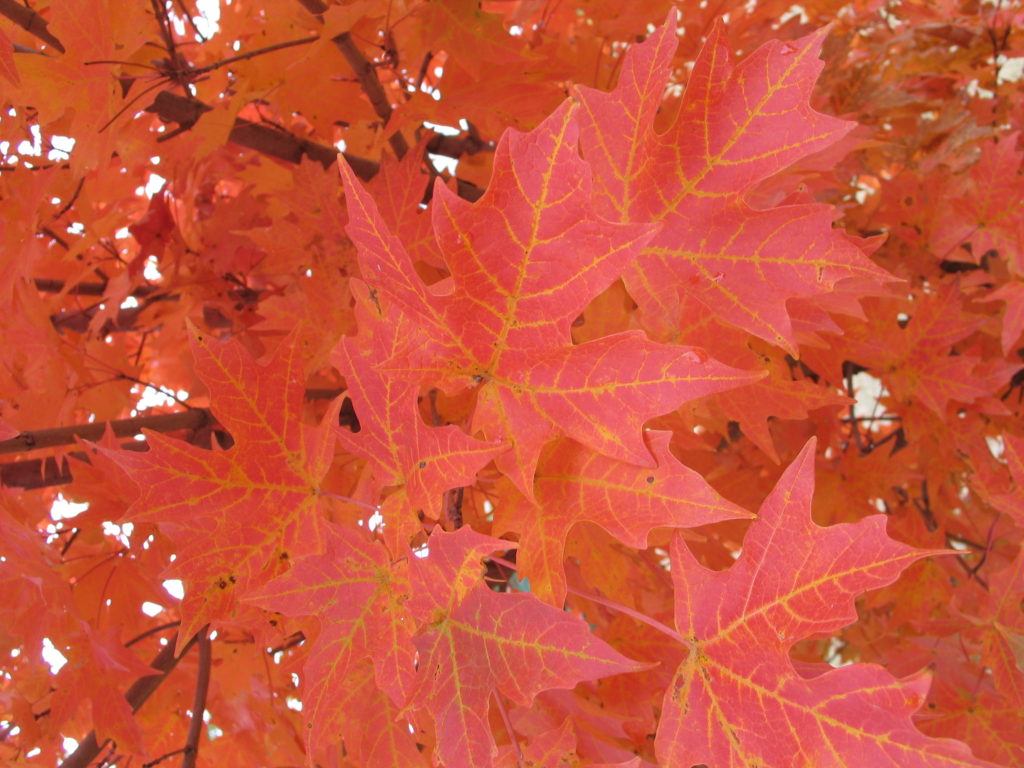
Sugar Maples and many other maples are the quintessential tree for fall color. In Kansas, sugar maples are relatively slow growing but worth the wait as a mature tree can put on quite a fall display.  They reach an ultimate height of 40-50 feet tall and equal spread.  The bright red, orange and yellow leaves appear in October and last for many weeks.  Try the cultivars, ‘John Pair’, ‘Autumn Splendor’, ‘Table Rock’, ‘Flashfire’, ‘Oregon Trail’ or ‘Legacy’ for the most consistent fall color each year.

Table Rock Sugar Maple

Bald Cypress

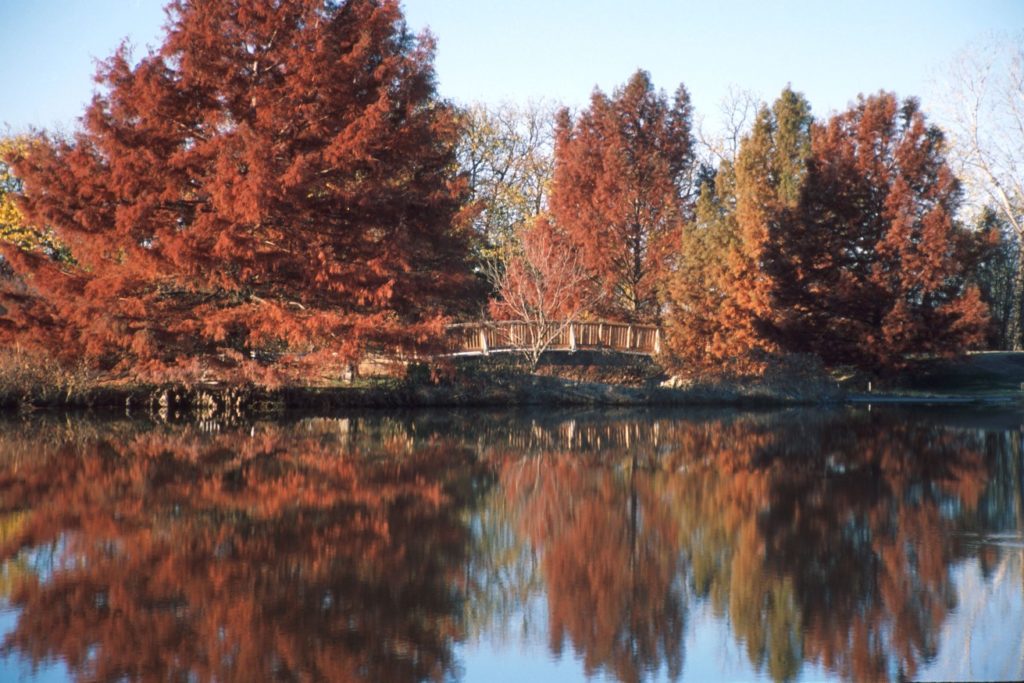
This is not usually recognized as a tree with exceptional fall color, but when the fine leaves turn reddish-brown in the fall, it is striking.  We have planted Our specimens near the pond where the “knees” can develop. The pyramidal habit reaching 50-60 feet tall make it a majestic tree for certain situations. It is certainly worth a try.

Bald Cypress fall color

Others worth noting:

  • Viburnum rufidulum
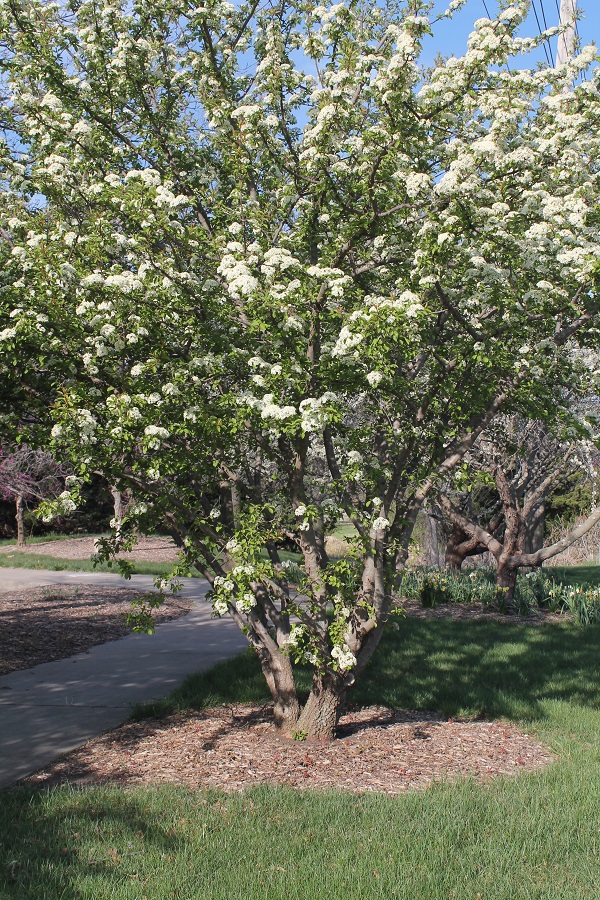
  • Viburnum prunifolium
  • Cotinus ‘Grace’
  • Betula tremuloides ‘Prairie Gold’
  • Sassafras
  • Ginkgo ‘Autumn Gold’
  • Carya cordiformis
  • persimmon

We are already seeing signs of fall here at the Arboretum.  Fall color starts in September and ends in November with peak coloration sometime in October.  Cool night temperatures above freezing, calm winds, and sunny days will make the colors more intense.  So, even though it’s not New England, let’s enjoy the beauty of fall.

Sugar Maple

How to Beautify Your Home Habitat Garden This Fall

I have said over the years that fall is a great time to plant just about anything.  I will not go into why fall is an ideal time to plant because you can read it here.  Whether you are creating a “new front yard” without turf grass or just supplementing your existing landscape, you will be rewarded in spring with healthier, heartier and well rooted plants that jump out of the ground.  The new fledgling plants you get from our fall FloraKansas Native Plant Festival will create a habitat garden that will be beneficial and attractive to wildlife as early as next spring.

The “New Front Lawn”

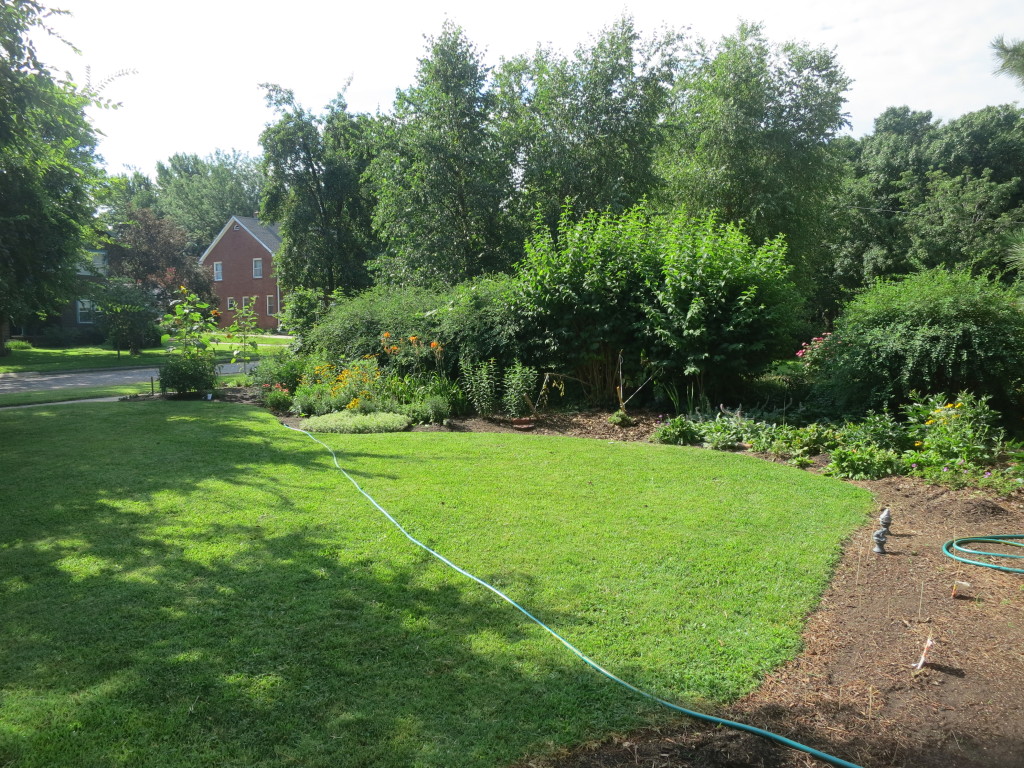
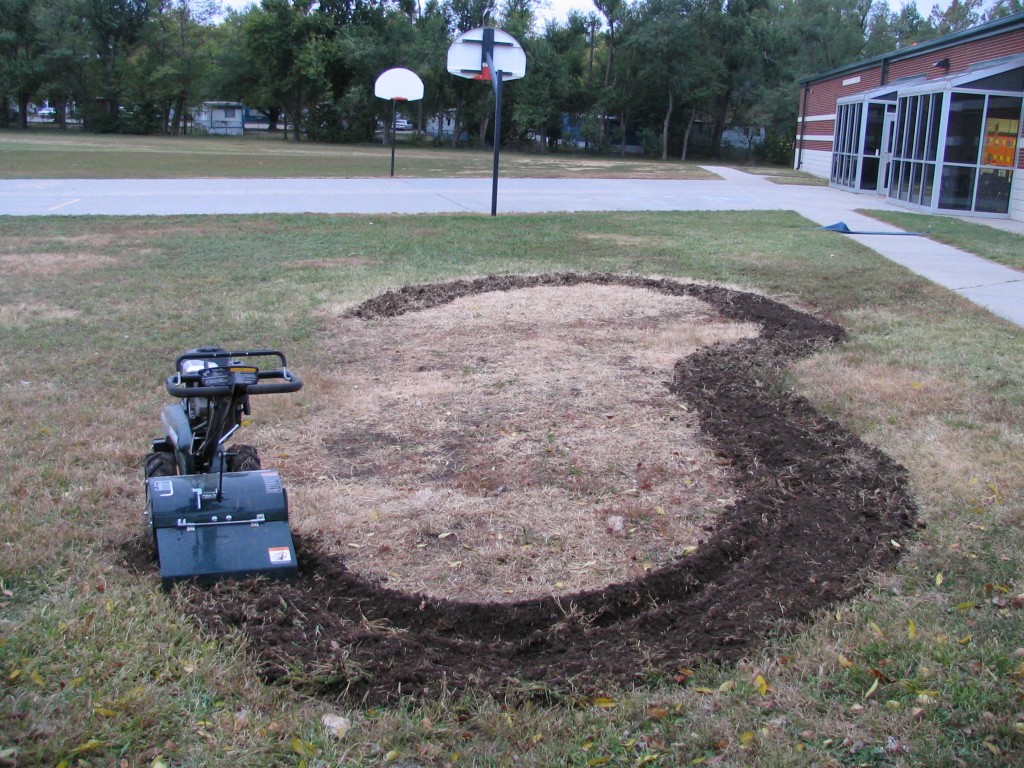
People are increasingly aware that the traditional front lawn is only marginally beneficial to wildlife compared to a habitat planting with wildflowers, grasses and shrubs.  This is an important paradigm shift as we think critically about how our landscapes can improve habitat loss.  By replacing small sections of turf with deep rooted plants, you reduce the need for water, create islands that wildlife, including pollinators, can use while increasing the overall aesthetics of your home.  This alternative to the traditional lawn starts with a thoughtful design followed by the removal of the turf you want to transition to native plants.  The area needs to be free of vegetation and problematic weeds.  Think about how you will be viewing your new landscape (from the kitchen window or from the street or both).  This process will help you lay out and stage your plants.


This gentleman is defining the new garden with a garden hose. Over the next year, he will dig up the grass and plant potatoes in the area while continuing to dig up any sprouting bermuda grass. It is a slow process, but he is able to develop a new garden without spraying. He gets nice potatoes too. A year later the area is ready for native plants.

Just a few additions

Fall is a great time to fill in some holes that have developed this summer.  Here at the Arboretum, the landscape is constantly changing.  As the landscape evolves and matures, new plants are added that complement the existing landscape.  I like to ask the question, “What is missing?” Do I need some structure plants, or wildflowers that bloom at a specific time? Do I need plants that can withstand a certain environmental condition unique to the site?  Asking these questions now provides you an exciting opportunity to add just the right plant(s) to round out your yard and help develop habitat.

Blank slate

I have done several designs this year and most are starting with new gardens. By starting from scratch, you have so many options available to you.  Homeowners want to make the switch and establish an alternative landscape.  Plan your garden, choose plants that fit your site, and get them established properly.  If you are not ready to plant the entire area this fall, I recommend getting the bones of the garden established.  Plant a cluster of grasses along the foundation of your home, a few shrubs in the center of the design, or a grouping of wildflowers along the perimeter. This will make it easier to fill in the holes and visualize the mature landscape next spring.

Photo by Brad Guhr

New garden ready for planting

Selecting plants with wildlife value and natural beauty will transform your landscape from dull and drab to dynamic and beneficial.  To see dragonflies, monarchs, other pollinators and birds being supported by your landscape is an inspiring experience.  Offering an attractive mix of drought tolerant plants will create the habitat these creatures seek to inhabit and use it.  Diversity of plants attracts a diversity of wildlife. Your garden can be part of the solution as we work to find balance in the world around us.

Habitat creation – the ultimate goal of any home landscape!

Let’s Talk about Mulch

It is no secret that mulch is great for the landscape.  There are so many benefits when you add mulch around your plants.  Mulch is a great insulator, because it modifies the soil temperature.  It reduces erosion, prevent weeds from germinating, retains soil moisture, provides a buffer between equipment and the trunks and stems, and increases the aesthetics of the overall landscape. As you add mulch to your garden, here are some things to know:

How much mulch is enough?

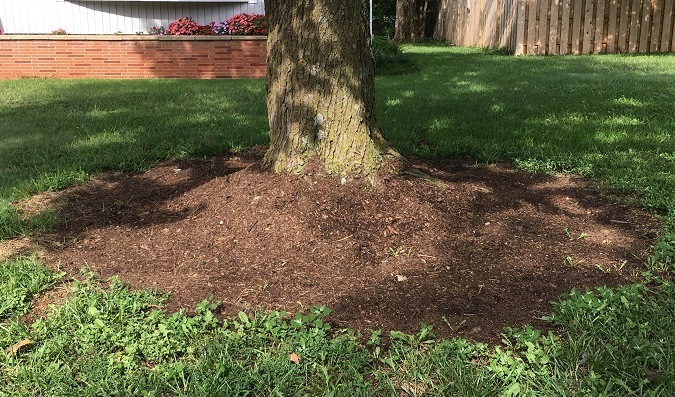
Mulching is not an exact science, but as a general rule, we try to apply 2-3 inches of mulch consistently throughout the landscape.  This depth of mulch will control weeds by decreasing sunlight exposure, which prohibits seeds in the soil from to germinating.  More than three inches of mulch seals off the soil and suffocates your plants.  It is extremely important that the plants are able to get the oxygen they need.  Spread the mulch evenly and don’t build a mulch volcano around the base of the tree.  Since mulch decomposes slowly, it is good to periodically check the depth and add some as needed.

Mulch volcano at base of tree. A big no no!

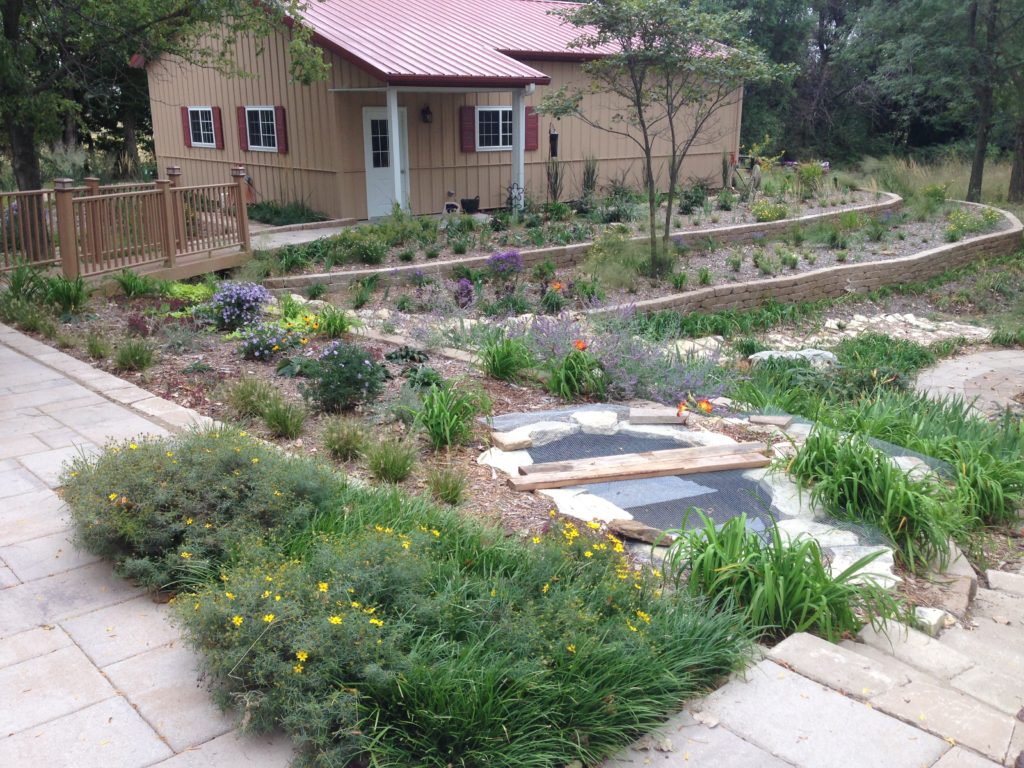
Nicely mulched new planting

What is the best way to mulch?

We start by laying out a garden hose, which allows you to visualize the curves and width of a bed.  You can either spray the area inside the hose or dig up the vegetation and let it slowly die.  When the area is cleaned up, we begin applying the mulch and leveling it to the desired depth.  Keep in mind that too much mulch will encourage growth of the roots into the mulch, where it will be susceptible to freeze damage.  The ideal 2 to 3 inch depth of mulch will keep the roots in the soil.

When is the best time to mulch?

We are mulching throughout the year, but direct most of our efforts in the spring or fall.  As we clean up our display beds in the spring, it is always a good time to freshen up the mulch, too.  At this time of year, soil temperatures are beginning to warm and a new layer of mulch will slow down the warming process.  A new layer of mulch will also cover seeds that may have landed in the mulch and covering them now will prevent germination.  We mulch anytime a new tree or shrub is planted.  This practice will keep the soil cooler, help retain moisture longer and insulate new roots from the cold weather. Some thicker mulch areas may benefit from being fluffed from time to time.  Simply take a rake and loosen up the top few inches of the mulch.

What type of mulch is best?

We use whatever is available to us.  Mulch is not cheap, so we use chippings from the tree trimming service.  We have used semi loads of hardwood mulch, which is expensive. It is not as important what you use, but how much you use.  Even free mulch can look attractive and function just like the most expensive mulch.  For sloped areas, the larger and heavier mulch works the best.  It is not as susceptible to runoff or wind displacement.  Smaller or finer mulch decomposes quicker too.  The bottom line is use what is available to you.

Our mulch pile of chipped up trees

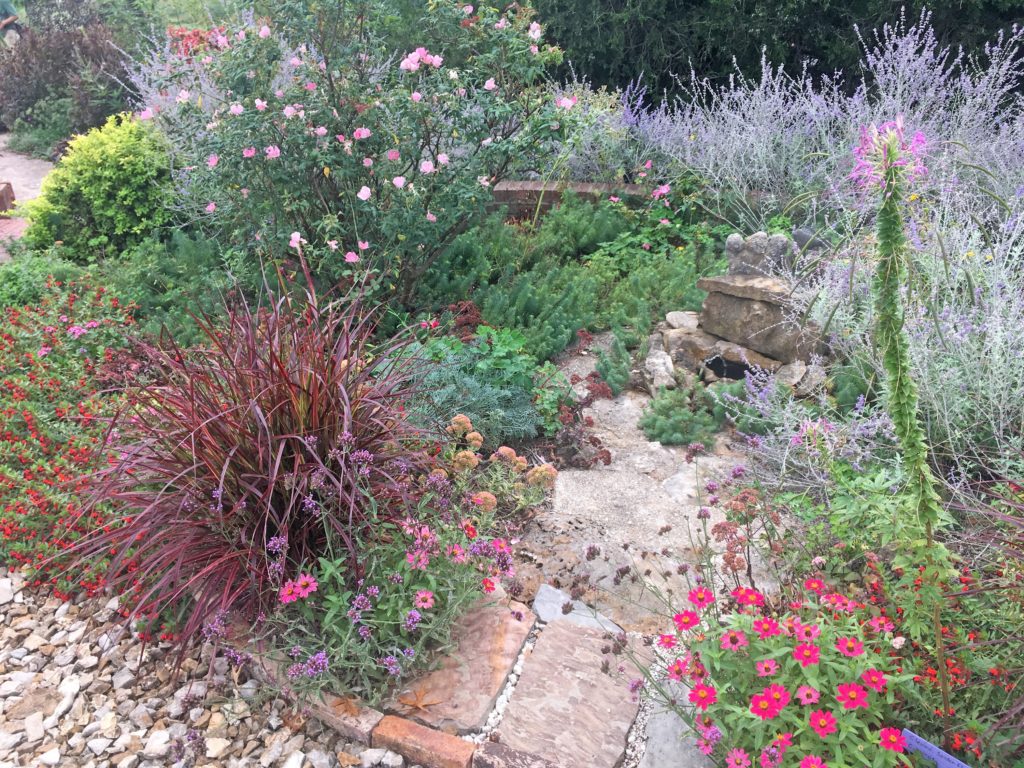
River rock as mulch with blackeyed susan and prairie dropseed

Can I use plants as mulch?

In the book Planting in a Post-Wild World: Designing Plant Communities for Resilient Landscapes, Thomas Rainer and Claudia West develop the ideas of layering plants.  There are usually at least three distinct layers of plants: the upper layer filled with taller structural plants used to frame and punctuate the landscape, the middle layer filled with ornamental flowering plants and the ground level that weaves the other layers together and shades the soil, which controls weeds.  These layers mimic natural plant communities and each layer is important for the health of the plants.  A collection of plants living in community can be extremely drought tolerant and water-thrifty.

Lenora Larson’s Garden with dense plants that smother weeds

A few final thoughts:

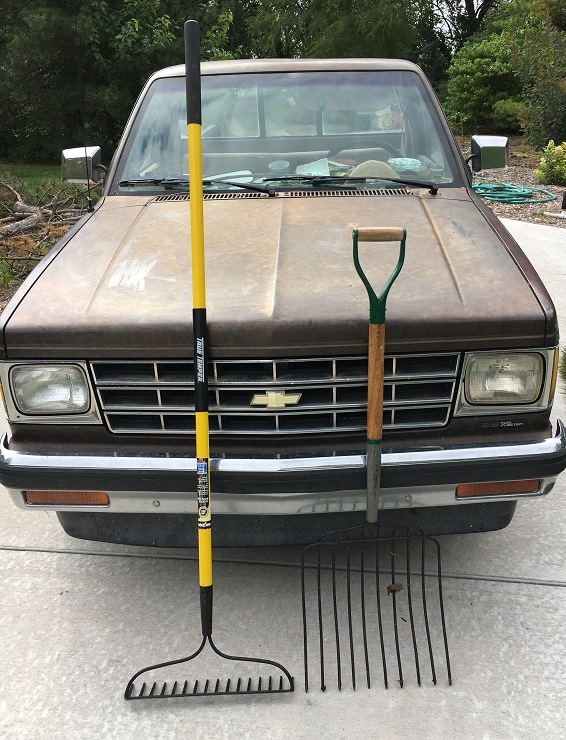
Purchase a heavy duty mulching fork and stiff garden rake for leveling.

Essential mulching tools: Silage fork and stiff leaf rake

Insects can be a problem in mulch, so keep it away from the foundation of your house and base of the plants.  Termites generally like larger pieces of wood but can even live in the finer mulch, especially if it is too thick.

Landscape fabric under mulch is something we avoid.  It only keeps weeds out for the first few years and then the decomposing mulch turns into compost, which is ideal seed bed for weeds.  It is also hard to transplant into it and often suffocates the soil.  We have purged the Arboretum of just about all landscape fabric.  Save your money and buy more plants.

You can use rock as a mulch, but don’t buy the recycled rubber mulch.  The rubber mulch may last forever but it does nothing great for the soil or the plants around it.  In fact, the compounds and residues that leach over time may do more harm than good.

Happy Mulching!

Five Water Saving Practices for your Landscape

Last week the Arboretum staff visited a flower farm near Lawrence.  It was interesting to see how they were growing their flowers to be used in arrangements and displays for special occasions. They focused on native plants, but also had some annuals, bulbs and shrubs, too.  During our tour, the topic of irrigation and water use were explored, because they are under severe drought conditions.  It made me think about our irrigation practices and ways to create a water-wise landscape.  Here are five water saving practices for you to implement in your garden.

Choose plants adapted to your site

One of the biggest mistakes I have made when establishing a new garden is choosing plants that I like rather than plants that like the area in which I am trying to establish them.  There is a big difference. It is critical to match plants to the site. The closer they are adapted to your landscape the less water they will need to survive.  Native plants are always a good choice, because they are already adapted to our climate.  Evaluate your landscape’s soil, sun exposure, and moisture content.  By understanding these aspects of your landscape, you will be able to make informed plant choices.  There is a palette of plants that will almost effortlessly grow in your garden.  Grouping plants with similar water needs that match your landscape conditions will ensure success.


Space Plantings Tightly

In their book Planting in a Post-Wild World: Designing Plant Communities for Resilient Landscapes, Thomas Rainer and Claudia West develop the ideas of layering plants.  There are usually at least three distinct layers of plants: the upper layer filled with taller structural plants used to frame and punctuate the landscape, the middle layer filled with ornamental flowering plants and the ground level that weaves the other layers together and shades the soil which controls weeds.  These layers mimic natural plant communities and each layer is important for the health of the plants.  A collection of plants living in community can be extremely drought tolerant and water-thrifty.

Use mulch around trees and shrubs

Mulches can be a blessing and a curse depending your mulching practices. We typically apply a two to three inch layer of mulch around a tree by simply mulching a tree a few inches away from the root flare and extending out to its drip line. Shrubs get the same treatment.  It is vital to keep mulch several inches away from the trunk or stem. Please, no mulch volcanoes!  Mulches prevent weeds, eliminate erosion, retain soil moisture, help moderate soil temperatures, provide a buffer between equipment and the trunks and stems and increase the aesthetics of the overall landscape.  Too much mulch (over four inches) starves roots of oxygen by sealing off the ground suffocating the plants. Old mulch can matte up and restrict water infiltration, too.

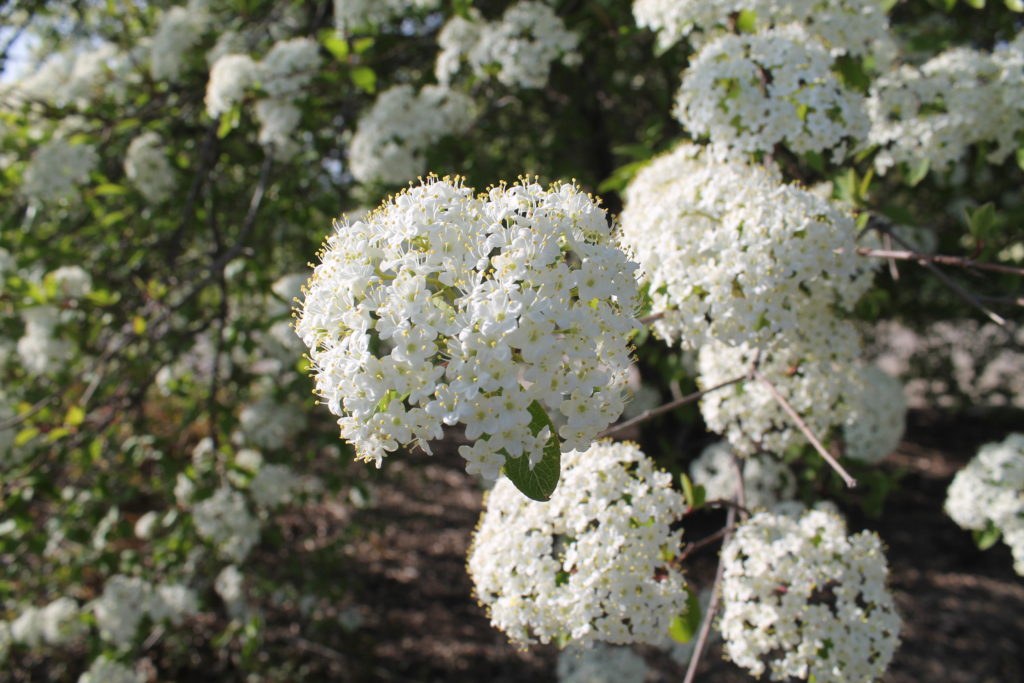
Viburnum prunifolium in bloom

Irrigate efficiently

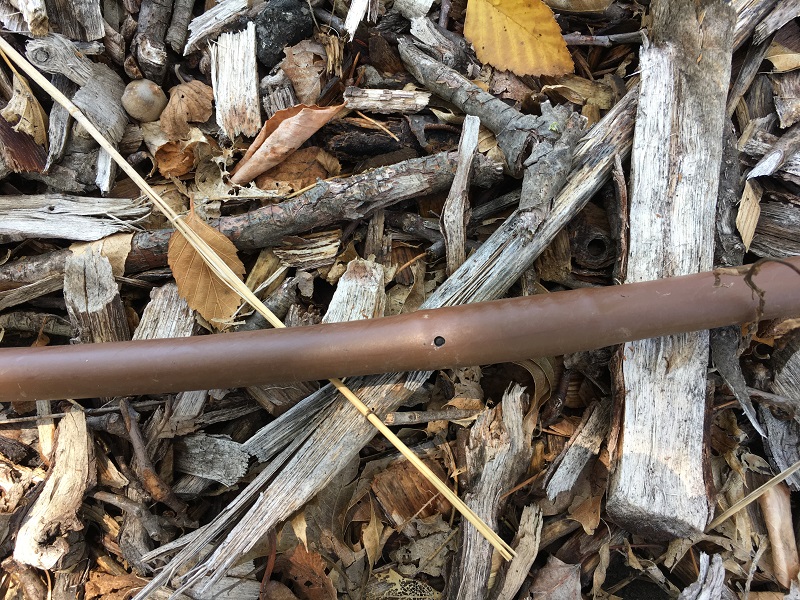
During times of prolonged drought, irrigation may be necessary.  Plants naturally go dormant, but in a display bed you can add supplemental water to keep them more vibrant and healthy.  We use pressure compensating drip irrigation tubing with emitters spaced 12 inch apart.  Drip irrigation puts water where it is needed for optimum efficiency in the root zone rather than on the leaves. If you irrigate with overhead sprinklers, start sprinklers early in the morning or later in the evening.  Avoid watering during the hottest part of the day to reduce evaporation and loss from wind.  You can also recycle rainfall and create a rain garden.

Pressure compensating 1/2 inch soaker hose


Reduce your lawn

Cool season grass lawns with roots that are maybe six to twelve inches deep are one of the most watered landscape plants. If you think strategically and replace part of a water-guzzling lawn with deep rooted wildflowers, grasses, shrubs and trees or even with native buffalograss, you will save water and increase wildlife diversity in your landscape.  You may like open spaces with lawn for play or leisure, but you can scale back the size of your lawn and still have the aesthetics you appreciate.  Mow your lawn at the highest height and water only as needed.  Turfgrass has its place in the landscape, but maybe not the most prominent place it currently does.

We don’t think often enough about the water we use. It is a precious commodity. Remember the 2011 and 2012 drought in Kansas? We were using tremendous quantities of water to keep our landscapes alive. It made us evaluate each plant according to its response to these extreme conditions.  Obviously, some plants did better than others and we lost some plants those years. It made us think critically about our plant choices and irrigation practices. A beautiful and resilient landscape that uses little if any supplemental water is an achievable result.  A few changes can make a big difference.

Plant Profile: The Versatile Viburnums

In addition to our interest in native trees, shrubs, wildflowers and grasses, one of the goals of the Arboretum is to grow plants which, while not native, are adapted to the rigors of the central Kansas climate. We are especially interested in displaying plants that are not widely grown in the area, but that show excellent hardiness and landscape potential.

The viburnums are a perfect example.  While not as widely known as forsythia and lilac, these shrubs deserve much more use in our landscapes. Not only do they offer year-around show of ornamental attributes, such as abundant floral displays, fragrance, outstanding fruiting characteristics, and fall color, they are also hardy and can serve a number of important uses in the landscape.

The Arboretum collection currently features a number of different viburnums, each displaying unique characteristics and qualities.  Most of the viburnums can be seen along the east border of the Arboretum, just south of the parking lot. A planting on the north bank of the Amphitheater features several additional kinds along with some newer varieties in the Pinetum.

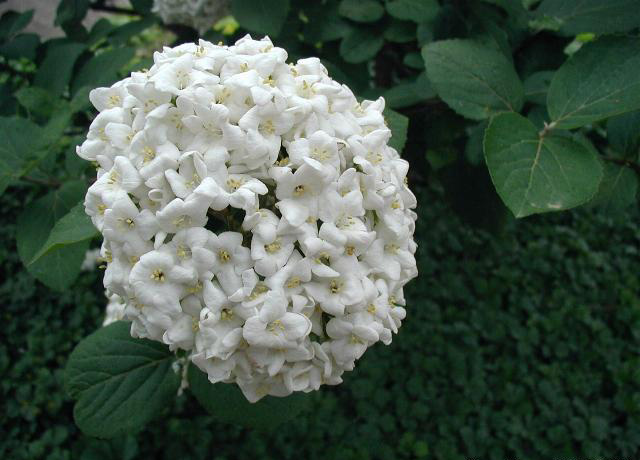
Fragrant snowball viburnum – Viburnum x carlcephalum https://en.wikipedia.org/wiki/Viburnum_%C3%97_carlcephalum

The three most fragrant viburnums in the Arboretum’s collection are the Koreanspice Viburnum (Viburnum carlesii), fragrant viburnum (V. x carlcephalum), and Judd viburnum (V. x juddii). These three are somewhat similar in appearance because the latter two are hybrids involving a cross between the Koreanspice and another viburnum. They are medium size shrubs (6-10 feet tall). However, our collection also includes a dwarf form of the Koreanspice. All produce clusters of fragrant white flowers in April into May followed by inconspicuous black fruits.

Another fragrant type in the Arboretum is Burkwood Viburnum (Viburnum x burkwoodii). This semi-evergreen grows 8-10 feet fall and produces a white snowball-like flower cluster in April. The fragrance in somewhat sharper, almost spicy.

Like the burkwood viburnum, Willowwood viburnum (Viburnum x rhytidophylloides ‘Willowwood’) is semi-evergreen, retaining its furrowed, leathery leaves throughout much of the winter. This 7-10 foot shrub blooms in April and often to a lesser extent again in October. The blue-black fruits are attractive and can be quite abundant. Another form that is really attractive is ‘Alleghany’ which has tough, leathery leaves, attractive white flowers and abundant bunches of reddish-purple fruit.

Alleghany Viburnum. Photo by Emily Weaver

The Wayfaringtree viburnum (Viburnum lantana) grows as a large shrub or small tree (12-15 feet). While not fragrant to any degree, it produces an outstanding floral display in May, followed by red-black fruit in late summer that persists into fall. Fall color is often red, although it is not consistent.

Another large shrub is the Wentworth cultivar of the American cranberrybush (Viburnum trilobum ‘Wentworth’). The Wentworth viburnum was selected for its large, edible fruits, which progress in color from yellow to red to bright red and persist throughout winter. Birds seek out the fruits from fall through winter.  I have often thought that this shrub was at is best on bright winter days with the fruit highlighted against a snowy background. It is also attractive in May with its show of white, flat-topped flower clusters. A dwarf form of the American cranberrybush is found on the north bank of the Amphitheater.

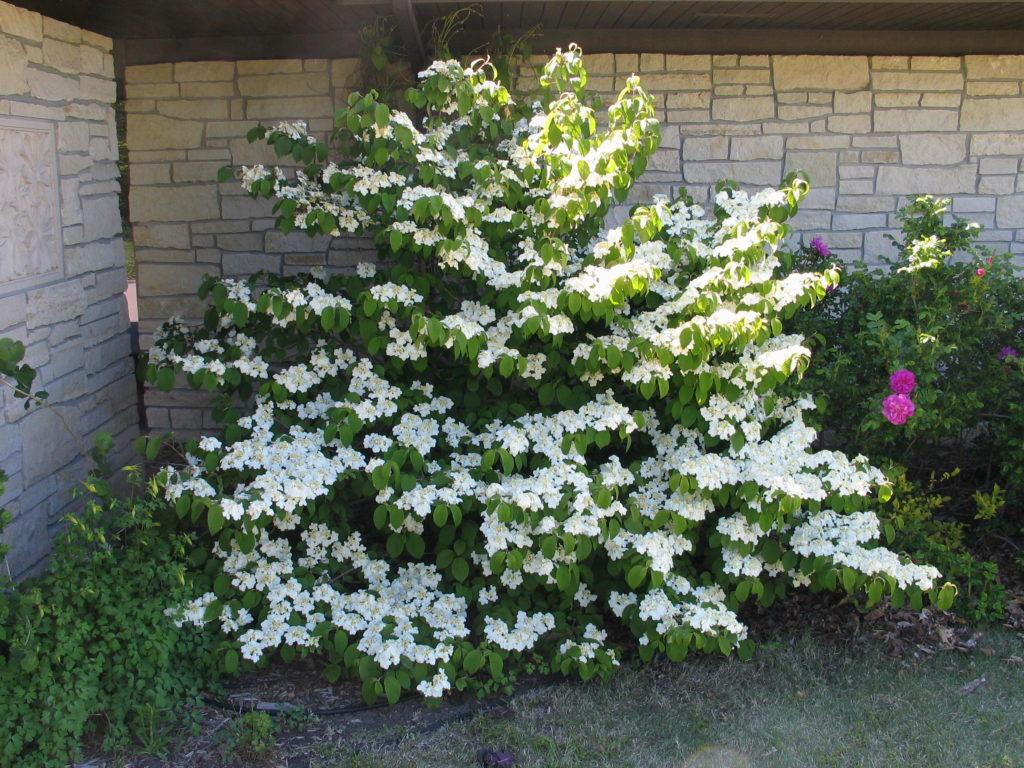
Tucked up under the northeast corner of the Visitor Center is a viburnum that is very attractive. The Doublefile viburnum (Viburnum plicatum forma tomentosa ‘Shasta’) is stunning in bloom as the flowers are held horizontally above the branches.  It has insignificant fruit, but the spring flower show makes up for it.

Doublefile viburnum

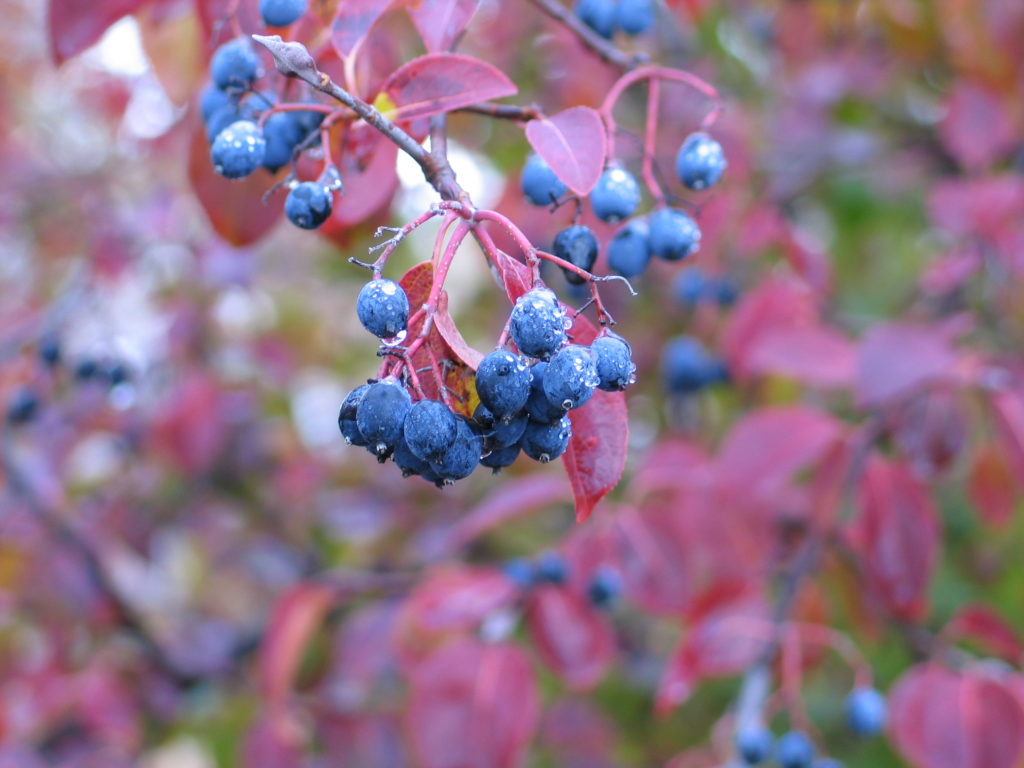
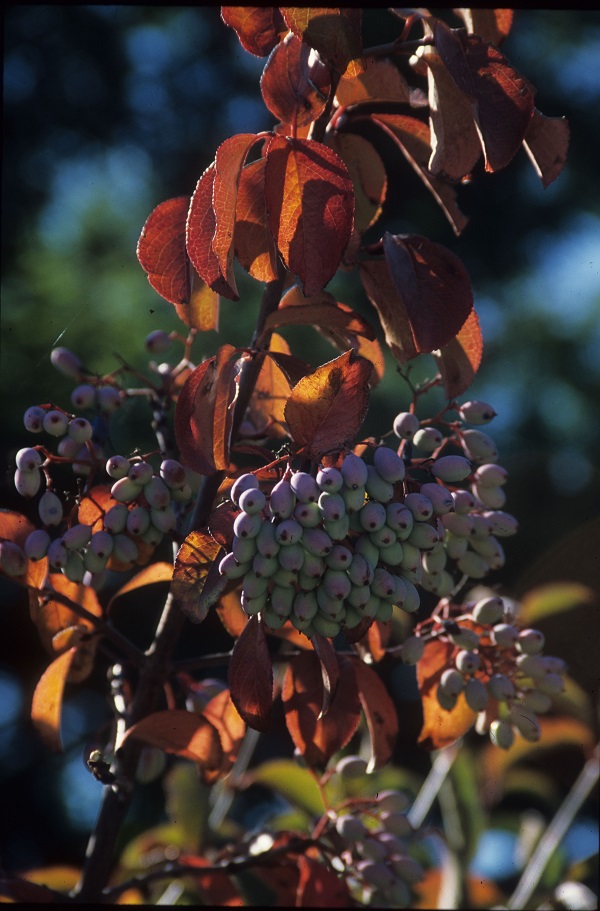
The last two species in the Arboretum collection are the Blackhaw (Viburnum prunifolium) and southern or rusty blackhaw (V. rufidulum). These two species are native to Kansas and distinct from each other. Blackhaw viburnum is a large shrub or small tree that has smaller leaves and brighter fall color with oranges, yellows and reds. The dense flower clusters develop into purplish-black fruit that the birds love.

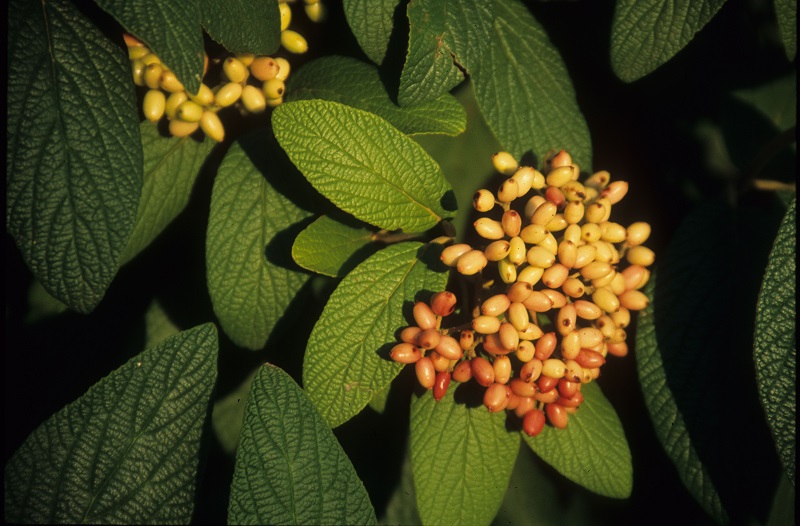
Rusty blackhaw is not widely available in the nursery trade at this time, but extremely adaptable and hardy. The glossy dark green leaves turn a nice burgundy-purple in the fall. Large, white, flat-topped clusters of flowers appear in early spring and later produce bunches of fruit that change from red to purple through the fall.  Again, many types of birds cherish the nutritious fruit.  These two native viburnums are my personal favorite, because they are the most adapted to our Kansas landscapes and have so many wonderful qualities.

Viburnum prunifolium. Photo by Janelle Flory Schrock

Viburnum rufidulum fruit. Photo by Emily Weaver

Any way you look at them, the viburnums are a versatile and highly ornamental group of plants that deserve a greater use in the landscape. We will continue to integrate new species and varieties into our plantings as development of the Arboretum progresses.

Can A Shade Garden Be Created In Kansas?

“I have shade in my yard, what can I grow?” We get this question every year at our FloraKansas Plant Festivals and I admit it is a challenge to come up with plants that will thrive in shade.  The difficulty with trying to grow shade plants in our area in not that we have shade, it’s that we have shade in an area that once grew sun loving deep rooted prairie plants.  Trees have been added to our landscapes out of necessity and the prairie has been pushed out due to lack of adequate sunlight.  The inconsistent rainfall and root competition of the trees are a real challenge to shade-loving perennials, shrubs and understory trees.

So what can we do to create a shade garden?

Start small

Choose drought tolerant shade loving plants. These new additions to your shade garden should be smaller and don’t require digging a deep hole and disturbing tree roots to get them in the ground.  Establish an area that can easily be managed and maintained the first couple of years.  Keep in mind that root competition and irregular rainfall will require consistent moisture from you the first year until the new plants can weave their roots through the tree roots and live in harmony together.

Be patient

This is not a quick fix. The roots of your shade plants develop slowly so you need to watch and wait to see what these plants need.  The first two years are vital to the success of your shade garden endeavor. You will need to water them regularly to encourage growth.  Work with the plants to create an environment in which they will thrive.  Your patience will be rewarded with new blooms several years into the future, but you have to start now to see this happen.

Forms and textures are important

Let face it, there are not as many showy flowering plants for the shade compared to the vast array of sun loving prairie plants.  So, we need to include plants with interesting forms and foliage.  A good example of this are the arching stems of Solomon’s seal. A group of these growing happily together are very striking. Incorporate plants that flower but don’t forget the architecture that give additional visual interest.  Great shade gardens have a balance of flowers and foliage.

Arching stems of Solomon’s Seal

Don’t fertilize

Leave the leaves as protection and organic matter.  As the leaves decompose, they will supply nutrients to the fledgling plants. The natural processes that make a woodland work effortlessly need to be replicated as closely as possible.  Woodland plant communities rely on the nutrients from the canopy and twigs that are slowly broken down and released back to the soil.  Too much fertilizer creates all kinds of problems, but the most obvious is too much growth with not enough sustainable roots.

CLICK HERE: For a list of shade loving perennials and shrubs.

Trees in Kansas are a blessing, not a curse.  We enjoy the shade, but often struggle to find the right plants for that barren shady spot under the trees.  Some properly chosen plants and some patience along with timely watering will make your woodland garden more natural and resilient over time.  The roots of the trees and roots of the shade plants co-mingle in our soil, sunlight and climate.  Even the most tranquil forest settings we have seen have complex processes and interactions taking place.  So, be patient and you will be rewarded with happy plants for years to come.


Five simple ways you can make a difference for wildlife

In the grand scheme of things, we have a tremendous capacity to impact our surroundings for good or bad.  A few changes in how we approach and look at our landscapes can make a real difference to the future of the wildlife we enjoy and care about.  Here are five ways you can positively impact wildlife and create something you enjoy too.

Increase vertical layering

Having tiers of plants from the largest trees to the lowest grass and everything in between is the perfect habitat for wildlife. Plants of varying heights and forms create interest in the garden, but more importantly these diverse plants provide food, shelter, and nesting sites for beneficial insects, birds, small mammals, and other wildlife. The use of native plants will only attract more wildlife.

Provide water

Water is an essential part of any diverse wildlife habitat. Just like us, wildlife need water for their survival. It doesn’t have to be anything fancy. A birdbath, small pond or bubbling fountain will be like a magnet for all sorts of wildlife. Besides, there is something soothing about the sound of water moving.  We may need it for our own healing.

Photo by Dave Osborne.

Reduce your lawn

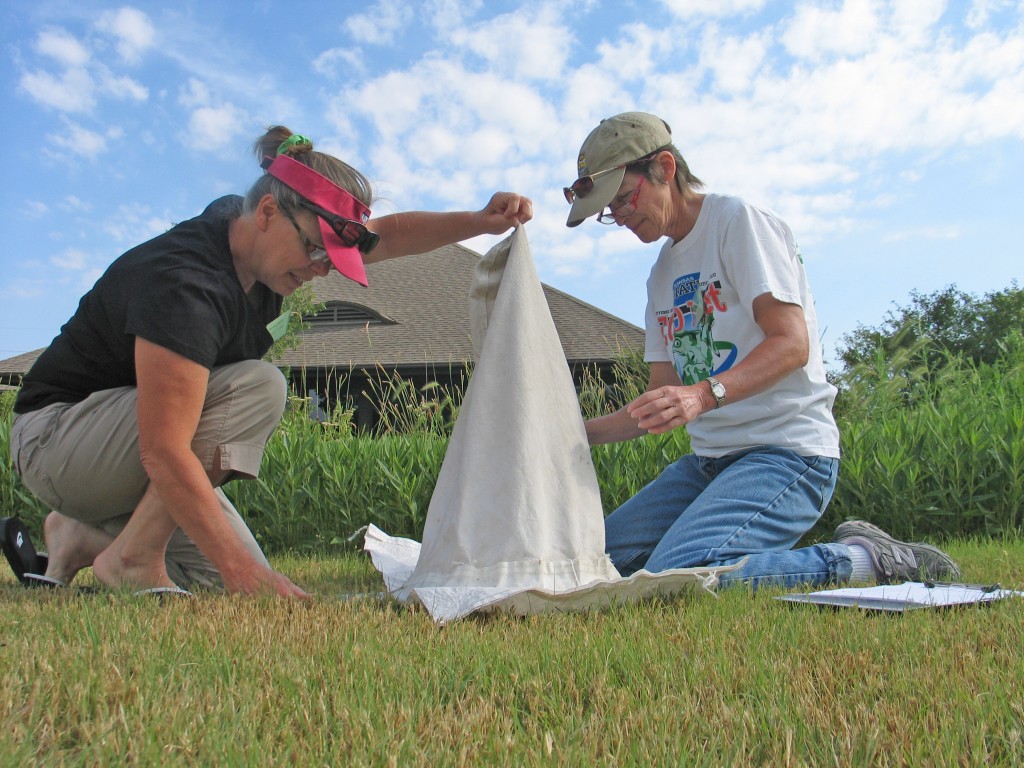
Invariably as we have done insect sweeps over lawns versus prairies, we always catch more insects and pollinators in the prairie. It makes perfect sense. The shortness of the lawn and lack of diversity of plants repel rather than attract more insects and birds to the areas that are more diverse.

Limit the use of chemicals

Obviously, chemicals were created to eradicate pests. However, chemicals adversely affect not just one pest but also many non-targeted species. In addition, the chemical residue can remain active for an extended period of time, lengthening the impact. Here at the Arboretum, we use chemicals sparingly and as a last resort. A diverse planting attracts a host of insects, including predator insects and birds that feed on the problem pest.  A pristine landscape with whole leaves and little insect activity is not natural. Some pests are inevitable and are usually controlled by other wildlife.  It is important to wait for the natural processes to take place.

Become a citizen scientist or naturalist. Be aware of wildlife and its needs.

The more you know about the wildlife in your landscape, the more you will understand what they need for their survival.  Knowledge is power. Monitor what is happening in your yard. Create habitat by establishing trees, shrubs, grasses and wildflowers that attract a host of diverse wildlife.  The awe that many of these critters invoke naturally creates within us a desire to learn more about them.
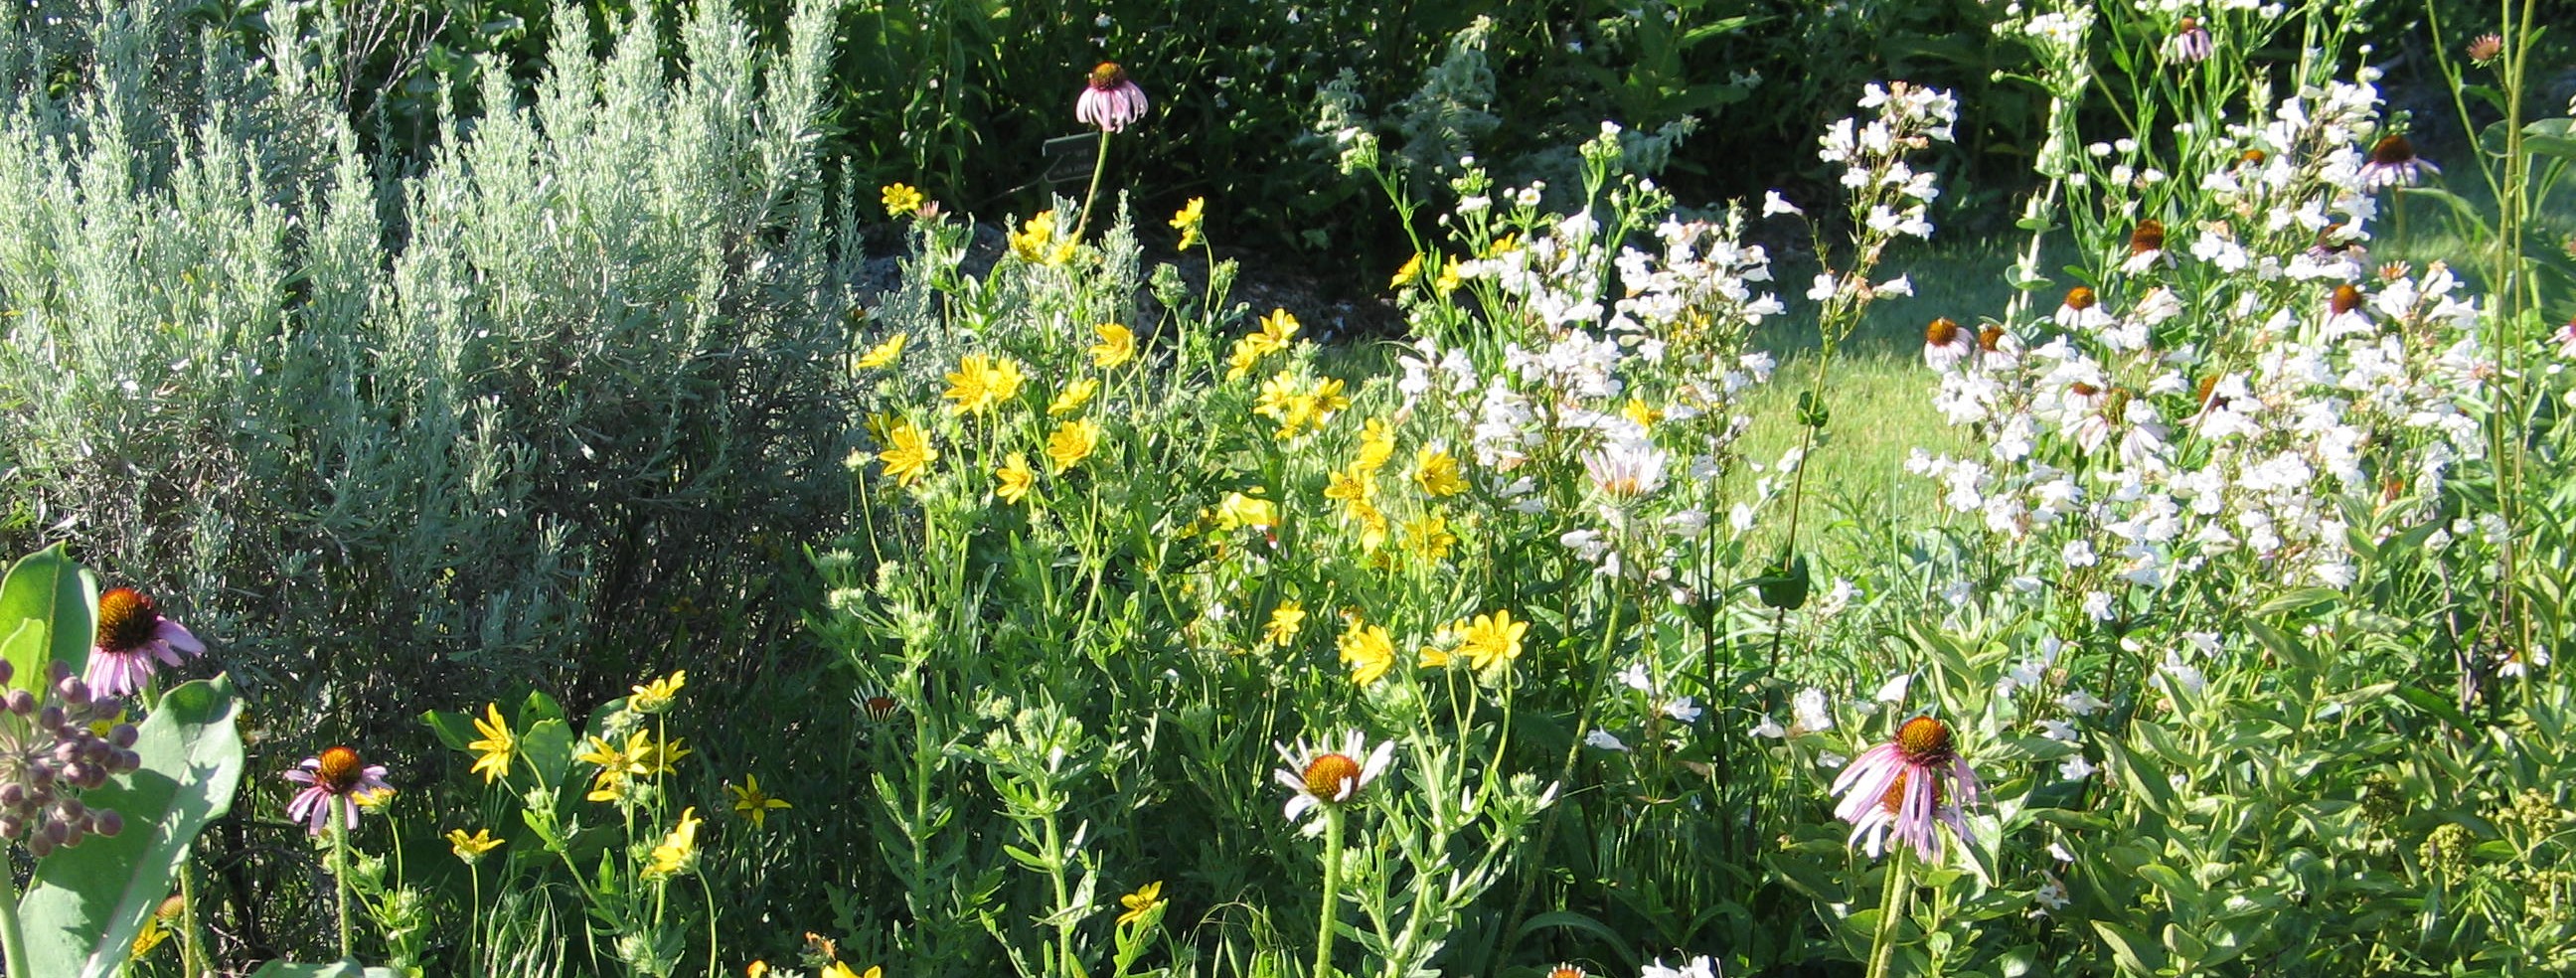
The most important thing to remember is that you can make a difference. Even a few small steps over the next few years will have a positive impact. While it might not seem like your small space is that important, imagine your landscape connected to hundreds of other patchwork gardens throughout the town. These gardens will make a difference, over time, on the wildlife we seek to help. No small change is too trivial—so pick one of these ideas today and take action!

Plant Profile: Rattlesnake Master (Eryngium yuccifolium)

There are quite a few native wildflowers that everyone knows – coneflowers, gayfeathers, prairie clovers, evening primrose and so on. But when I tell folks to try some rattlesnake master, Eryngium yuccifolium, I get the blank stare, or the proverbial crickets in the room sound. What does that do? What does that look like?  True, it is one of the lesser known wildflowers, but I contend that it is just as attractive as some of the common wildflowers.
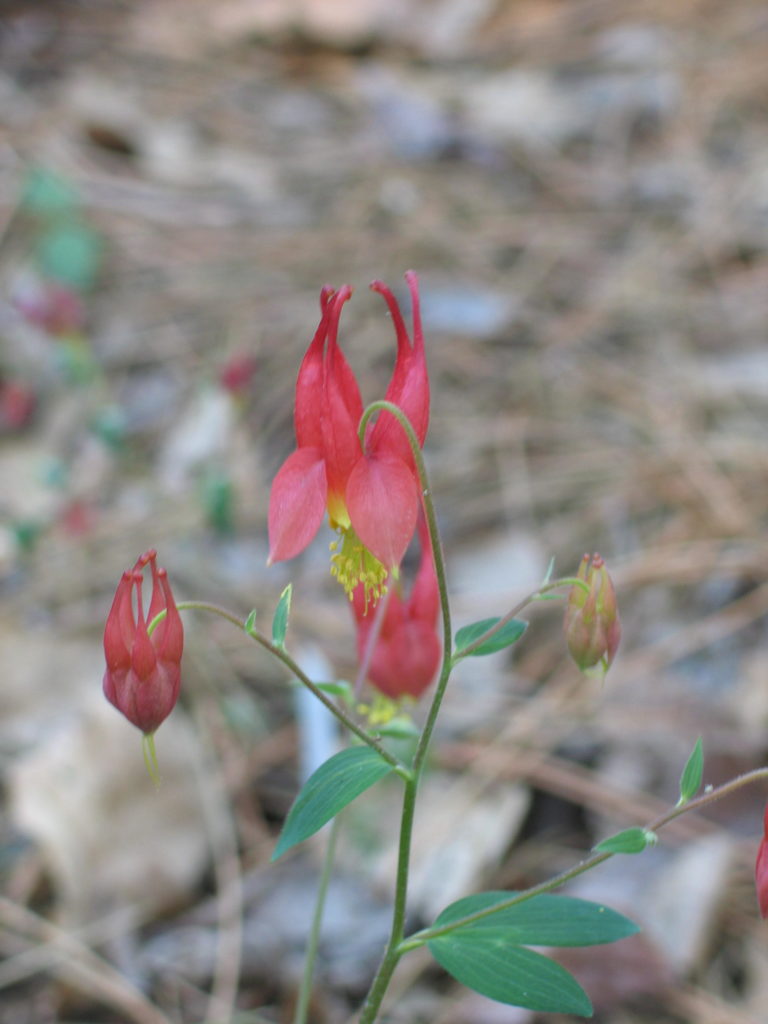
Rattlesnake master, Eryngium yuccifolium, gets its name from the belief that the roots have the ability to heal snake bites. In today’s world, I would stick to the true antidotes. Often the root was dried and used in bitter teas as a supposed cure for maladies such as venereal disease, liver problems, impotence, expelling worms and to induce vomiting. It makes me thankful for modern medicine, but back in the 18th and 19th centuries many herbs from the prairie were used to cure a variety of ailments because they had nothing else.

This unique wildflower’s scientific name comes from the close resemblance the leaves have with a yucca plant. The sword-like leaves have soft tiny barbs along the edges that make it easily recognizable. In the summer, the white thistle-like flowers develop atop the stout upright stems. Even though it looks like a thistle, it is actually a member of the carrot/parsley family. Rattlesnake master ultimately reaches about three to four feet tall with a spread of one to two feet. I like to combine them in groups of three in the middle to back of the flower bed.

In the landscape or in a prairie, it is quite a striking plant. The grey-green foliage and one inch diameter flower heads make it stand out in the garden as an accent plant. The flowers slowly dry and become yellow-brown later in fall and into the winter. The stalks are sturdy and remain well into winter, providing interest in the landscape. We have even used them in dried flower arrangements.

Plant them in full sun or part shade for best growth. They are quite adaptable, but prefer a medium to dry soil. I have planted in spring and fall with easy establishment either time of the year. This is a plant that should be used more in roadside plantings, prairie restorations, prairie landscape settings, and in your wildflower garden.

You may never need a rattlesnake master for a snake bite, but you do need some rattlesnake master in your garden. Its attractive appearance and resilient beauty are outstanding. Plus, pollinators love it too.  You may have just found your next favorite plant.