Plant Profile: Pink Muhly Grass

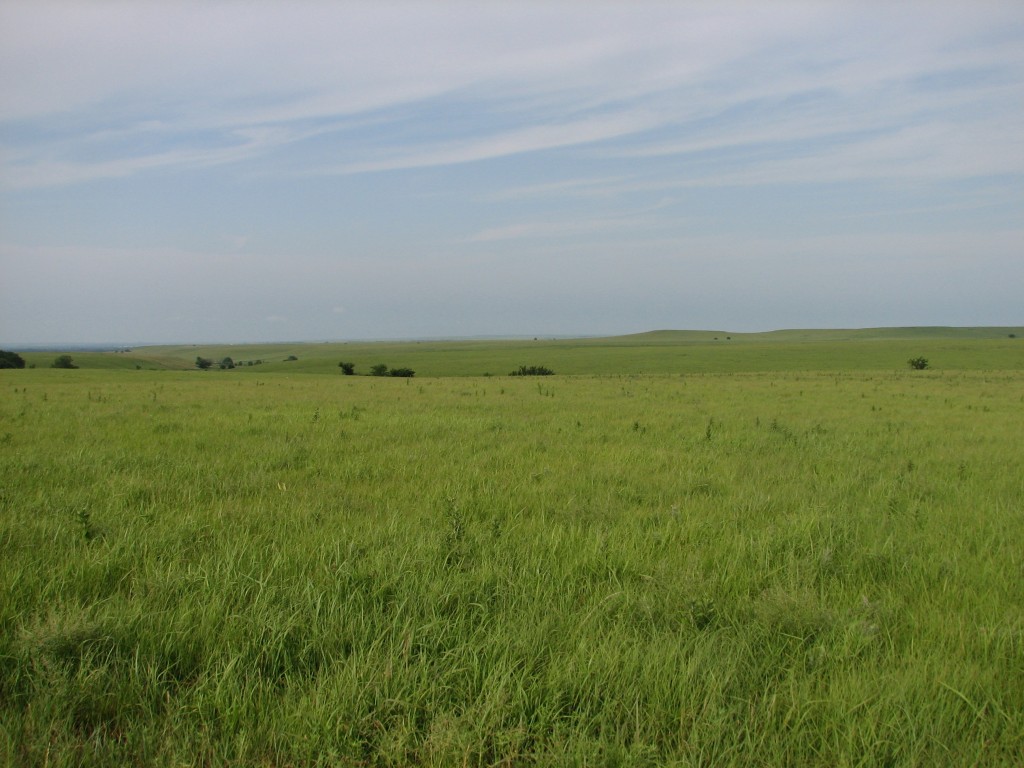
Fall is the best time of year to admire the beautiful regalia of native grasses. During the spring and summer, these grasses blend into their surroundings. As autumn deepens, the wonderful fall color and attractive seed heads of these grasses are on full display.

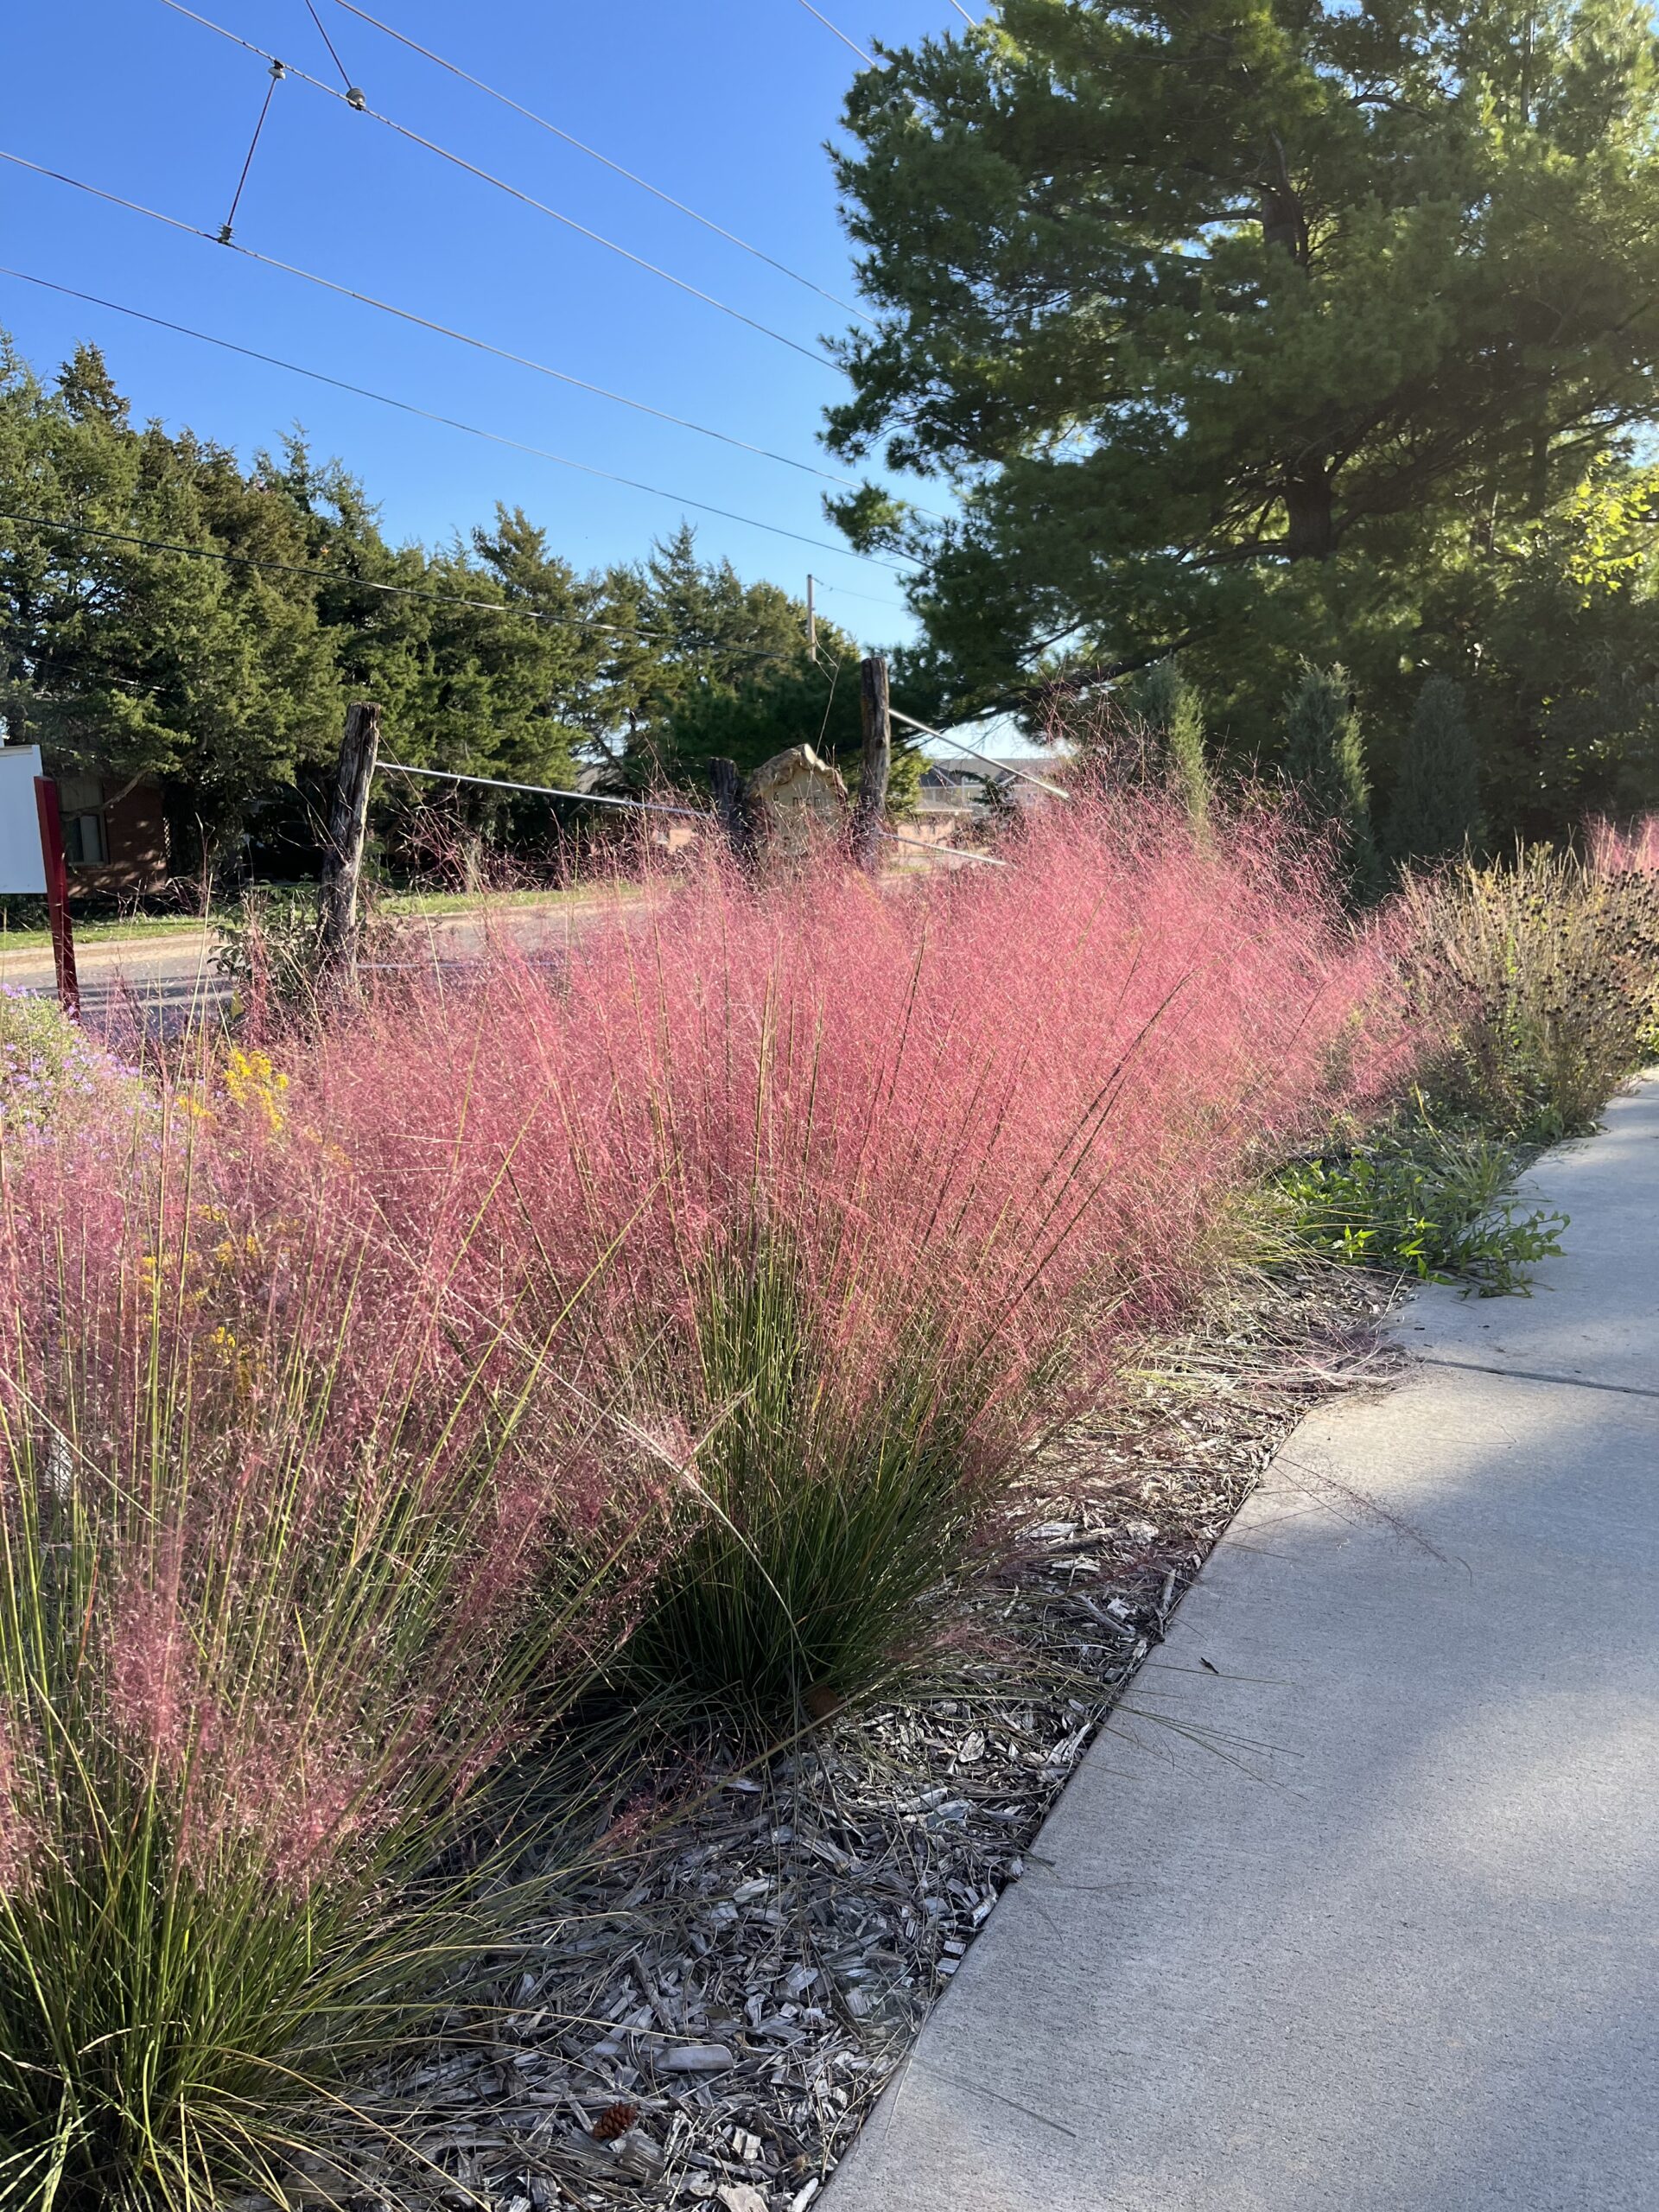
One of the most talked about grasses this fall has to be pink muhly grass (Muhlenbergia capillaris). A few years ago on the sidewalk in the northwest corner of the Arboretum, we established a couple groupings of these plants. This year, these swaths are topped with vibrant pink blooms.

Pink muhly with Wichita Mountains goldenrod

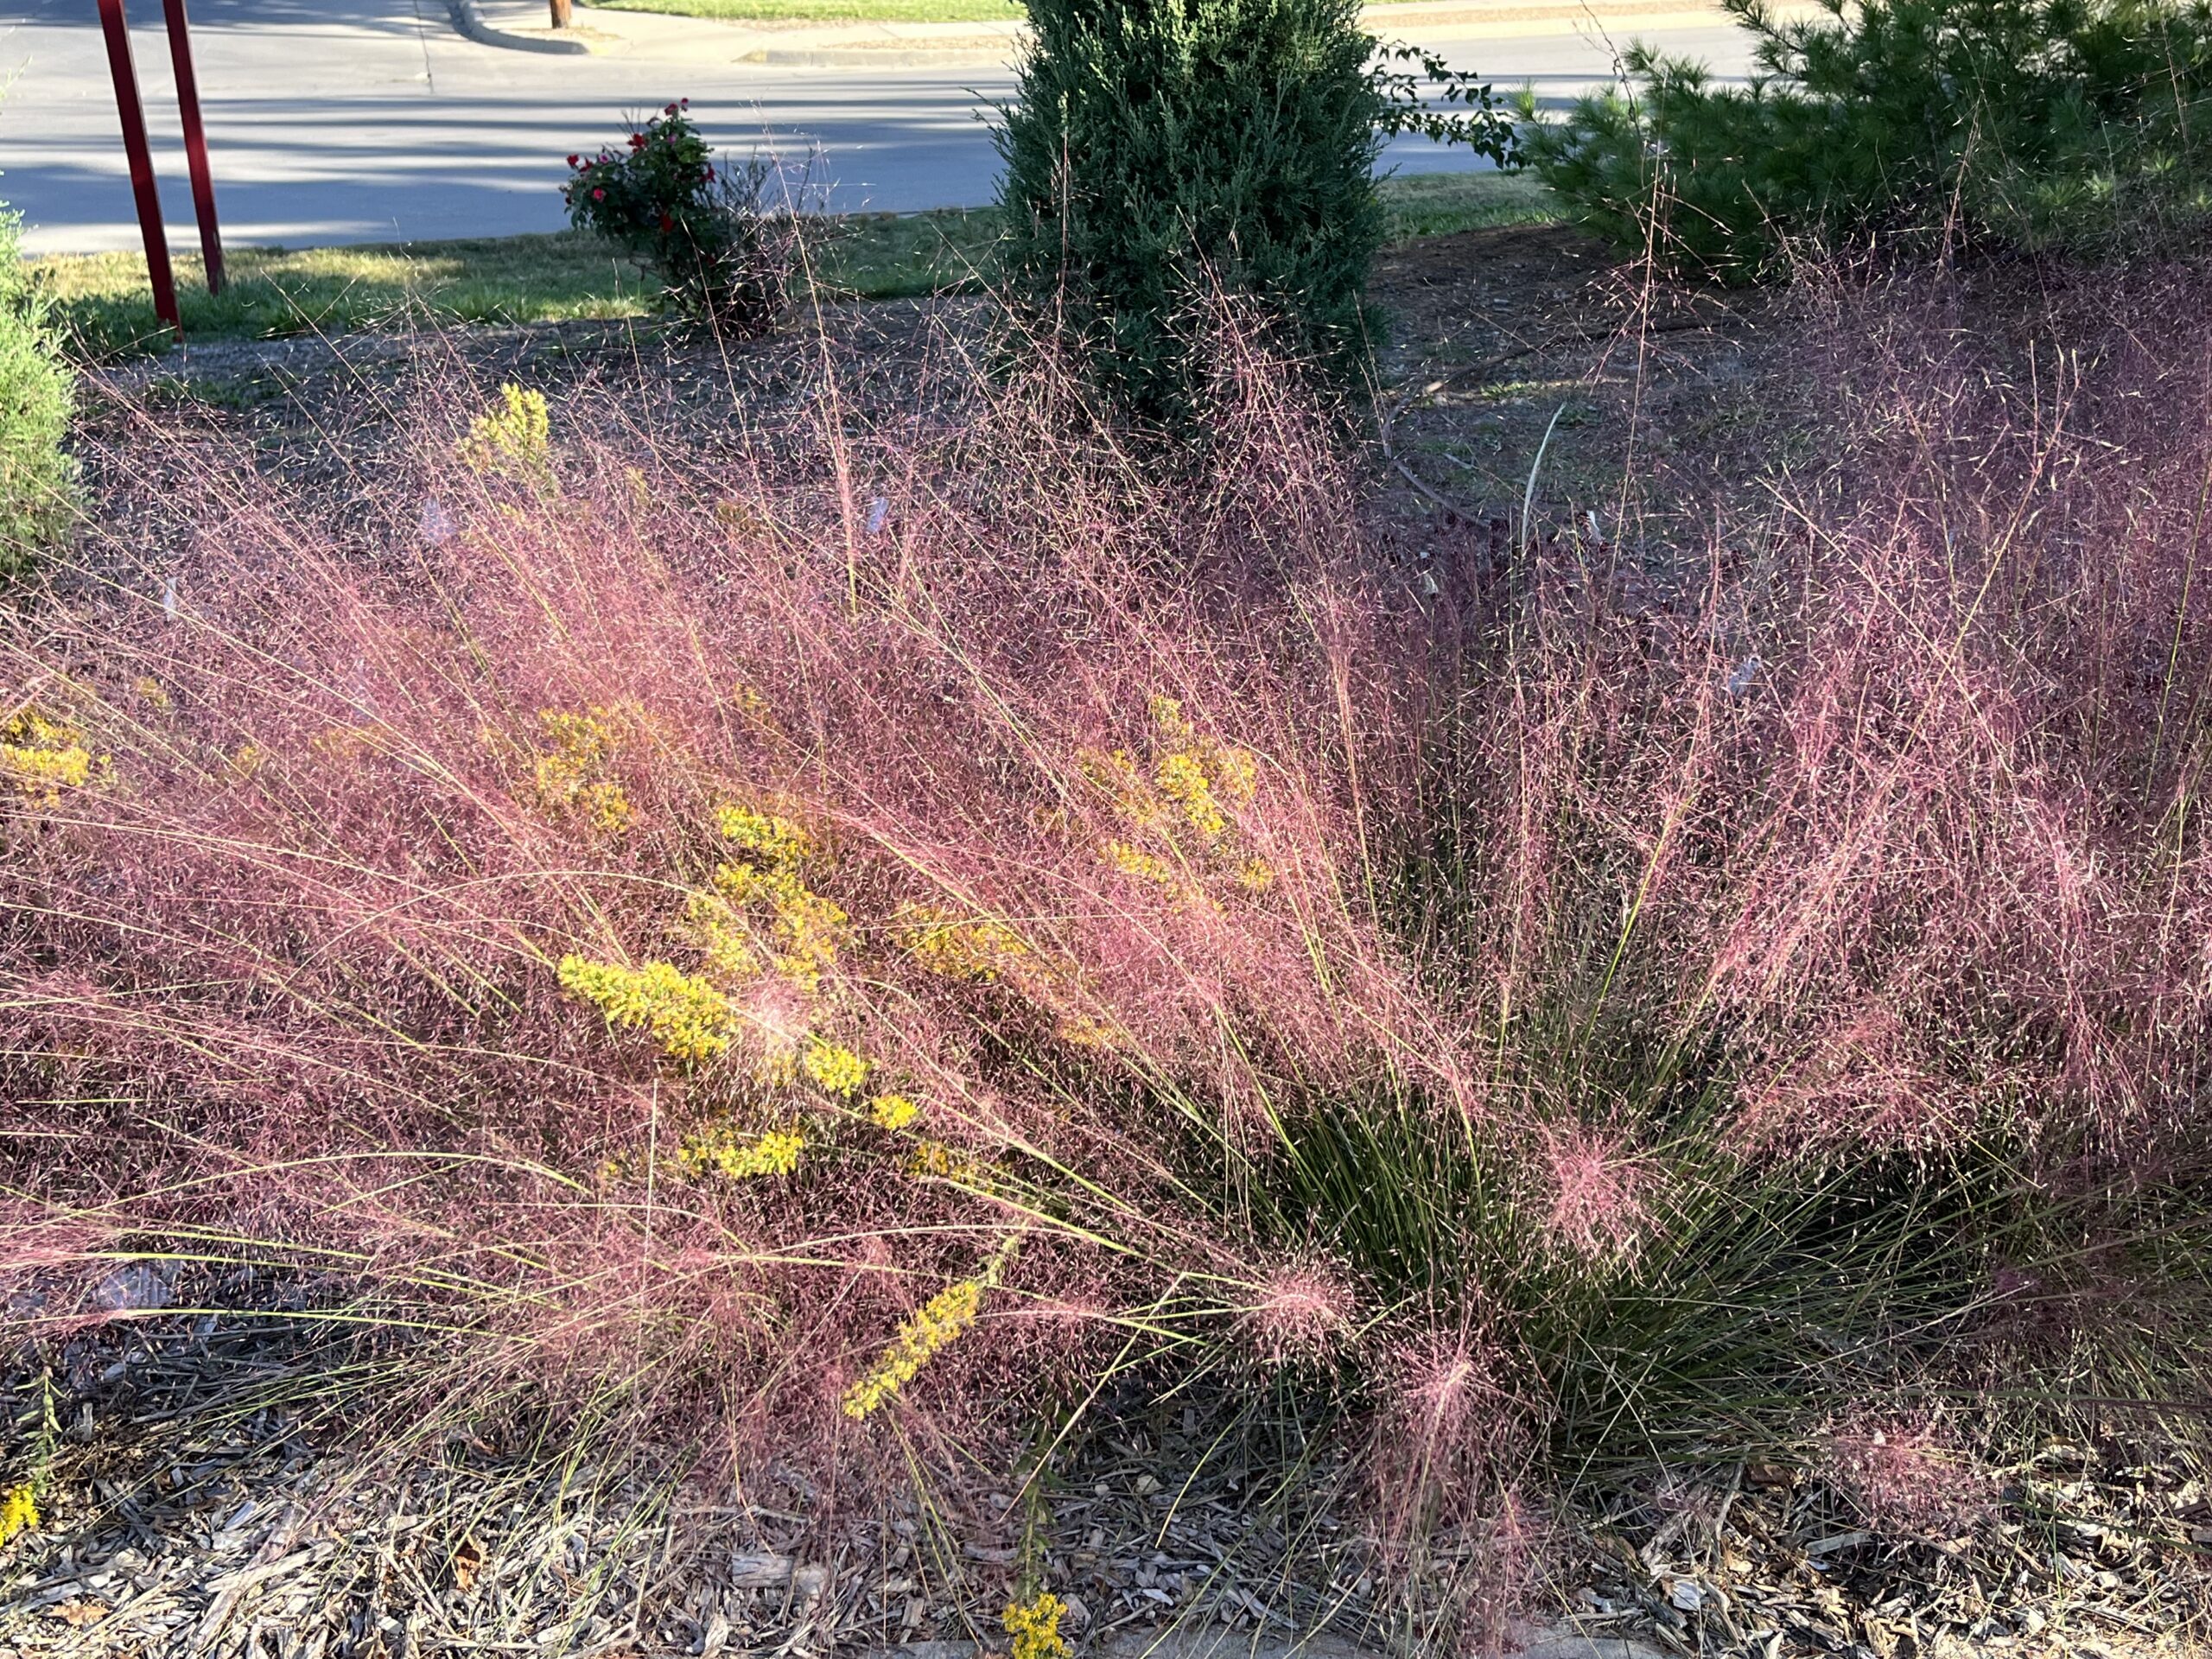
Pink muhly grass is not only a beautiful ornamental grass, but it is also low-maintenance. We have not done much to keep these grasses going this growing season. It gives you the best of both worlds, a showy plant that doesn’t require much time and attention.

These plants establish relatively quickly, either planted in the spring or in the fall. If you are planting in the fall, plan ahead by getting them in the ground at least a month before the expected initial frost. They are a warm season grass that needs soil at least 60 degrees to continue rooting.

In the spring and summer, the rounded, slender, long shoots of grass are dark green in color. As fall approaches, the plant produces soft, fuzzy flowers in pink or pinkish-red hues, with an appearance resembling cotton candy. As winter grows near, the flowers lose their color, but the dried plumes are still attractive.

Muhlenbergia capillaris grows well in sandy or rocky woods and clearings with good drainage. It is native to Kansas and states south and east. We grow the straight species, but the cultivar ‘Regal Mist’ is another popular variety. Other beautiful cultivars include ‘Pink Flamingo’ and ‘White Cloud’. Planting in large drifts is breathtaking.

While not as well-known as some of the other native grasses, it should be used more in landscapes because of its tolerance to poor soil and dry conditions. It needs good drainage especially during the winter, but is quite adaptable once fully established. As the clumps develop excessive thatch after three or four years, division may be helpful. Perfect for slopes; great in a container; beautiful when tucked into cut-flower arrangements.

Sunlight on pink muhly grass with side oats grama in the foreground.

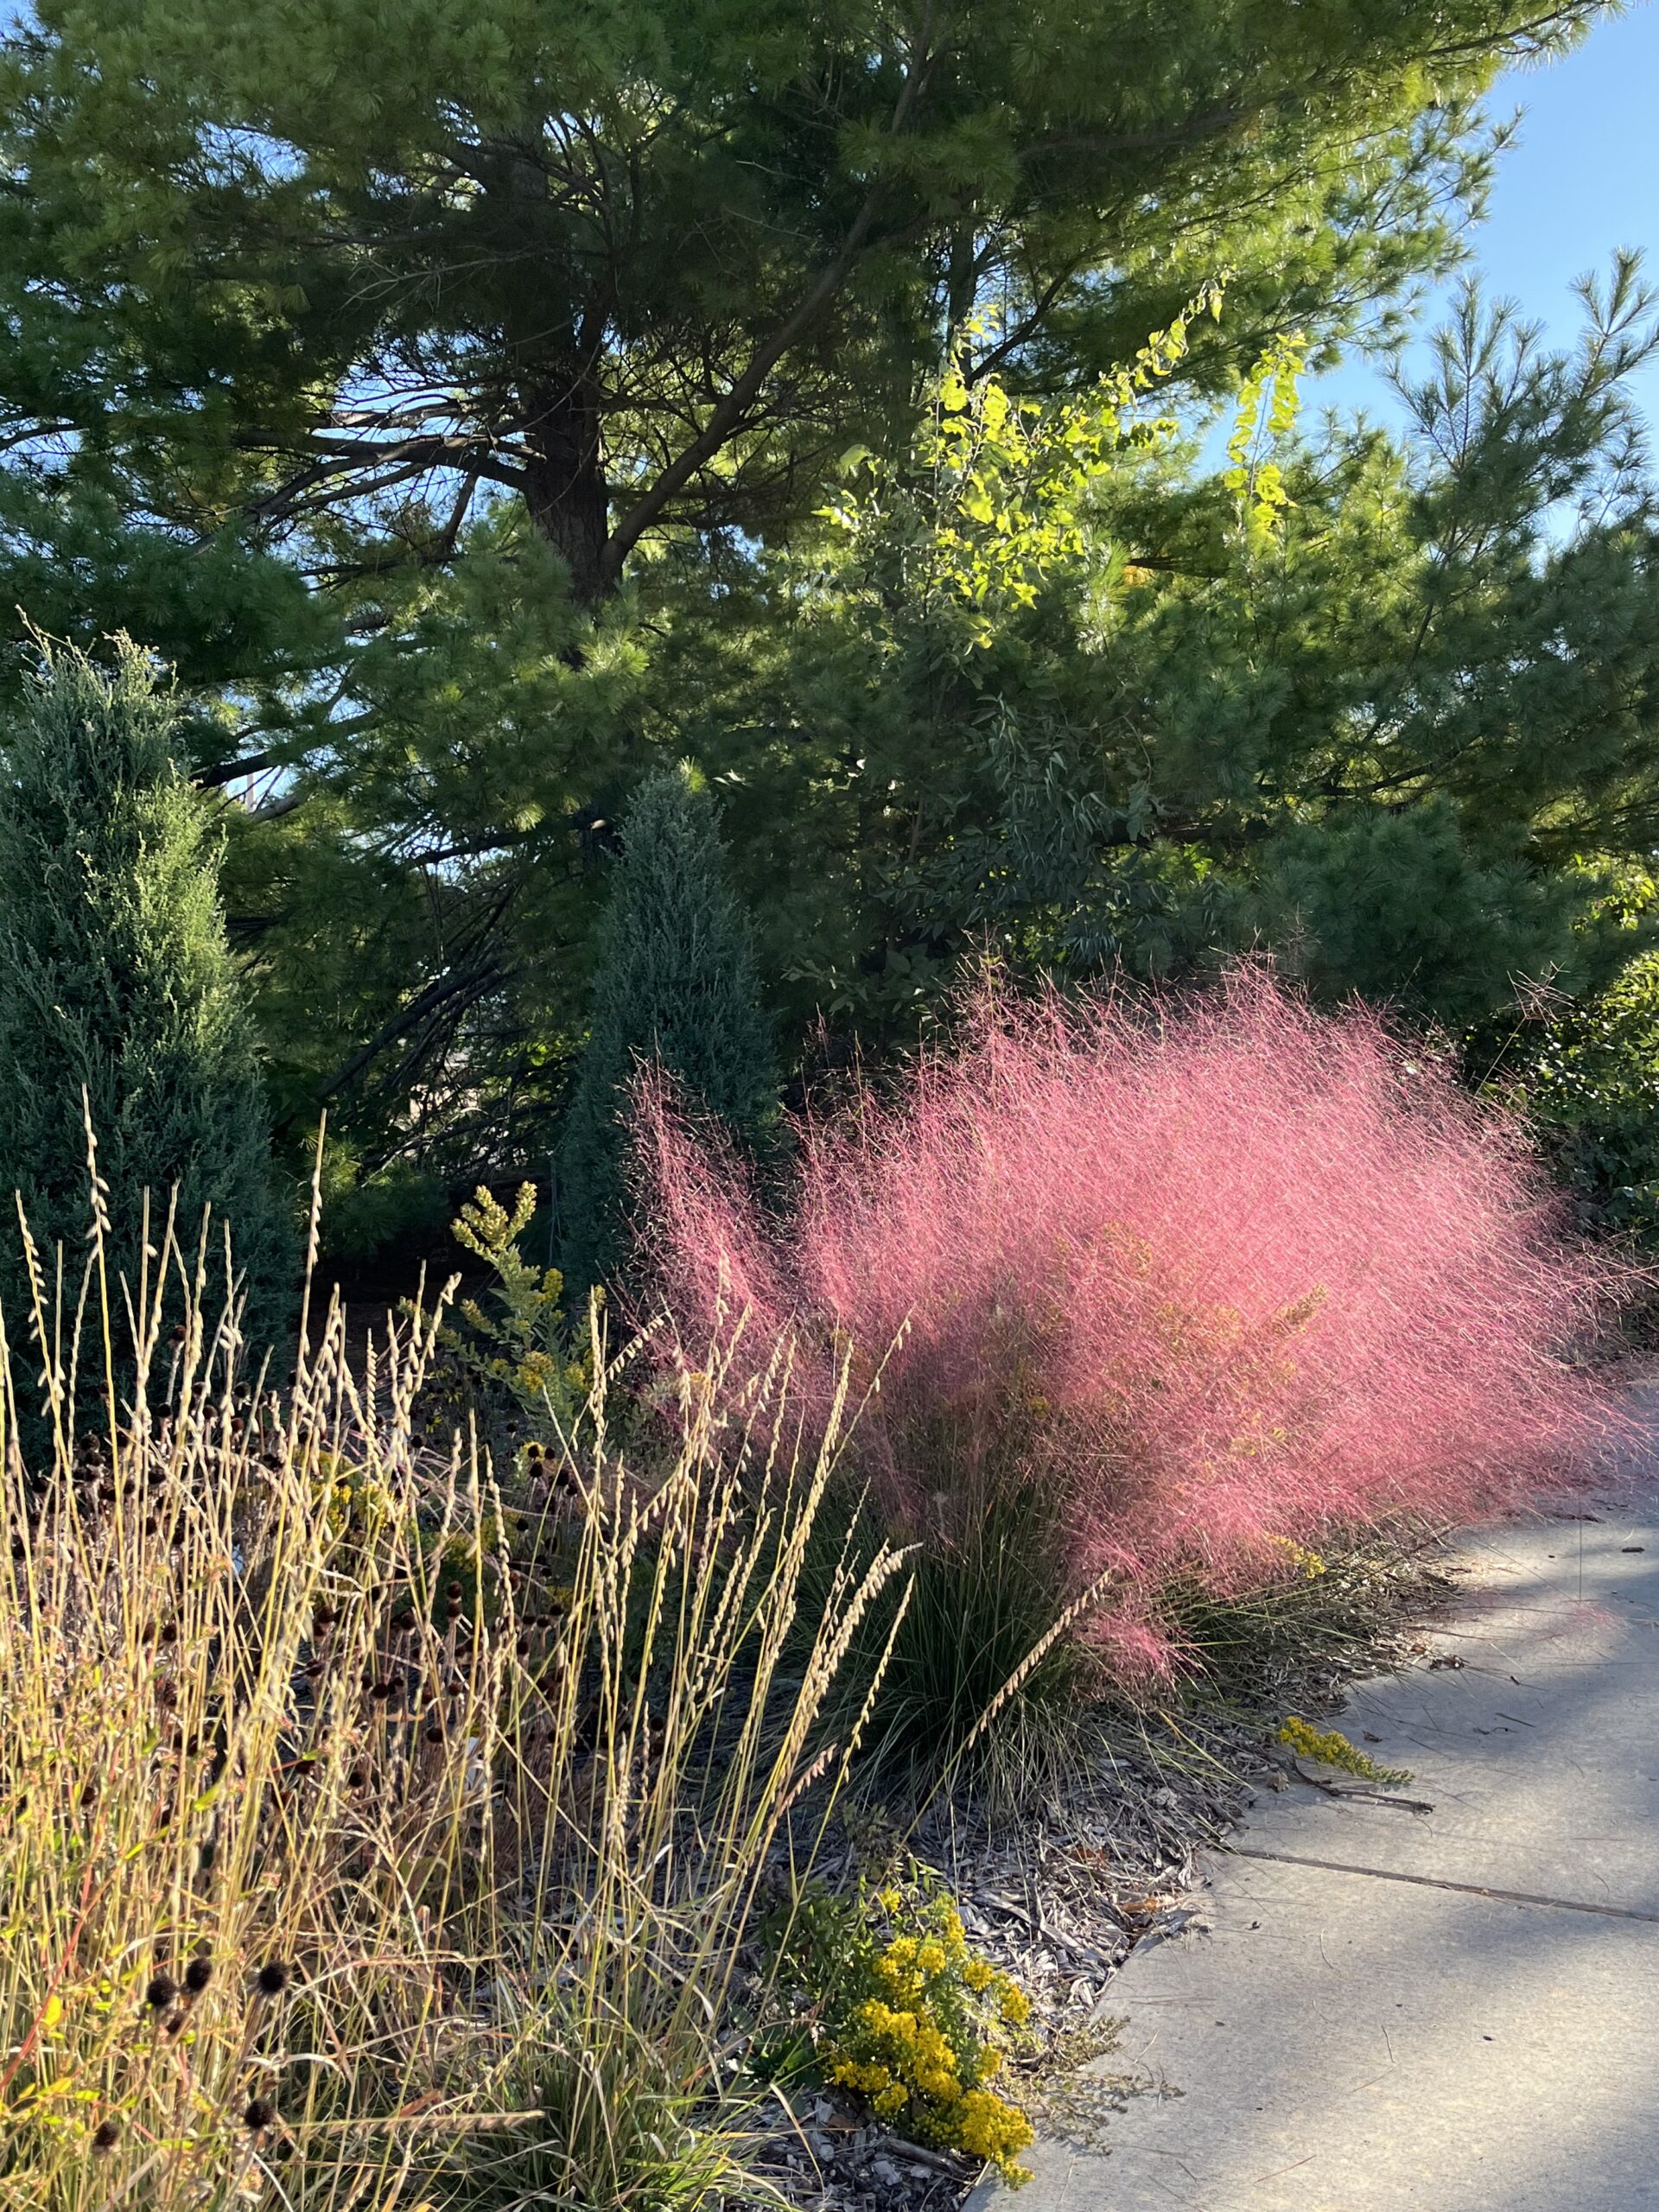
For next spring, put this grass on your bucket list. You will not be disappointed. The soft watercolor effect will stop you in your tracks.

The first year: Getting native plants established

Originally published on May 27, 2020

The prairie communities we see are diverse and complex.  Plants, intricately woven together, crowd out weeds and harmoniously coexist.  When you look at a prairie, you only see about 1/3 of the plant.  The root systems that sustain these native plants make up the remainder, because they reach deep into the soil.  The first year is so critical to the whole process of getting native plants established. Developing these root systems properly is vitally important and the establishment period takes time.  Here are a few steps I take to get my new native plants started. 

Prairie Photo by Brad Guhr

Planting

I like to lay out the entire area by placing the plants where they are supposed to be planted.  This does a couple things: first, it helps with proper spacing of the plants and second, it helps to visualize the final outcome.  Think about mature size, rather than what the plants looks like in its infant state. 

Now that we have the plants laid out, we can start putting them in the soil.  It is critical to not plant them too deep.  In our heavy clay soils, it is best to plant them level or slightly higher (1/8 to ¼ inch) than the soil line, especially in heavier clay soil.  This keeps the crown drier, which is important for disease control.  Over time, these natives will develop at the depth they prefer to grow in. 

Lay out entire bed for proper spacing

Watering

Now that the plants are in the ground, they need frequent watering until they get established. Even drought-tolerant plants need to be watered daily until they begin to root and connect with the soil around them. Keep in mind that improper watering is the most common reason for plant loss during the establishment period. 

For me, I water each new area by hand rather than with a sprinkler. It helps me control the amount of water each plant receives and directs it to the intended plant.  I water every day for the first two weeks depending on the weather.  After that first two weeks, you should start to see new growth. 

For the next few weeks, I water every other day or every third day as needed, monitoring the planting each day for signs of stress/wilting. 

Even after this month long process of establishment, each plant must be monitored and watered through the following summer, fall, winter and spring.  Native plants are not established until the second summer. 

Remember, it takes a few years for those roots to fully develop.  If your plants are properly sited, you will not need to water much after the first full year.  However, if you must water your area during a dry period, natives will appreciate deep and infrequent watering. 

Using a watering wand to direct water on to new plants

Don’t Fertilize

People ask me all the time about fertilizing native plants.  As a general rule, I don’t fertilize our native plants especially during that first year. Think about those small plants in the ground and what will happen to them if they are fertilized. They will have tremendous top growth that is not sustainable by the small root system. This will put the plant under stress and slow its progress. 

Natives are resilient and adaptive. The deep roots most often will find the nutrients and moisture each plant needs.

Mulch

In the book Planting in a Post-Wild World: Designing Plant Communities for Resilient Landscapes, Thomas Rainer and Claudia West develop the ideas of layering plants. There are usually at least three distinct layers of plants: the upper layer filled with taller structural plants used to frame and punctuate the landscape, the middle layer filled with ornamental flowering plants and the ground level that weaves the other layers together and shades the soil, which controls weeds. 

These layers mimic natural plant communities and each layer is important for the health of the plants.  A collection of plants living in community can be extremely drought tolerant and water-thrifty.

If you decide to mulch your display beds initially, only place one to two inches of mulch down and keep it away from the stems.  This is fine as the beds are first established. As they mature, less mulch is needed because, with the right care, the plants become the mulch.  Something to think about is whether you have seen mulch in the prairie?  No, the plants eventually co-mingle and intertwine to push out weeds.     

Creating a native landscape takes time.  With each new plant established comes an expectation of a brighter future. Often, we garden and landscape our yards with the anticipation of what we will get rather than what we are giving back.  By adding native plants to our gardens, we will help make our gardens not only beautiful, but also productive and full of life.

Native Grasses in the Garden

One of the more exciting trends in gardening today is the use of grasses, not for lawns, but as ornamental plants. Even though they do not have showy blooms, grasses can add graceful beauty to gardens and landscapes.

With long narrow leaves and upright habit of growth, grasses have a fine texture, which can provide interesting contrast to other plants in flower gardens.  They can also be used alone as accent plants in the landscape. Many grasses produce attractive seed clusters and have foliage that changes color at the end of the summer.  The dried foliage of grasses can be left standing through the winter, adding movement and texture to the landscape when garden flowers are dormant and tree branches bare.

Little Bluestem and Coneflower seedheads. Photo by Emily Weaver.

Many of the grasses being used in landscaping today have their origins in Asia and Europe. There are a number of different grasses from our prairies, however, that also make excellent ornamental plants. These native grasses possess the added advantage of being well adapted to our soil and climate.

Big bluestem, indiangrass and switchgrass are three tallgrass prairie species that make attractive plants in the garden or landscape. Growing 4-6 feet in height, they can be used in flower beds and borders as screens and as accent plants.  Switchgrass is the most common of these added to landscape designs because of cultivars like ‘Northwind’, ‘Cheyenne Sky’ and ‘Totem Pole’, which offer consistent height and color year after year.

Like the leaves of certain trees, the foliage of these grasses also changes color with the onset of fall.  Big bluestem is particularly noted for its reddish fall color. Each of these species also produce distinctive seed clusters that add interest to the plant toward the end of the growing season. The seed clusters are shaped like a turkey’s foot.  Indiangrass produce attractive golden plumes.  Switchgrass seed cluster are open and feathery.

Indiangrass plumes. Photo by Brad Guhr.

Sand lovegrass is another attractive taller species. It grows 3-4 feet tall and is found in sandy prairie areas.  It produces graceful arching foliage and open, airy seed heads.

Although found throughout much of the Great Plains, little bluestem and sideoats grama are two grasses that are particularly characteristic of the mixed grass prairie region of central Kansas. Both make beautiful additions to gardens and landscapes.

Little bluestem is a fine-textured, clump-forming grass that grows 2-3 feet tall.  Its landscape value is enhanced by its attractive reddish coloration late in the growing season. There are several selections that offer nice winter coloration and sturdy habit.

Beautiful little bluestem in fall. Photo by Emily Weaver.

Sideoats grama is of similar height.  The most ornamental attribute of this grass is its beautiful seed clusters.  The seeds hang gracefully from one side of the seed stalk, giving the plant a windswept look, even when the air is still. The Sioux Indians called this plant “banner-waving-in-the-wind grass.”

Prairie Dropseed is a favorite of mine because it is long-lived and tough.  It is so tough, that they are often planted in mass in street medians.  The fine textured leaves and airy, fragrant panicles are a nice addition to any landscape.  Each clump can reach 12-18 inches wide and up to 24 inches tall.  The entire plant turns shades of orange and yellow in the fall, providing multiple seasons of interest.  It is great in a border, as a groundcover, in an informal prairie setting or as an accent to other short or mid-range perennials.

For people who live in prairie country, it may be easy to take our native grasses for granted. Yet these plants with their simple form and subtle beauty, can make attractive additions to the home landscape.

Switchgrass and big bluestem. Photo by Emily Weaver.


The Resilient Prairie

An interesting thing happened in the Fall of 2012, after one of the hottest and driest summers on record – the prairie bloomed.  The historic drought was harsh and many plants that were borderline hardy in Kansas were lost, but very few of the wildflowers and grasses of the prairie were lost.  Asters, blue sage and goldenrods bloomed in spite of the brutal summer conditions.  The native grasses, though much shorter, survived.

This was a great lesson about one of the ultimate surviving landscapes—the prairie.

Blue Sage (Salvia azurea)

Kansas has some of the largest expanses of the tallgrass prairie in the United States.  Less than four percent of the original North American prairie land is left.  This sea of grasses and wildflowers survives floods and drought, high and low temperatures, grazing, fire and many invasive species.  The deep roots and adaptability make it one of the most resilient landscapes in the world.

Liatris and Indian grass in the Prairie Window Project

This prairie ecosystem manages heat and drought through adaptation.  The deep roots absorb water that other shallow-rooted plants can’t touch.  Plants go dormant during drought to conserve water and maintain growing points just at or below the soil surface.  Once conditions improve, these plants begin to grow again.  Leaves are shiny or have tiny hairs to reduce water loss.  Grasses stay shorter and produce fewer seeds.

Each of these adaptations help the prairie plants survive and use less water.  This diverse ecosystem is resilient – more resilient than many other landscapes and certainly more resilient than a typical lawn.  It provides habitat for wildlife and food and nectar for pollinators.  It is a self-sustaining environment that persists through harsh conditions.

Reconstructed Prairie at Dyck Arboretum of the Plains

Those drought years gave us a chance to evaluate what we are doing with our own landscapes and to take a look at the types of plants that will actually grow here with minimal time, water and maintenance.  It provided an opportunity to select new plants that can tolerate adverse weather conditions.  More and more Kansans are choosing plants like little bluestem, switchgrass or prairie dropseed.  Gardeners are filling up their landscapes with wildflowers such as coneflowers, penstemon, blazing stars, goldenrods, asters and milkweeds in smaller “pocket” prairies.  These micro-prairies have all the ornamental qualities of a larger prairie, but on a much smaller scale.

Nature is a good teacher.  These plants, which survived and even bloomed after one of the driest summers in recent memory, are amazing.  I knew that prairie plants were tough, but that season made me take notice.  It made me rethink my own perceptions of what is environmentally-sound landscaping.  We can create sustainable plant communities in our own small landscapes simply by copying what nature has done so successfully in creating the prairie. These are beautiful plants that are diverse in form, texture and color.  Plants that would work well in any sunny location.  The combinations are endless.


The prairie has a legacy of resilient beauty.  Embrace what is around you and create a sense of place in your own pocket of the historic prairie land.


Water Smart: Steps to Establishing Your Native Plants

Originally published on April 29, 2015, here are some helpful hints from our Executive Director Scott Vogt on getting your native plants established using “waterwise” methods.

Also, due to the rainy weather during our FloraKansas Native Plant Sale last weekend, we are happy to announce we will be having a “rain check” native plant blitz this coming Saturday, May 6, from 9 a.m. to 2 p.m. If you missed the weekend sale, come enjoy the lovely weather and consult with Scott and our other native plant experts in the greenhouse.


Now that you have purchased your plants at our FloraKansas plant sale and hopefully gotten them planted in your landscape, you’ll want to be intentional about watering methods. It’s true, native plants are more drought-tolerant than you may be used to. However, in order to get your plants successfully established, they will still need some careful attention these first few weeks and through the summer.

Follow these steps to be “water smart” as you establish your native plants:

4-23 photo 2

The First Year

When planting: Water plants as soon as you get them in the ground. Allow the water to soak in, then water again until the soil is thoroughly moistened.

First Two Weeks: Water plants daily depending on the weather.   If it rains, skip a watering.  Just-planted roots are only able to absorb soil moisture from the potting soil.  They have not attached to their surrounding soil.  When you see new growth, the plants have begun to get established.

First Month: Unless the weather is extremely hot and dry, you may be able to decrease watering frequency to two or three times per week.  Generally, you want the soil to be dry an inch or two below the surface before you water. Too much water leads to foliar and root problems.  It is optimal to allow the soil to dry between watering because this encourages roots to grow deep.

Following Months: Water only when top inch or two of soil dries or when plants display signs of being dry.  Water deeply and infrequently.  How much water will depend on your soil and environmental conditions.  Don’t forget to check your plants during the winter months.

IMG_0380


The Second Year

Water deeply as needed.  During prolonged periods of dry weather water once or twice per week.  Generally, it takes plants at least two years to fully develop a sustaining root system.

The Following Years

Properly planted and watered plants should be fairly well established, and can thrive with less watering than you may expect. Drought-tolerant plants may need no supplemental water, whereas shallow-rooted plants or plants with greater water needs may need water weekly. Many plants, when selected for the conditions in your yard, may need watering only once or twice a month in dry weather.

Picture1

Best Management Practices for Native Plants (BMPs)

Drought-tolerant plants: Even drought-tolerant plants need regular water until they are established!

Young Trees and Shrubs: Young trees and shrubs need deep regular watering. During times of little or no rain, water deeply once a week until trees become established.

Fertilization: Don’t fertilize new plants.  Fertilizing during establishment encourages rapid top growth that is not sustainable by the root system.

Mulch: Mulch new plantings with 1-3 inches of mulch and keep mulch away from plant stems.

Water in the morning: Less water is lost to evaporation.

Choose the right watering method: A soaker hose applies water directly to the soil and reduces evaporation. If you are planting a few plants in an existing planting bed, hand watering can get the new plants the water they need while not overwatering the rest of the bed.

Get to know your soil: Is your soil sand or clay?  It greatly affects watering frequency and duration.  Our clay soils can only take in about an inch of rain per hour.

Check soil moisture before watering: Check soil moisture with finger or spade.  Soil should be dry an inch or two below the surface before you water.

Recheck soil after watering: At least an hour after you water (or two hours with clay soil), probe soil to see how deeply the water penetrated. If it didn’t reach the root zone, you may need to increase your watering.  If the area is soggy, try cutting back on watering next time.

Pick the right plant for the right place: Choose plants that are pest-resistant, require less water, and match the sun, shade, and soil in your yard.

Avoid planting in hot, dry weather: Plants will easily stress and not develop healthy roots under hot, dry conditions.  If you must plant in summer, plant in the cool of the morning when less water is lost to evaporation.


Five Ways Native Plants Enrich the Environment

One of the traits of being a horticulturist is a heightened awareness of plants.  The good, the bad, the ugly, the sad, and the beautiful are all critiqued.  My family is used to it, but they still roll their eyes from time to time as I stop to look at various landscapes.

Over the past few days as I shop for gifts for Christmas, I have noticed several sad landscaping attempts outside the stores.  Creativity is at a minimum and most displays add nothing to the beauty of the place.  Granted, it is a parking lot or store front, but the plants I have seen do nothing to enrich the environment.

I don’t have all the answers for these areas, but I think native plants could really bring some life to these tough spaces and our own landscapes.  Here are five ways I believe native plants enrich the environment.

Native plants increase biodiversity.

A healthy ecosystem includes a variety of plants that are in bloom throughout the year, attracting a host of pollinators.  We don’t need to give up beauty for function.  Simply put, native plants make things happen in the landscape.

Flying Flowers of Kansas

Native plants enrich the soil.

It goes without saying, but a diverse collection of native plants with deep roots benefits any soil type.  Native plant roots can grow up to 10 to 15 feet deep depending on the species.  Their roots break up heavy clay soils and allow water to thoroughly permeate the soil profile.

A good example would be Big Bluestem.  What we see above ground is only 1/3 of the entire plant.  The roots are 2/3 of the plant and 1/3 of those roots die each year, adding organic matter to the soil and opening pores so water can percolate into the soil.  Legumes such as purple prairie clover or wild indigos fix nitrogen from the air and deposit it into the soil as well.  The extensive root systems of native plants help stabilize the soil and prevent erosion.  Wow, so many soil benefits!

Native Plants Slider

Native plants reduce inputs.

Native plants do not need pesticides or fertilizers to promote growth.  They are able to use nutrients already in the soil to actively grow.  A healthy plant that is not under stress is able to fend off pests more easily.  Native plants are drought tolerant and require little – if any – supplemental water to survive.  If the right plant is matched to the site, that native plant will grow with minimal care after it is properly established.

ArbFlowers 263

Native plants provide habitat.

Native plants increase habitat used by wildlife, particularly songbirds. With songbird populations in decline, native plants provide the food and shelter they need for survival.  Even a small garden display can have a positive impact.

A robin looks for food in a native plant bed.

A robin looks for food in a native plant bed.


Native plants provide a “sense of place”.

Native plants thrive in the Great Plains.  They are adapted to its unique environmental conditions and require no special care to survive. Native plants growing in your area convey an understanding of the special place where we live.  Let’s look at the particular plants that are native to the land and embrace our “sense of place”.

BradsFlintHills


Buffalograss: Five Keys to a Successful Planting

Believe it or not, now is the time to plant buffalograss.  It is one of the few native prairie grasses that can be used for low-maintenance lawns and other turf areas.   It thrives in our clay soils and stays relatively low.

The arboretum has benefitted from the established stands of buffalograss we maintain.  The fine leaves stay a nice blue-green during the growing season, and it requires less mowing, watering, and fertilizing compared to our fescue or bluegrass lawns.

Newer varieties of buffalograss (Bowie, Cody, and Sundancer) green up faster in the spring, stay green longer in the fall, spread quickly by stolons to cover a planting area and remain shorter. They therefore require less mowing.

Once established, we have found it to be a tough, durable alternative to many cool-season grasses.  It thrives in dry, sunny conditions and even survived the extreme drought of 2012. We will be planting some additional areas to buffalograss in the coming weeks.

IMG_2191

Here are some ways to ensure a favorable outcome when planting a buffalograss lawn:

Give it sunshine.

Buffalograss needs at least 6 hours of direct sunlight per day and a well-draining soil to grow best.  It will not grow well in low areas with periodic standing water or areas of shade.  Typically, if it is unhappy, you also will be unhappy with its overall appearance.

Weed control prior to planting.

Just like establishing a flower bed, your seeding area needs to be as weed free as possible.  I have found that several applications of Round-Up in the spring prior to planting is the best way to control weeds, especially Bermuda grass and bindweed.  I also lightly till (1/4-1/2 inch deep) the area before planting so that I have some loose soil to just cover the seed.  Keep in mind that every time the soil is tilled new weed seeds will germinate, which will need to be eradicated before spreading the seed.

Proper seed selection.

There are new forms being discovered and introduced every year, but the forms we have used at the arboretum have been Cody, Bowie, and Bison.  We seeded them in June or July at a rate of 2-3 lbs. of seed per 1000 square feet.

Proper establishment.

Buffalograss needs soil temperatures that are above 60⁰ F for germination to start.  I normally spread half the seed in one direction and then spread the other half perpendicular to the first half of seed.  I lightly rake the area and then pack it in (drive over entire planting with a mower or tractor) to get good seed-to-soil contact.

I water the whole area deeply the first watering to completely saturate the soil (just to the point water is running off) and then follow with frequent light watering until the seeds germinate in 14-21 days.  Once germination is complete, infrequent deep soakings will keep the new seedlings spreading.  Full establishment of an area from seed can be completed in the first year.

IMG_1002

Weed control after planting.

These new forms of Buffalograss perform well in our area.  In ideal conditions, they form a thick, dense lawn that can out compete weeds.  In marginal situations, weeds can become problematic, requiring weed control through herbicides or manual eradication.  We apply a broadleaf weed control in the fall to eliminate henbit, dandelions, bindweed and other broadleaf weeds.  Management of weeds in your buffalograss both before planting and the first few years after establishment will, over time, reduce future weed control, watering, mowing and overall maintenance.

I have found buffalograss to be a valuable turf for open, sunny spaces, but keep in mind that it is not a miracle grass that can solve all your lawn problems.  The natural look of this native grass should be appreciated because it is adapted to our area.    It should also be planted with the expectation that it will require less financial input and minimal work to maintain a dense, attractive turf.  For these reasons, I have found buffalograss to be a low-maintenance lawn alternative that is worth growing.


Three Lessons I Have Learned About Native Plants

When I started at the arboretum 18 years ago, I thought I knew so much.  I had book knowledge about horticulture, but I had not learned much about native plants.  In fact, information about native plants was almost non-existent.  My learning curve was very steep those first few years. Even now I continue to learn how to garden with native plants – the lessons just keep coming.  Here are the three lessons I think are essential for a successful prairie garden.

Be Patient

I know this goes counter to our “instant everything” culture, but prairie plants don’t work that way. A prairie garden does not magically appear overnight.  It takes time for those transplants or seedlings to develop root systems that will sustain them during the dry periods of the year.  I remember visiting a prairie reconstruction in Wisconsin several years ago.  It had been established from seed 20 years earlier and they said it was just then really maturing into a true prairie.  I have found that if you are patient, you will be rewarded by beautiful, strong and adapted native plants.

Kansas gayfeather


Start Small

Planting too much too soon – I have made this mistake many times.  My eyes get bigger than I can manage.  I like too many of these native plants and rather than working at a project in stages, I plant the whole area.  I then spend the rest of the summer maintaining a planting that is too big for the time I can give it.  It has a tendency to get out of hand in a hurry if I don’t keep up with it on at least a weekly basis.  Plant an area that you can handle with your schedule.

EPS Planting


Plan your garden for all seasons of the year

This lesson took the longest to learn, because it meant becoming familiar with the native plants.  I needed to learn all about them – their bloom times, soil conditions they need to thrive, mature height and what they look like when not blooming, including seedheads and forms.  Most of these characteristics had to be experienced over several years.  That information is vital to planning and developing a prairie garden.

Monarch on Aster


There are no Wave Petunias in the prairie, so you need to plan your garden with a succession of bloom.  Combine wildflowers in such a way that there is always a new set coming into bloom and going out of bloom throughout the year.  Grasses can be strategically incorporated as a backdrop or to highlight interesting seed heads and to add texture and movement during the winter.

With each new season comes new revelations about native plants.  They are so intriguing and diverse.  There really is a plant for just about any area if you match the plants with your site.  The key to understanding the prairie landscape is to keep learning.  I know that I still have much to learn and experience.  Each day is a new opportunity.


Water Smart: Steps to Establishing Your New Plants

Now that you have purchased your plants at our FloraKansas plant sale and hopefully gotten them planted in your landscape, you’ll want to be intentional about watering methods. It’s true, native plants are more drought-tolerant than you may be used to. However, in order to get your plants successfully established, they will still need some careful attention these first few weeks and through the summer.

Follow these steps to be “water smart” as you establish your native plants:

4-23 photo 2

The First Year

When planting: Water plants as soon as you get them in the ground. Allow the water to soak in, then water again until the soil is thoroughly moistened.

First Two Weeks: Water plants daily depending on the weather.   If it rains, skip a watering.  Just-planted roots are only able to absorb soil moisture from the potting soil.  They have not attached to their surrounding soil.  When you see new growth, the plants have begun to get established.

First Month: Unless the weather is extremely hot and dry, you may be able to decrease watering frequency to two or three times per week.  Generally, you want the soil to be dry an inch or two below the surface before you water. Too much water leads to foliar and root problems.  It is optimal to allow the soil to dry between watering because this encourages roots to grow deep.

Following Months: Water only when top inch or two of soil dries or when plants display signs of being dry.  Water deeply and infrequently.  How much water will depend on your soil and environmental conditions.  Don’t forget to check your plants during the winter months.

IMG_0380


The Second Year

Water deeply as needed.  During prolonged periods of dry weather water once or twice per week.  Generally, it takes plants at least two years to fully develop a sustaining root system.

The Following Years

Properly planted and watered plants should be fairly well established, and can thrive with less watering than you may expect. Drought-tolerant plants may need no supplemental water, whereas shallow-rooted plants or plants with greater water needs may need water weekly. Many plants, when selected for the conditions in your yard, may need watering only once or twice a month in dry weather.

Picture1

Best Management Practices for Native Plants (BMPs)

Drought-tolerant plants: Even drought-tolerant plants need regular water until they are established!

Young Trees and Shrubs: Young trees and shrubs need deep regular watering. During times of little or no rain, water deeply once a week until trees become established.

Fertilization: Don’t fertilize new plants.  Fertilizing during establishment encourages rapid top growth that is not sustainable by the root system.

Mulch: Mulch new plantings with 1-3 inches of mulch and keep mulch away from plant stems.

Water in the morning: Less water is lost to evaporation.

Choose the right watering method: A soaker hose applies water directly to the soil and reduces evaporation. If you are planting a few plants in an existing planting bed, hand watering can get the new plants the water they need while not overwatering the rest of the bed.

Get to know your soil: Is your soil sand or clay?  It greatly affects watering frequency and duration.  Our clay soils can only take in about an inch of rain per hour.

Check soil moisture before watering: Check soil moisture with finger or spade.  Soil should be dry an inch or two below the surface before you water.

Recheck soil after watering: At least an hour after you water (or two hours with clay soil), probe soil to see how deeply the water penetrated. If it didn’t reach the root zone, you may need to increase your watering.  If the area is soggy, try cutting back on watering next time.

Pick the right plant for the right place: Choose plants that are pest-resistant, require less water, and match the sun, shade, and soil in your yard.

Avoid planting in hot, dry weather: Plants will easily stress and not develop healthy roots under hot, dry conditions.  If you must plant in summer, plant in the cool of the morning when less water is lost to evaporation.


False Indigo: Beautiful Baptisias Reach for the Sky

Every spring I marvel at the changing landscape, especially prairies that have been burned.  A seemingly lifeless and brown prairie is turned black by fire and reduced to ashes.  This important process removes last year’s growth, allowing the sun to warm the soil.  This warmth is just what native wildflowers and grasses need to emerge from their winter slumber.  They jump to life in just a few warm days, turning the charred plains emerald green.

In this new growth, there are some very recognizable plants that stand out.  Indigos rise from rocky hillsides and dot the landscape in early spring with beautiful blue, white and cream flowers.  They thrive in challenging environments because of their deep roots.  The roots of wild indigos can be quite extensive – reaching down over ten feet deep – making them impervious to drought.

IMG_1548

Baptisia ‘Indigo Spires”

Locally, only two varieties of indigos grow in the prairies of south-central Kansas.  Blue False Indigo (Baptisia australis var. minor) has a stately posture.  The entire plant is stiffly upright and forms a miniature canopy with the attractive blue-green foliage.  The showy spires of small pea-like blooms develop in May.  Later in the season, oblong brownish-black seed pods emerge providing another highlight to this beautiful wildflower.  They love any sunny spot with well-drained soil.  They are difficult to move once established because of the deep tap roots.

Native Blue False Indigo

Native Blue False Indigo

Cream Wild Indigo (Baptisia bracteata) is the other indigo found in our area.  It is one of the earliest wildflowers to bloom. In fact, one of the plants outside the Visitor Center is showing flower buds now, in the first week of April.  The creamy-white flowers are held horizontally to the ground in long prostate clusters.  Again, these flowers turn into brownish-black seed pods filled with small beans.  The entire plant has a fuzzy appearance from leaves to the stem.  They are tough and drought tolerant when planted in a well-drained soil with full sun.

Other nativars (cultivars of native plants) worth trying are Baptisia ‘Blue Berry Sundae’ Blue flowers, 24-36 inches tall; Baptisia ‘Cherry Jubilee’ Maroon/yellow flower, 30-36 inches tall; Baptisia ‘Lemon Meringue’ Lemon/yellow flowers, 36 inches tall; Baptisia ‘Vanilla Cream’ Pastel yellow flowers, 24-36 inches tall; Baptisia ‘Indigo Spires’ Dark Purple flowers, 36-48 inches tall; Baptisia ‘Blue Towers’ Blue flowers, 48-54 inches tall; and Baptisia ‘Pink Truffles’ Pink flowers, 30-36 inches tall.  All of these varieties will be available at our upcoming plant sale in just a few weeks time.

Baptisia 'Lemon Meringue'

Baptisia ‘Lemon Meringue’

Baptisia 'Pink Truffles'

Baptisia ‘Pink Truffles’

Baptisia 'Cherries Jubilee'

Baptisia ‘Cherries Jubilee’

I have always been enamored with Baptisia.  They are so resilient.  They effortlessly survive in the toughest conditions.  To see a whole prairie dotted with indigos as far as the eye can see is amazing.  The stunning beauty of these wildflowers can be brought home as well.  They adapt to any sunny landscape setting.  I can’t resist their charm and beauty.