Right Rudbeckia, Right Place

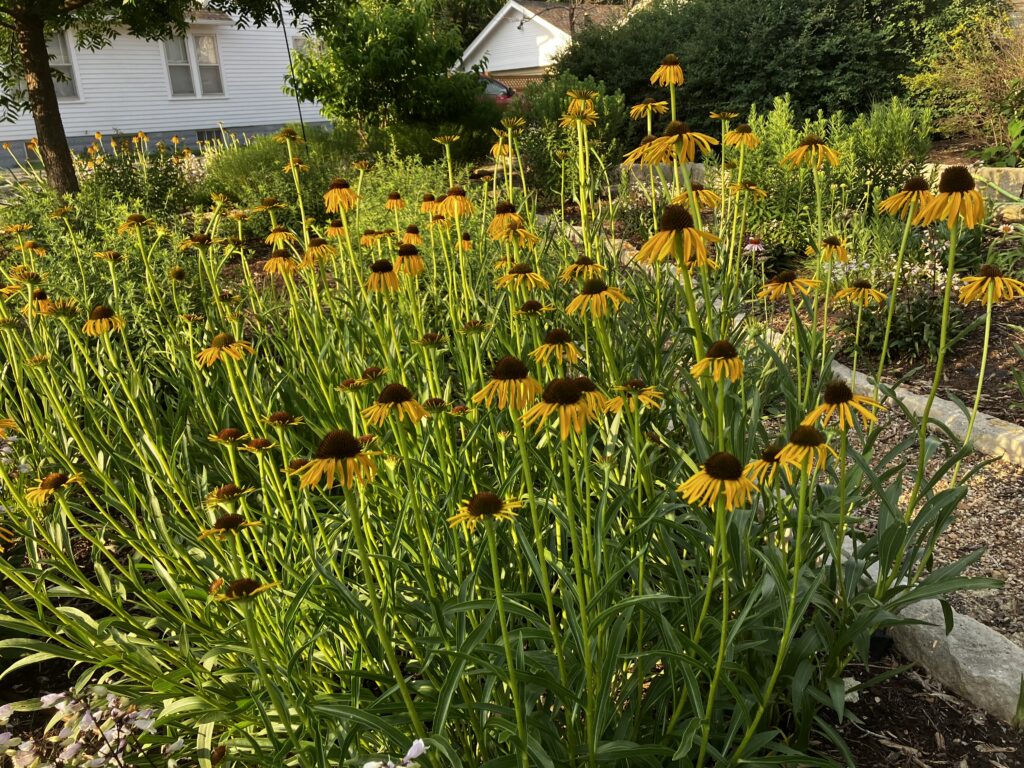
Rudbeckia is a very recognizable flower. Its bright yellow blooms appear when summer reaches its peak, and flowers steadily through the hottest part of the summer when we all need it most. Also known as black eyed Susan (named after a romantic poem!) or sometimes as yellow coneflower, Rudbeckia is a variable genus with many garden worthy species. But they each want a little bit different environment, so be sure to put them in the right place!

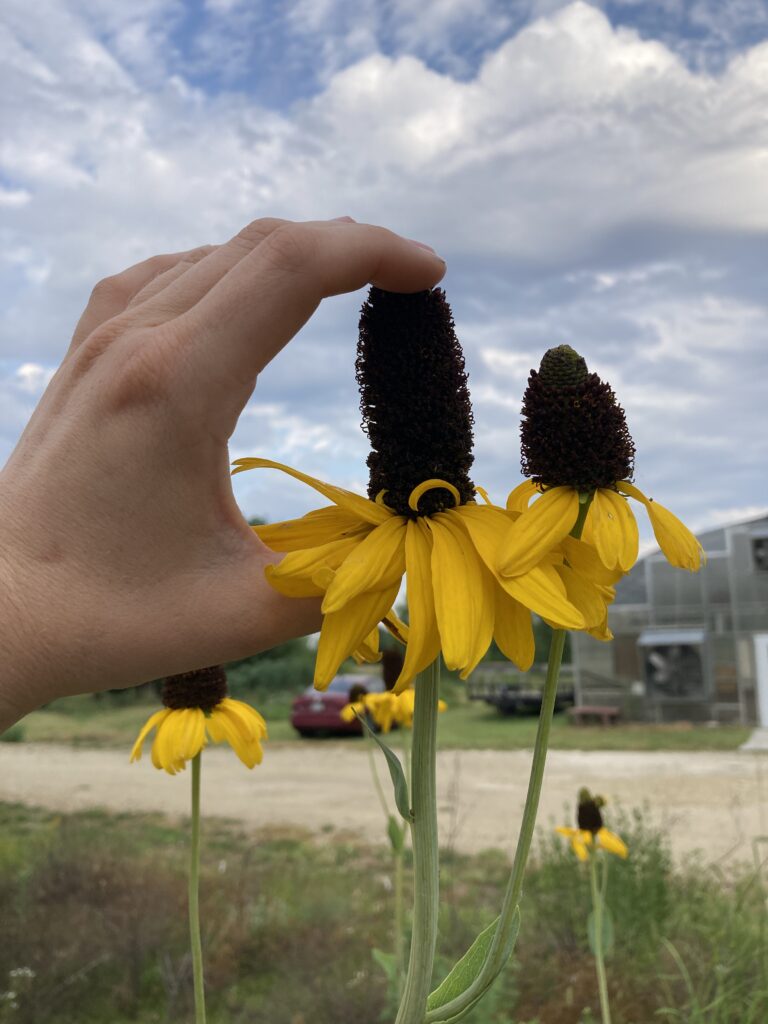
Rudbeckia maxima – Giant Coneflower

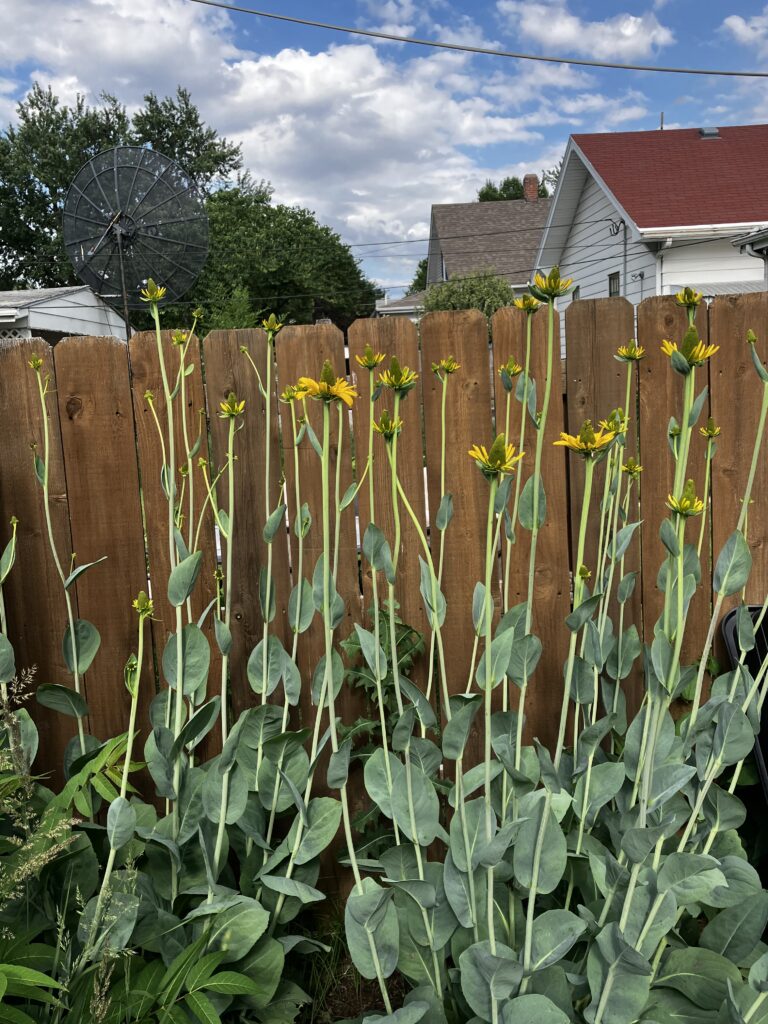
R. maxima is a lesser known species native to the southern US, including Oklahoma and Texas. It averages about 6 feet tall in our area, but can be taller in moist, fertile soils. The flowers attract pollinators all through July, and through the winter a bevy of birds perch on the cones and eat the nutritious seeds. The foliage is striking: waxy and grey, resembling cabbage leaf. A wonderful vertical element to add to your landscape, with very sturdy stems and large blooms. It is a show piece in the garden! But it can easily be floppy if it gets too much shade or the soils are too rich. Situate it in strong sun and semi-dry soil, with dense grasses around it for support.

These R. maxima are thriving on the dry side of our drainage ditch near the greenhouse. The cones were huge this year!

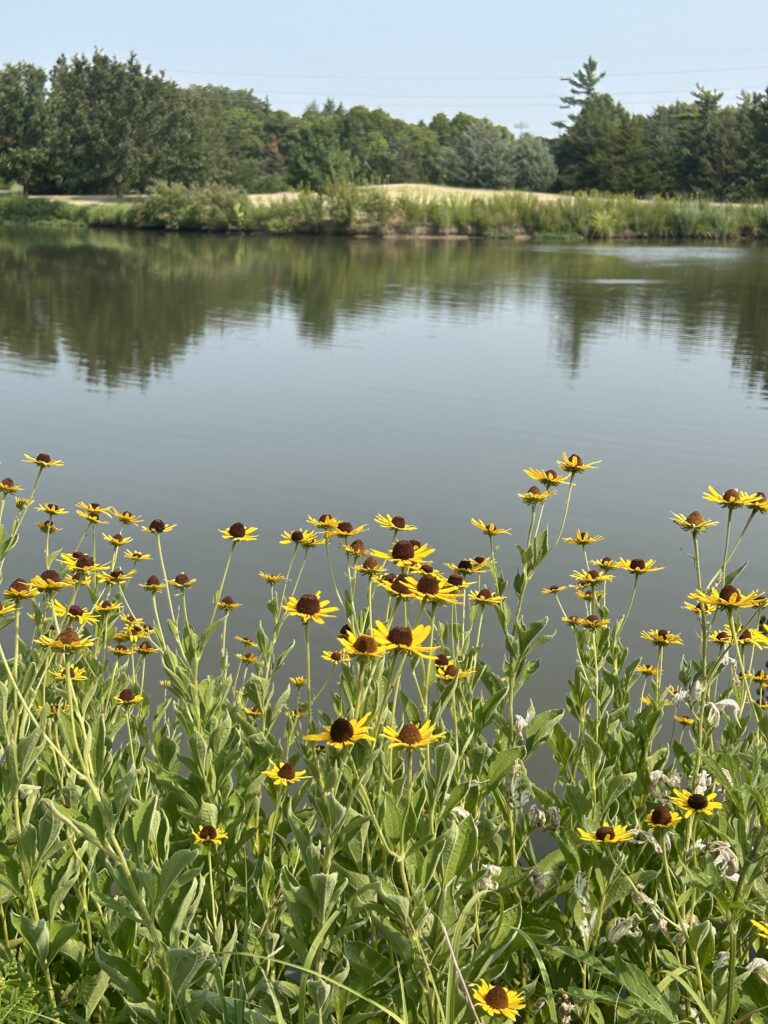
Rudbeckia subtomentosa – Sweet Coneflower

Sweet coneflower is often found in moist sites, as seen here growing on the banks of the Arboretum pond. This plant can handle a bit of dry soil once established, but in general it likes moist sites. So try to plant it in a low spot or drainage area. The common name references the subtle sweet smell of the blooms. Less spready than other species of Rudbeckia, it pairs well in the garden with grasses like Panicum and other tall forbs like Eryngium yuccifolium. The petals can vary in length, and sometimes they are even rolled or ‘quilled’ as seen in the cultivar ‘Little Henry’.

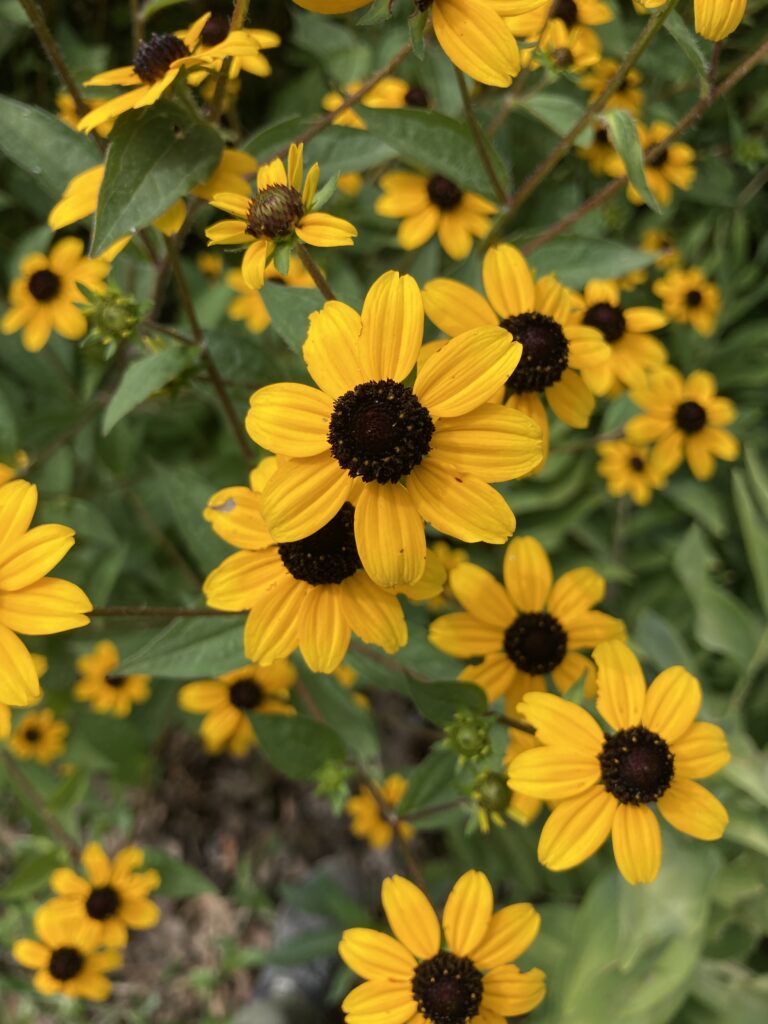
Rudbeckia triloba – Brown Eyed Susan

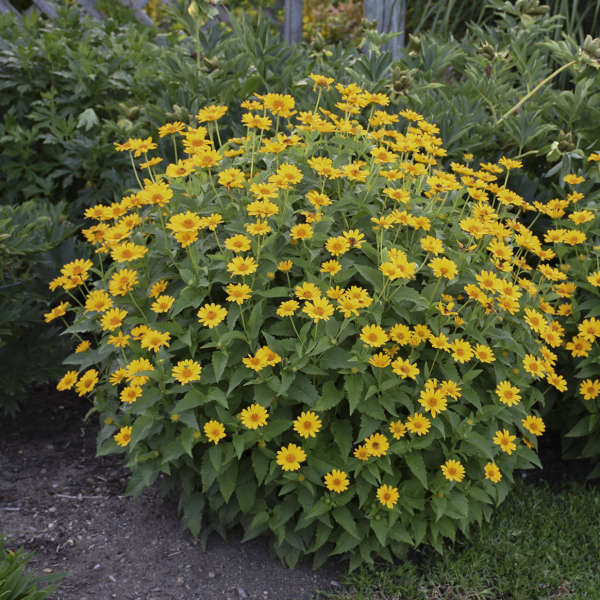
Clouds of small yellow blooms on stiff, wiry stems appear in mid to late June on this easy to grow perennial. It readily self seeds, to the point of becoming an absolute menace in the garden! But if you have the space to let it run wild it is a pollinator-attracting powerhouse. It is best planted in an area that can be contained, either by mowing, burning or hemmed in by sidewalk/pavement. This species is native throughout most of the eastern half of the continental United States, and grows well in full to part sun and average to moist soil. The cultivated variety called ‘Prairie Glow’ flowers red with yellow tips. It is a seed strain from breeder David Cavagnaro introduced to the garden trade in 2003. Both the straight species and the cultivar are often available at FloraKansas.

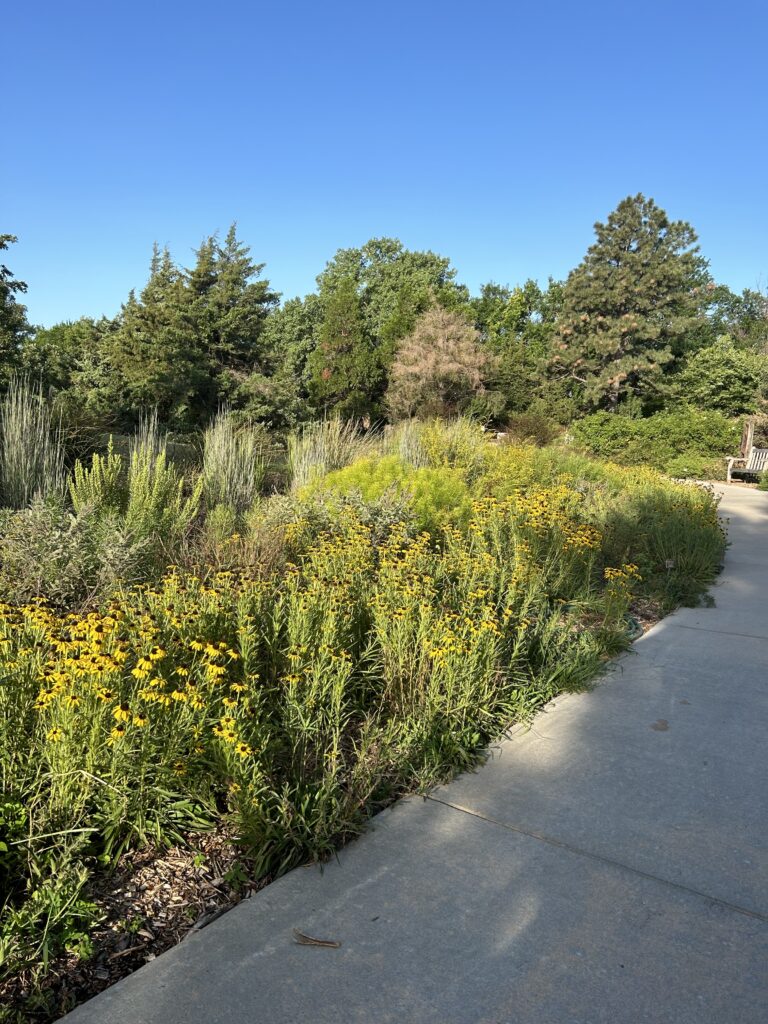
Rudbeckia missouriensis blooming in the Gjerstad garden on the northwest side of the Arboretum.

And beyond these three, there are tons more to choose from! In a previous post, Scott talked a bit about R. missouriensis, R. hirta, R. lacinata, and R. fulgida, all great options for the habitat garden. All of these and more are usually available at our biannual FloraKansas event, so be sure to keep your eyes peeled for our updated plant list when it comes out.

Water Smart: Steps to Establishing Your Native Plants

Originally published on April 29, 2015, here are some helpful hints from our Executive Director Scott Vogt on getting your native plants established using “waterwise” methods.

Over the past few weeks, we have been fielding quite a few questions about how to properly establish plants purchased at our fall FloraKansas Native Plant Days.  Hopefully, many of you have a great start and your plants are beginning to attach to the soil. But if you have questions, keep reading for some helpful reminders and step by step instructions for our method of establishing plants.


Now that you have purchased your plants at our FloraKansas plant sale and hopefully gotten them planted in your landscape, you’ll want to be intentional about watering methods. It’s true, native plants are more drought-tolerant than you may be used to. However, in order to get your plants successfully established, they will still need some careful attention these first few weeks and through the summer.

Follow these steps to be “water smart” as you establish your native plants:

4-23 photo 2

The First Year

When planting: Water plants as soon as you get them in the ground. Allow the water to soak in, then water again until the soil is thoroughly moistened.

First Two Weeks: Water plants daily depending on the weather.   If it rains, skip a watering.  Just-planted roots are only able to absorb soil moisture from the potting soil.  They have not attached to their surrounding soil.  When you see new growth, the plants have begun to get established.

First Month: Unless the weather is extremely hot and dry, you may be able to decrease watering frequency to two or three times per week.  Generally, you want the soil to be dry an inch or two below the surface before you water. Too much water leads to foliar and root problems.  It is optimal to allow the soil to dry between watering because this encourages roots to grow deep.

Following Months: Water only when top inch or two of soil dries or when plants display signs of being dry.  Water deeply and infrequently.  How much water will depend on your soil and environmental conditions.  Don’t forget to check your plants during the winter months.

IMG_0380

The Second Year

Water deeply as needed.  During prolonged periods of dry weather water once or twice per week.  Generally, it takes plants at least two years to fully develop a sustaining root system.

The Following Years

Properly planted and watered plants should be fairly well established, and can thrive with less watering than you may expect. Drought-tolerant plants may need no supplemental water, whereas shallow-rooted plants or plants with greater water needs may need water weekly. Many plants, when selected for the conditions in your yard, may need watering only once or twice a month in dry weather.

Best Management Practices for Native Plants (BMPs)

Drought-tolerant plants: Even drought-tolerant plants need regular water until they are established!

Young Trees and Shrubs: Young trees and shrubs need deep regular watering. During times of little or no rain, water deeply once a week until trees become established.

Fertilization: Don’t fertilize new plants.  Fertilizing during establishment encourages rapid top growth that is not sustainable by the root system.

Mulch: Mulch new plantings with 1-3 inches of mulch and keep mulch away from plant stems.

Water in the morning: Less water is lost to evaporation.

Choose the right watering method: A soaker hose applies water directly to the soil and reduces evaporation. If you are planting a few plants in an existing planting bed, hand watering can get the new plants the water they need while not overwatering the rest of the bed.

Get to know your soil: Is your soil sand or clay?  It greatly affects watering frequency and duration.  Our clay soils can only take in about an inch of rain per hour.

Check soil moisture before watering: Check soil moisture with finger or spade.  Soil should be dry an inch or two below the surface before you water.

Recheck soil after watering: At least an hour after you water (or two hours with clay soil), probe soil to see how deeply the water penetrated. If it didn’t reach the root zone, you may need to increase your watering.  If the area is soggy, try cutting back on watering next time.

Pick the right plant for the right place: Choose plants that are pest-resistant, require less water, and match the sun, shade, and soil in your yard.

Avoid planting in hot, dry weather: Plants will easily stress and not develop healthy roots under hot, dry conditions.  If you must plant in summer, plant in the cool of the morning when less water is lost to evaporation.
Plant Spotlight: Spigelia marilandica

Bright red, versatile, compact habit and attracts hummingbirds…why has the landscaping industry so often overlooked this plant? Spigelia is a lesser known and underutilized species for native gardens. We rarely see it in landscape designs in this area, and it can be hard to find commercially available. What gives? Read on to find out about this wonderful plant and how to use it in your garden.

Photo by J. Carmichael (Tevonic), Public domain, via Wikimedia Commons

Pinkroot

Spigelia marilandica, also known as woodland pinkroot or Indian pink, is a petite treat. Two feet tall and wide and blooming in June, it is a big show in a small package. The deep red trumpet shaped blooms are yellow on the inside, forming a two-toned flower when the petals bend outwards. Indigenous people in its native range have used it medicinally, though we don’t suggest trying this on your own as it does have some toxic properties at higher doses.

USGS Bee Inventory and Monitoring Lab from Beltsville, Maryland, USA, Public domain, via Wikimedia Commons

The tube shaped blooms attract butterflies and hummingbirds, and it is low maintenance once established, needing no special trimming or care. According to its entry on the Ladybird Johnson database, “This plant does very well in gardens. It blooms from the bottom upward and the flowering season can be prolonged by removing the flowers as they wither.”

So, What’s the Catch?

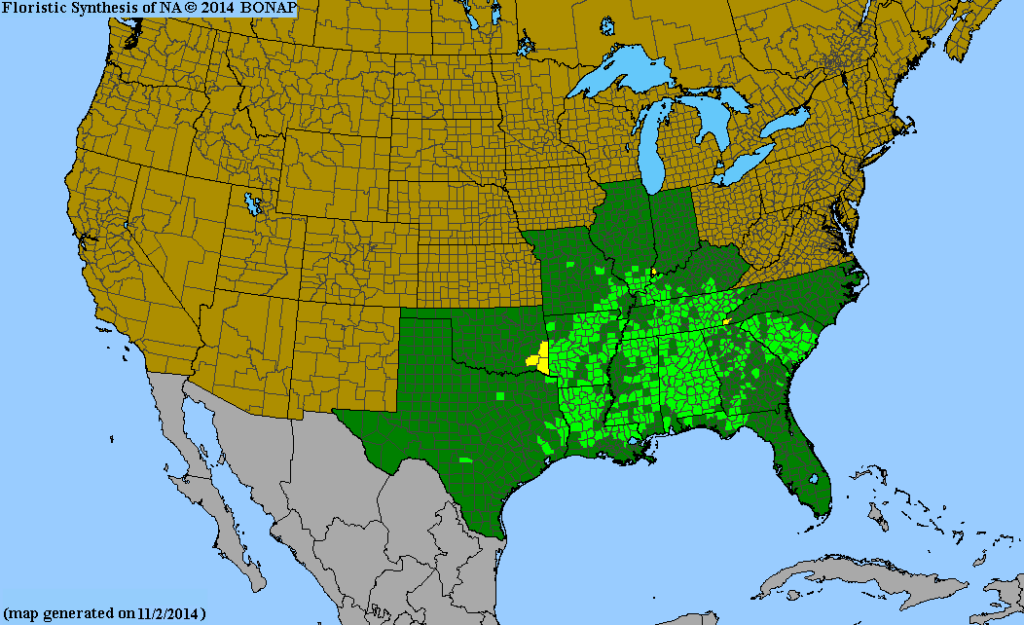
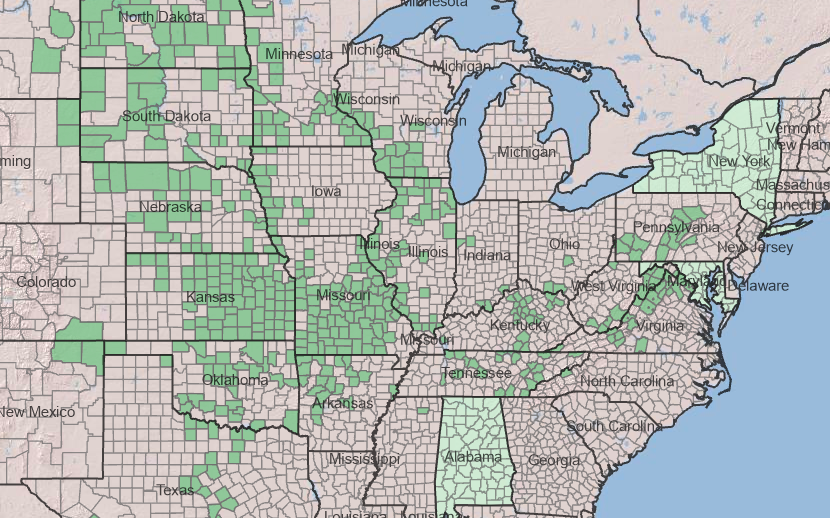
S. marilandica is not found much around here. Its native range is mostly in our neighboring states to the south and east. Not to say there aren’t going to be a few stray specimens living in some moist woods of eastern and south eastern Kansas, but it would be rare. It likes lots of moisture, like streambanks and seasonally wet ravines, and prefers shade. Moisture and shade are not what Kansas is known for.

This map shows the native range of Spigelia marilandica, from BiotaNA

But if you have a shade garden in Kansas, you are likely giving it a bit of supplemental watering just to keep things going during our droughty summers. Why not add this beauty to the mix? They are difficult to find and propagate from seed (though there is some helpful advice here on that topic), but lucky for our local readers we will have some live plants available at our fall FloraKansas fundraiser! We will have a variety called ‘Little Red Head’,

Spigelia ‘Little Red Head’, Photo courtesy of Walter’s Gardens

Companion Plants

With its bright red color, Spigelia is a showstopper. But that doesn’t mean it can’t be complemented by companion plants that also like semi-moist shade. Think hostas, phlox, geranium, and starry champion. Spring blooming woodland ephemerals like Columbine and Mertensia would play well with this species. Remember to plant in clusters of three or five for the biggest impact, and repeat those clusters to create a cohesive look even if you are aiming for a naturalistic woodland garden.

Spigelia will be available at our fall FloraKansas event, which is coming right up in September, the weekend following Labor Day!

Peonies, please!

Peonies are in full bloom right now, and what a show! They are an old fashioned favorite, and a plant can only achieve such a title by being easy enough to grow that it lives on to be beloved by multiple generations. Don’t we all remember peonies in grandma’s garden? As well recognized as they are, there is more to this flower than meets the eye! Read on to learn about the many different types of peonies and their growing habits.

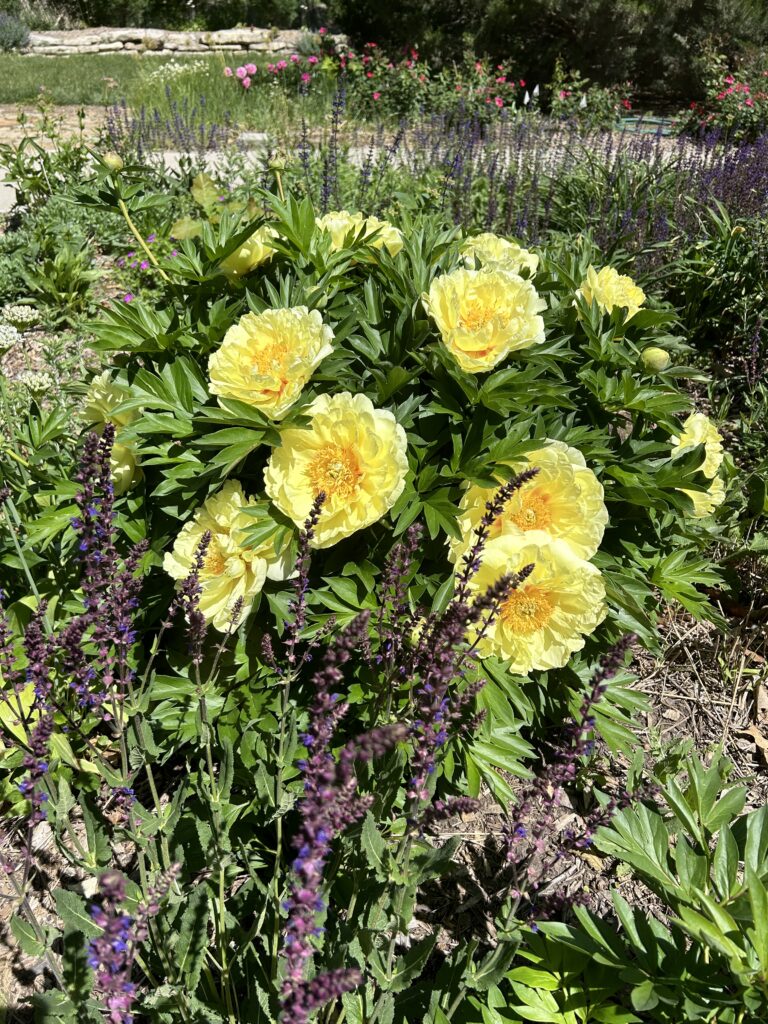
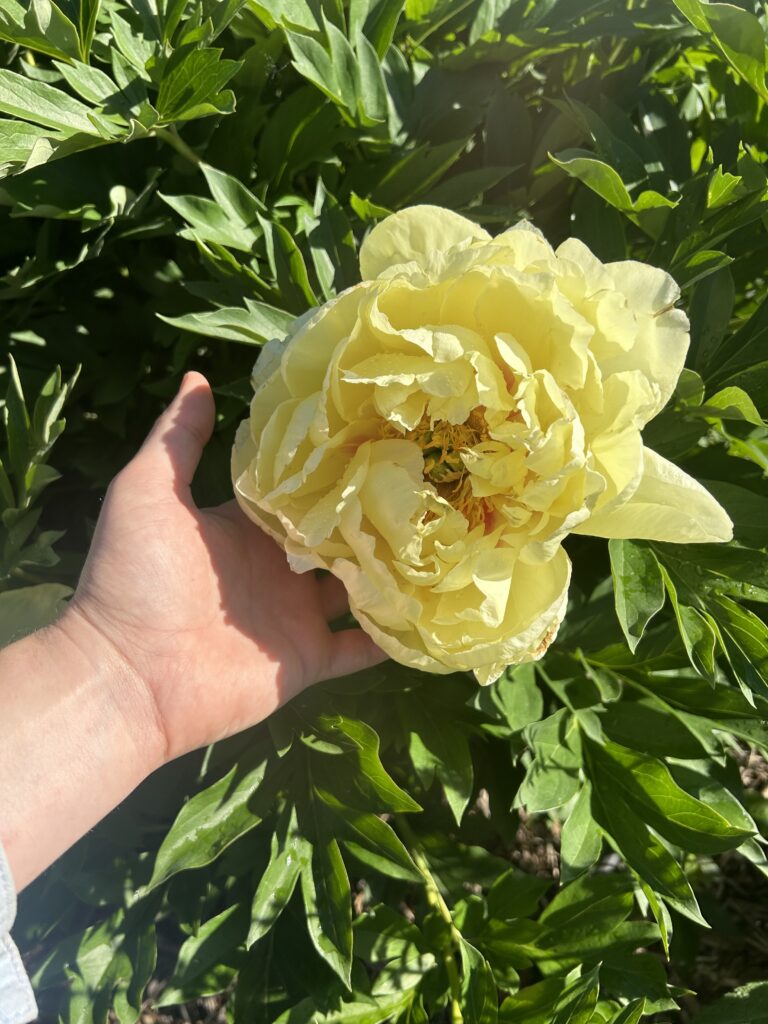
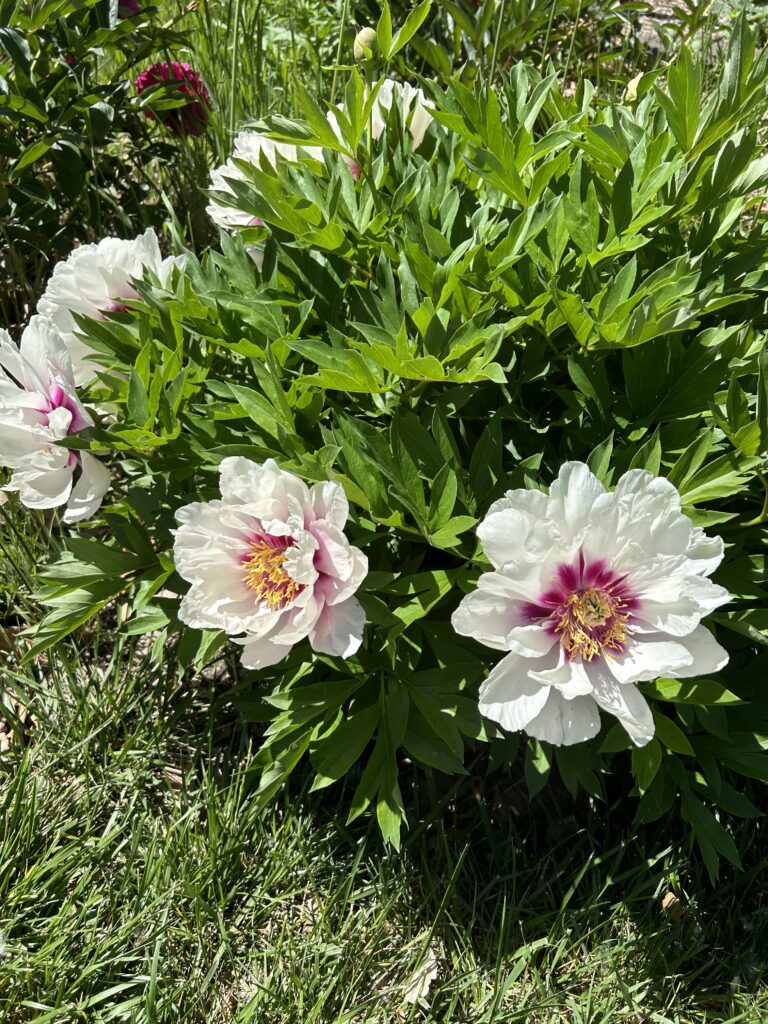
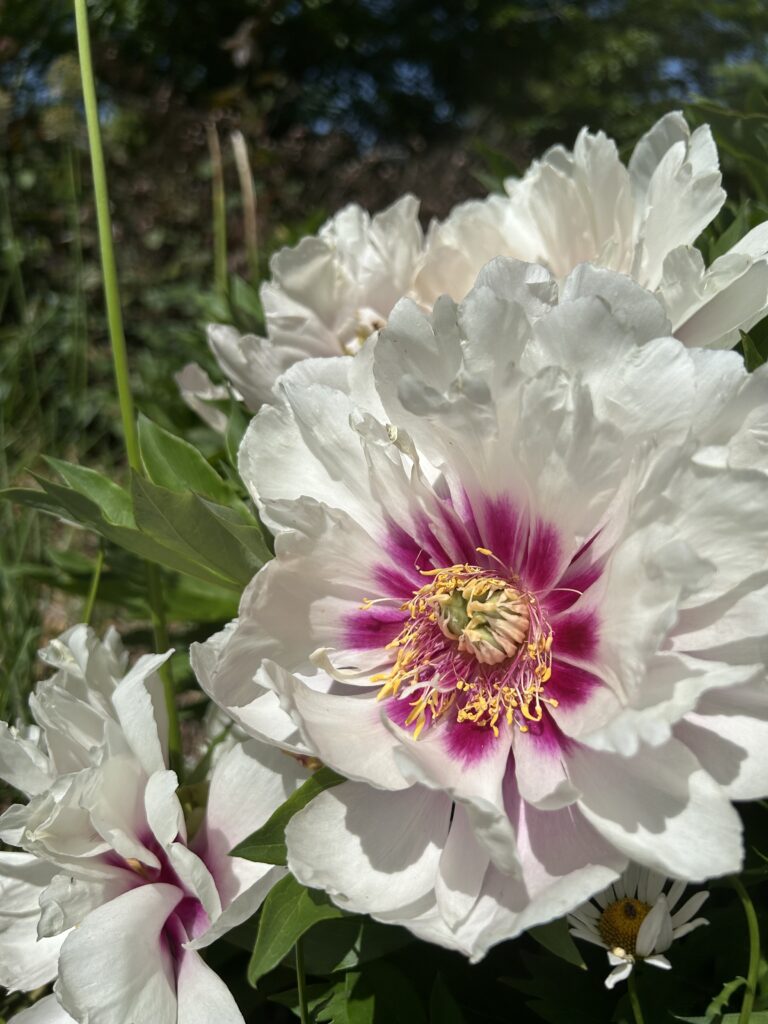
A ‘Bartzella’ Intersectional Peony in Our Mother’s Garden just west of the main parking lot.
‘Bartzella’ flowers are by far the largest in our peony collection, and with a lovely fragrance!

Three Main Types

To most folks, a peony is just a peony. Besides different colored flowers, aren’t they all the same? Actually there are three types of Peonies – tree, herbaceous, and shrub (which are a hybrid of the first two). Tree peonies can be 7 ft tall with massive flowers and woody stems. These are not commonly grown in our region, but herbaceous and shrub types are. Herbaceous peonies often called ‘garden peonies’. They are 2 to 4 feet tall and wide, easy to grow and long lived, but have a tendency to flop over in a stiff wind or rainstorm. Shrub/Intersectional peonies are a hybrid of tree and herbaceous types; they exhibit the larger flowers and stiffer stems of the tree peony, but the heat tolerance and shorter height of the herbaceous species. They were developed in the 1940s by Toicho Itoh, a Japanese plantsmen. This is why they are also called ‘Itoh Peonies’.

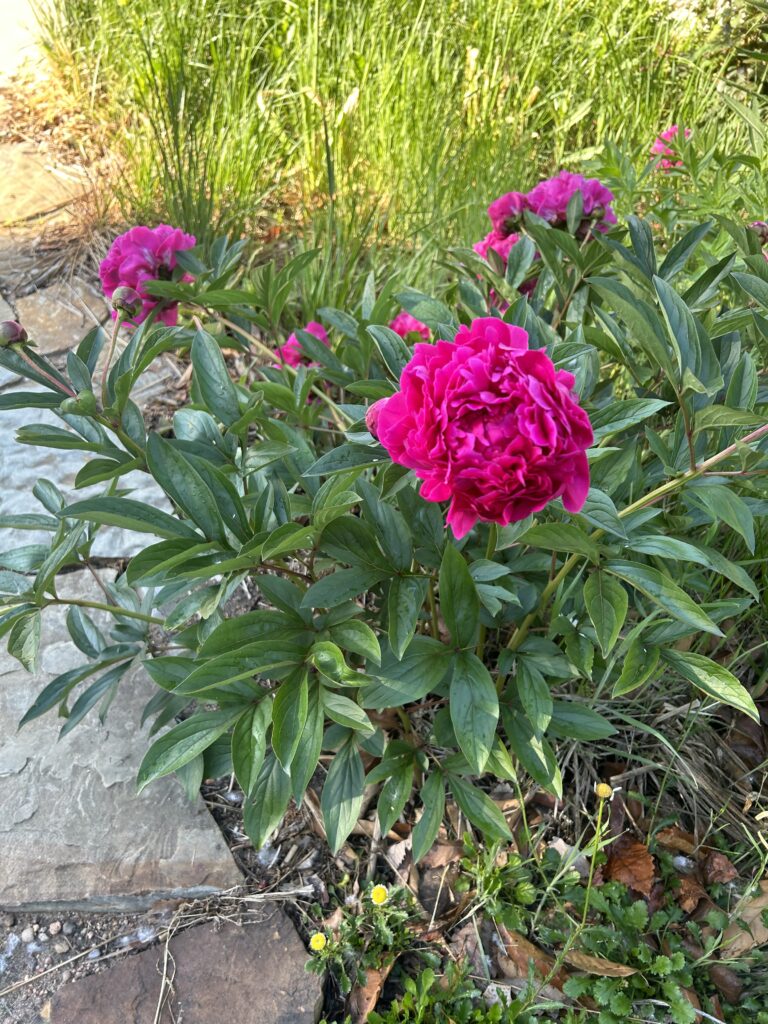
'Kansas' variety garden peony -- pom-pom shaped flower head with multple petal layers, hot pink/magenta
Fittingly, this is a ‘Kansas’ Peony. A regular garden/herbaceaous type, it is a reliable addition to the garden, but it does flop over under the weight of its own blooms.
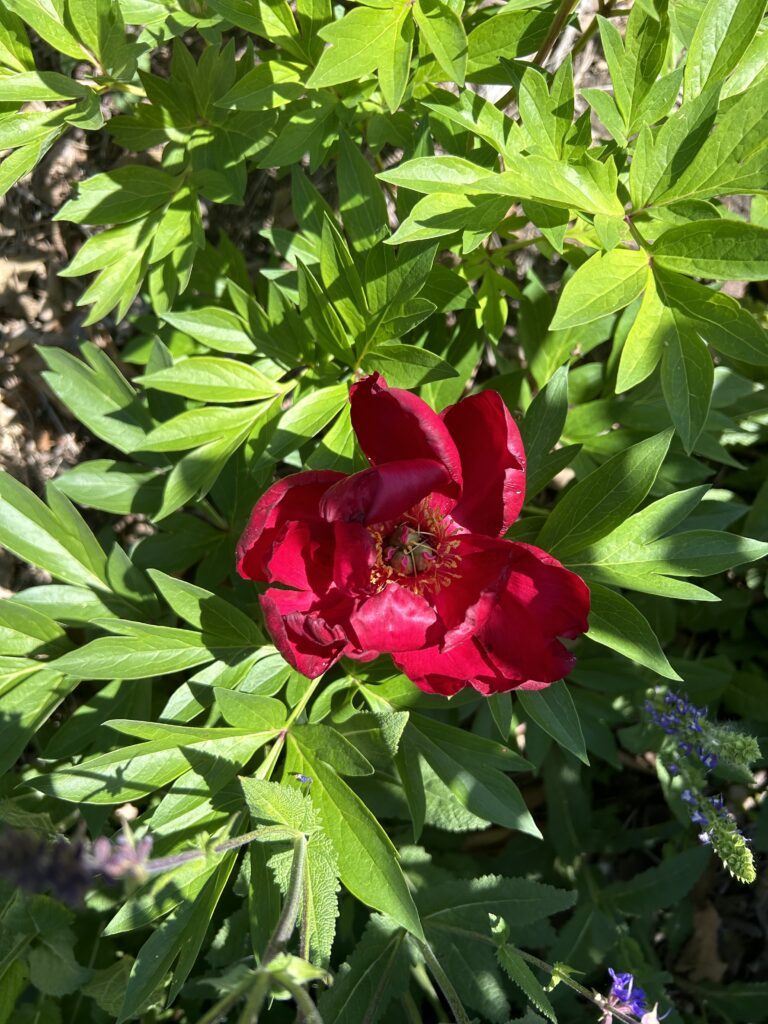
'Scarlett Heaven' Intersectional Peony -- deep red single layered bloom
We recently added the Itoh peony ‘Scarlett Heaven’ to our gardens. At only two years since planting, it’s flowers stay relatively small and few. But it will get more robust as time goes on!

Native Peonies

The genus Paeonia contains 33 known species, and is native to several places across the globe. From Europe to China and even some in North America. The garden and intersectional peonies commonly sold in garden centers are usually cultivated varieties of some of these native species, brought about via grafting, selective breeding, and tissue culture. Before all the primping and plumping, they were just wildflowers! Here are a few species of note:

  • Paeonia lactiflora – common parent plant to modern garden peonies, also known as the Chinese peony, native to eastern Tibet throughout northern China and Siberia
  • Paeonia officinalis – very similar to a modern garden peony, native southern and western Europe
  • Paeonia suffruticosa – tree peony, native to northern Asia
  • Paeonia brownii – very short species native to high elevations of northwest North America
  • Paeonia californica – medium sized drought loving species endemic to southwestern California and the northern Baja region
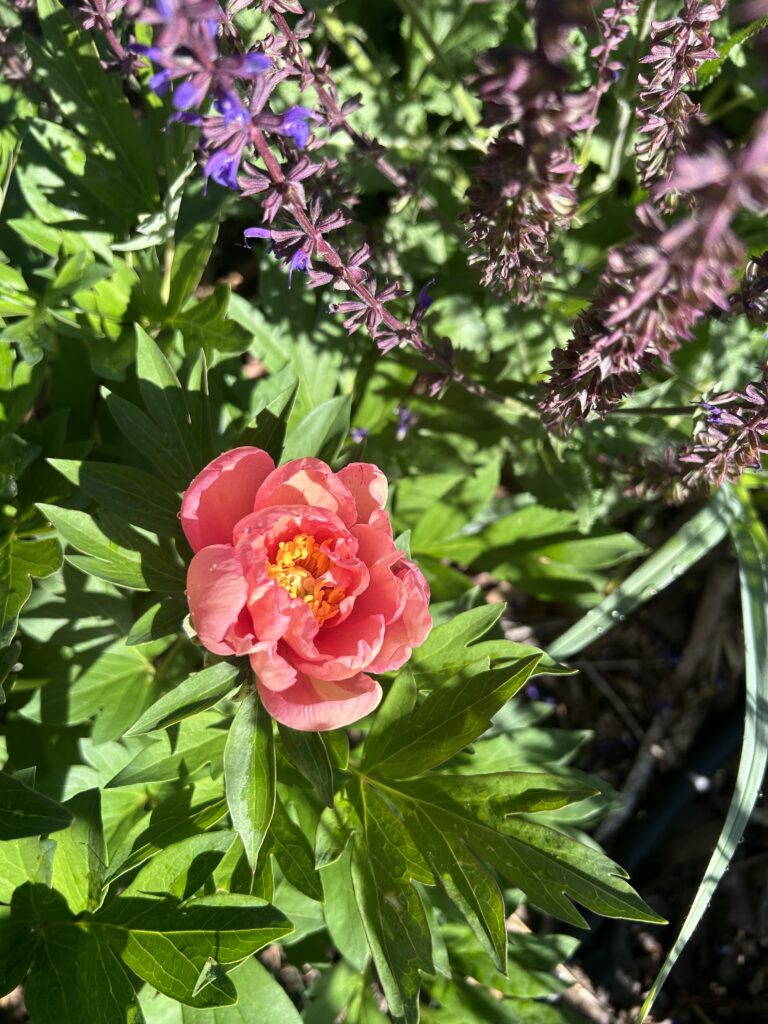
'Julia Rose' Itoh Peony -- coral pink bloom with frilly yellow center
‘Julia Rose’ Intersectional Peony

Make Room for the Bloom

If you want these beautiful flowers in your garden, make sure you have the space! You may need to stake garden peonies as they don’t all support their blooms well, so you will need some wiggle room around your plants to retain walking access. If you opt for the intersectional type, note that these showstoppers can easily be 4 feet tall and wide! Peonies appreciate medium moist soil and aren’t fussy about pH. In fact they prefer a slightly alkaline soil over anything acidic, so our limey Kansas clay is often just right! They can even handle mild drought once established. Avoid planting in soils that stay soggy for long periods of time.

Spring and fall are the best time to plant peonies. You can order them online, through catalogs, or even purchase a few at one of our biannual FloraKansas events! However you acquire them, with the proper care they will bloom and thrive for years to come.

The Importance of Site Analysis, Part 3

As we have discussed over the past few weeks, beautiful gardens don’t happen by accident. You need to analyze and deeply understand your garden over time. Once you have a pretty good handle on what you are working with, you will be ready to begin the process of choosing the right plants. Here are a couple more things to be aware of within your landscape.

Sight Lines

One of the questions I ask clients about their property is “Where will you be looking at your garden from?” Seems like a simple question, but it is often overlooked. This helps orient the plants in the right lines and heights for maximum viewing.

For instance, for an island planting in your backyard, will you be mostly looking at it from your living room or deck? If so then put the taller plants in the back and the shorter perennials along the front. In the case of a foundation planting, then the viewing would be mostly from the street, but you will want to see it from your windows. I would not use really tall plants that block the view from the front porch or windows.

Another aspect of sight lines is screening. Is there a view that you want to hide/screen? Are taller plants needed to provide you with privacy? Both can be achieved with plant material but your need to be thinking about mature plant height. Is there a structure arbor, fountain or garden art that you want to guide people to with a path or by using the clean lines of a flower bed?

Topography and Drainage

Positive drainage away from your house is so important. Basements are ruined with poor drainage around your home. Really work at getting water to flow away from your home before putting any plants in the ground.

Another thing to understand within your landscape is where the water flows. Standing water for a few hours is one thing, but if the water stands for days then plants will be adversely affected. If you have pooling water after a big rainstorm, then you can divert it away more quickly via a ditch or shallow swale. A better idea might be to develop a rain garden?

Butterfly milkweed in the small rain garden at the arboretum

By understanding these aspects of your landscape, you will be rewarded season after season with beautiful, functional, earth-friendly oasis. A garden that works with landscape and not against it. Whether, you just moved to a new home that you are unfamiliar with or want to start over with your current garden, site analysis is the place to start. Good luck!

If you need help with your native garden come to FloraKansas: Native Plant Days.

The Importance of Site Analysis Part 2

The more you understand your garden, the easier it will be to choose the right plants for your site.  We all have plant preferences but not all of your plant preferences will grow in your garden.  Here are a few more aspects to consider as you analyze your landscape. 

Soil Type

Here in south central Kansas, our soils are typically alkaline, which is good for growing most prairie plants.  Soils can be pH neutral with a value of 7.0, or anything below that is classed as acid, and anything above, alkaline. To determine your pH, a simple soil test can be done by yourself from kits at most garden centers or through the extension service. 

Other soil considerations are consistency and texture. At the Arboretum, we deal mostly with clay soils.  This soil type compacts easily and drains poorly. You must find plants with root systems that can penetrate through the dense structure of clay, i.e., big bluestem, asters, and indigos.  Other soil types are sandy (dries out quickly, low nutrient holding capacity, low organic matter and loose in your hand), Silty (mixture of a sand and clay, easily compacted), Chalky (stoney, exposed subsoil after construction, good drainage) and Loamy (high in organic matter, holds moisture and nutrients). 

If you have been working in your garden for any length of time, you have a good idea of what type of soil you have.  You can add some compost to your soil if it is really terrible, but typically, you can find plants that will grow in your soil conditions.  For example, there are plants that appreciate the consistent drainage of sandy soils especially during the winter months. 

If your soil is alkaline, you will struggle growing rhododendrons and azaleas that need acidic soil.  Try to gather as much information about your soil and then find plants that grow in it. Finding the right plant for the right place will make you garden smarter not harder.

Think of Garden Aspect

Once you have defined the area you want to landscape, you need to understand aspect. Garden aspect simply means which way your garden is facing.  If it north facing, typically shadowed by your house, it needs plants that can grow in shade or partial shade.  If it is south facing, then choose plants for all day sun.  If it east facing, then choose plants that need six hours of sunlight, but are protected from the hottest sunlight hours.  If your garden is west facing then choose plants that can endure the hottest sunlight hours. 

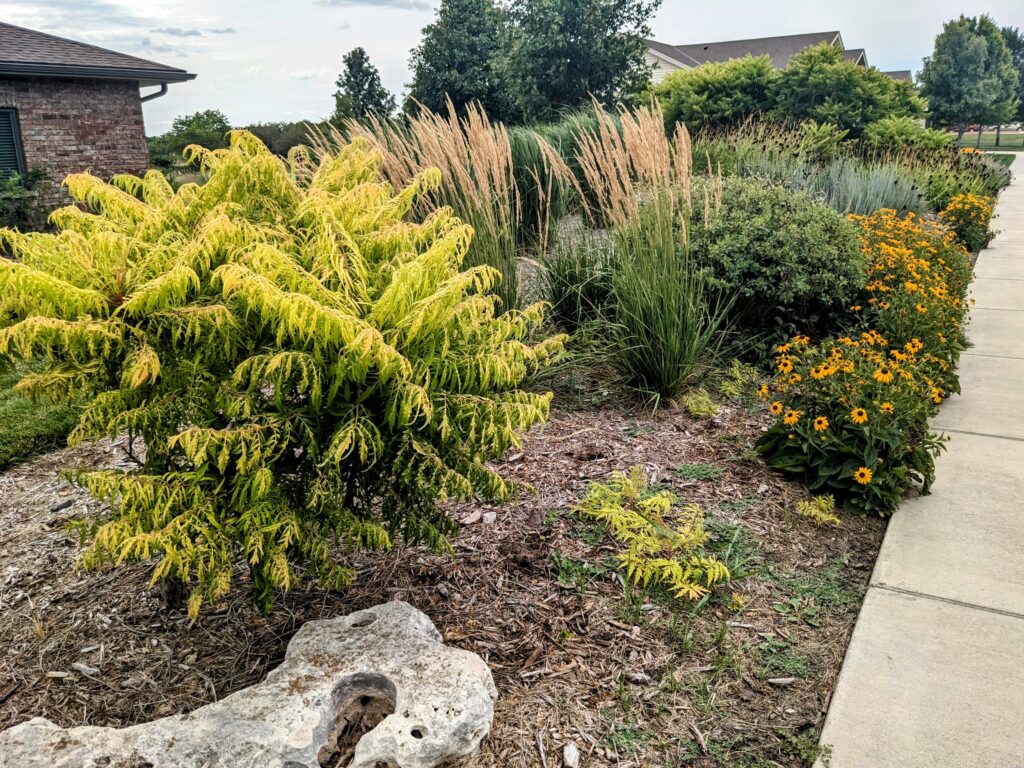
South-facing garden with prairie dropseed, blackeyed susan, Amsonia hubrichtii, russian sage and Taylor junipers.

Obviously, trees, structures, and house orientation play a role in garden aspect.  The key is to observe your garden at different times throughout the year.  This will help you understand completely where the sunlight is coming from and how intense it can be.

One other thing to consider is microclimates within your garden.  There may be small areas that behave totally different than other areas ten to fifteen feet away.  One example would be a protected area along a fence or under a tree the shields that site from hot west sunlight and drying winds. Or, a low area in your yard that stays consistently moist is another example. These areas might allow you the opportunity to try a few different plants that would not otherwise grow in your garden.

Next Week: Site Analysis Part 3

The Importance of Site Analysis

Over the past few months, I have been working on some landscape designs.  These designs have reminded me how important site analysis is to a successful design.  Choosing the right plants for an area begins with a close look at the area being considered for a new garden. In my opinion, gardeners (I include myself in this category) don’t spend enough time observing our gardens throughout the year prior to planting anything. Here are a few important aspects to consider that will help you develop a rewarding planting scheme.

What is the size of your outdoor space? 

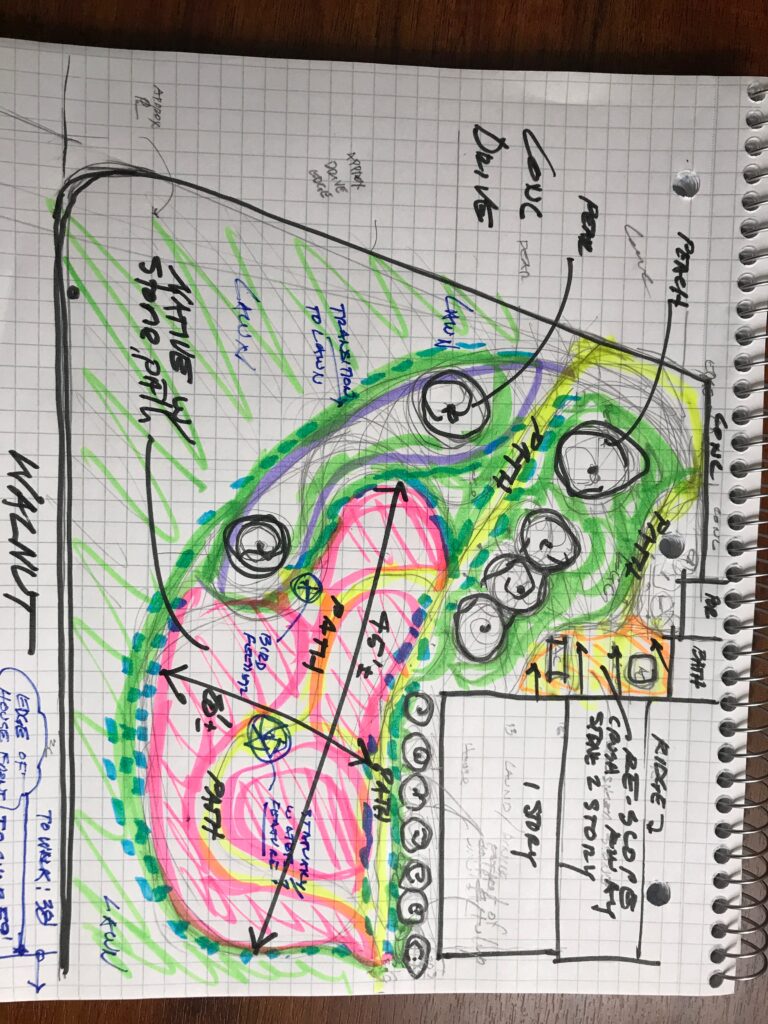
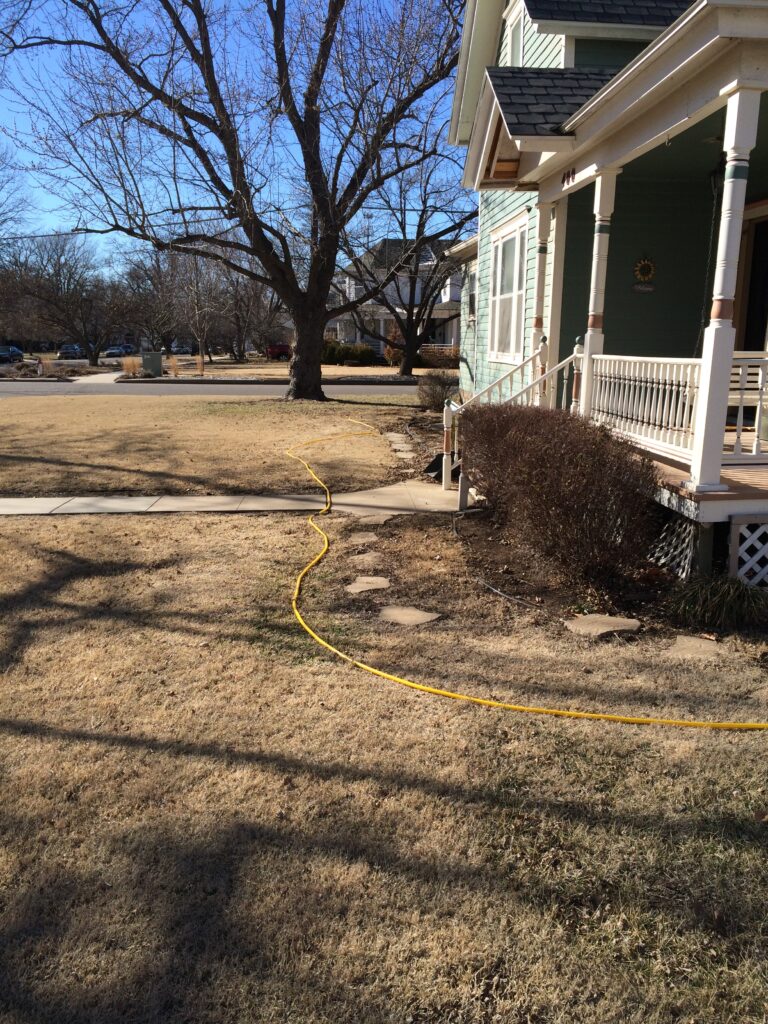
Site analysis begins with taking a step back to observe the big picture. A small planting bed leading to the front door versus a larger foundation or island planting require different plants. Most plants need space to fully develop. Be realistic when you first start thinking about your garden.  Lay out your garden beds with a hose to help define the landscape space.  Step back and look at the lines and size of the bed.  Is this the look you want for the area? 

Another piece of advice I often give is to start small and work on your areas over successive seasons.  A new garden can be overwhelming as you work to establish new plants, control weeds and maintain those new plants through the first year.  Once the first area is up and growing, you can move to the next area.  By starting small, you can build on your successes.

By using a garden hose to layout your garden, you can play with the design and curves before moving any soil. Step back and take a look. Adjust the lines until you are satisfied with the flow and size of the bed. Visualize the area with mature plants.

Control perennial/annual weeds before planting anything

Bindweed

Obviously, the best time to eradicate bindweed is before you plant. I spray the area with Roundup™ several times starting in July and August. Anytime we see green, the area is sprayed. This is the best time to spray because the plant is moving energy from the leaves into the roots for winter storage. The chemical is also moved throughout the extensive root system, killing even those deep roots. Trust me, it is worth waiting to plant until this weed is removed permanently.

Small patches can be hand pulled but you have to stay on it. Every sprig that pops up must be pulled immediately.  We have also had limited success with hand painting the leaves with Round-up.  Again, every new plant must be found and painted.  Essentially, you have to be as ruthless and relentless as this weed is to completely remove it from your garden. I thank my ancestors for bringing this over to America with their wheat seed.

If you are firmly opposed to using any chemicals, you might consider solarization instead, or you may want to read my colleague’s blog post “On Weeding“.

Bermuda grass

This perennial grass is a problem because of its vigorous creeping habit.  The plant spreads by seeds and by above and below ground stems that can take over a garden in one season.  It is drought tolerant and thrives with neglect.

Like bindweed, bermudagrass is best removed before planting (same as bindweed).  If you have it growing next to your gardens, a buffer must be maintained between the perennial display and the lawn area.  This buffer can be weeded by hand or sprayed every few weeks with Roundup™ to burn back any new runners toward the garden.  Raised beds are another defense against bermudagrass.  Don’t blow bermuda grass clippings into your gardens.  Again, it is better to wait to establish your new wildflower garden until you have bermudagrass eliminated.  I have made the mistake of planting into bermudagrass and I am fighting with it every year. 

Keep plants in scale

I don’t always observe or think about proportion and scale until it is too late. Keep in mind that your overall garden size helps determine what plants you can use in your design. Plant scale generally means using plants that are half the bed width. For instance, an area six feet wide needs plants that are no taller than three feet. A tall (8 foot) compass plant would stick out like a sore thumb if used in this area. In a narrow bed leading to your front door, taller plants tend to fall over and get in the way. Shorter plants such as prairie dropseed and black-eyed susans are a better option. Measure up what you have in order to see how everything will fit into place.

Compass Plant is a beautiful wildflower that gets eight feet tall. It is out of scale in a smaller space. Give it room to grow.

Look for Site Analysis Part 2 next week.

The Edible Landscape

I am a big fan of a landscape that is functional as well as beautiful. Functionality might mean wildlife and pollinator attraction, water absorbing (rain garden) or water conserving (xeriscaping). But it can also mean incorporating human food plants into your perennial garden. This not only provides a healthy snack, but it encourages more interaction and participation. What is the point of a beautiful landscape if you aren’t out enjoying it?
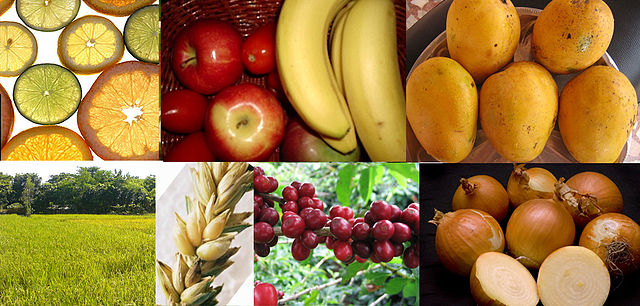
Here is a small preview of some of the plants I discuss in my Native Plant School class, now available on our YouTube channel, all about landscaping with edible plants.

If this topic fires you up, stop by our gift shop to grab a copy of Kelly Kindscher’s Edible Wild Plants of the Prairie, a wonderful plant guide and exploration of ethnobotany on the Great Plains.

Elderberry (Sambucus canadensis)

A personal favorite of mine, Elderberry is as beautiful as it is nutritious. This plant will love a low spot in the yard where water tends to collect after rains, or an area with poor drainage. It can reach 8ft tall, putting on an impressive show in late spring when covered with massive white flower clusters. Berries ripen in July, a perfect time to spend the hot afternoons in the kitchen making jams and syrups. I make a cold remedy from them that has never let me down!

Pawpaw (Asimina triloba)

Persimmon (left) and PawPaw (right) both produce delicious fruit.

Everything about pawpaw seems tropical. Surely this fruit cannot be native to hot, dry Kansas…yet it is! It is an easy growing plant that can grow in full sun or partial shade and tolerates alkaline soil. To get a good fruit set you should plant more than one; though they have both male and female flowers on a single tree they are not self-fertile. The fruit is worth it! A custard-like texture with the flavor of bananas and mangos, it is perfect for pies and homemade ice cream.

Bee Balm (Monarda fistulosa)

Monarda fistulosa flower, photographed by Brad Guhr

If you are short on garden space and can’t add a shrub or tree, never fear. Monarda fistulosa is a wonderful edible perennial much smaller in stature than the previous options. About 3ft by 3ft when happy and mature, the leaves of this plant make excellent tea, with a flavor reminiscent of the bergamot oil used in Earl Grey. It has a long history of medicinal use by indigenous North Americans, for everything from upper respiratory problems to sore feet. The flowers are also edible and add a citrusy, spicy punch to salads.

From persimmon to chokeberry, we have so many native plants to choose from to diversify our diets and add beauty to our home landscapes. Thanks to thousands of years of culinary experimentation by the tribes and nations of North America we have a rich ethnobotanical tradition to learn from, an example of how to learn about, appreciate and interact with food and flora.

Gardens of France: American Cemetery at Normandy

When most people visit Normandy, they aren’t coming for the gardens. World War II historians flock here from all over the world to learn, explore, and pay tribute to the thousands who died here liberating France, and later freeing Europe. I personally love this area of France. It is my favorite by far, not only for its history, but for its beautiful, rugged landscape and friendly people. (And did I mention Normandy is the home of Camembert cheese?)

Of course, no trip to Normandy would be complete without a stop at the American Cemetery and Memorial. And though we aren’t always looking for great garden design, sometimes I can’t help but notice!

Design That Sets the Tone

This is a garden bed at the entrance to the Normandy American Cemetery and Memorial. It surprised me! Modern and understated, blending so well into the blocky, simplistic design of the memorial I almost walked right past it. It is made up of two species: likely Calamagrostis ‘Karl Forrester’ and Gaura lindheimeri, also known as white beeblossom.

This is a perfect example of matching the tone of the place to the design. At such a somber site, it might feel strange to have anything too colorful, jazzy, or disorganized. Instead, the grasses stand tall and stately, the Gaura wispy and low. The combination is perfect here, and when a bit of wind comes through them the planting has wonderful movement, and an ethereal quality. If a garden could whisper, this one would.

Ornamental Grasses

I spotted some familiar North American native grasses as I explored the well kept grounds. Through the memorial and onto the walkway to the cemetery, there is a border of switchgrass and fountaingrass. This combination was repeated multiple times along the way, softening the edges of the walkway – pink and pillowy, and always in motion thanks to the sea winds off the beach. The shrubs and trees behind created a three tiered border – making the walk feel a bit enclosed and sheltered from the otherwise open plain. After a tearful trip through the memorial hall and museum, it is a lovely feeling to be ushered along by this soft texture and gentle swaying movement, mimicking the waves on the beach.

A planting of ornamental grasses at the Normandy American Cemetery and Memorial

Beauty in the Margins

In Normandy, even the parking lots are beautiful! I was impressed by the city planning. In the many small towns in the area around the beaches, there was an effort to create greenspace at every opportunity. Instead of bare, sparse plantings dominated by mulch we are used to seeing in parking lot islands, I encountered lush shrubs and thickly planted perennials. This is simply a choice of good design — choose plants that thrive under harsh conditions, plant thick enough that weeds cannot get through, and stick to mass plantings for the greatest effect.

Landscape vs Landscaping

The genius of the plantings in this region was that they seemed to blend right into the surrounding rural landscape. I can’t be sure whether the plants used were always native to the area or just well adapted ornamentals. But regardless, great care was taken to blend and match the natural shapes and textures of the seaside climate. Sometimes with grasses that bring to mind sandy hues and beach waves. Or even by using dense shrubs planted in layers, to mimic the famous hedgerows of the area. We can bring this lesson back home by taking careful note of the common shapes, colors, and textures in the natural landscape of our area. Using that, we can recreate those things in our residential landscaping on a smaller scale. It is an abstract way of designing, but the pay off is a garden that feels balanced and very much at home.

Gardens of France: Chateau de Chenonceau

Refined, elegant, and dare I say…lady-like? The castle and gardens of Chenonceau are truly a must-see in the Loire Valley. It is known as the ladies castle because of its many famous female inhabitants, as well as the fact that its construction and upkeep was overseen by women. With formal gardens surrounding it on two sides, and an extensive estate with woods, hedge maze, vegetable plot, and a medicinal herb garden, one could easily spent the entire day here. This is one of my favorite gardens of France, but sadly we only had a few hours to admire the grounds and take a few notes on the exquisite landscape designs!

view of Diane de Poiteirs garden and Chateau de Chenonceau
View of Chenonceau from Diane de Poitiers garden, from Wikimedia

A Brief History

Owned by the monarchy, mistresses, government financiers, and chocolatiers, this property has a fascinating history. Straddling the river Cher, it was used as a military hospital in WWI and a secret escape corridor in WWII. But none of its history defined it as much as the rivalry between Catherine and Diane. Catherine Medici was the wife of King Henry II, Diane was his mistress. These women had a famous feud with a lasting imprint on the castle and grounds. Henry gifted the Chateau de Chenonceau to Diane, much to Catherine’s chagrin. Once Henry died, Catherine promptly took the castle back and sent Diane packing. Among the many renovations and additions each lady made, the gardens stand as an obvious example of their contrasting styles and personalities.

View of Chenonceau from the Medici garden.
Hermann Luyken, CC0, via Wikimedia Commons

Dueling Gardens

On one side of the entrance to the chateau stands the garden of Catherine de Poitiers, and on the other side the rebuttle: the garden of Catherine Medici. Both gardens are built on platforms above the banks of the river banks, and both exhibit the elegant features popular in the 16th century:

  • long straight gravel pathways (French parterre style)
  • small sections of very short shorn lawn separated by low hedges
  • topiary and ball-shaped shrubs
  • all paths leading to a central fountain or pool
Diane de Poitiers garden, one of the famous gardens of France
Garden of Diane de Poitiers, complete with its dwarf fruit trees and carefully manicured scroll pattern made of Santolina.

But they are unique in tone. The Medici garden is orderly, if slightly less symmetrical than Diane’s. It contains more squares rectangles while the Poitier garden is laid out in triangles. Catherine’s garden is modest in size, while Diane’s stretches on lavishly. But, many agree that the Medici garden has the best view of the Chateau, perhaps purposely planned that way due to her great affection and attachment to the residence. The memorable feature in the Garden of Diane de Poitier are the “santolina swirls”: grey santolina, trimmed very low, in delicate scroll patterns throughout the innermost lawns. Diane’s garden is grand, showy, and sprawling, while Catherine’s is elegant and slightly understated. While Diane’s has a flashy fountain in the middle, Catherine’s simply has a reflecting pool.

Catherine Medici's garden at Chenonceau (taken in October 2023), one of the famous gardens of France
The Garden of Catherine Medici, with its dark leaves sweet potato vine and the ornamental grasses (Pennisetum?) bursting upwards.

Formality with Flair

While formal gardens are not my particular taste, I really enjoyed the way these gardeners are playing with color palette. Dark leaf ipomea constrasts with silver santolia and lavender. The grasses rush upwards out of the other ground-hugging foliage like fireworks (which interestingly enough, were used for the first time in France at this very location). Rather than feeling stuffy and boring, the contrast of dark and light keeps it interesting and the winding shapes lead your eye in unexpected directions. On Diane’s side of things, a strict adherence to shades in purple, pink and whites keeps an otherwise very thick, diverse beds looking intentional.

A garden border of hibiscus, salvia, and castor plants in the colors purple, pink and burgundy. Plants range from 3ft to 6ft high, and the chancellory building is in the background.
Pinks, purples, and the burgundy of the caster bean leaves all blend together to create an almost monochrome landscape design.
A low hedge in the vegetable garden area, made of what I believe to be apple trees, in the espalier style.

Grandness, Scale, and Planning for the Future

the long entryway lined with plane trees (sycamore) that leads to Chateau de Chenonceau. This is a very memorable scene from one of the most famous gardens of France.
Chris enjoying the walk to the chateau, lined with massive plane trees.

One of the most memorable moments of Chenonceau is the tree lined entryway. It stretches on for the entire stately avenue and perfectly framing the castle up ahead. The property also has a hedge maze made of yew bushes, as well as a great collection of specialty trees. These types of displays only work with patience. For these grand landscapes to take shape, it takes more than just a growing season. Years, and in some cases, centuries of growth have to be accounted for. So if you have big plans for your own property, perhaps a tree lined driveway of your own or a prairie reconstruction, remember not to be intimidated by big plans! Start now to create something truly spectacular and awe-inspiring for future generations.
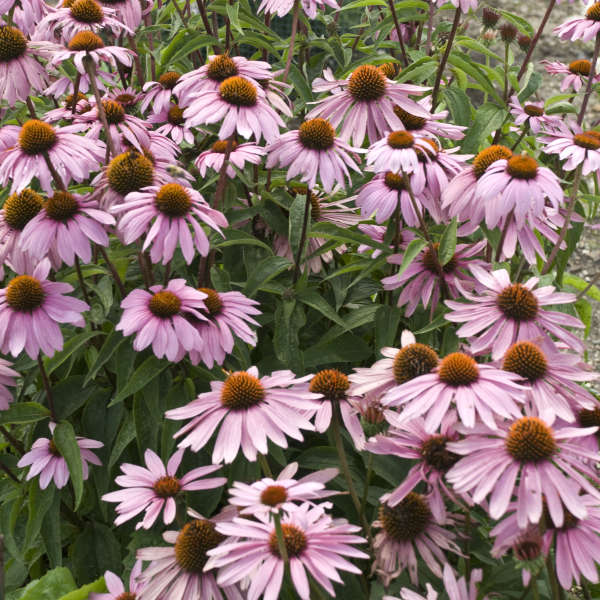
A mass planting of Hydrangea along the fence of the vegetable garden and maintenance area. Even the mundane and functional spaces are beautifully kept!

You don’t have to go all the way to France to experience excellent landscape design – implement these lessons into your own garden and get that royal touch of elegance! Keeping a simple color palette, use clean lines and repeating geometric patterns to achieve a timeless aesthetic. And for further inspiration, take a virtual tour of Chenonceau here. There are only a few more posts left in our gardens of France series, so stay tuned!