If you come to the Dyck Arboretum during these wet spring days, you will be greeted by a unified chorus. I’m not referring to the sound of people with spring fever, singing the praises of nature while walking the paths and enjoying the prairie gardens and native plant communities. You will hear the mating call of the boreal chorus frog (Pseudacris maculata).
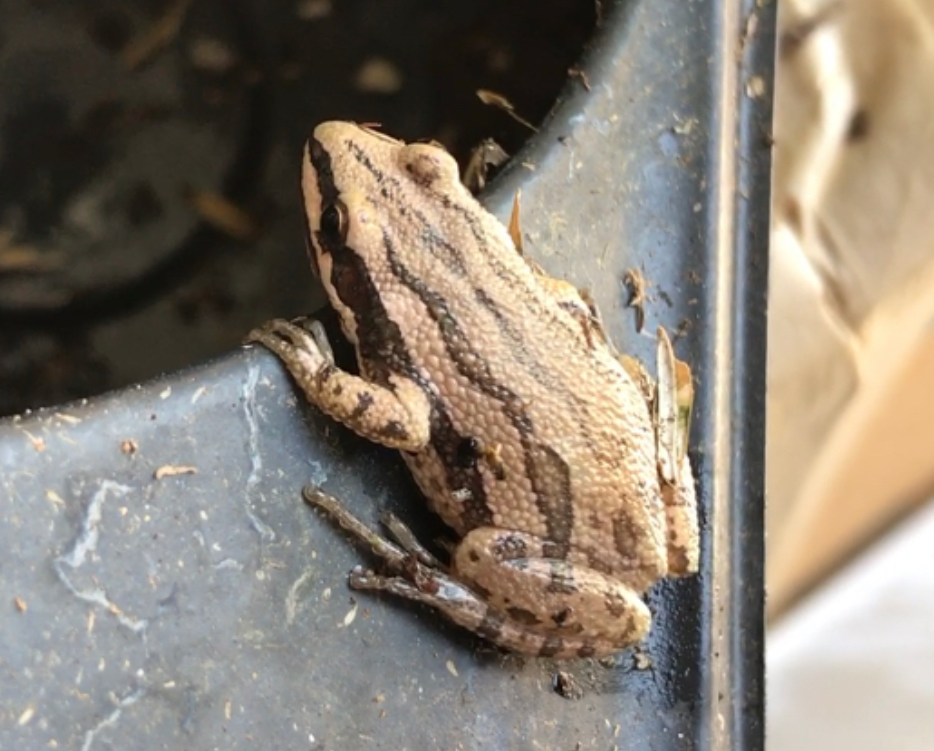
This up to 1.5-inches in length amphibian exhibits various shades of brown, gray or green with three dark brown stripes running down its back and an especially noticeable one running the length of its side through the eye from nose to hind leg. If you are patient and observant, you will see one at our greenhouse rain garden.
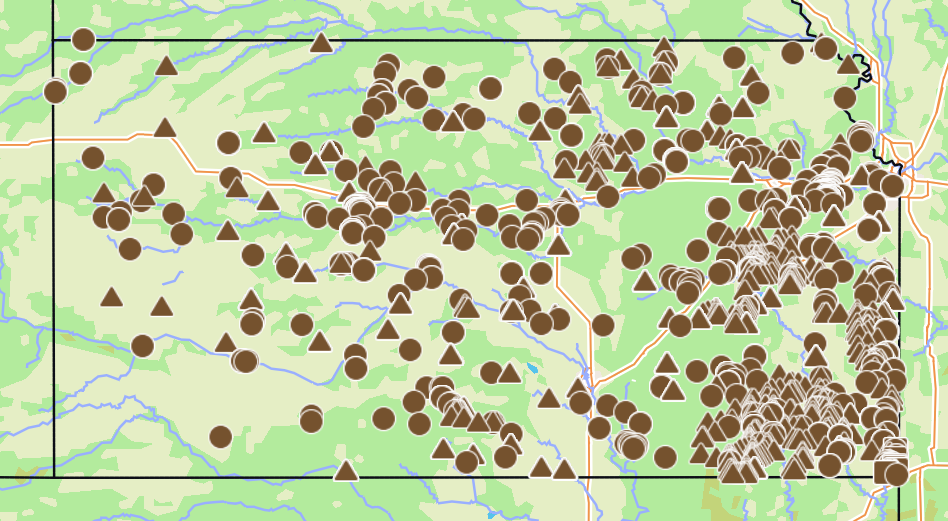
The boreal chorus frog is one of the most widespread frogs in Kansas with distribution nearly throughout the state. They are commonly found in the daytime during the breeding season from late February through May. Outside of this time, they are seeking refuge under cover of wetland vegetation or soil. After rains or during humid nights, they emerge to forage for small invertebrates. According to the Kansas Herpetofaunal Atlas, in a 1906 article by F.A. Hartman, he reported finding algae and ants in the stomachs of young specimens and spiders in the stomachs of adults.
Follow our paths to the rain garden/small pond by our greenhouse or simply walk toward the unmistakable high-pitched shrill sound to find these critters. When you approach the pond edge, their calls will stop. If you stay quiet and still, one-by-one their clicking trill (like the sound of running a fingernail along the teeth of a comb for two to fives seconds with a slight rise in inflection) will return. At full strength, the volume of their collective chorus may make you want to hold your ears.
A boreal chorus frog on a pot in our plant nursery (photo by Dyck Arboretum grounds manager, Katie Schmidt)
As we humans avoid physical contact from each other during these anxious times of a worldwide pandemic, I find some comfort in knowing that cycles of the natural world are still carrying on around us. Amphibians may be facing other challenges as my colleague Katie Schmidt recently wrote about. But I’m glad these Arboretum chorus frogs are not practicing social distancing at the moment. Their mating call signals that their population will be alive and well here in the future.
Creating Frog Habitat
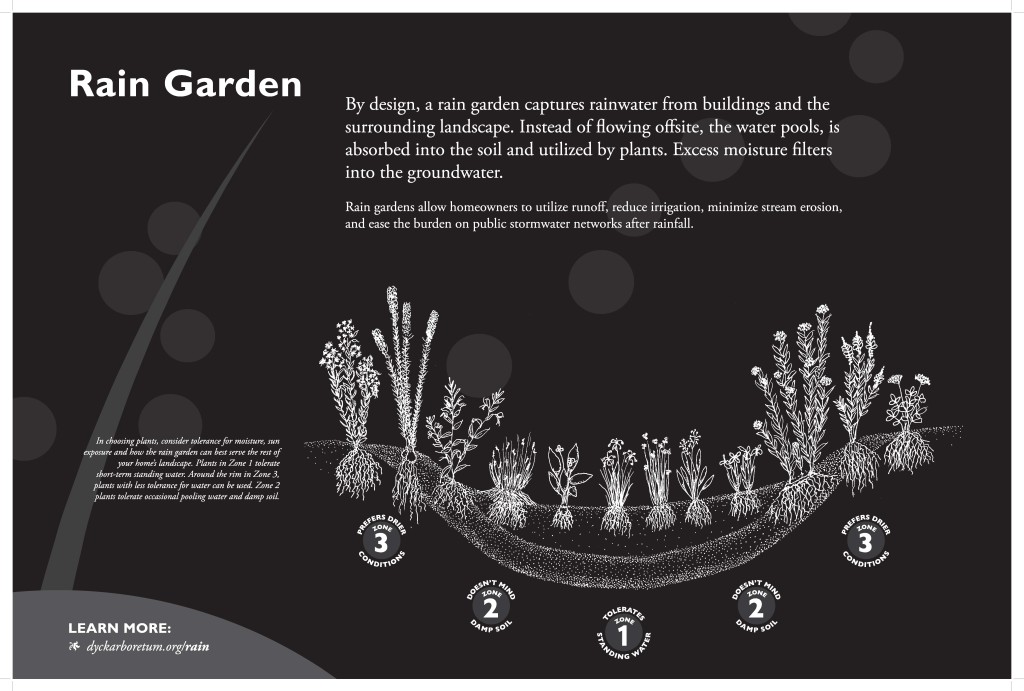
This interpretive signage next to our rain garden is located between buildings at Dyck Arboretum. The line drawings artwork is by Lorna Habegger Harder.
If you would like to create habitat for frogs, consider restoring wetland habitat in a low place on your property that collects water. I am in the process of holding a virtual rain gardening class through which I will send you a link to a presentation and then set up consultation time to discuss your project and the logistics of making it happen. At our upcoming spring FloraKansas event, you can get the plants that like their feet wet to make habitat for chorus frogs and all other sorts of water-loving creatures.
I’ll leave you with one more serenade from our local population of boreal chorus frogs.
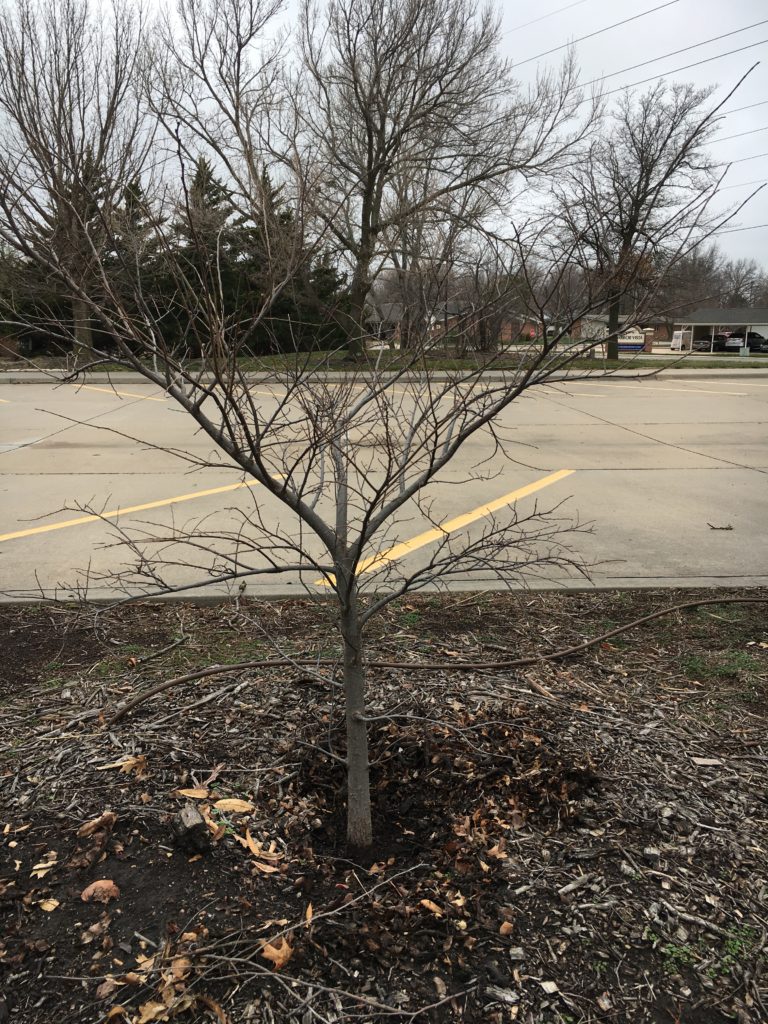
This spring is going to be anything but normal. I know that’s an obvious understatement. All this social distancing has made me think of the many things I need to get done around my house. Social distancing time may be beneficial and help me stop procrastinating. My house needs to be painted. I need to add a fresh layer of mulch on my front flower beds. Another thing I was thinking about was planting another tree.
For those of you who are looking for things to do with your children who are home from school, planting a tree is a great activity to do together outside. And with the 50th Anniversary of Earth Day on April 22nd and Arbor Day on April 24th, there are many related online educational resources available to help talk about the importance of trees and caring for the earth.
So in that vein, here are the steps I take when planting a tree.
Choose the right tree
I work from a short list of trees I know will grow well in our area. Some of my favorites are: Caddo sugar maples such as ‘John Pair’ and ‘Autumn Splendor’, Shumard Oak, disease resistant crabapples, Shantung maple, and bur oak. There are so many good options for our area, but make sure you are aware of the tree’s mature size. This will affect power lines, crowding buildings and porches, and heaving sidewalks. See our Native Plant Guide or recommended plants from KSU extension for other options.
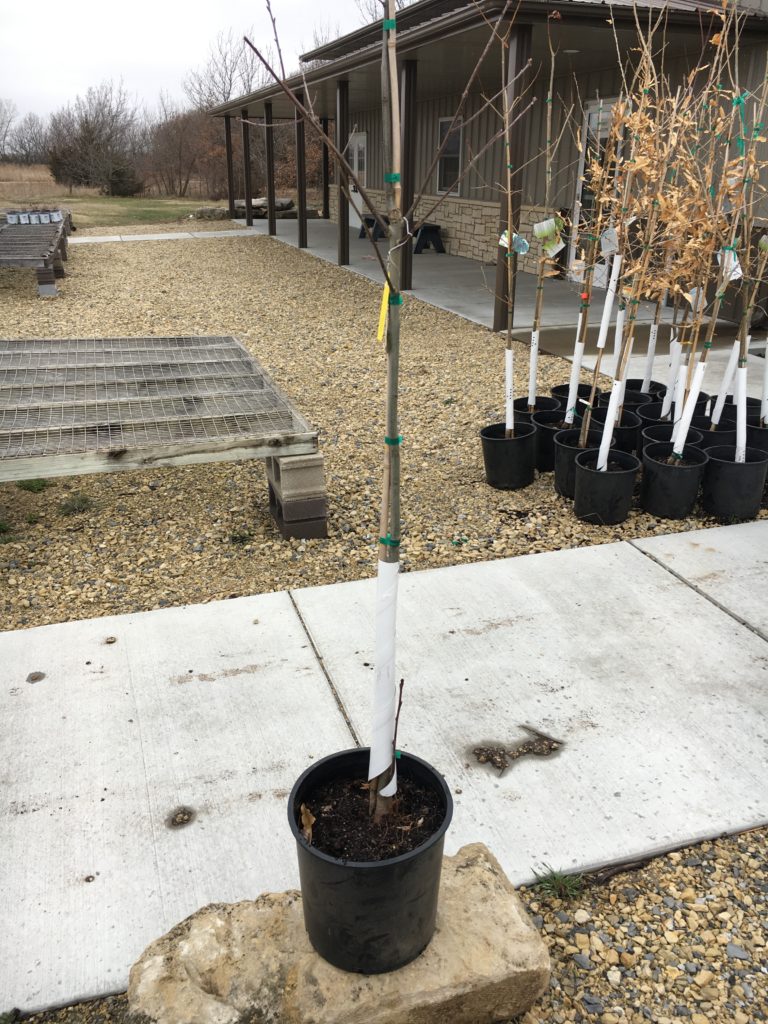
Shumard Oak ready for planting
Dial 811
We have all seen the cheesy commercials to “dial before you dig”, but the truth is it’s important to locate utilities. It doesn’t cost anything. You just give the location and then wait a few days for them to flag the area. It is worth making the call rather than guessing while you’re digging.
Locate the tree
Depending on the tree, some may be easy to find while others may take some time. We recommend smaller trees that are ¾” to 1 ½’ caliper trees. In our experience, these smaller caliper trees tend to root faster and acclimate to the site better than larger 2-3 inch caliper trees. Plus, they are more economical and as I get older, I am less willing to wrestle with a 200 pound root ball than I used to be.
Before Planting
As you look at your new tree in a pot or balled and bur lapped, you must find the root flare. This is the point where the trunk widens to transition to roots. If the root flare isn’t visible, you will need to remove enough soil until it is exposed. This is a critical step to insure the tree is not planted too deep because this root flare needs to be slightly above the soil line. Sometimes, nurseries heap two to three inches of soil on top of the flare, causing you to plant it too deep.
Dig a proper hole
Dig and measure, dig and measure so you don’t dig too deep of a hole. Make sure the root flare is a couple inches above the soil line. The tree needs to sit on solid soil, not loose soil that will settle and move the tree deeper. Make the hole two to three times the diameter of the root ball.
Plant the tree
Before putting the tree in the hole, remove all wires, twine or anything else tied to the tree. If you don’t, these ties and wire can girdle the trunk or branches and cause severe damage.
Once the tree is in the hole, orient the larger branches to face south. The prevailing winds are from the south, which force branches to grow on the north side of the tree making it lopsided.
Once oriented, carefully remove the wire basket and cut circling roots from potted trees in two or three spots around the root ball. This process will encourage new outward rooting of the tree.
Back fill with the same soil you removed from the hole. Don’t amend the soil with something like peat moss, because you want the tree to immediately root into original soil, not some artificial environment. Trees planted into peat moss or amended soil have toppled over by wind because they just circled in that loose soil, never venturing out into our clay soils. Don’t give them an option, force the trees to grow in our challenging soils from the start.
There is no need to fertilize at this time either. Fertilizing forces growth that cannot be supported by the new root system. If you need to fertilize, it is better to wait several years until the root system is more established. I don’t add root stimulator either. In my opinion, it is an added expense that doesn’t benefit the plant enough to justify the cost.
Build a basin for watering
After the tree is properly back filled, I like to build a small basin around the tree. This will help with watering the tree, but also slowly settle as the back fill settles. This basin can be mulched to help with cooling the environment, retaining moisture and controlling weeds. Give it a good soaking at this time.
Basin around an American Elm
Staking the tree
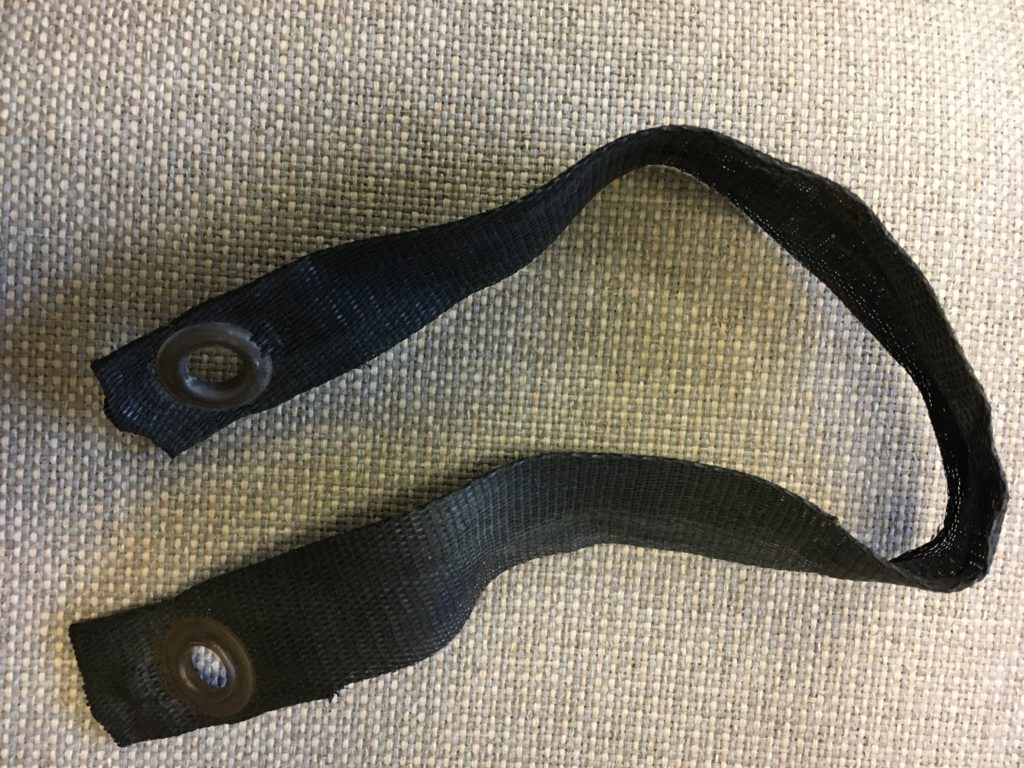
Most smaller trees will not need to be staked. It has been proven that trees will establish quicker when left to move with the wind, which make the trunks stronger. Larger trees will obviously need to be staked the first year, but stake only when necessary to keep the tree from toppling over until roots can anchor the tree on their own. If you do need to stake a tree, we put one stake on the north side and two on the south side of the tree. These stakes are evenly spaced around the tree. Don’t use old garden hose but rather true tree straps around the trunk of the tree tied back to these stakes. After one year, remember to remove all of the stakes, wire and straps from the tree.
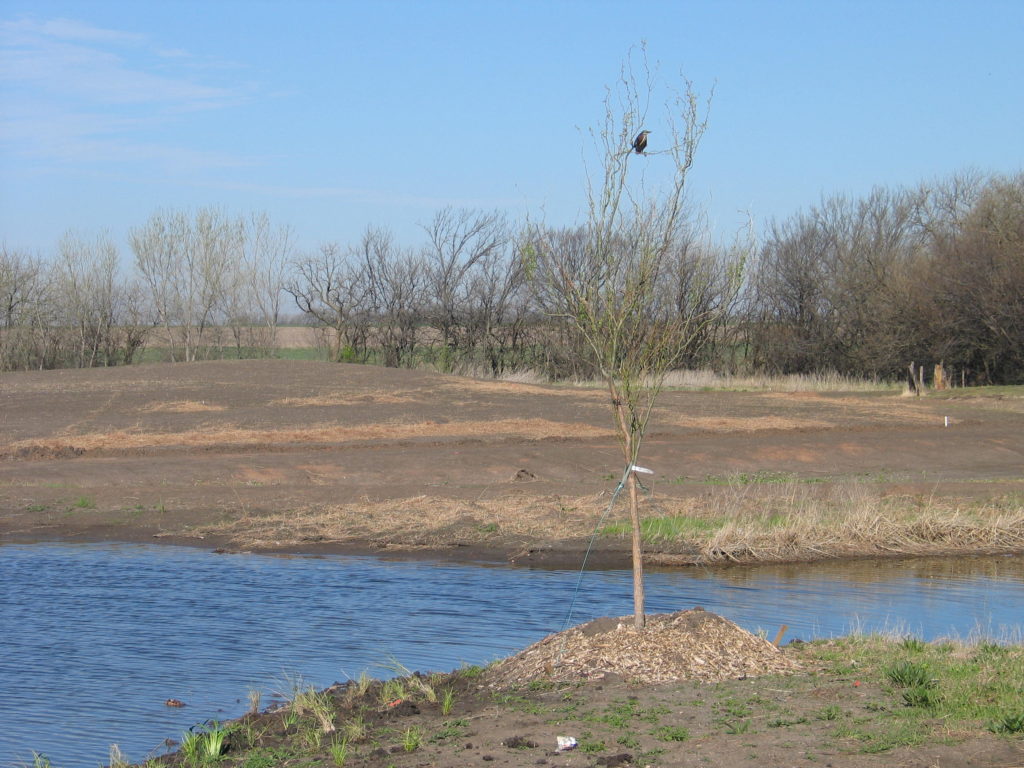
Weeping willow with basin and stakes on bank of rain gardenTree strap used for staking trees
Maintenance after planting
It is better to wait to do any pruning on the tree for the first year. The only exception would be removing any damaged branches. With the basin you have created around the tree, it makes it easier to water it thoroughly once a week for the first year depending on rainfall. Keep in mind that it takes a year or two to develop an adequate root system to sustain a tree on its own without supplemental watering.
I have a placard at my desk with a quote from Martin O’Malley that says, ‘Reversing deforestation is complicated; planting a tree is simple.’ This post seems rather lengthy, but the process of planting a tree goes rather quickly once you get started.
At the Arboretum we talk a lot about how to support pollinators with native plants because we are concerned about the sharp decline in their populations. However, frogs and toads have experienced sharp population declines as well, but without the fanfare and media attention. In fact, nearly one-third of the world’s amphibians are threatened or extinct. Perhaps it is the slimy skin, bulgy eyes and webbed toes that make us less sympathetic to their plight. Whatever the reason, we need to put it behind us and rally around these lovely little hop-alongs before it is too late!
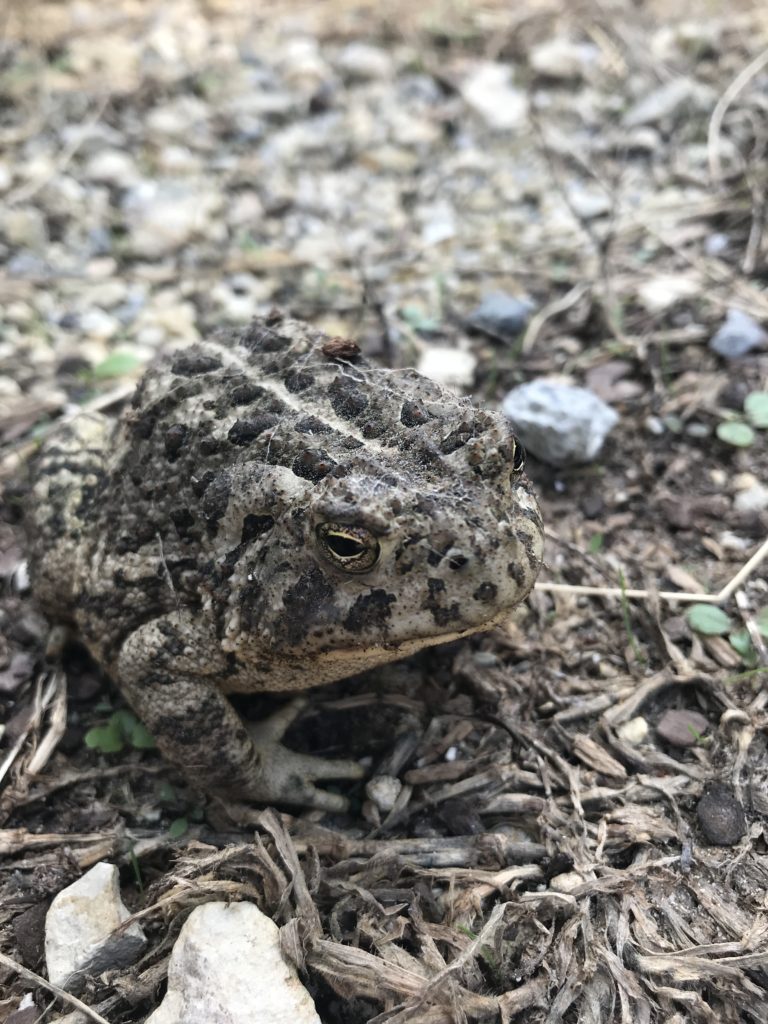
Toads love to hang out in areas of wet mulch and debris. They blend right in! I found this one just outside the greenhouse door.
What is Making Them Croak?
Many factors have led to the dramatic declines in amphibian populations world wide. One prominent issue is habitat destruction and pollution. Amphibians are especially susceptible to these issues because their skin is part of their respiratory system. Even small amounts of pollutants in water systems can seep into their bodies through their permeable skin layer. Or, a change in the habitat such as logging or damming can change the humidity levels within a forest, making it uninhabitable for amphibians with very specific living conditions.
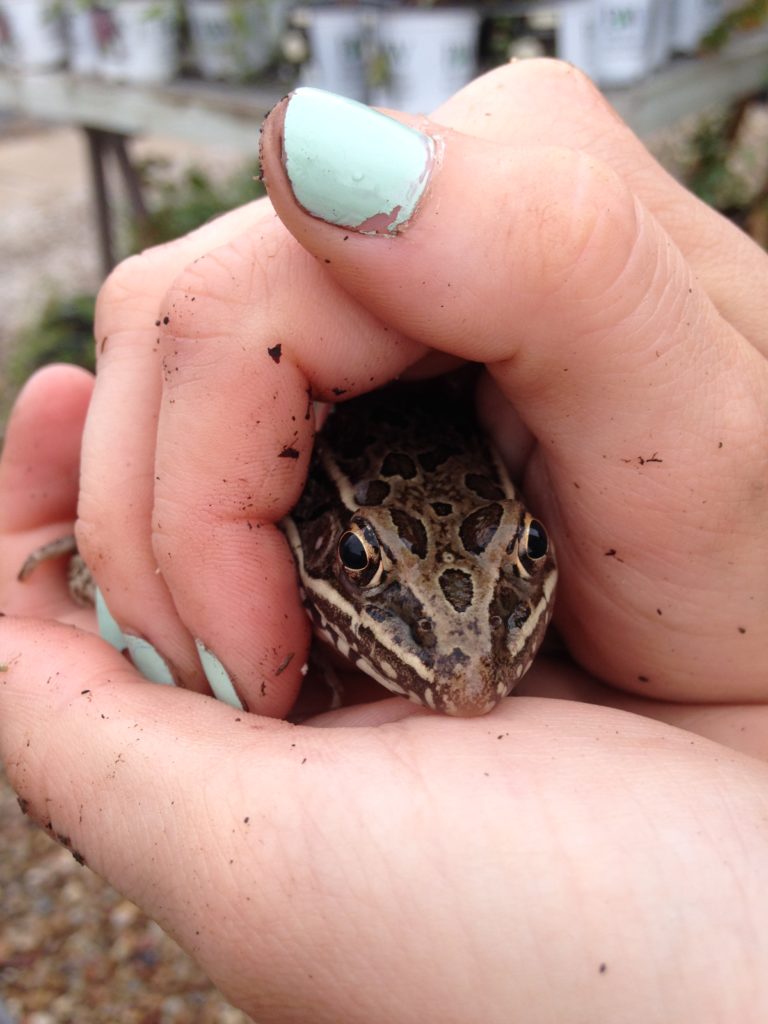
The plains leopard frog loves to hide out in our nursery pots, where the sprinklers keep it frequently moist.
Create Habitat
Rain gardens are a great way to attract frogs and toads to your area. Amphibians are lovers of cool, damp places, such as the shaded banks of a rain garden, which provide ample shelter and attract a plethora of insects for a froggy buffet.
Catch the rainwater from your roof in a shallow depression, and plant the edges of the depression with water loving natives like marsh milkweed, cardinal flower, switchgrass, and Virginia iris. Visit our previous post for more info to start your own rain garden, or attend our Native Plant School class on rain gardens.
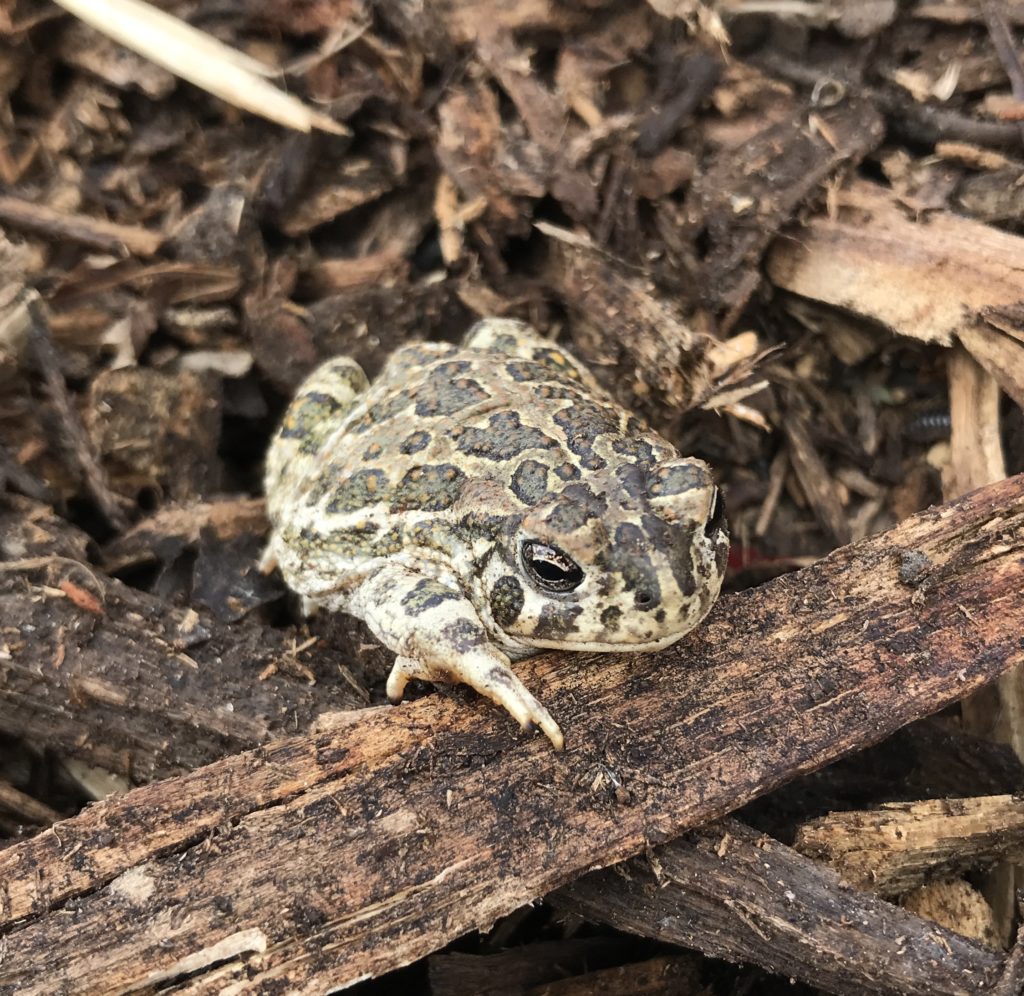
Found this great plains toad (Anaxyrus cognatus) in the Arboretum gardens, early August.
Fungus Among Us
Cytrid fungus is devastating the world’s frogs. While we haven’t yet pinpointed how and why the past ten years have seen such dramatic increases in cytrid fungus spread, we do know the pet trade has made the problem even worse. Exotic animals shipped from around the world bring with them exotic pathogens. This exposes native frogs to illnesses they never evolved to resist. Demand for exotic pets also hurts frog populations due to over harvesting specimens from their home country. All in all, it can be a sketchy business. Do your part by not keeping rare and endangered frogs as ‘pets’, and never release a ‘pet’ into the wild. When handling native frogs, leave them in the same area you found them to avoid potentially contaminating new populations.
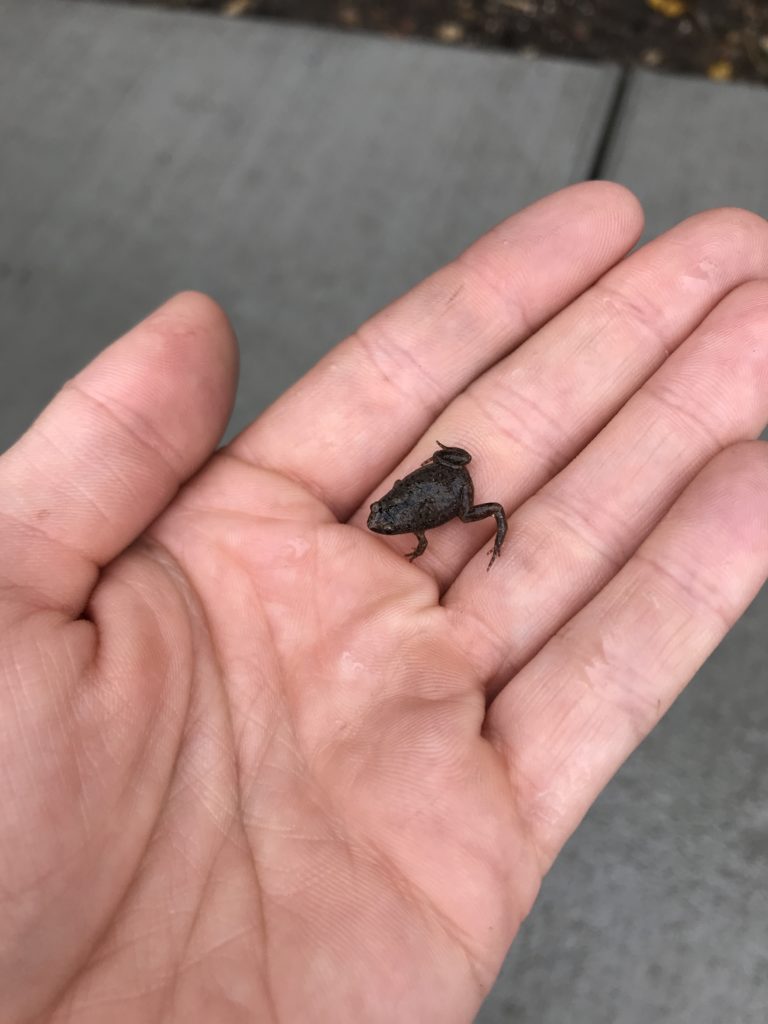
A very tiny frog found on our greenhouse sidewalks. We moved him outside so he didn’t get stepped on!
Eye on the Fly
While the frogs are watching flies, you can be watching the frogs! Be part of the citizen science effort to track frog populations with FrogWatch USA. Learn their calls, spend time outside, contribute to a nationwide science initiative — a fun way to spend spare time in the spring and summer!
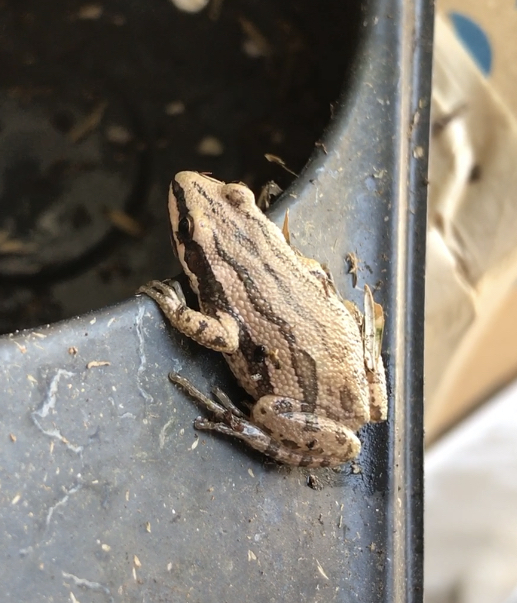
A boreal chorus frog (Pseudacris maculata) clings to the side of a nursery flat.
I hope to start my own rain garden this year in my side yard. If I get any froggy visitors, you can bet there will be a blog post about it!
At our Native Plant School sessions, the topic of weed control often comes up. When establishing new beds or planting buffalograss, eradicating weeds prior to planting is critical for success. Hand weeding can be time consuming on these larger areas. Often we first use chemicals to control difficult weeds in our landscapes and garden areas without thinking about other options or ramifications of the chemicals we use. Solarization is another technique you can use without reaching for the chemicals to control problem weeds.
What is solarization?
Solarization is the process of covering an area with clear plastic to heat the soil and kill weeds and seeds in the top six inches of soil. If done properly, the use of chemicals to control weeds is not necessary.
Solarization can be an effective method of controlling many weeds such as bermudagrass, bindweed and other annual weeds. Keep in mind that some of these weeds have extensive root systems and many re-sprout, even after being subjected to super high temperatures. It may take several solarization attempts to completely eliminate them from the area. In the end, it may take a few more months before you are ready to plant, but you have not used chemicals to control these problem weeds.
Steps to Solarization
It is best to use this method during the longest, hottest days of summer. The goal is to get soil temperatures under the plastic above 140 degrees. It is easier to reach these temperatures in June through August.
This is a process that will last for a couple months. Plan ahead in your planting schedule so solarization has enough time to work. Some of the more aggressive weeds will not be eliminated in just a few weeks.
It is best to remove existing growth and lightly till the entire area.
Remove stalks and debris that will puncture the plastic.
Rake the area smooth. It is critical that the area is completely flat so plastic lays right on the soil with no air pockets.
Irrigate the entire area so it conducts heat better. The soil should be moist to 12 inches deep, but not muddy. This is a real trick in clay soils. This is a critical step in the process, because it is not recommended to re-irrigate after the solarization process has started.
Dig a 8-12 inch trench around the solarization area.
Lay one entire piece of plastic over the area and tuck the edges into the trench you just dug.
Cover the edges of plastic in the trench with soil, pulling plastic tight as you move across the whole area. This makes a good seal around the entire site.
Source: W. Suckow, ucanr.edu
Solarization incorporates the same principles of a hot compost pile to kill weed seeds and break down organic matter. We have used this technique in smaller areas here at the Arboretum from time to time with mixed results. Some have been very successful, but others have not completely eliminated some of the target weeds. Smaller areas have had better results than larger areas especially when dealing with aggressive weeds like Bermudagrass.
In the end, I think solarization should have a place in your weed control options. It is a nice alternative to using chemicals. Give it a try sometime.


